

————————————————————————–
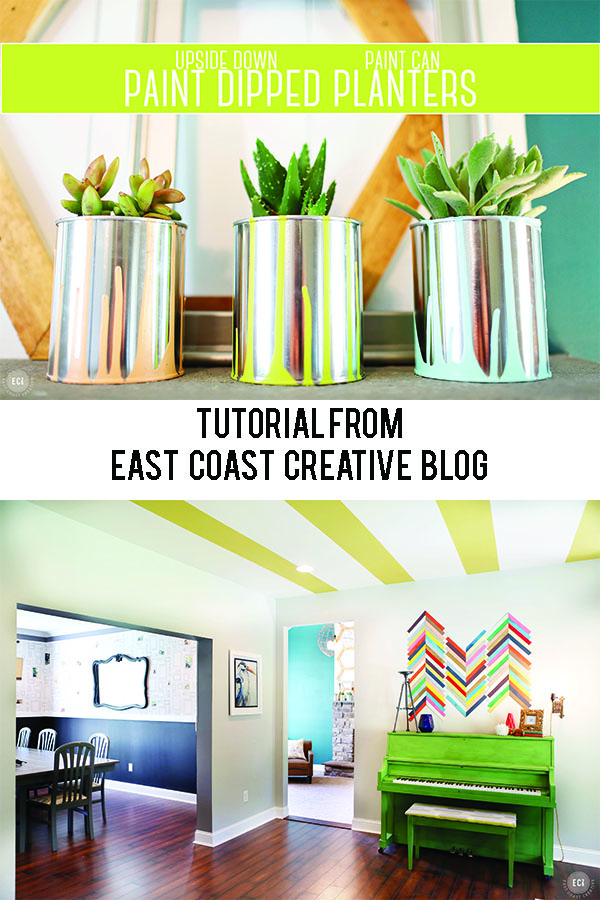
I’m so excited to share this project with you guys today! I made these DIY planters a few weeks ago and just hadn’t gotten around to sharing them on the blog. They could potentially be one of my favorite projects of 2014!
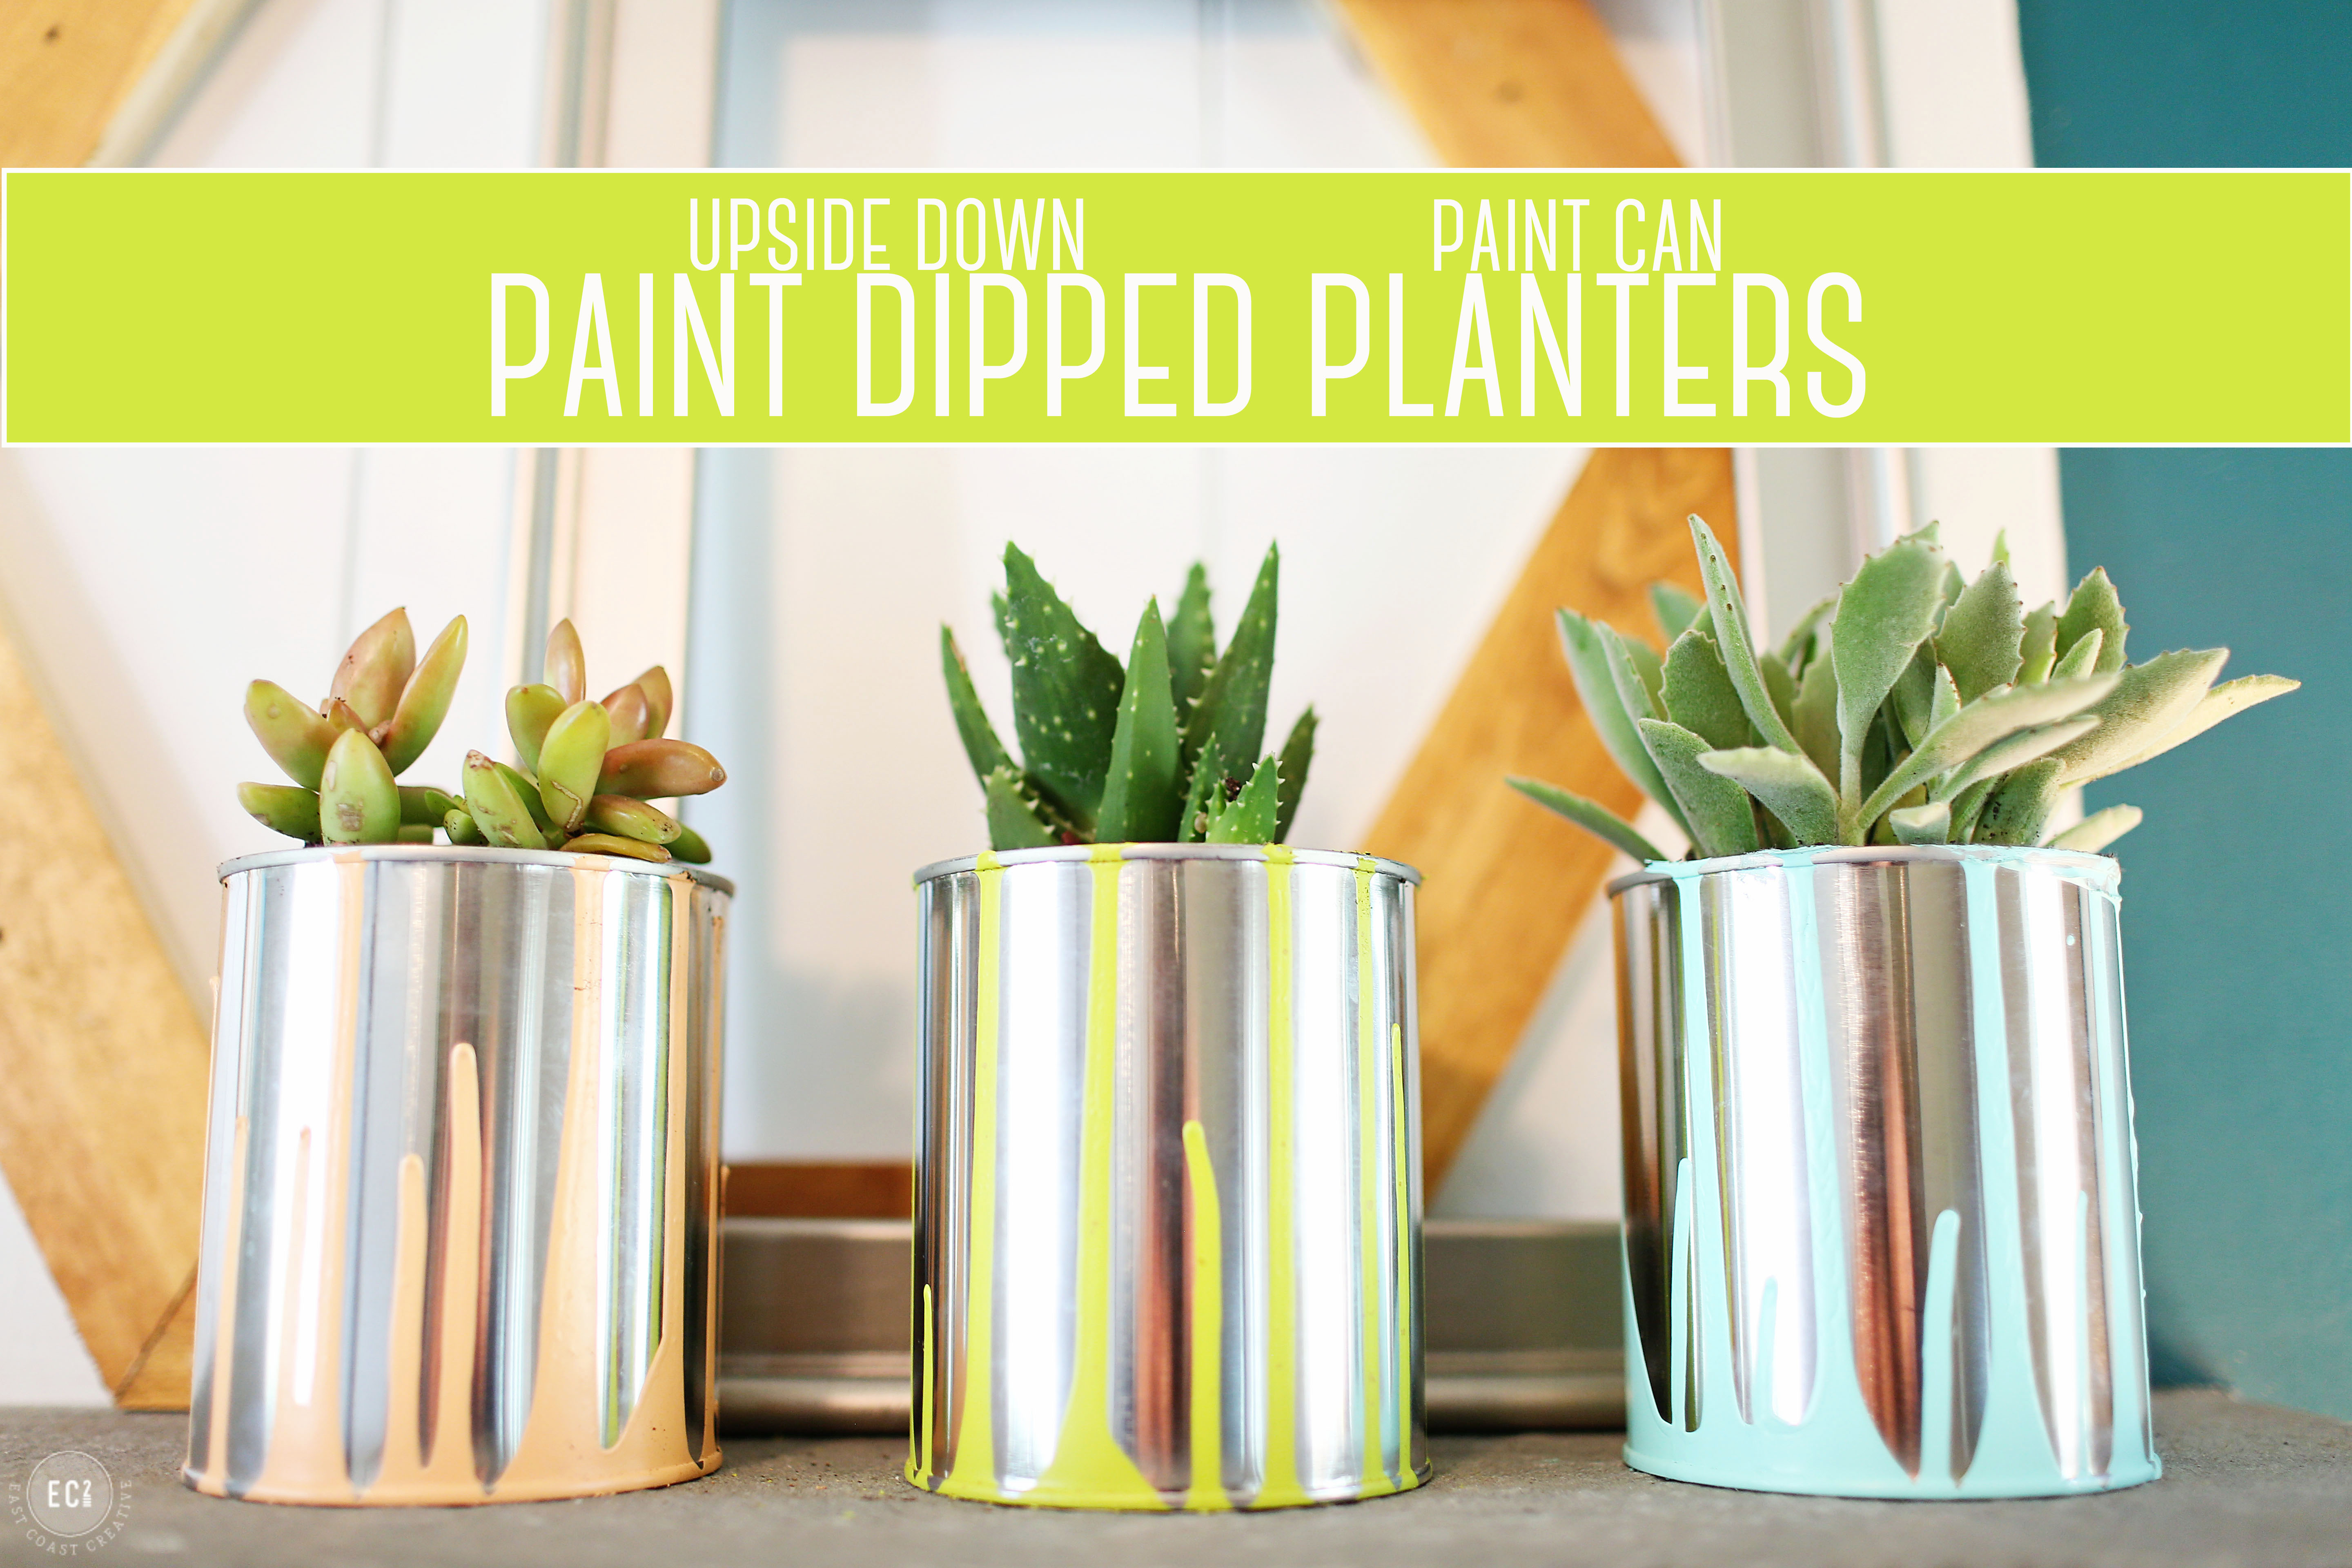
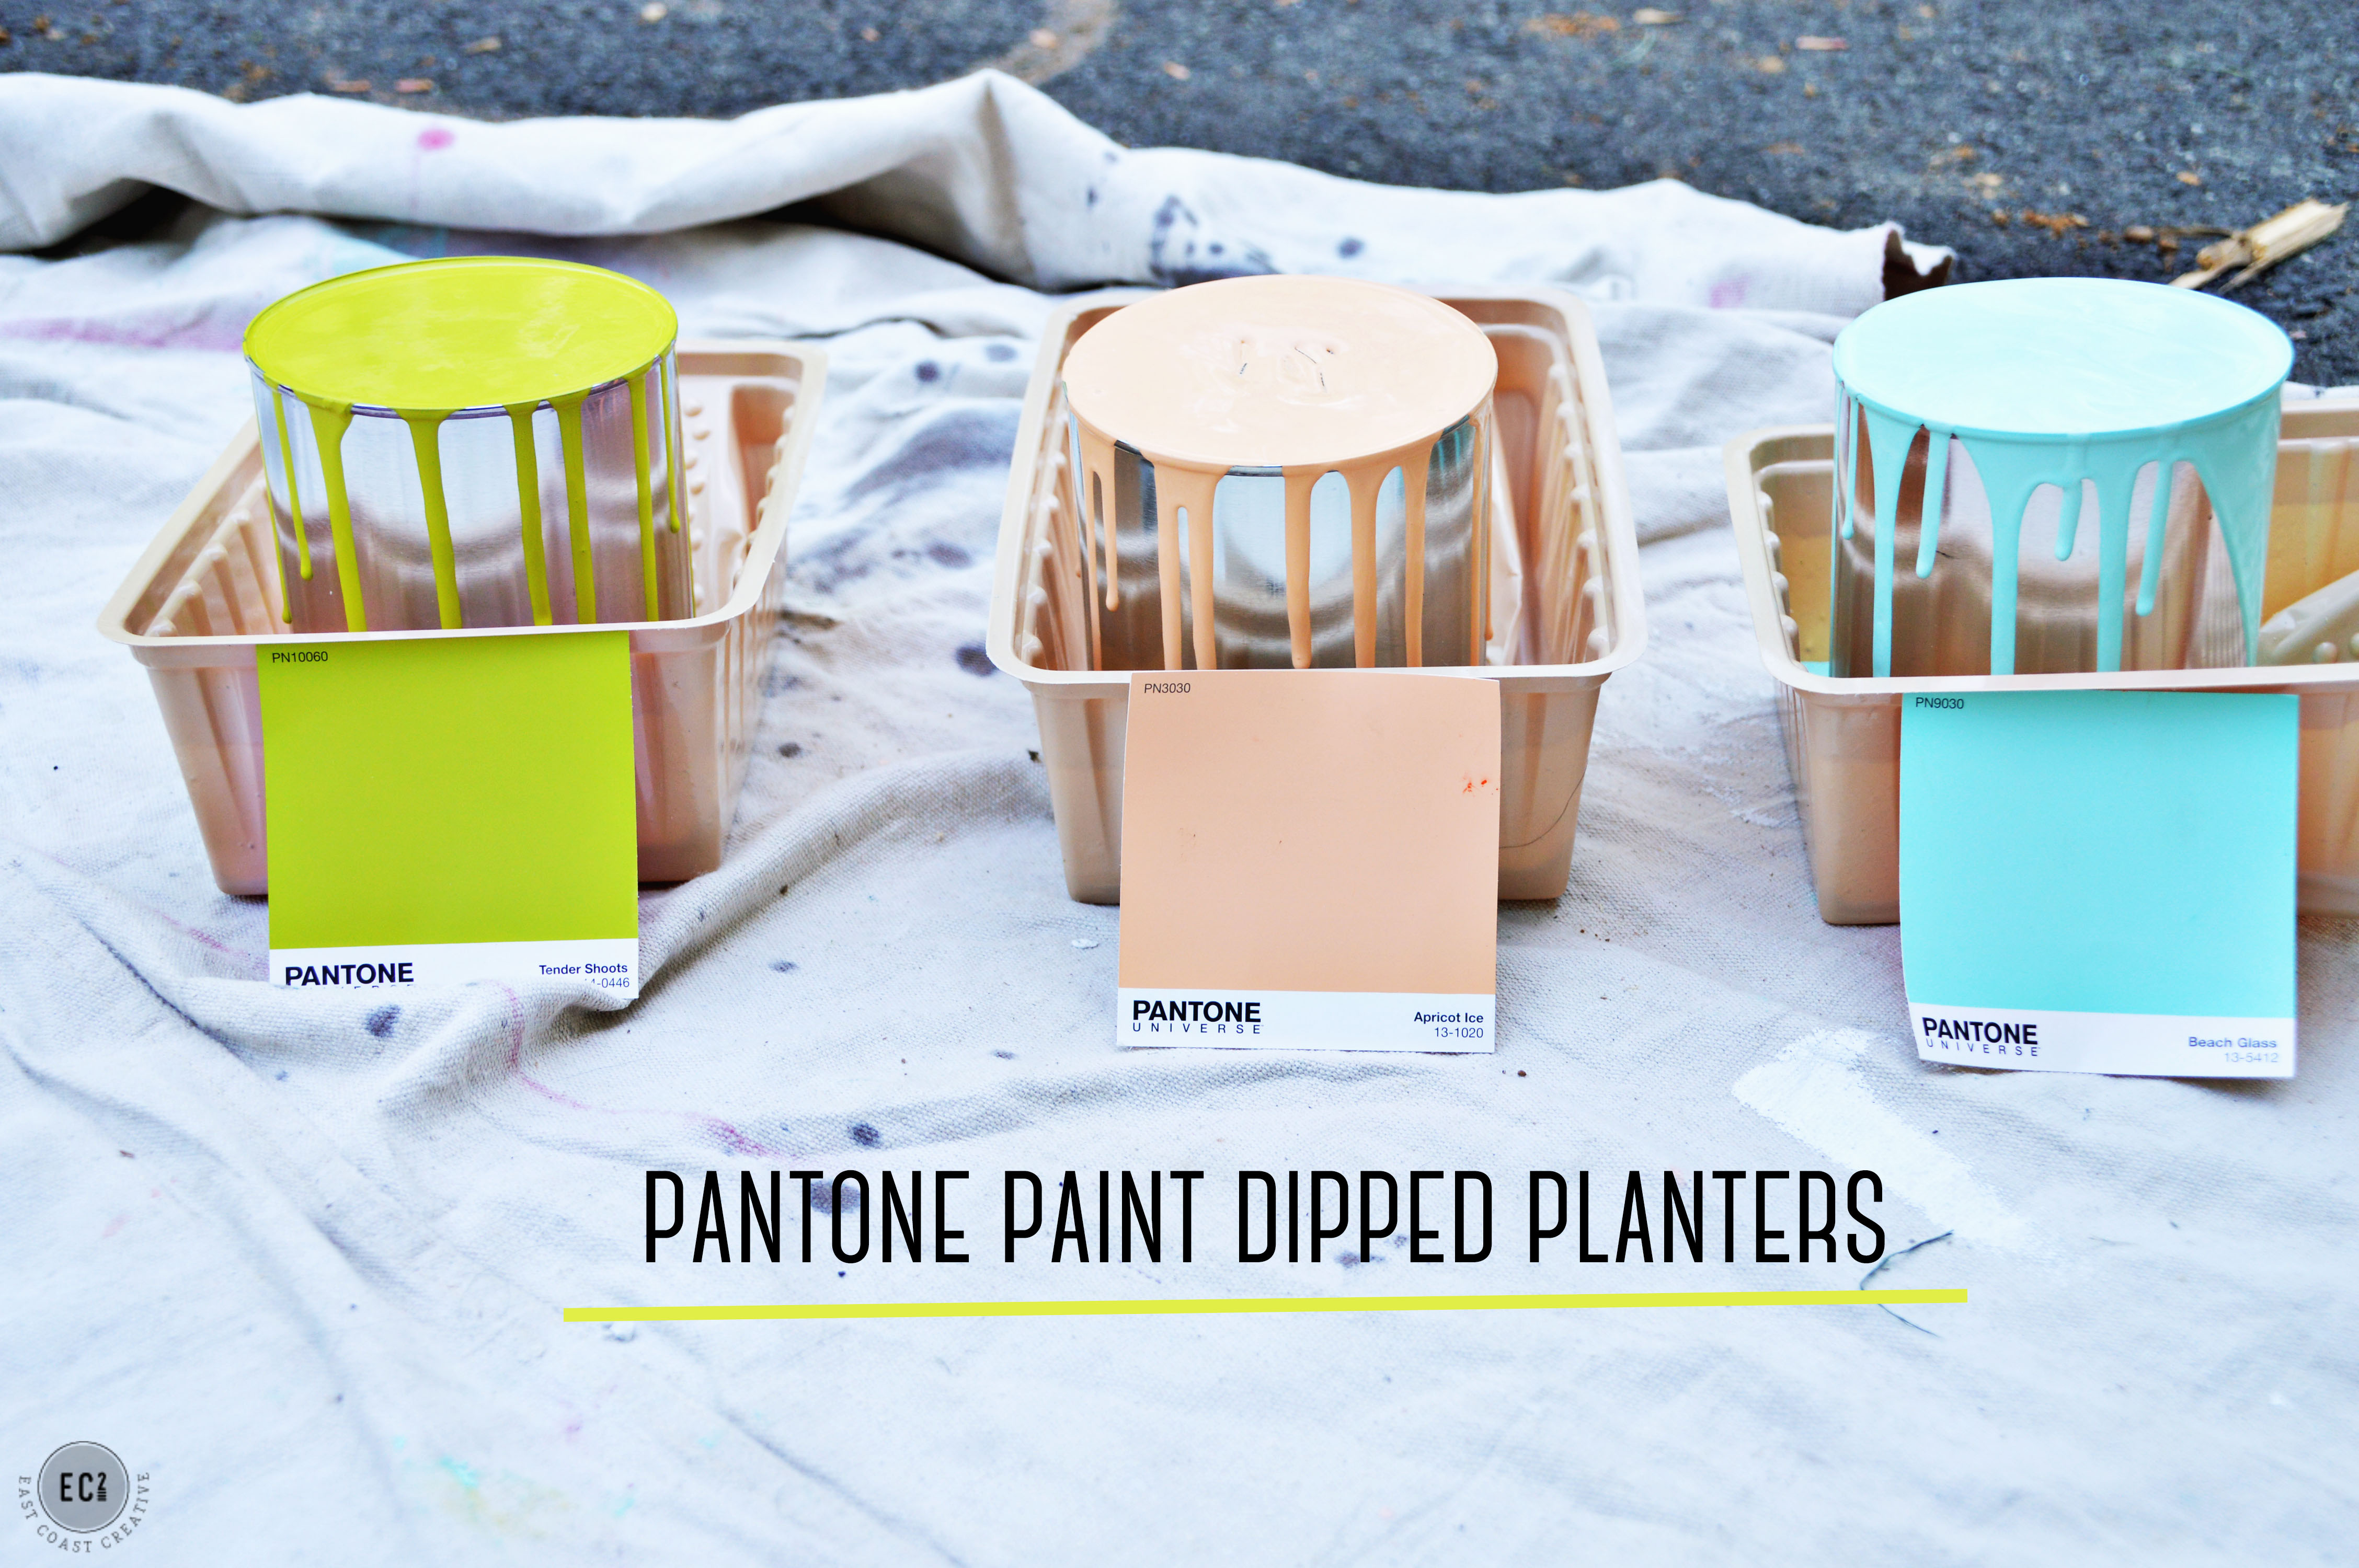
Ok, so here’s what I love about these babies… they’re made from inexpensive paint cans and secondly, they’re upside down paint dipped- it looks like it’s defying gravity! What’s cooler than defying gravity?!? Nothing!! Now, here’s how you can make your own!
Upside down Paint Dipped Paint Can Planters (it’s a mouthful I know)
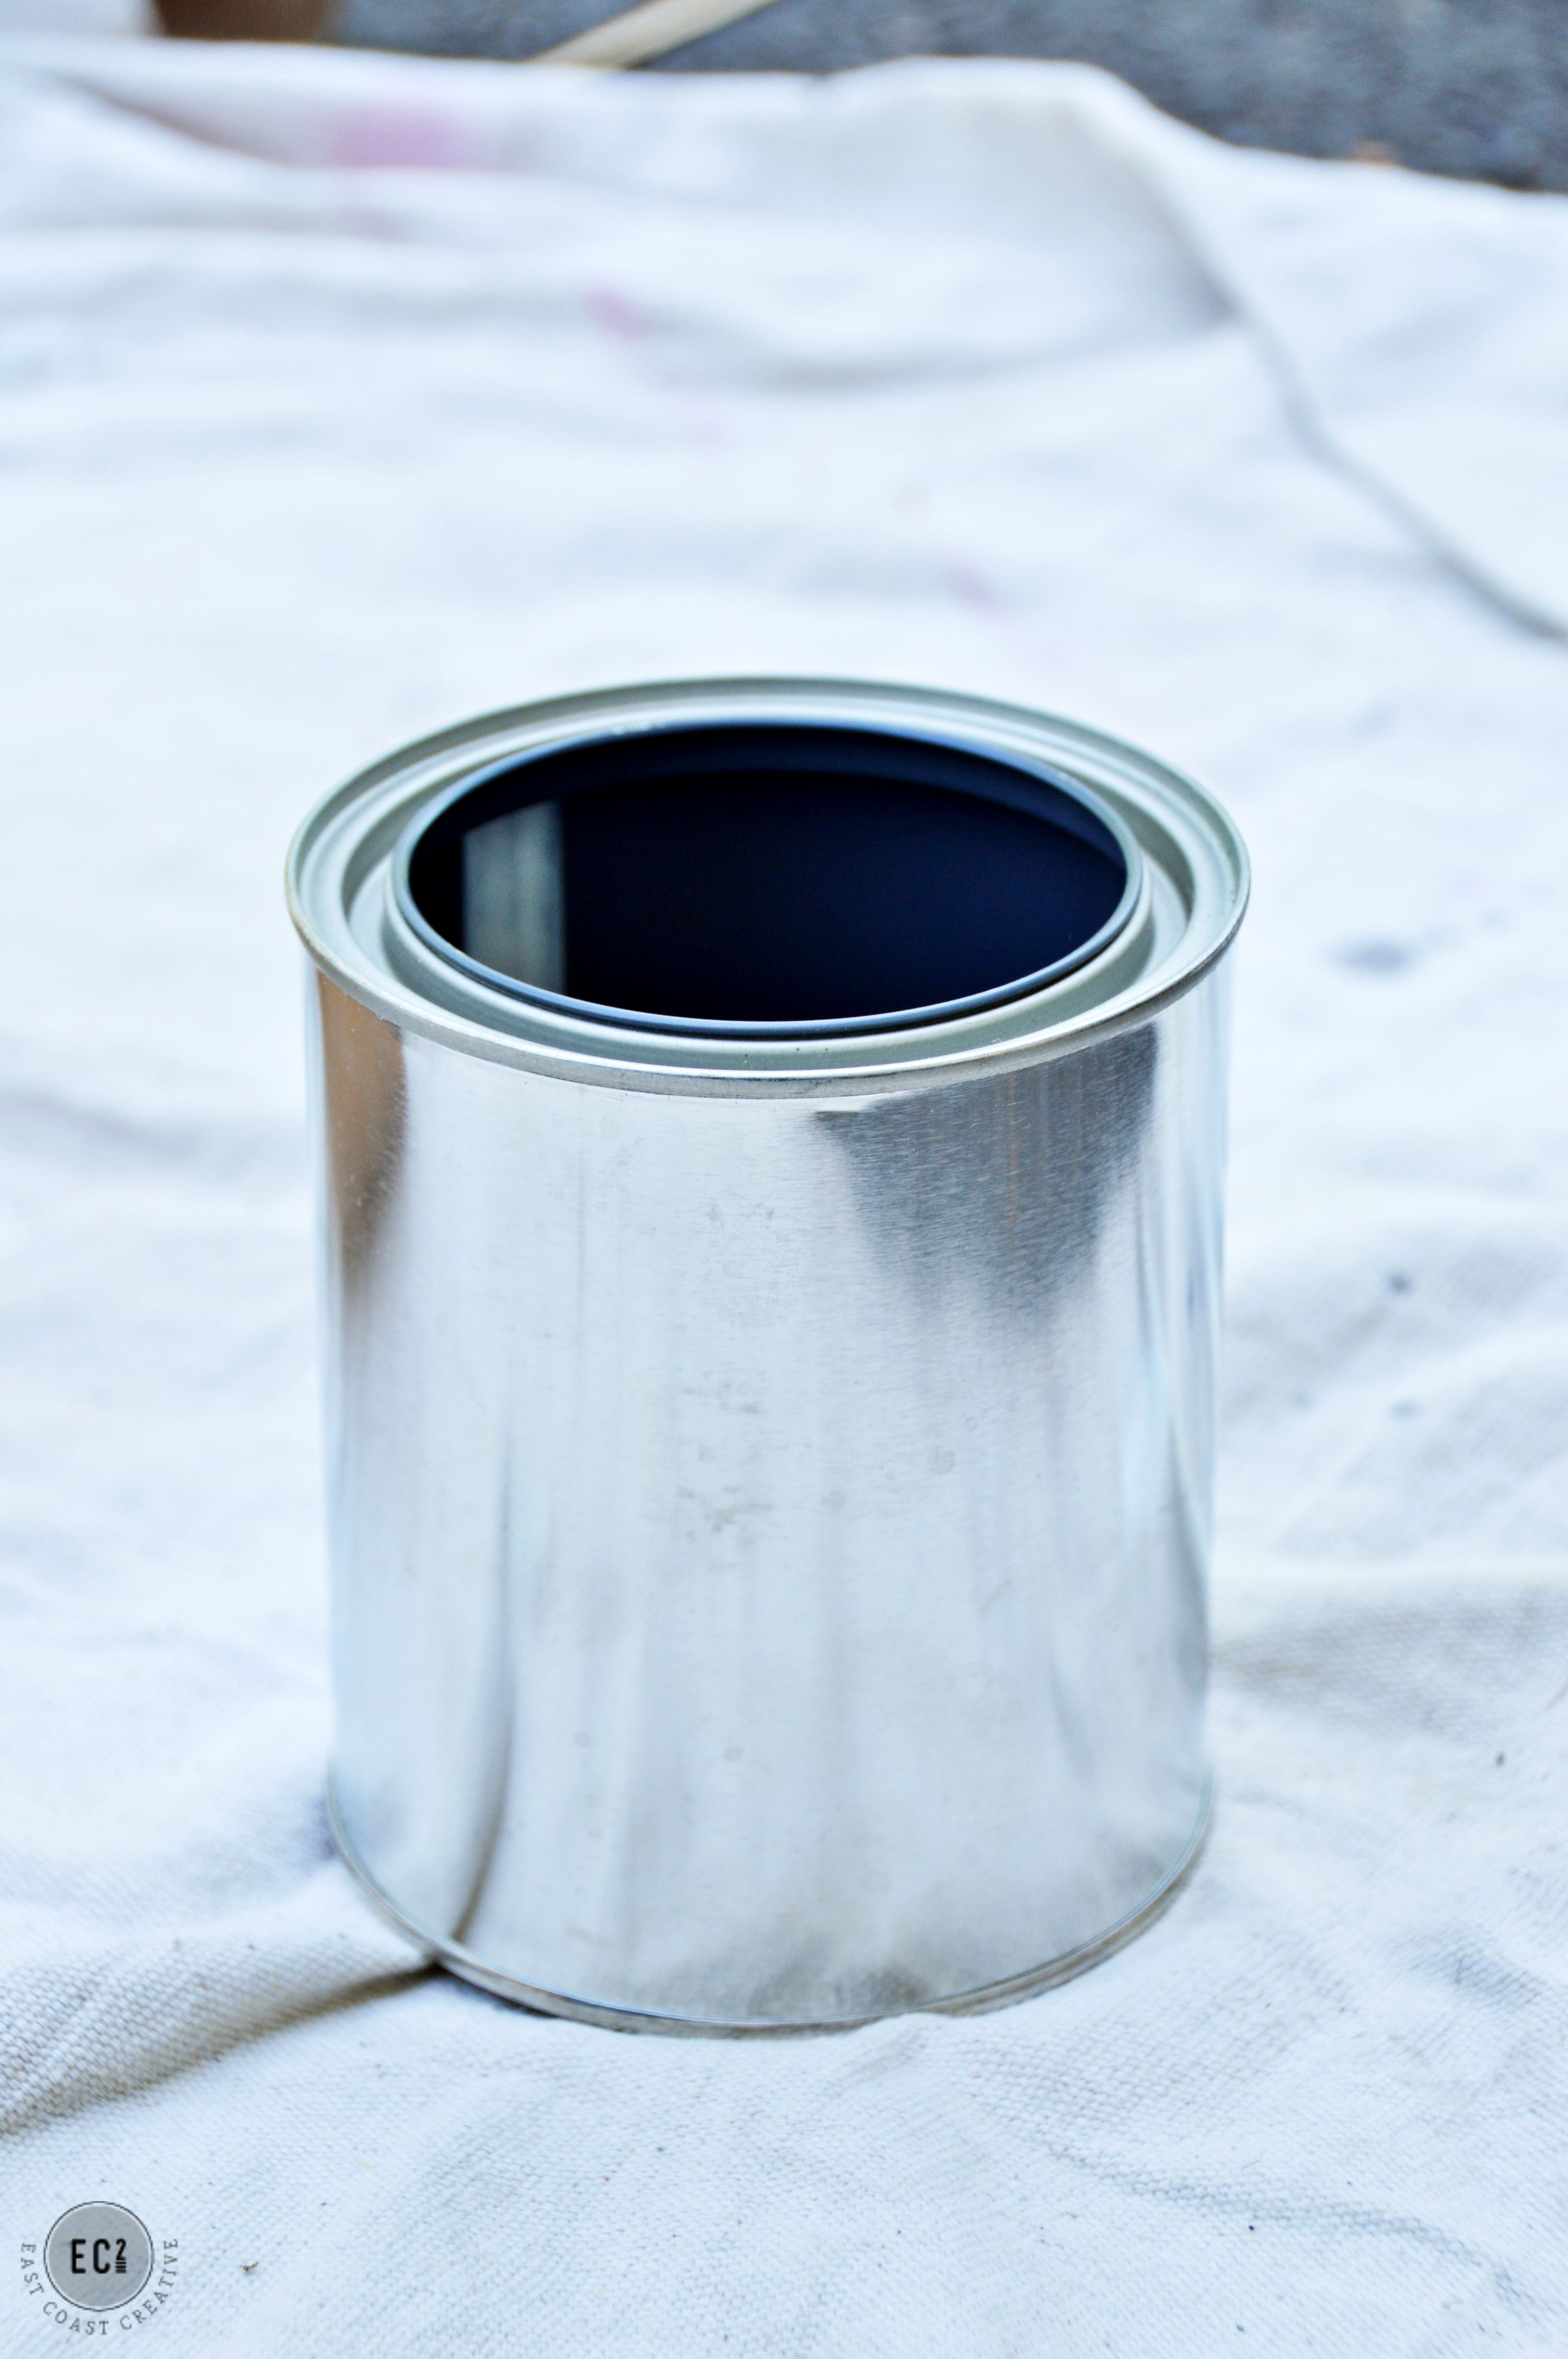
Start off with some empty paint cans. I used quart sized ones I picked up at the store, but this is an awesome way to upcycle old cans you have from past projects. Just wash them out well and they’ll be golden!
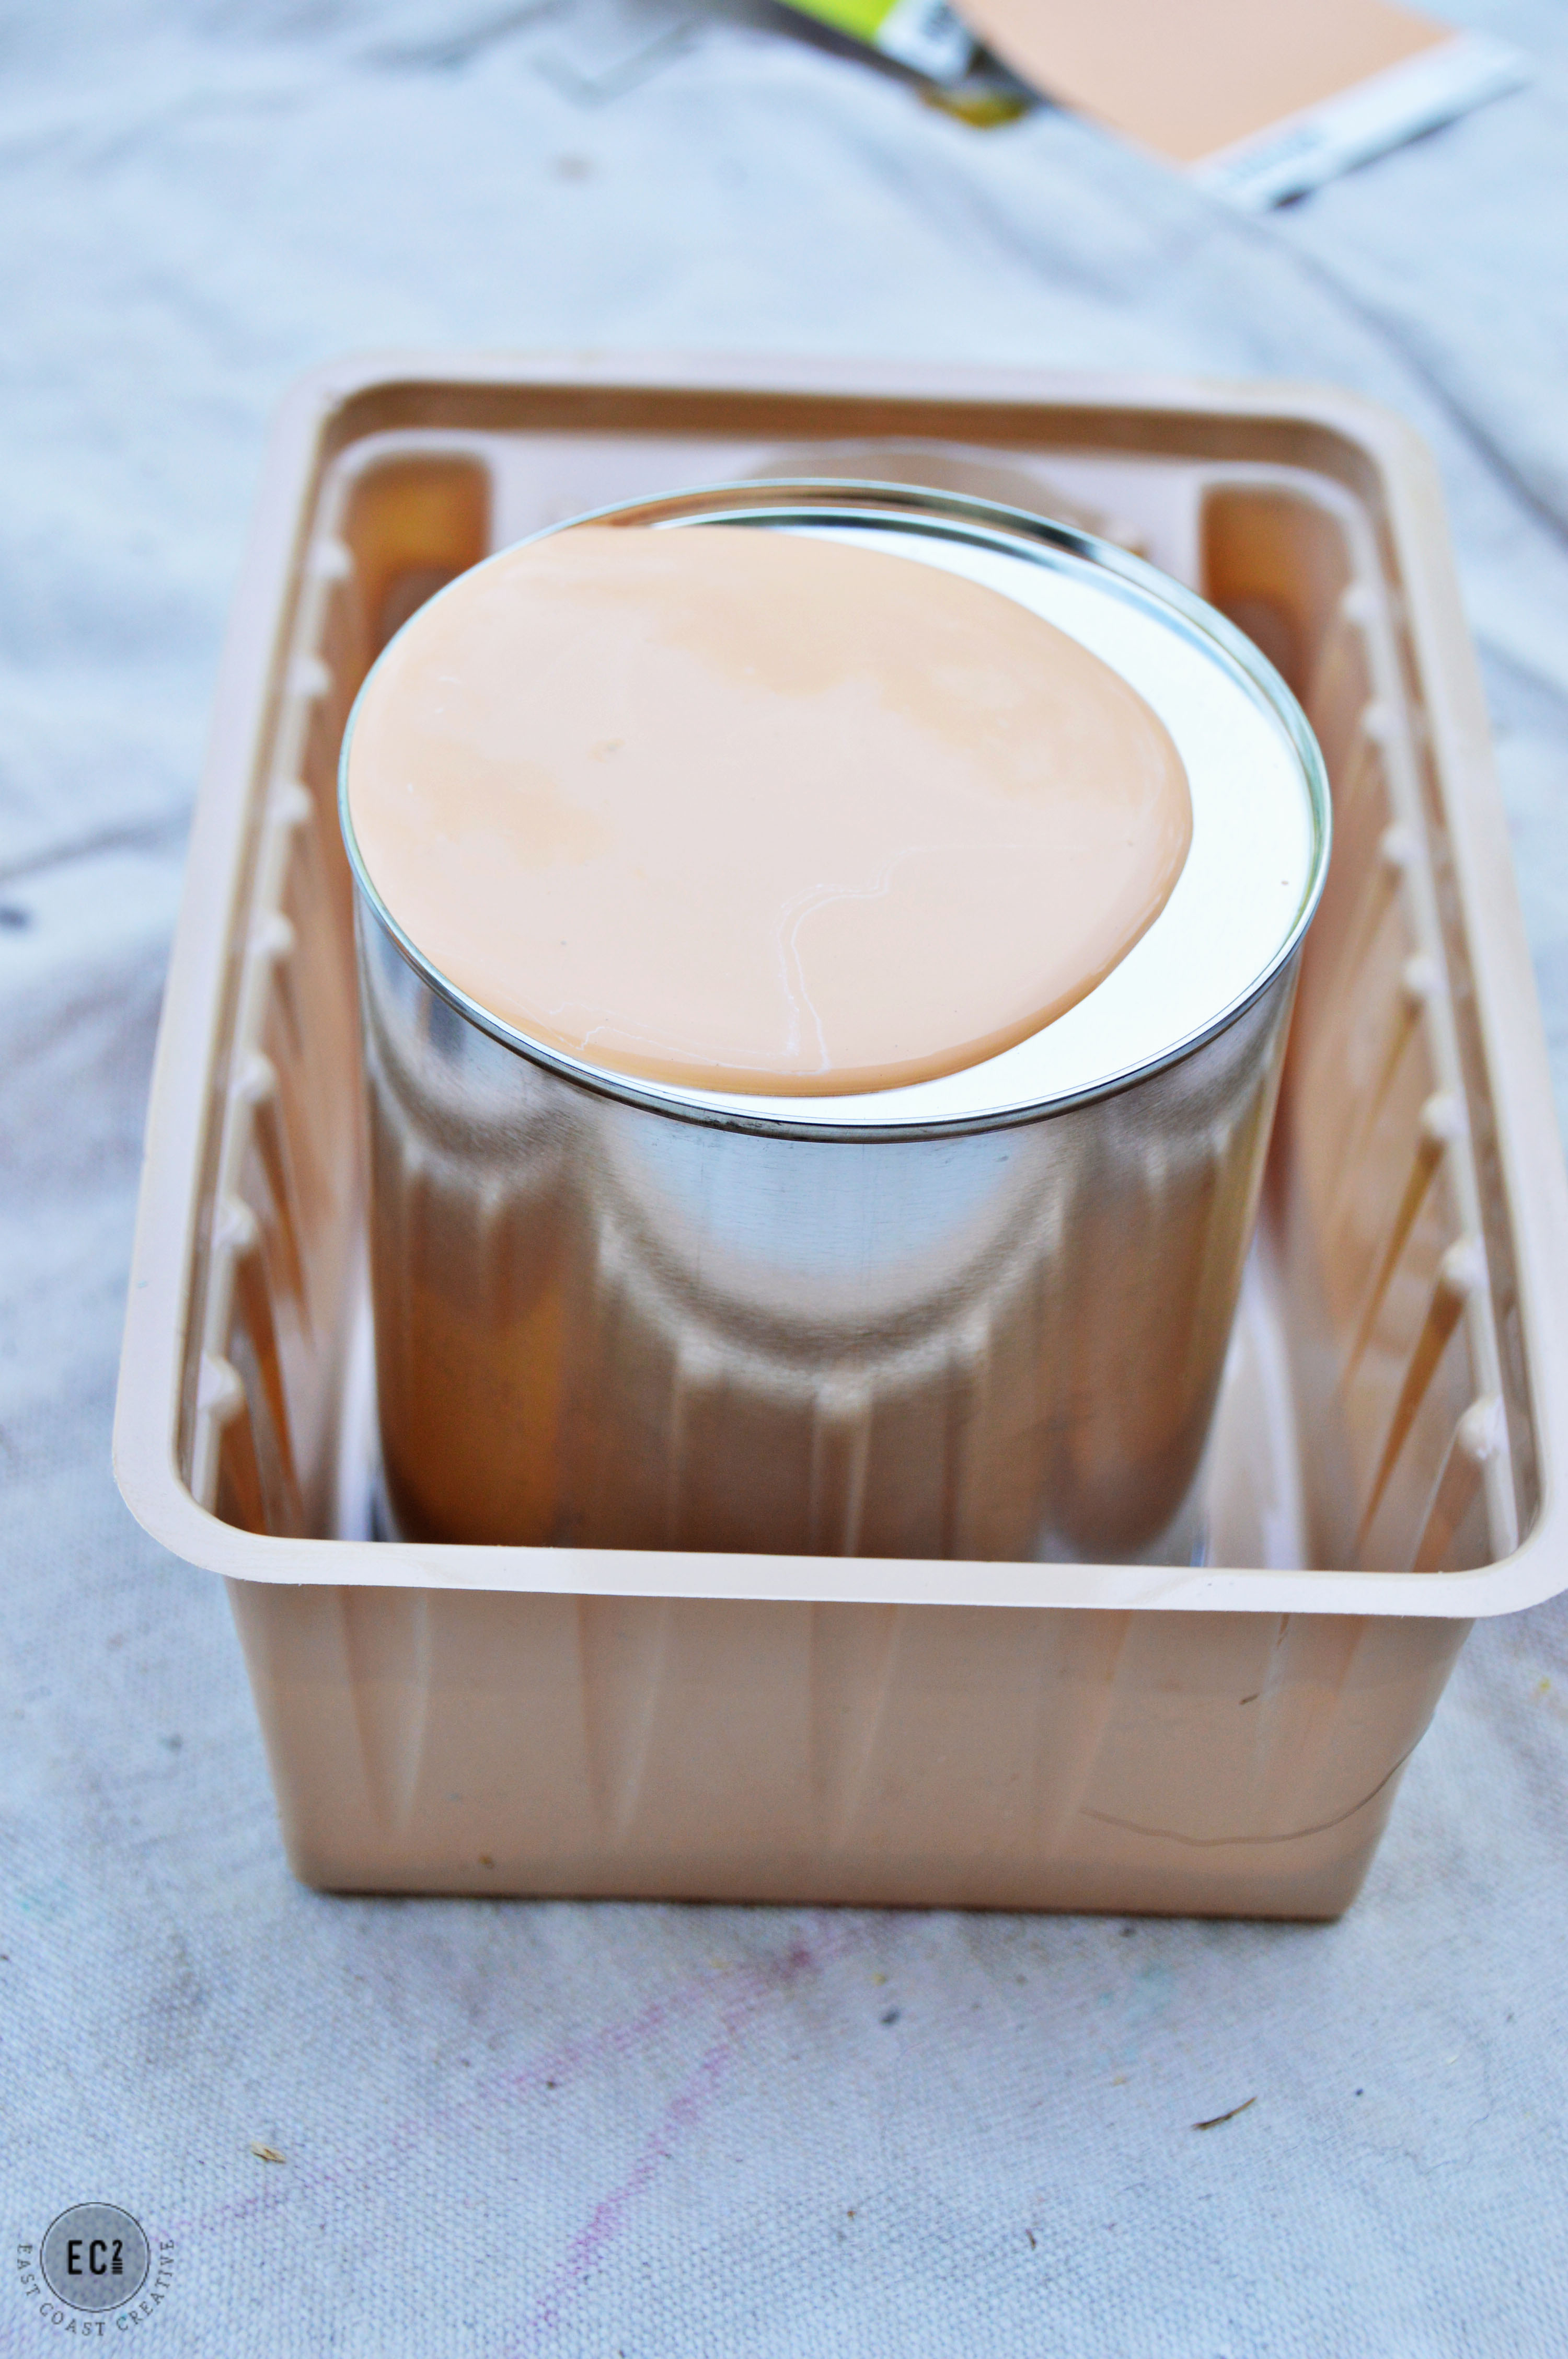
I placed the paint can upside down in a small, disposable paint tray. You could just use plastic or a paper plate, but I had these handy.

Next, I poured on some paint. Not enough to flow over the sides, just enough to sit in the middle. I bought the sample size paints for this project because they’re cheapy cheap and I didn’t need much paint at all.
Once I’d plopped my paint, I used a paint can opener, to pull the paint down over the edge in spots, creating drips. You could use anything for this step, a pencil, popsicle stick etc… Make sure you vary your amounts, you want some long drips and some short. Variance will add to the authentic paint dipped look.
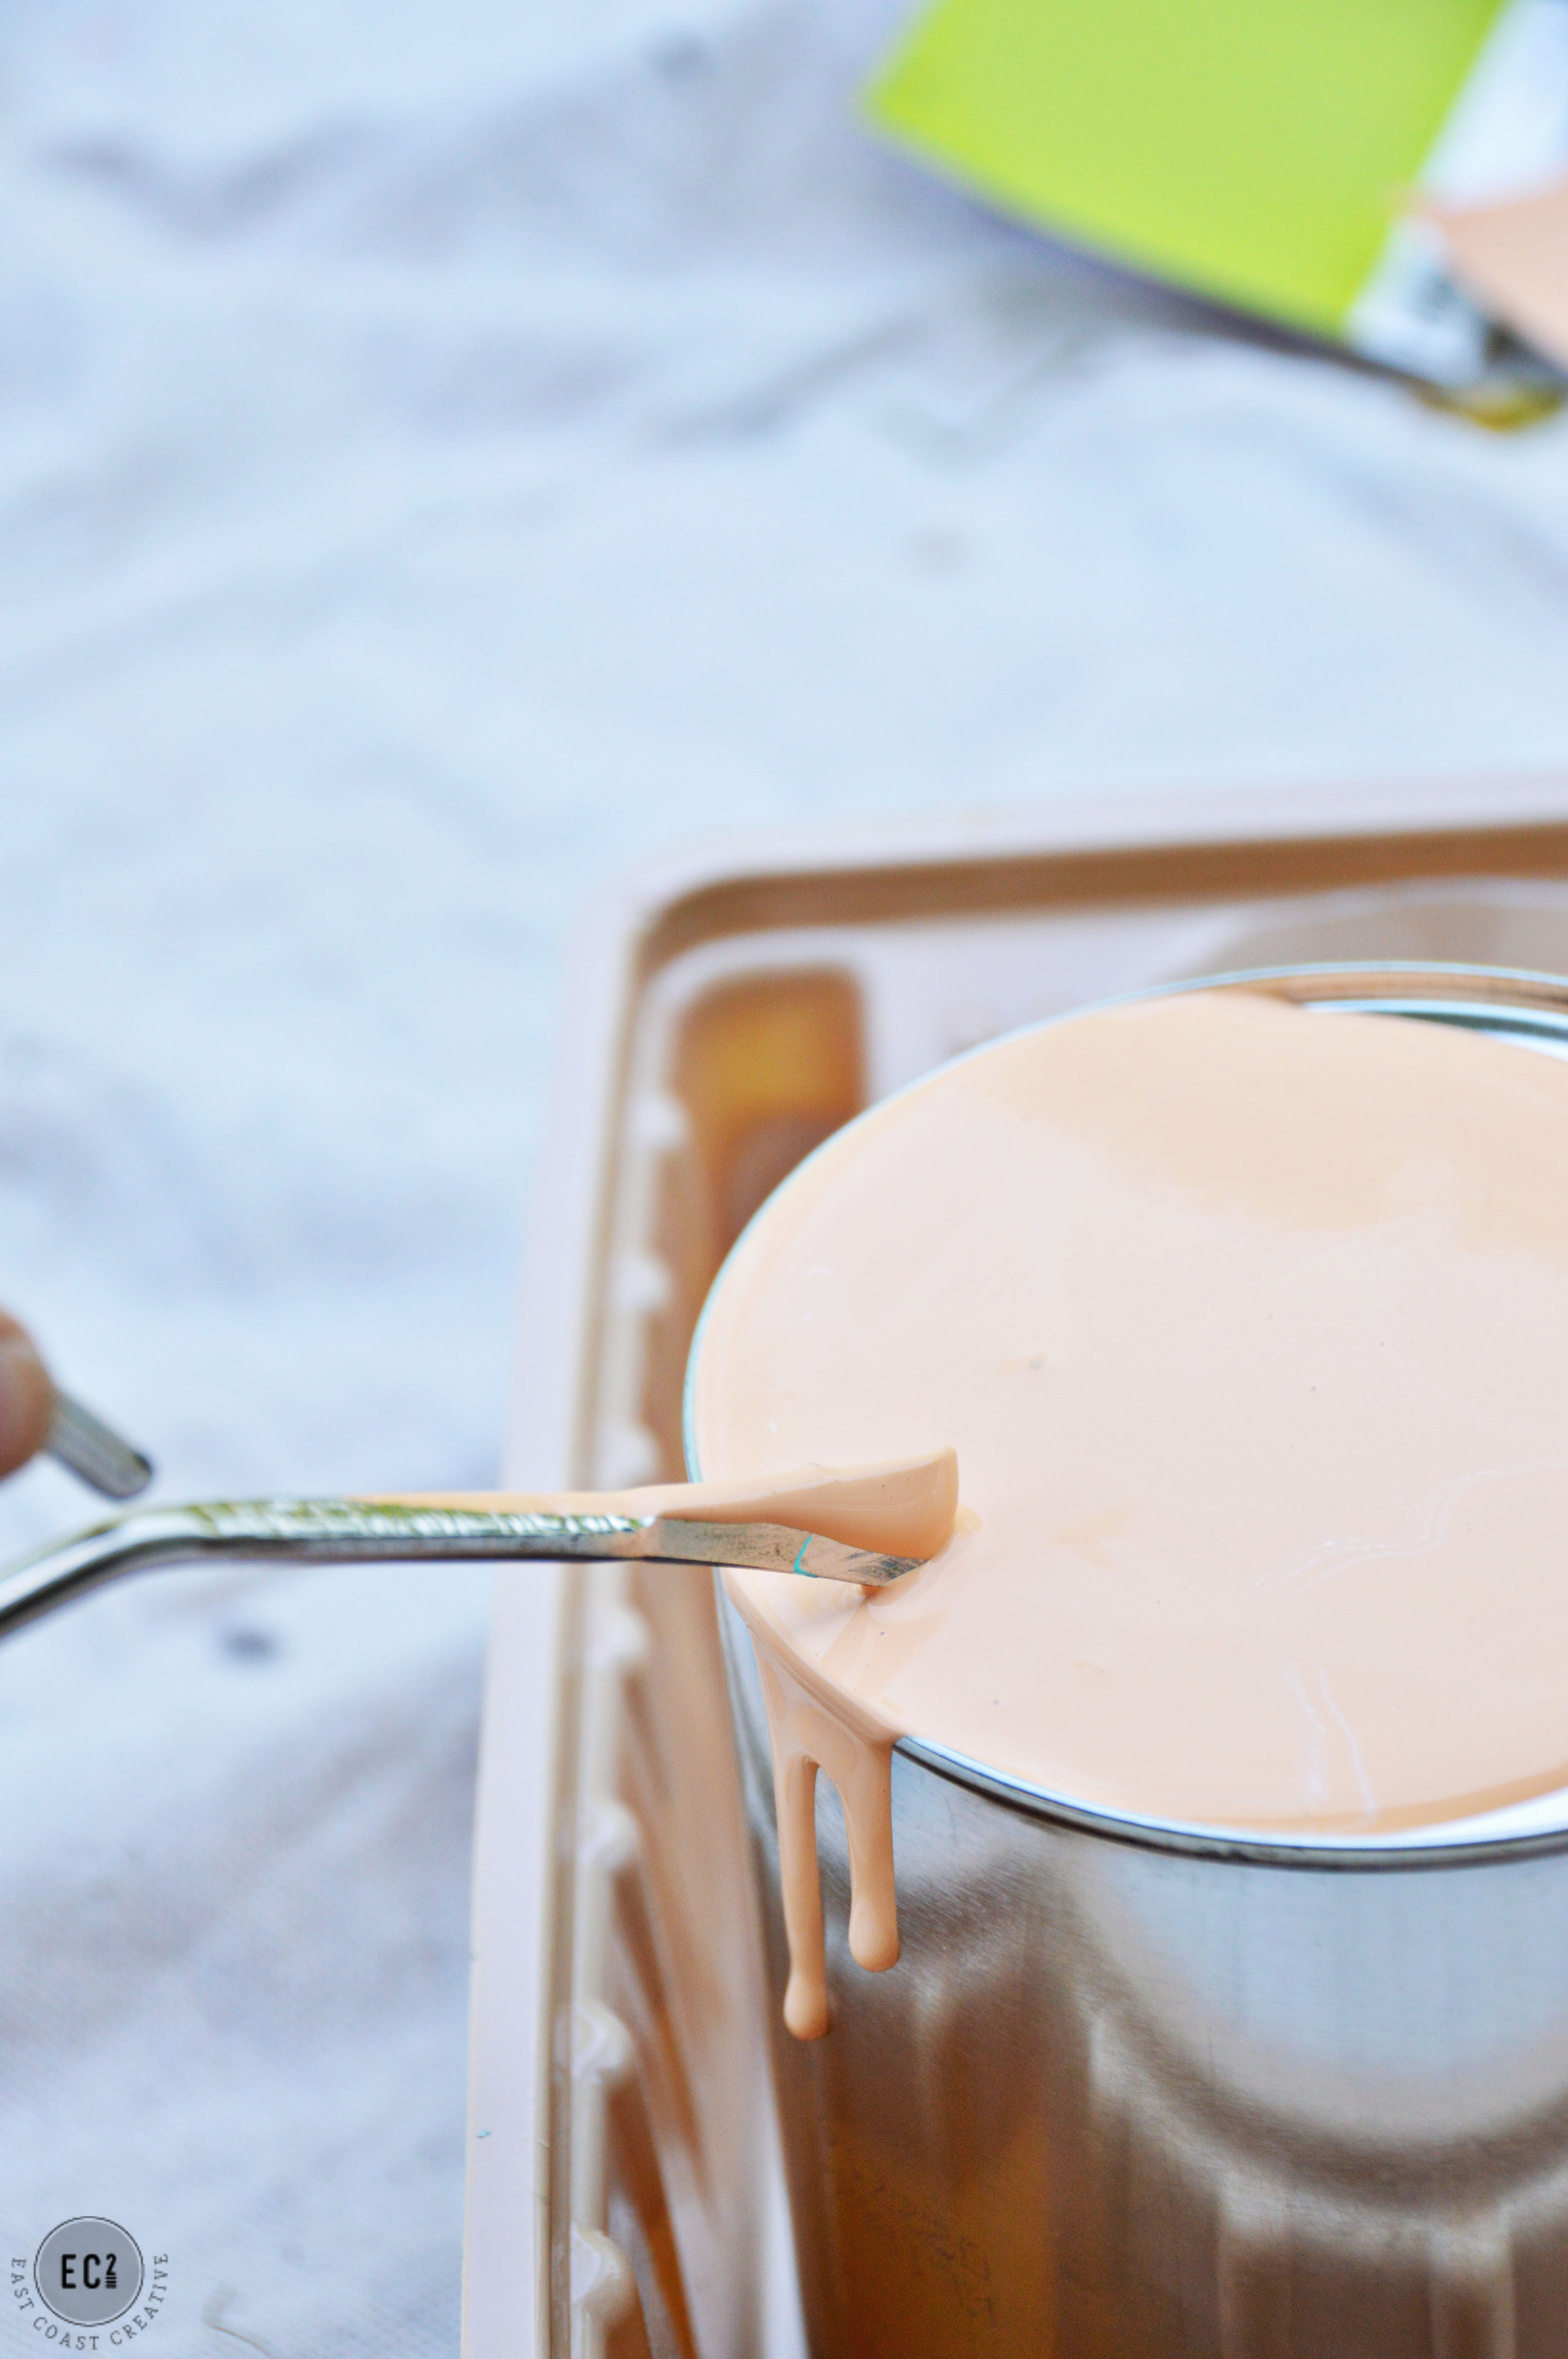
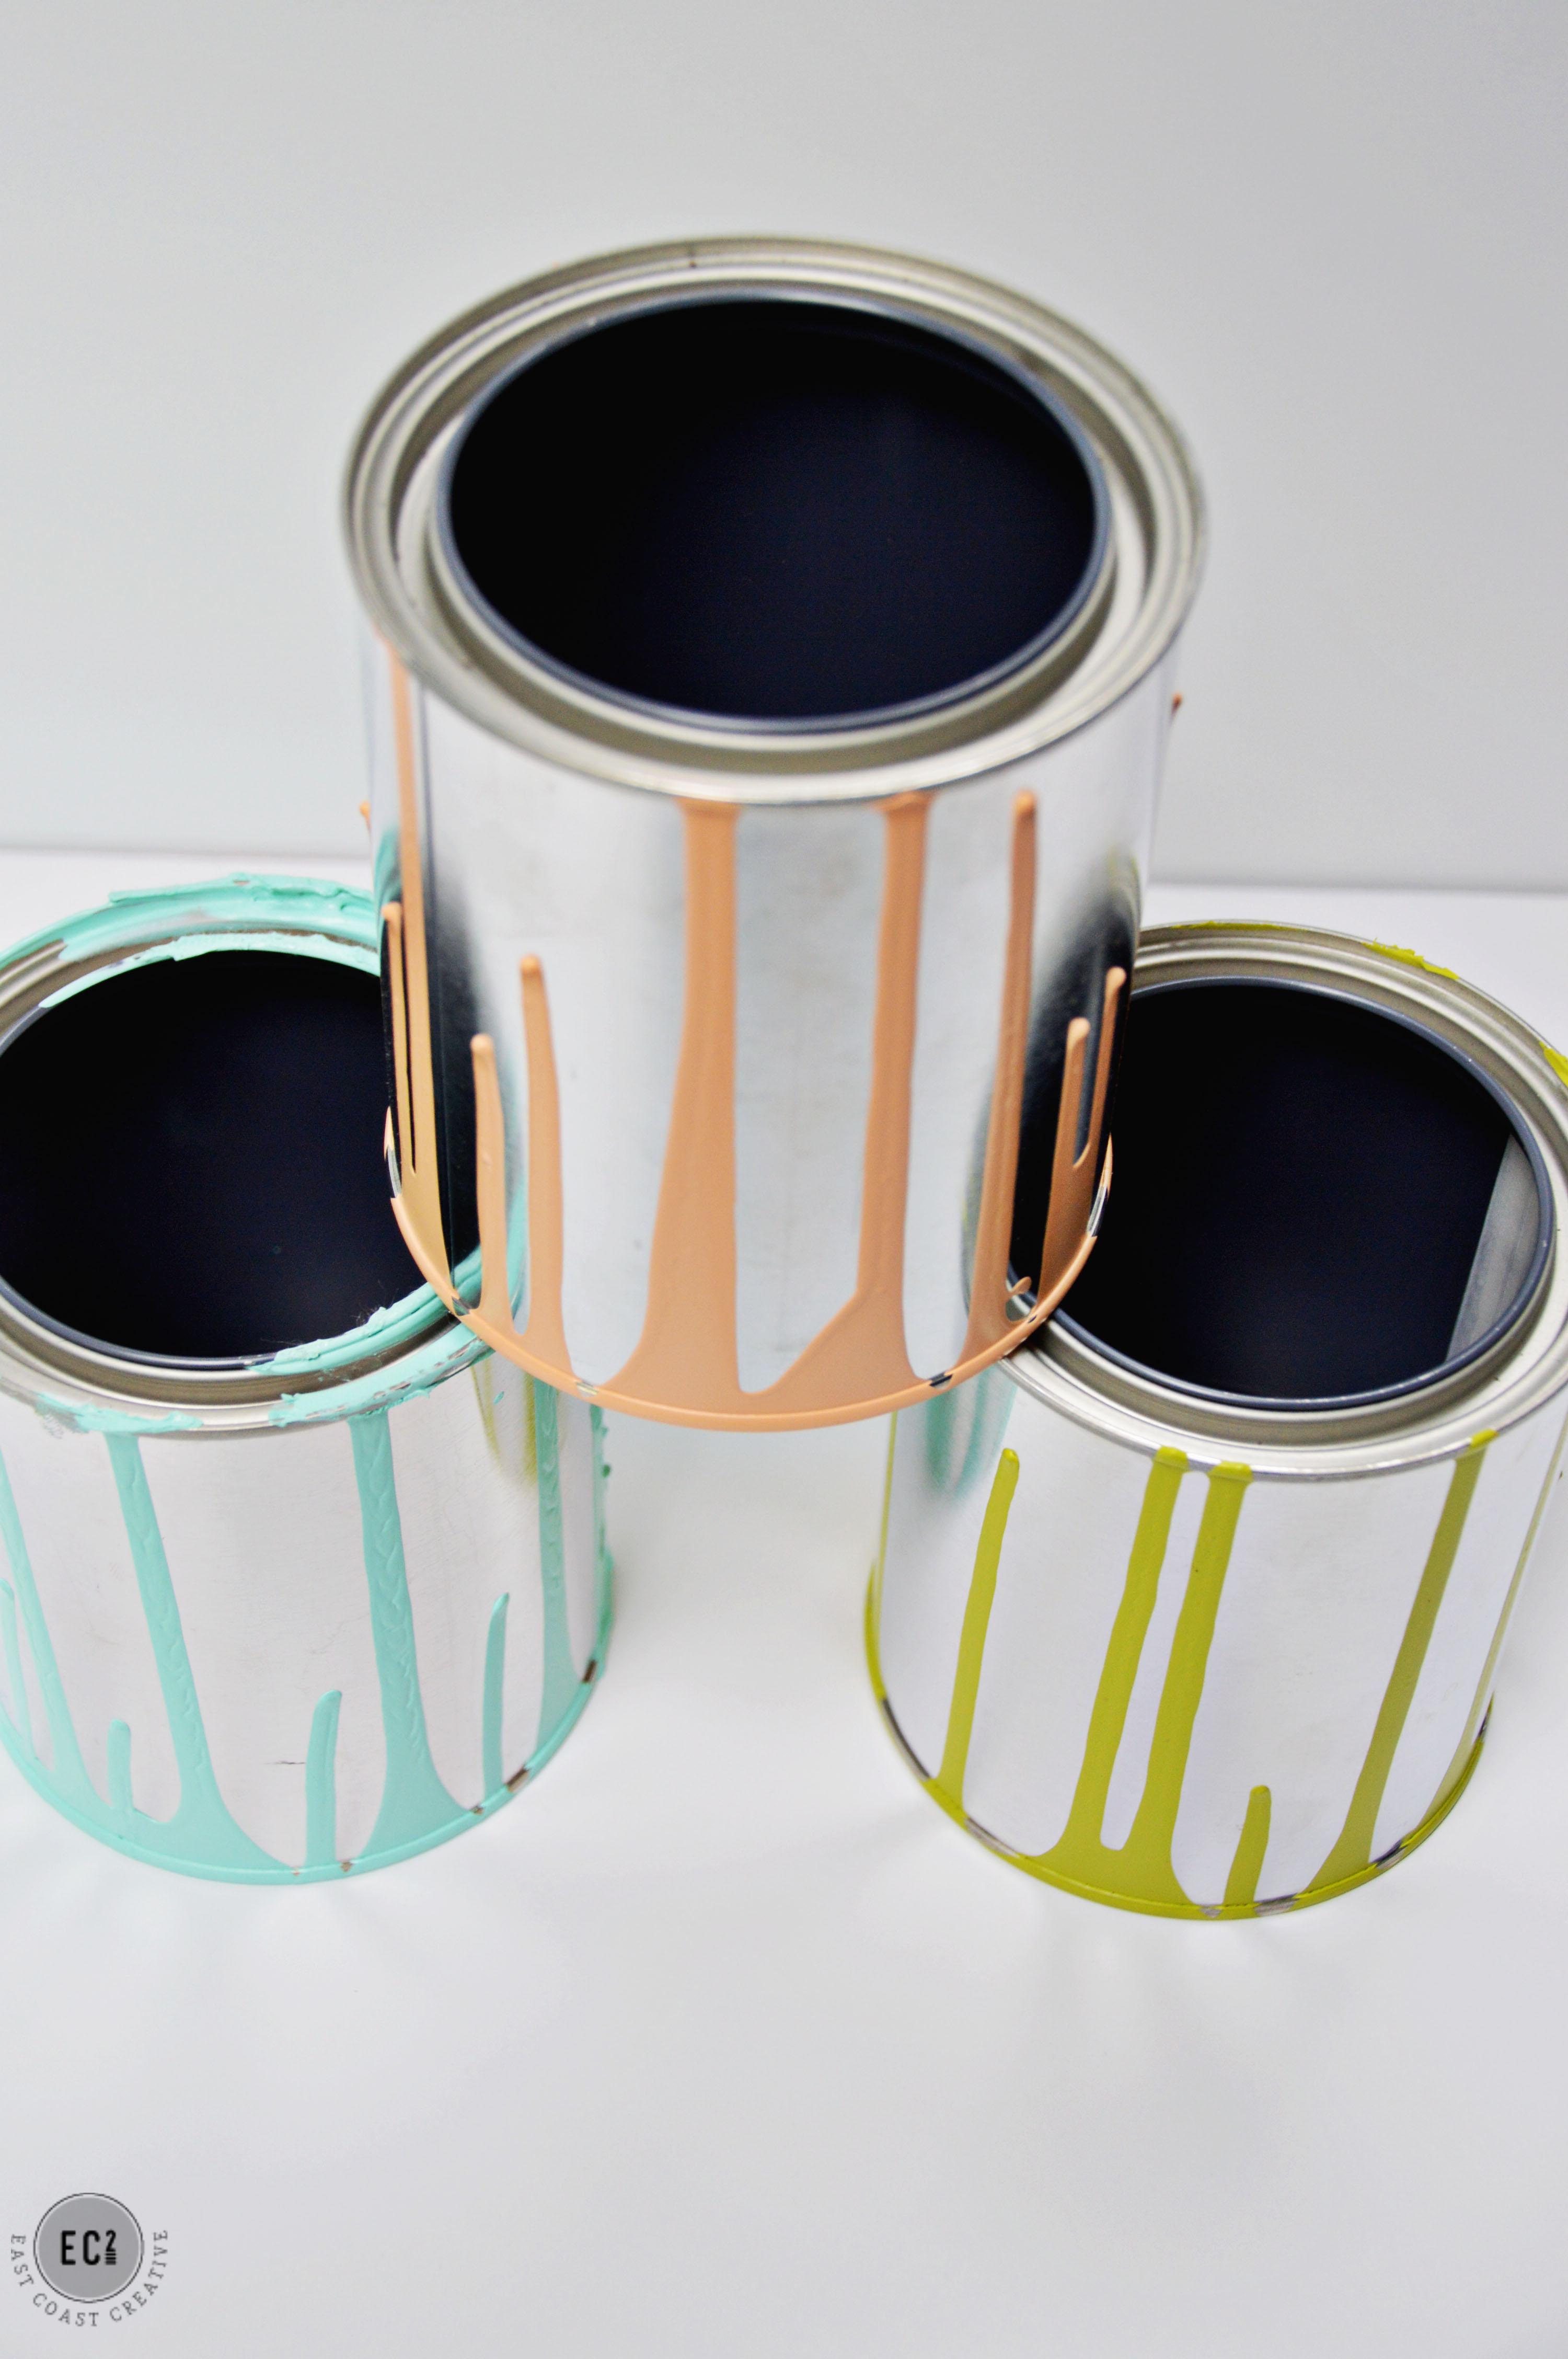
Once you have the look you want, allow the paint to dry for a full 24 hours. Since the paint on the bottom of the can is thicker, it will take a while to dry.

I used three different Pantone colors and I love the combo!
Once they were dried I officially fell in love with them. The whole anti-gravity paint dip rocked my world!

I forgot to take a picture of this step, but I drilled a few holes into the bottom of each paint can for drainage and then planted my succulents.
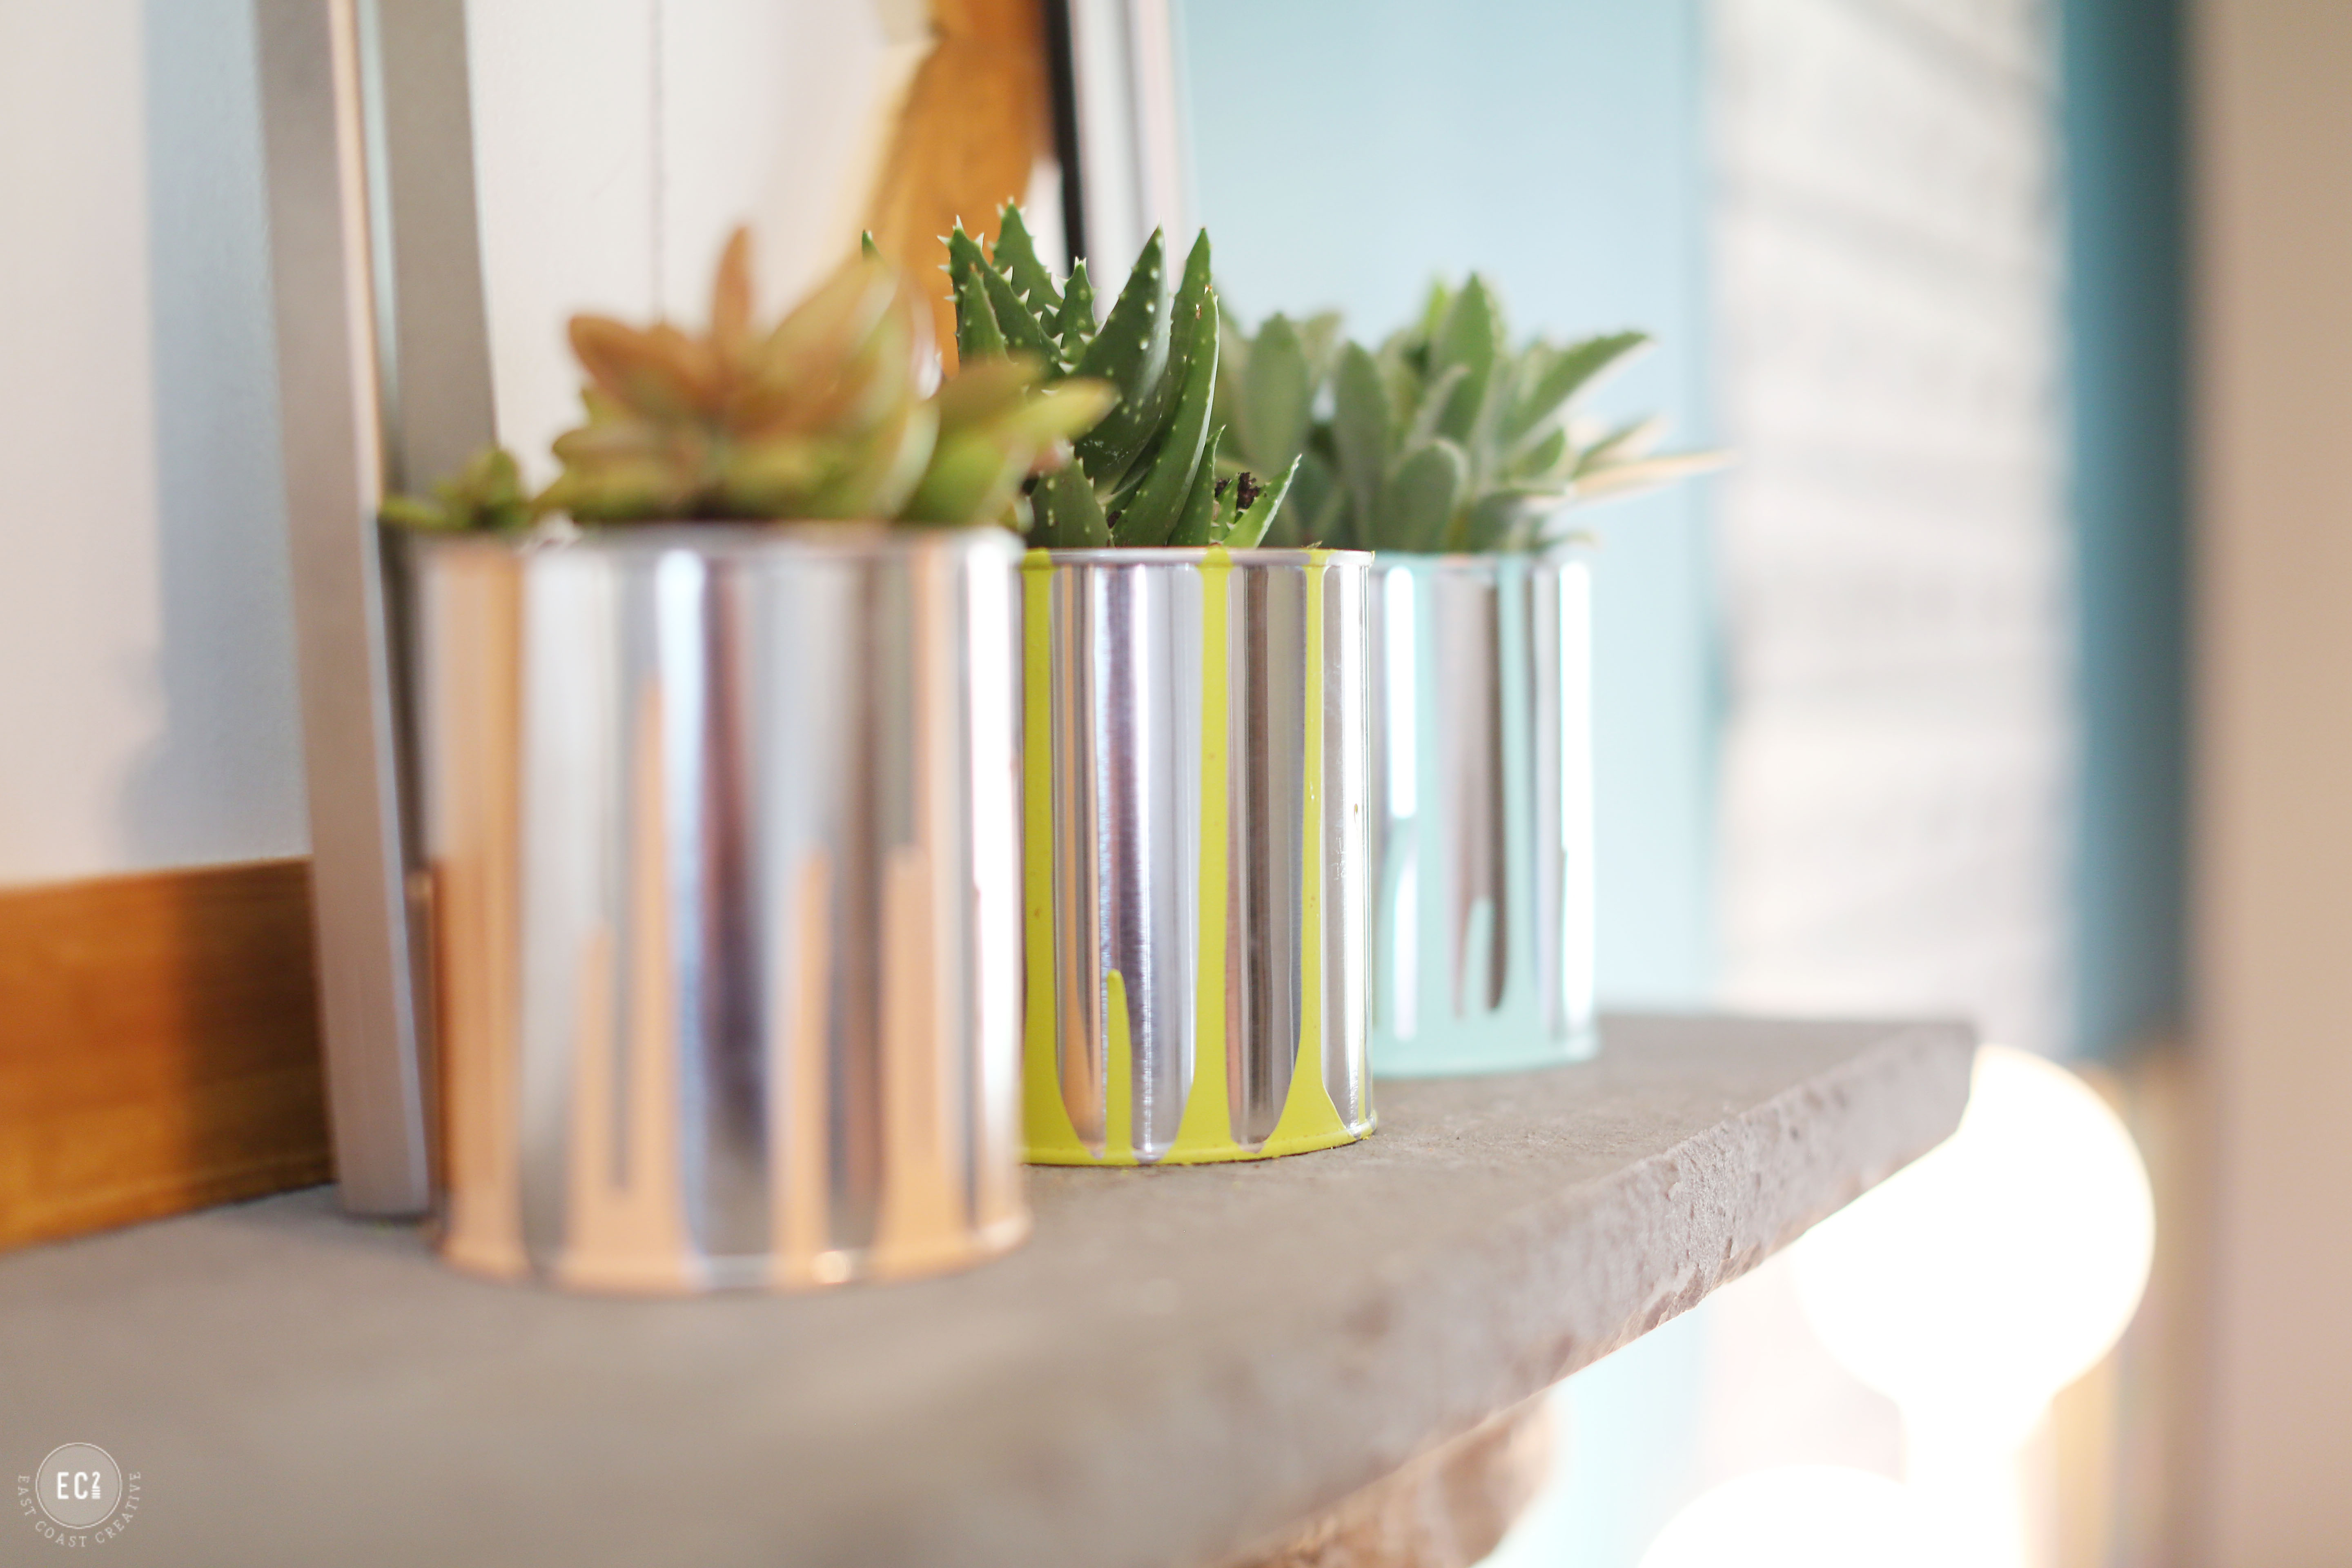
The color of the succulents with the fun Pantone summer colors makes me happy.

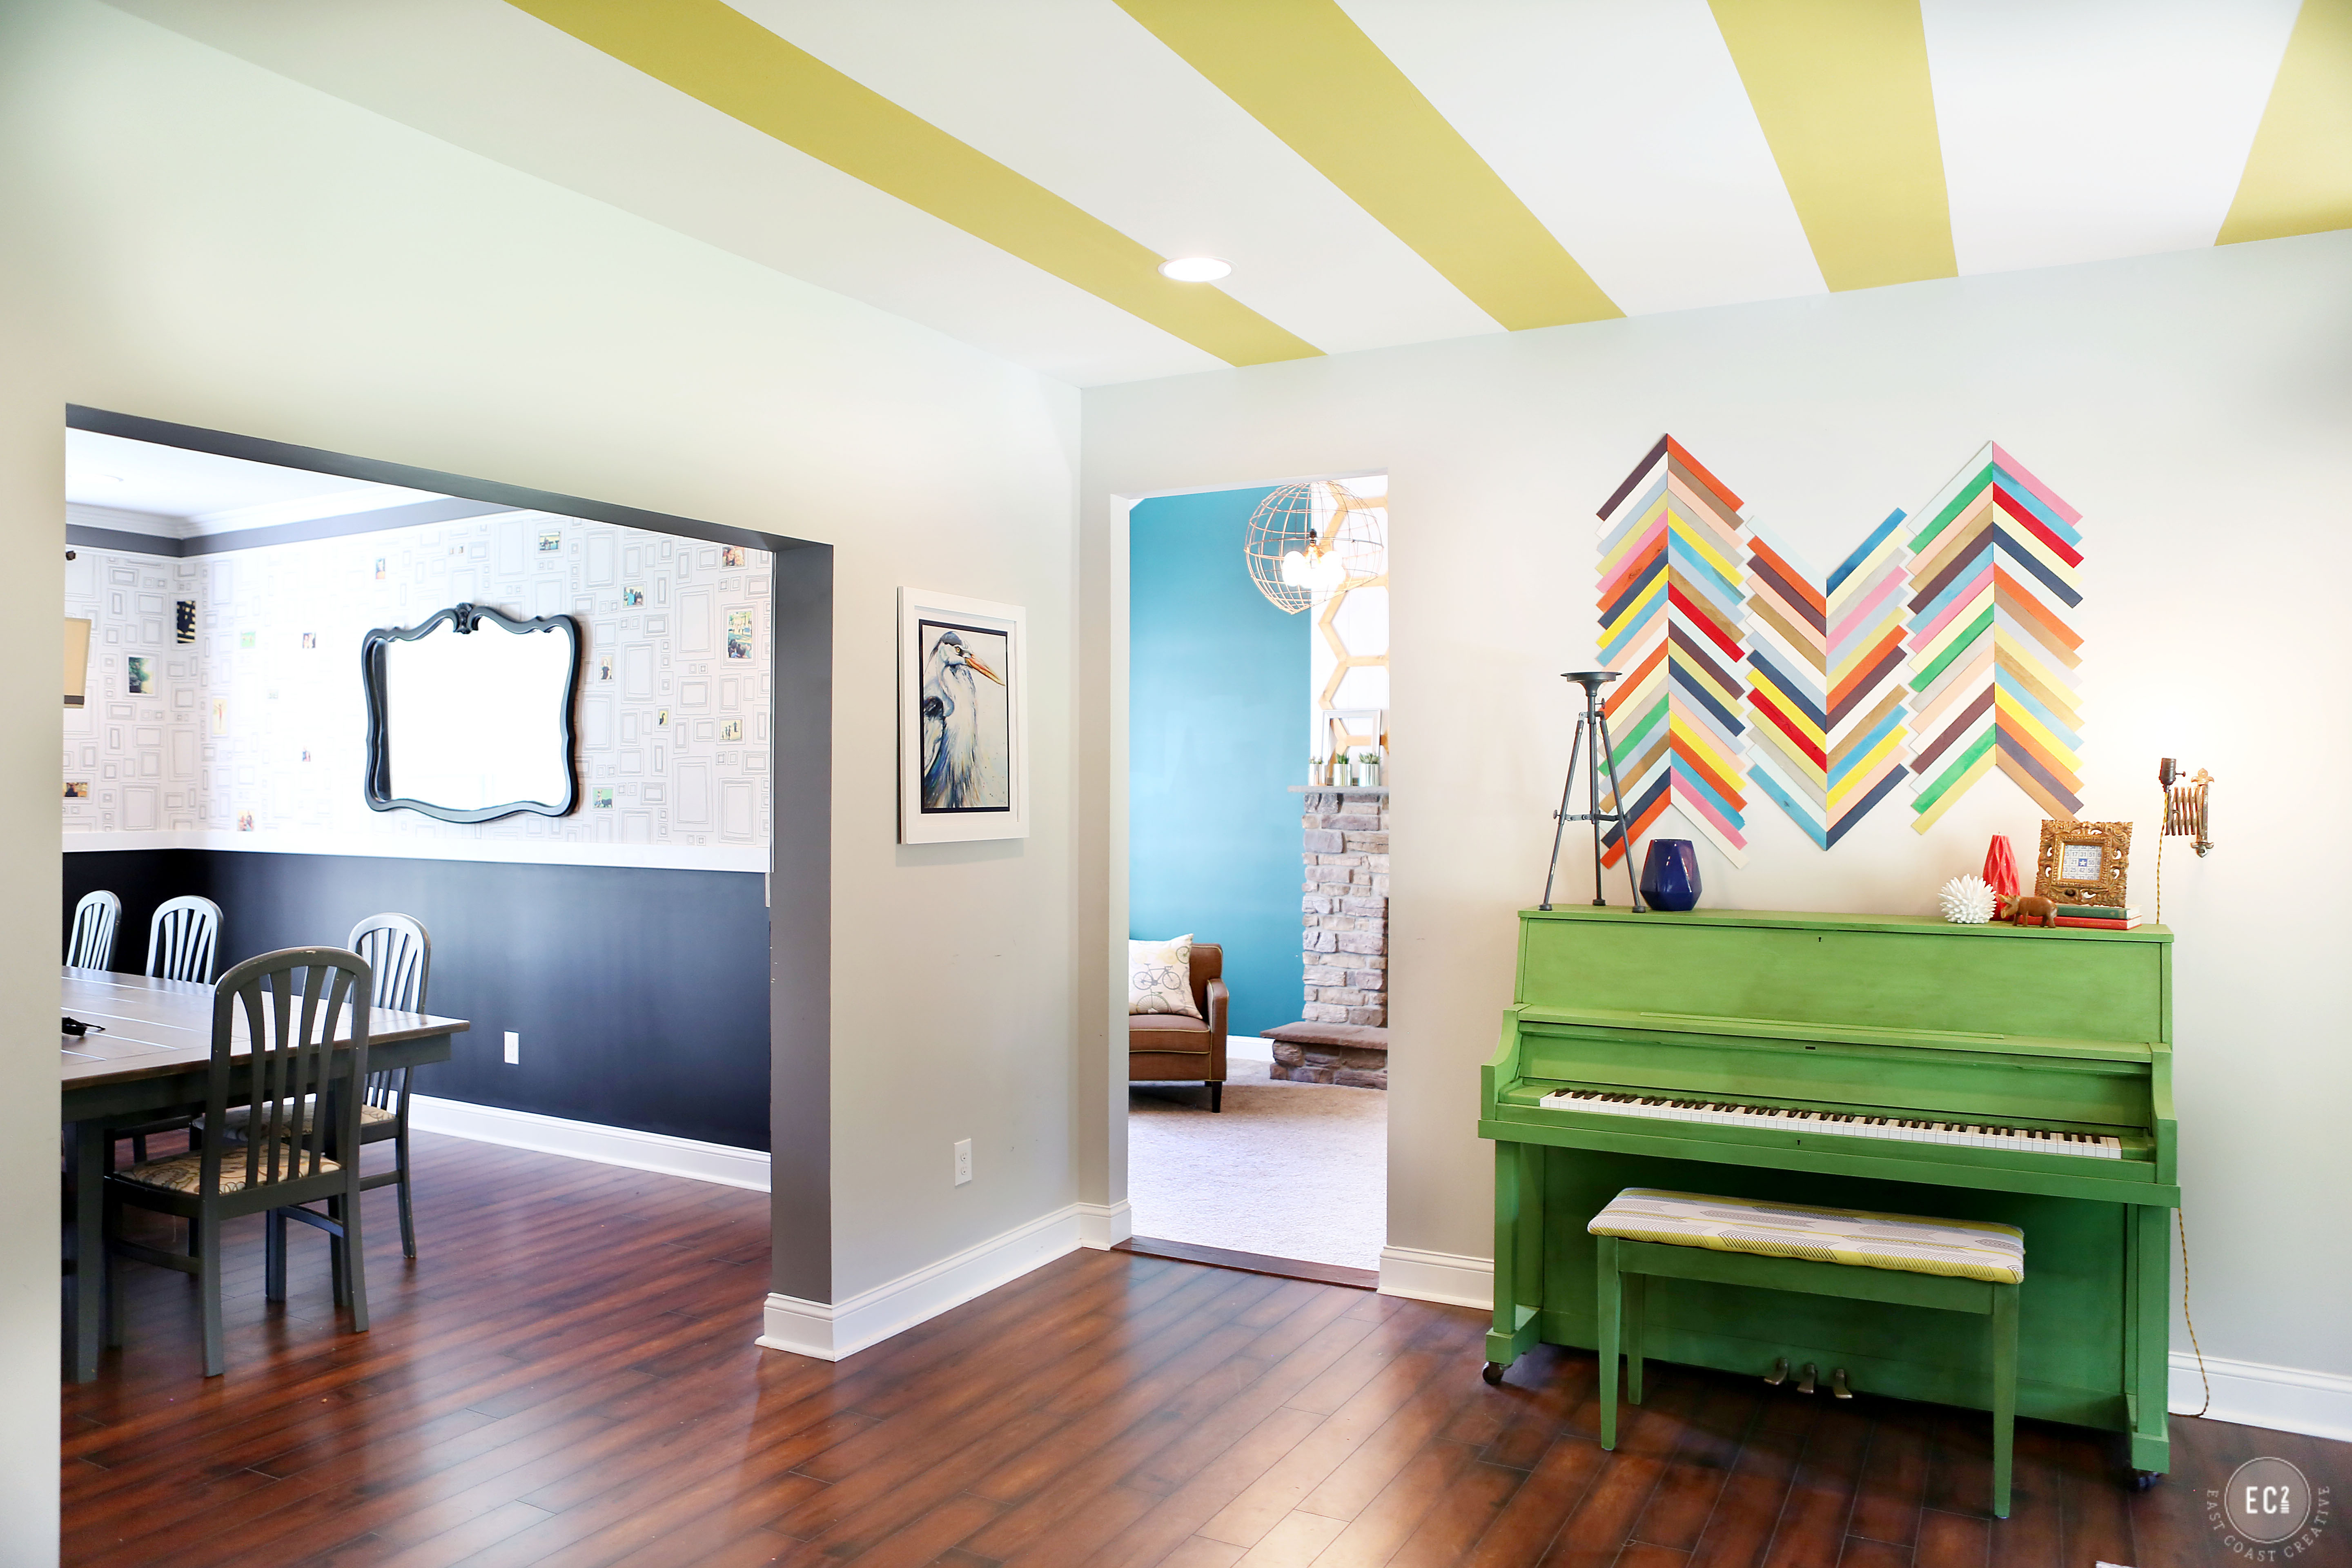
I had planned to put these in our breakfast nook near my Neon Thrift Store Art and Scrap Wood Wall Planter, but I thought they might look good in my kids’ playroom, so that’s where they’ve been hanging out.
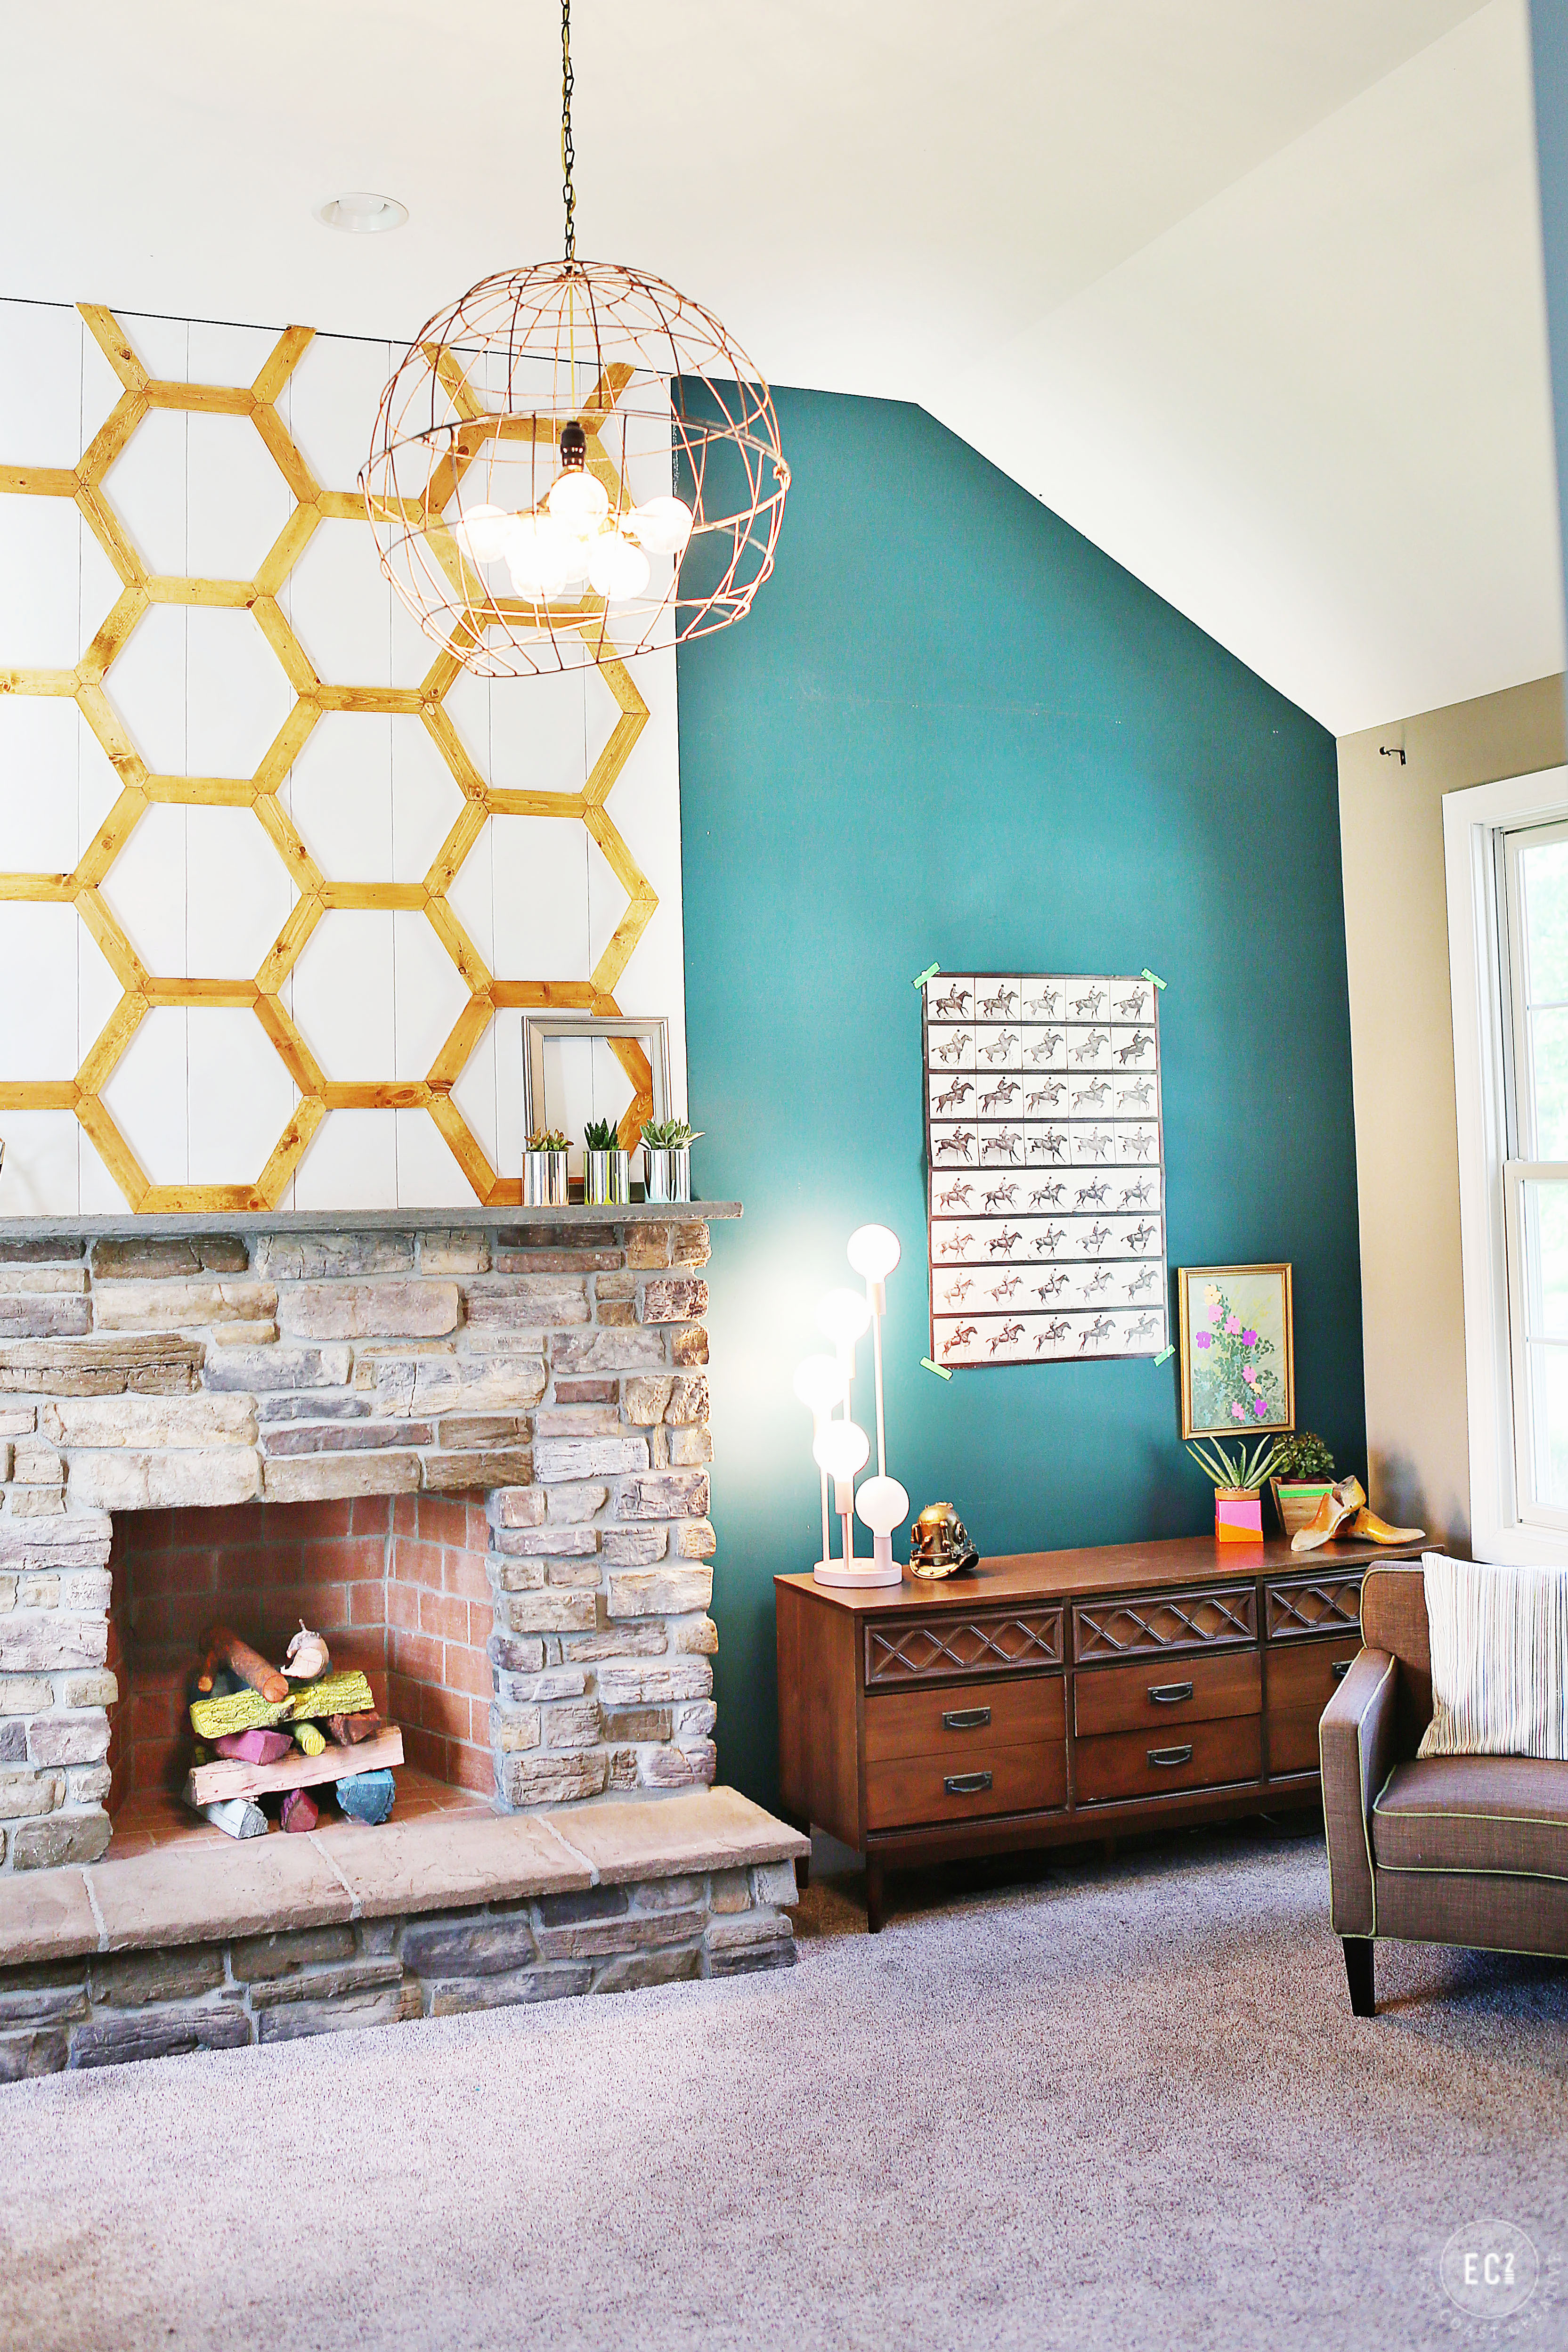
I’ll be sharing about the little summer tweaks I made to this room, later next week, but as you can probably tell I went big on color!
Actually, I always go BIG on color in my own home. Here’s what it’s looking like these days….
Except most days the floor is covered in puppy prints, an occasional puppy puddle (we’re back to housebreaking), drywall dust everywhere from a major basement project we have going on, and about 100 kid toys- so pretty much it only looks like the picture below one out of thirty days a month.
I’ve really been loving up trying some small scale DIYs lately. I guess with all the big projects we do on Knock It Off! that I enjoy doing the littles once in a while!
So do tell… what do you think of these freakin’ awesome anti-gravity DIY planters??
Did you know East Coast Creative’s Most Popular Blog Project of all time is now for sale?!?
Get Ready to Break Up with Your Bedtime Routine!
Check out our online store!


These are totally awesome!
Thanks Julia!! I really love how they turned out! 🙂
I could totally see this in stores, West Elm maybe?? You are just too creative for your own good, loooooove it (i my Dragon Tales voice).
These are so much fun! I love how sparkly they are with the silver and then those colors you picked are just awesome! Love!
[…] Paint Dipped Succulent Planters […]
Ok, flat out LOVING this simple project. Creative & easy – perfect combo 🙂
Thanks Sarah!! Yeah it’s definitely a fav lately!
[…] To see the full tutorial on for how to make your own paint dipped planter click HERE […]
Hi, Looks great, love it! If you don’t wish to drill holes in the cans yet still get drainage you can put some broken terra cotta pots in the bottom. They will absorb the extra water. This way you don’t have to have a dish under them. I heard on your show something about making your own chalk paint would you know the recipe? Possibly email it to me? Thanks so much
I love ’em. I also like that the silver picks up other colors in the room. They look a bit iridescent. Maybe not your intent but very pretty/cool.
I think those cans are really neat! You have a great creative mind! Next time you are in Florida, please stop by and visit! You would have a blast at my house with your creativity! 🙂
Totally sharing this on Pinterest and FB today. Love, love this idea!
Thanks so much Kari!! Hope you’re doing well! 🙂 -Mon
This is such an awesome; fun project. Love it!!
I feel like you could probably teach a class on how to make a great blog. This is fantastic! I have to say, what really got me was your design. You certainly know how to make your blog more than just a rant about an issue. Youve made it possible for people to connect. Good for you, because not that many people know what theyre doing.
stuart weitzman for cheap http://www.belue.co.uk