

Did you see the nail-biter results of our first round of Creating with the Stars? Every single project was incredible and we’re sad to say goodbye to three contestants, but are so excited to see what Round 2 brings! While our contestants are hard at work painting something spectacular, we get to share with you the tutorial for Jaime’s sliding barn door console table! You guys, this console table is no joke. Jaime, from That’s My Letter, literally must not have slept for five straight days putting this thing together, but it is absolutely gorgeous. And so so well-made. She set the bar very high, ladies and gentlemen, very high. Enjoy, and if you’re feeling extra motivated, give it a try!
—————————————————————————————————————————————————————————-
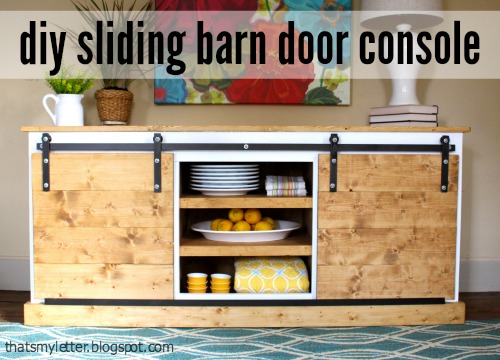
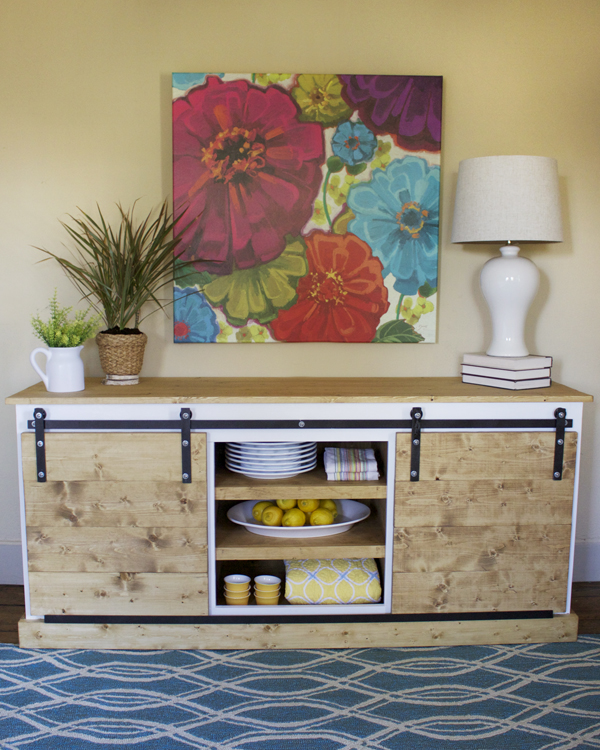
This console was my knock off project submission for week one of Creating with the Stars and it took first place!
You can build it too and for a fraction of the retail cost.

My build was inspired by Sundance Catalog’s Yorkville Sliding Door Console:
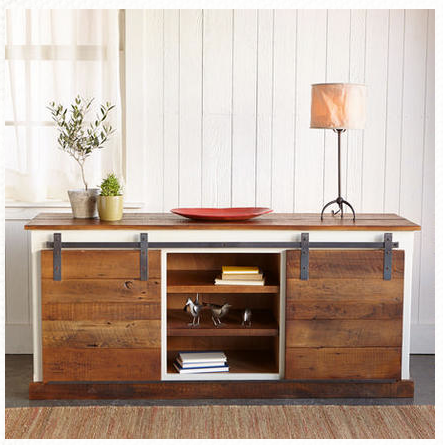
The retail version above sells for $2500 plus $400 shipping – yikes! I’ll show you how to make your own diy version for $300.
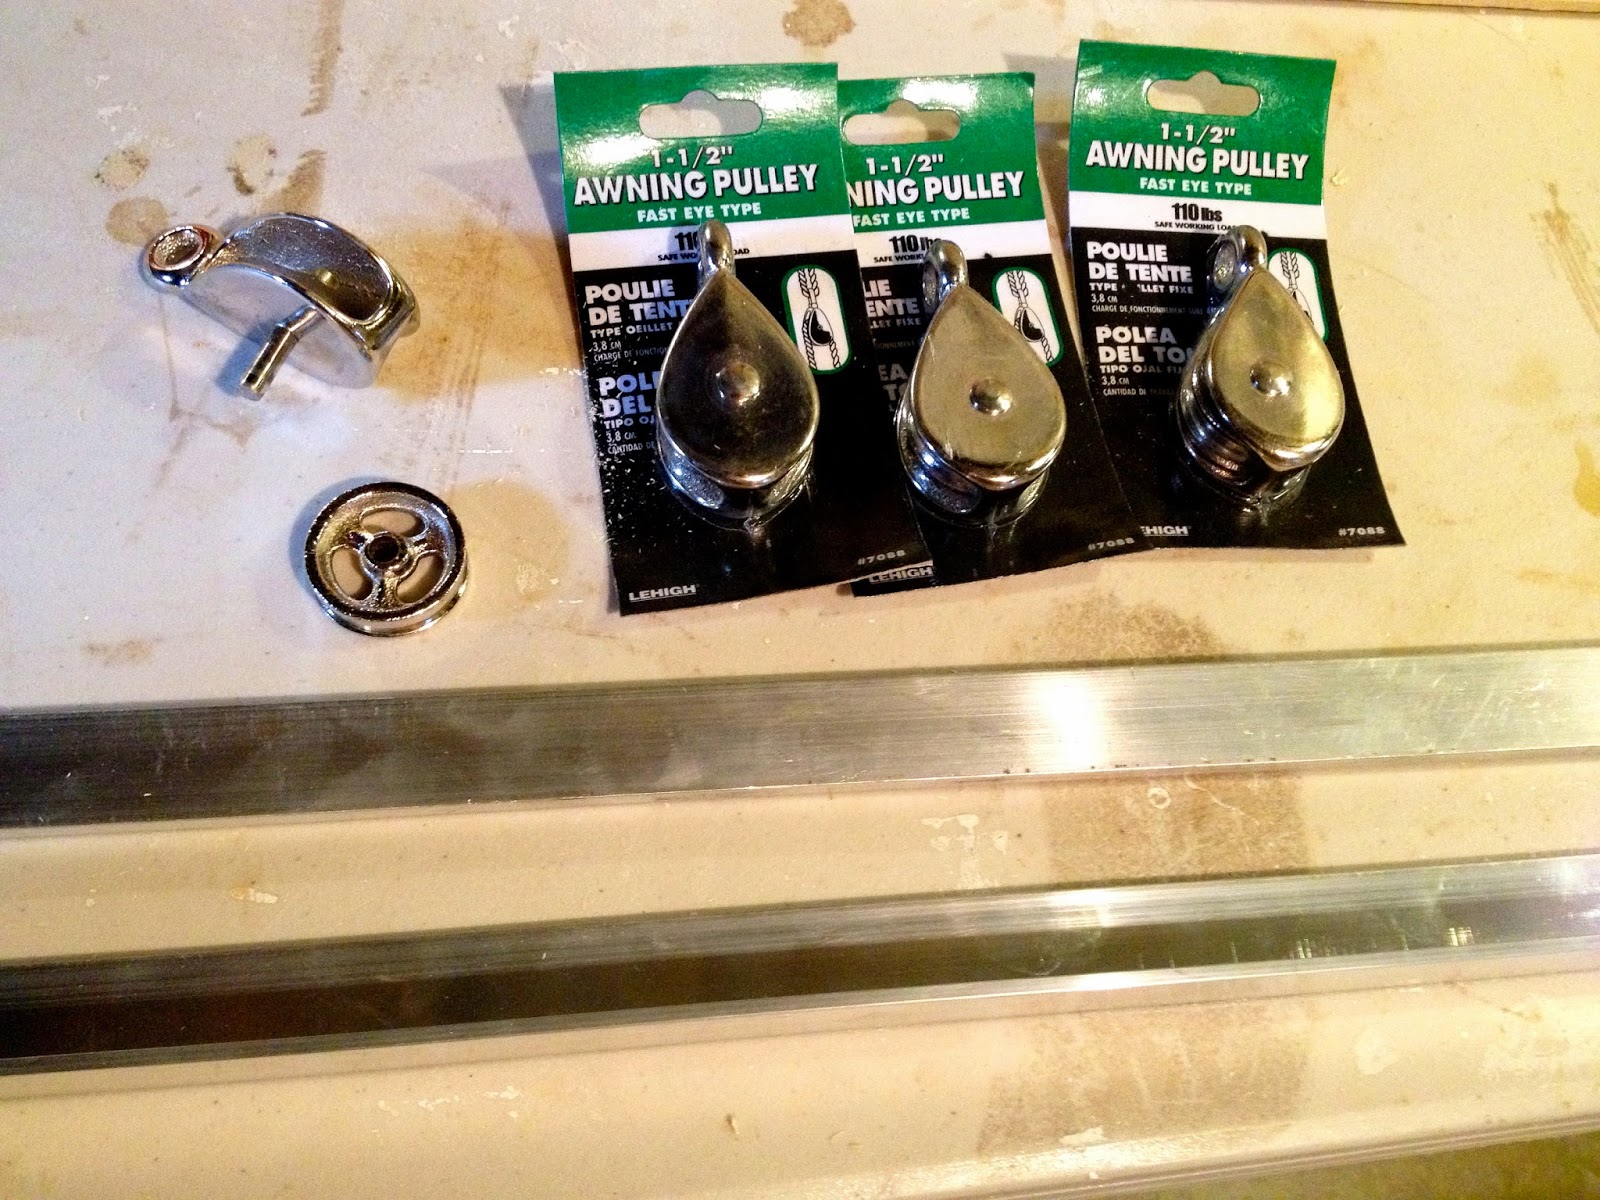
The barn door hardware is fairly simple pieces you can find at any big home improvement store – aluminum bars with 1 1/2″ pulley wheels.

How to build a sliding door console:
Lumber cuts:
Carcass:
2 – 3/4″ plywood @ 18 1/4″ x 63 1/2″(top & bottom)
2 – 3/4″ plywood @ 18 1/4″ x 29 1/4″ (sides)
2 – 3/4″ plywood @ 18 1/4″ x 25″(dividers)
2 – 3/4″ plywood @ 17 1/2″ x 20 5/8″(middle shelves)
2 – 3/4″ plywood @ 17 1/2″ x 20 3/4″(side shelves)
3 – 3/4″ plywood @ 2 3/4″ x 18 1/4″ (base supports from scraps)
Face frame:
2 – 1×2 @ 25 3/4″(sides)
1 – 1×2 @ 62″ (bottom)
1 – 1×5 @ 62″ (top)
2 – 1×2 @ 20″(dividers)
2 – 1×2 @ 20 5/8″(middle shelves trim)
2 – 1×2 @ 20 3/4″(side shelves trim)
Base moulding:
2 – 1×4 @ 19 1/8″(sides)
1 – 5/4 x 4 @ 66 1/2″(front – hidden)
1 – 5/16? @ 66 1/2″(front)
Top:
2 – 1×6 @ 67″
2 – 1×5 @67″
Doors:
8 – 1×6 @ 21″
2 – 1/4″ plywood @ 21″ x 22″
Backing: 1/4″ plywood @ 26″ x 65″
Hardware:
1 1/4″ pocket hole screws
2″ screws
3/4″ screws
1 1/4″ finish nails
Door hardware listed below.
1. Build the carcass:
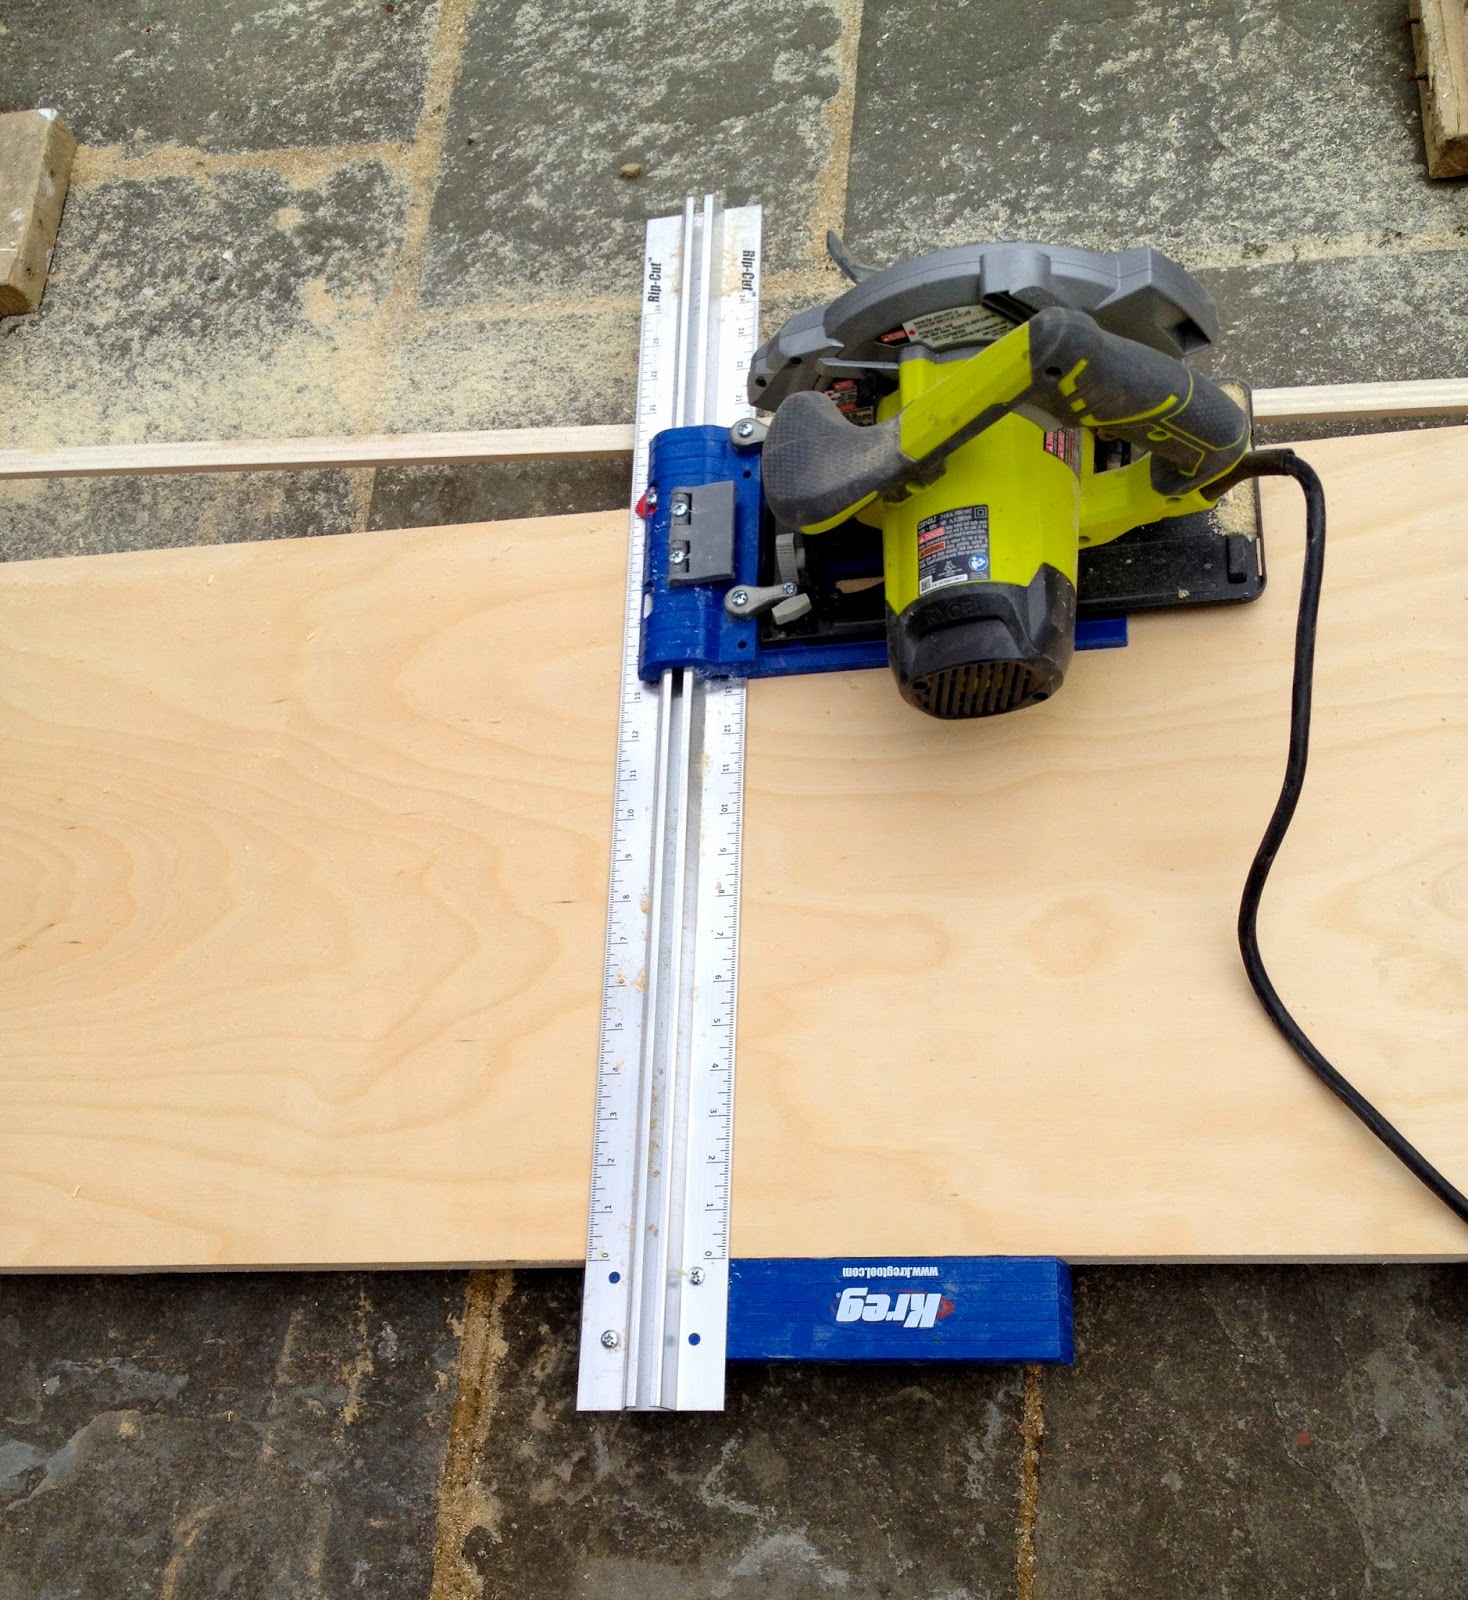
I used my Kreg rip cut to rip down the plywood.

2. Add the shelves.
Work face down and use scrap 1×2 spacers to get perfect placement of the shelf on the front side no matter if the back is a tiny bit too short.

3. Face frame.
You could build the face frame separately and then attach but I choose to build it directly on the carcass since I wasn’t following any plans I needed to be exact in my measurements.
Start with the side 1x2s, then bottom and top, then dividers, then shelf trim.
4. Base molding.
Sides first then front.
5. Top.
Connect boards using pocket holes on underside:
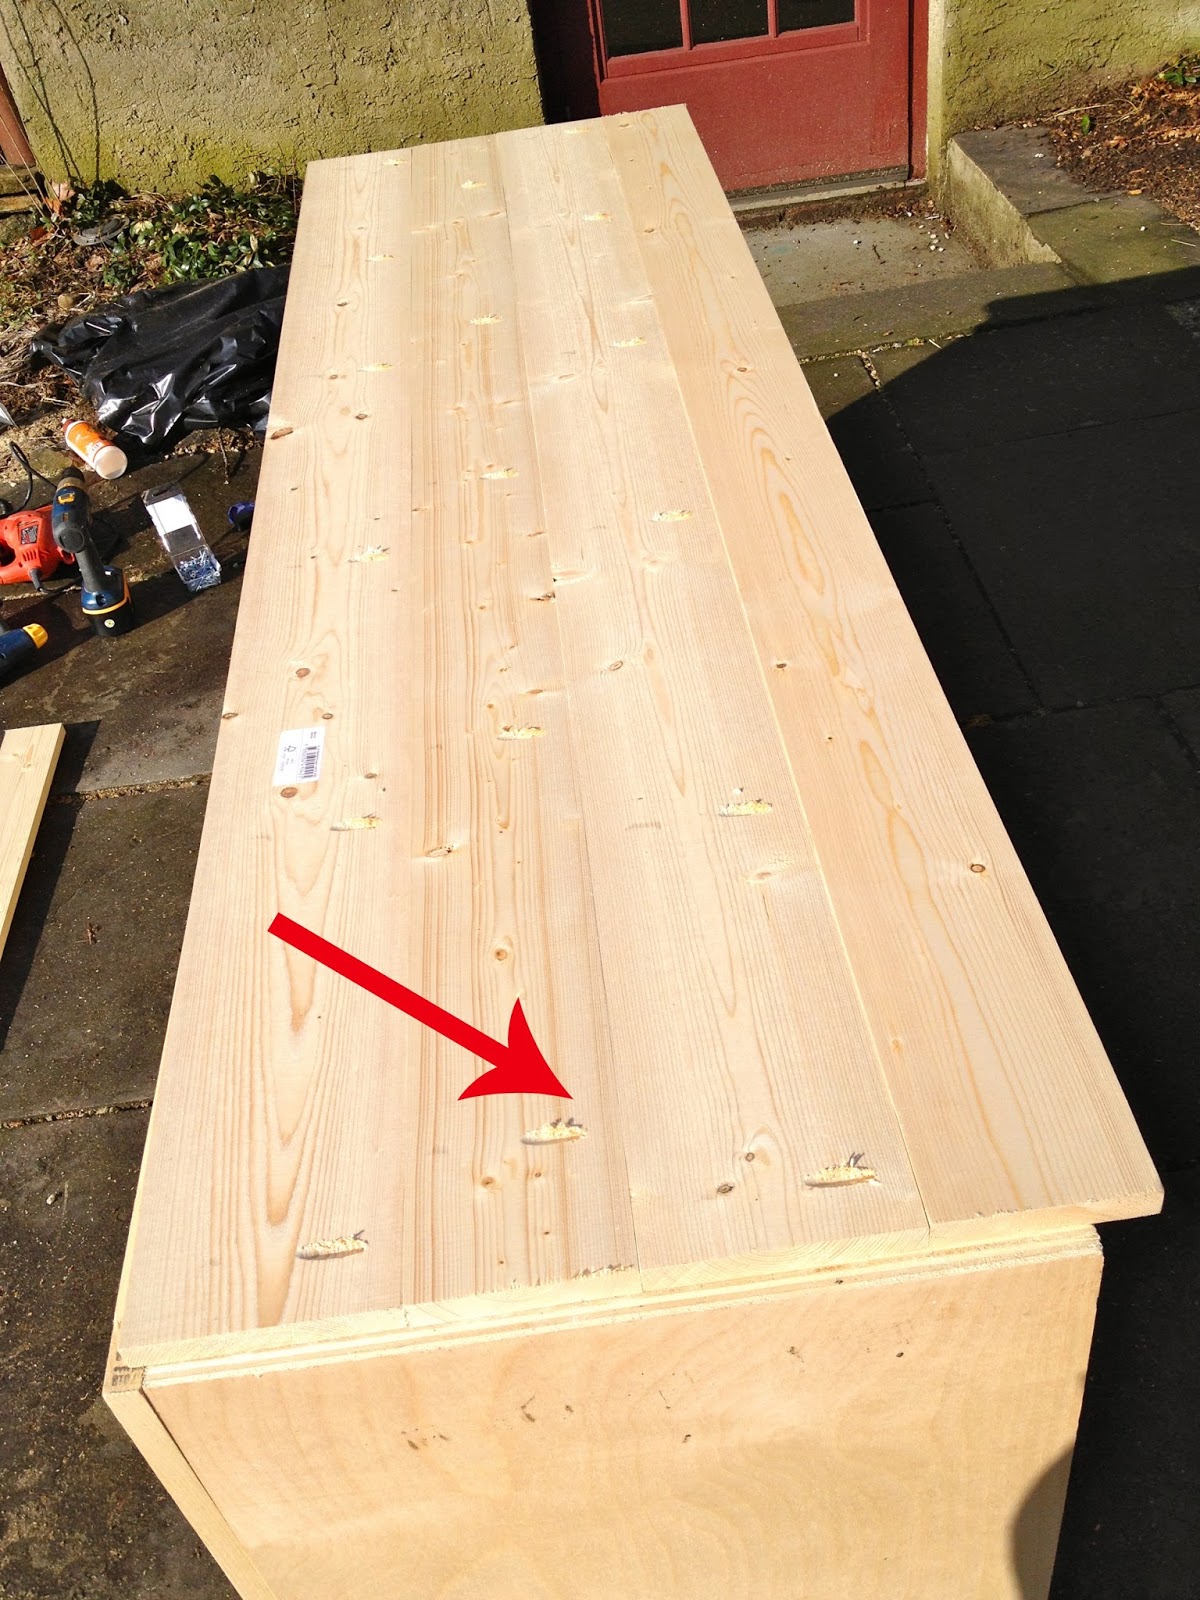
and then glue and clamp top down and attach with countersink screws from inside the console:

6. To build doors connect 4 boards using pocket holes:
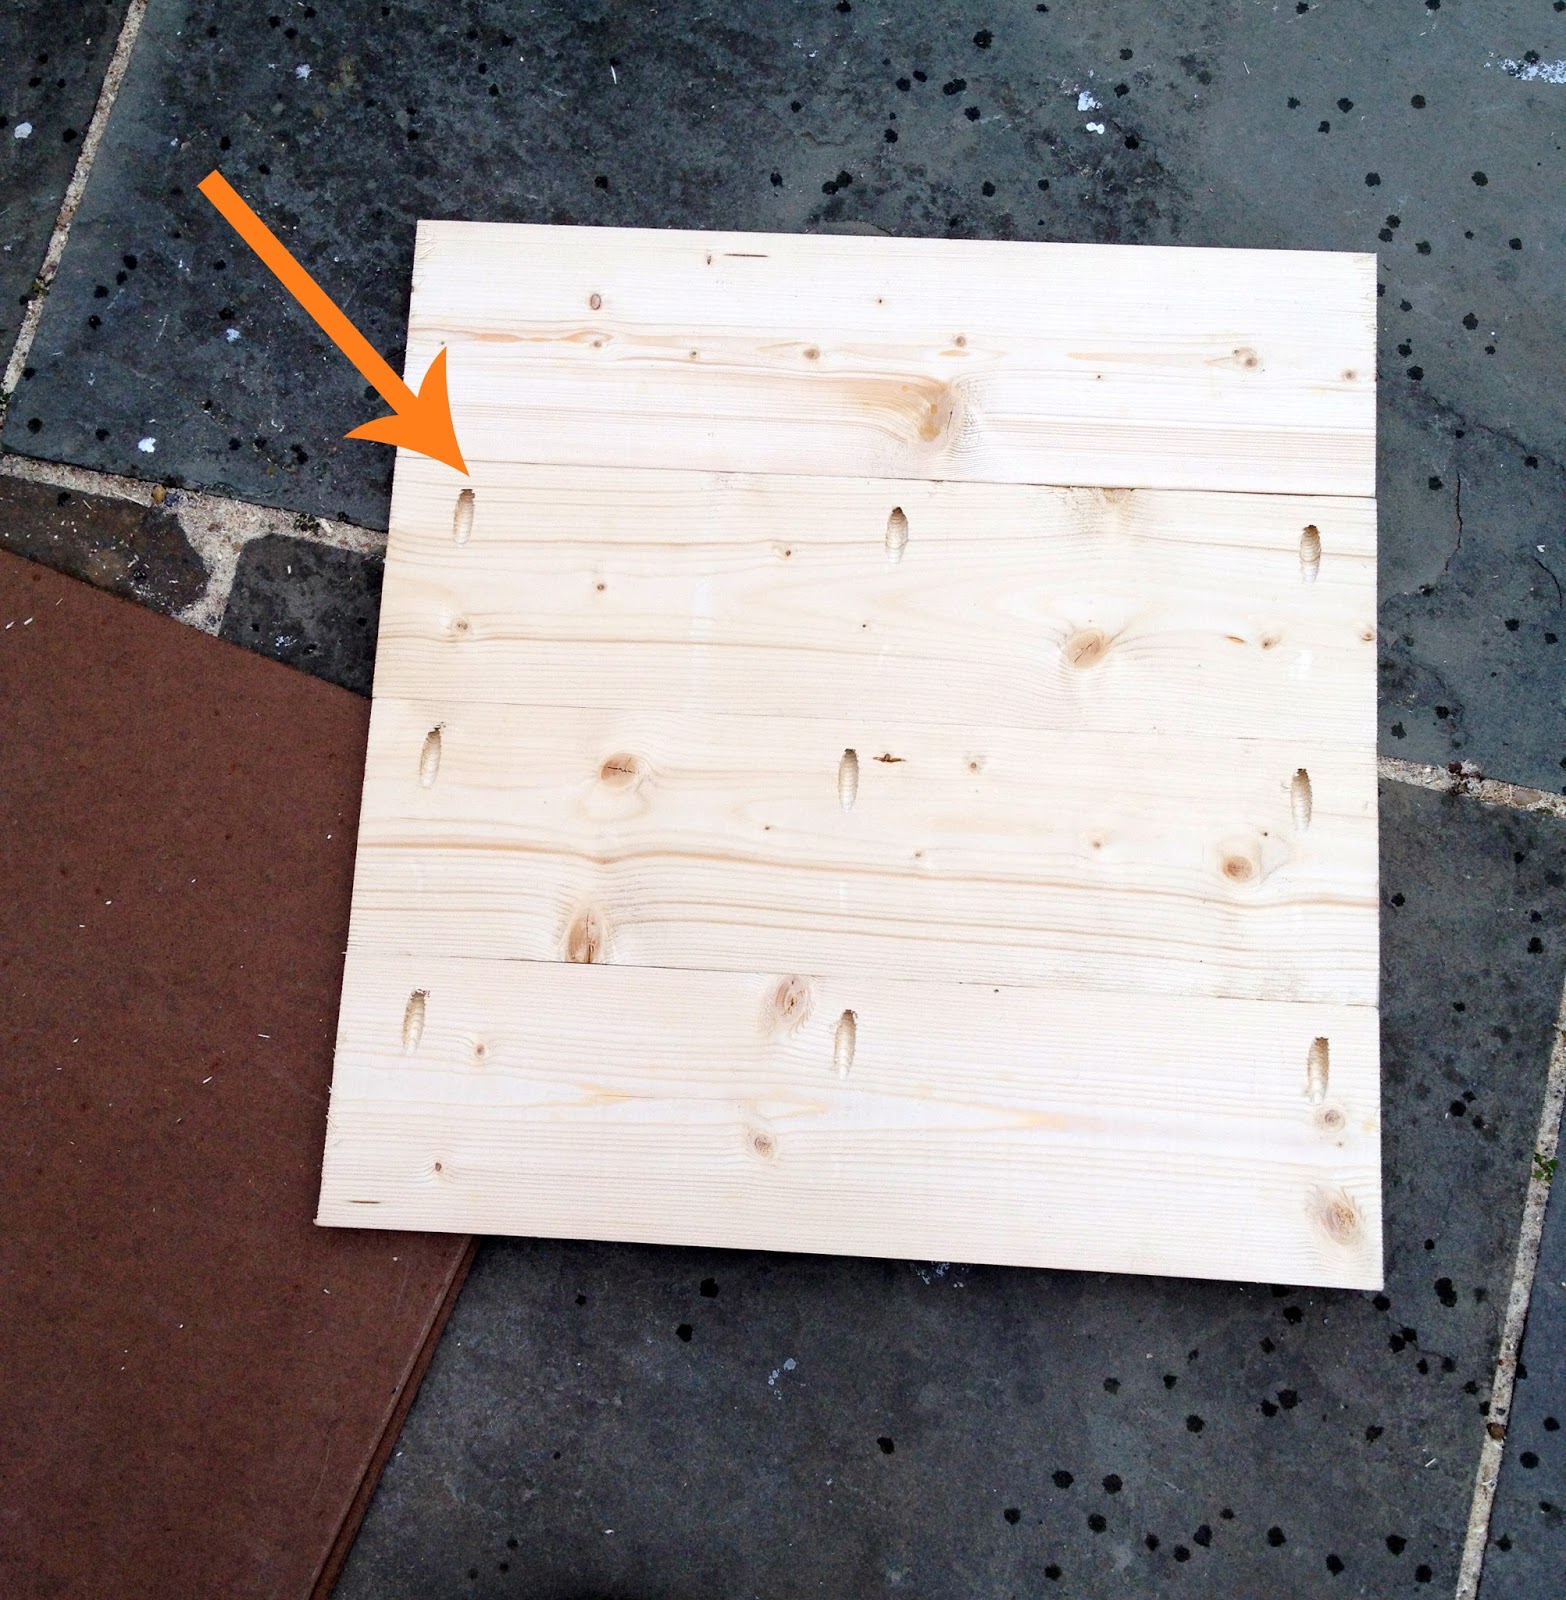
Then secure to 1/4″ backing using 3/4″ screws from back.
7. Sand and tape off face frame for paint.
Prime and paint white high gloss enamel.
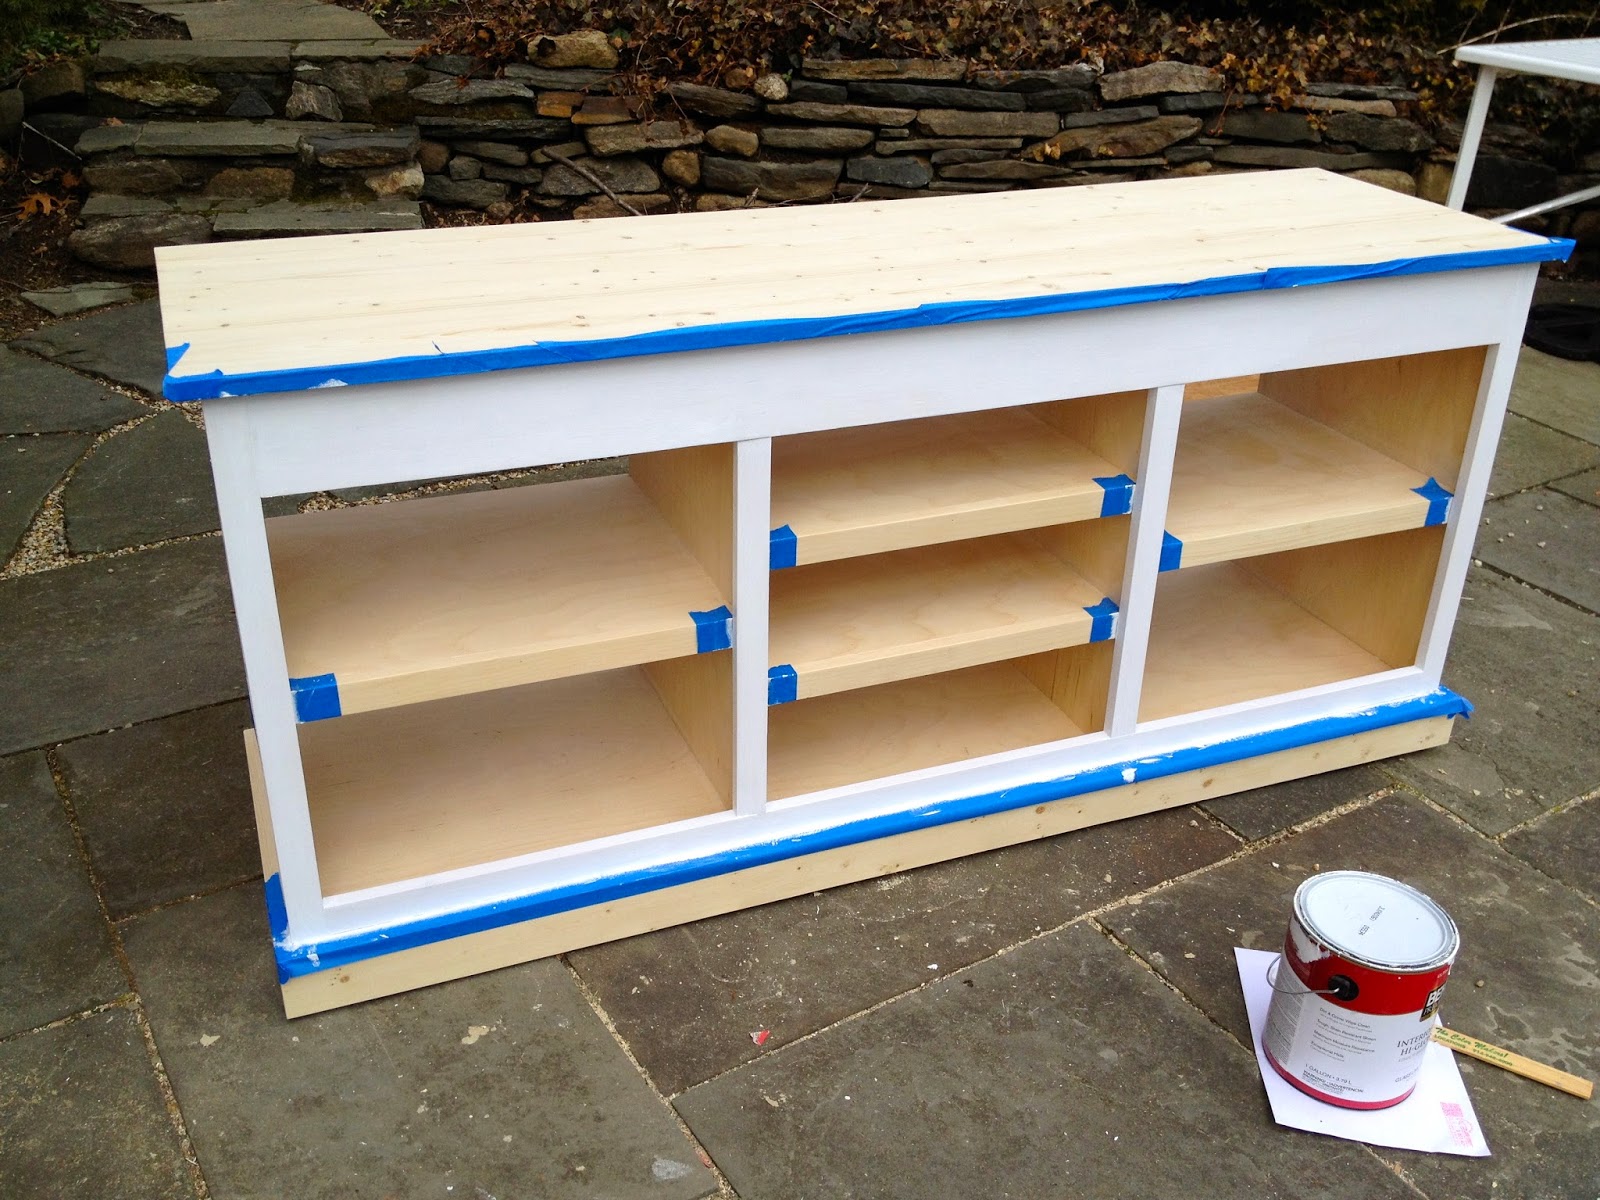
8. Stain remaining sections Minwax golden oak.

Door hardware:
1 – 1″ L shape angle aluminum bar x 1/8″ thick x 96″l (base track)
1 – 1″ flat aluminum bar x 1/4″ thick x 96″l (hanging track bar & vertical door bars)
3 – #12 x 2 1/2″ metal screws
3 – 1″ steel spacers
24 – 1/4″ washers
7 – 1/4″ hex nuts
4 – #12 x 1 1/2″ metal screws
8 – #12 x 3/4″ metal screws
Cut list:
1 – L shape aluminum bar @ 60″l (base track)
1 – flat aluminum bar @ 62″l (hanging track bar)
4 – flat aluminum bar @ 8 1/2″l (vertical door bars)
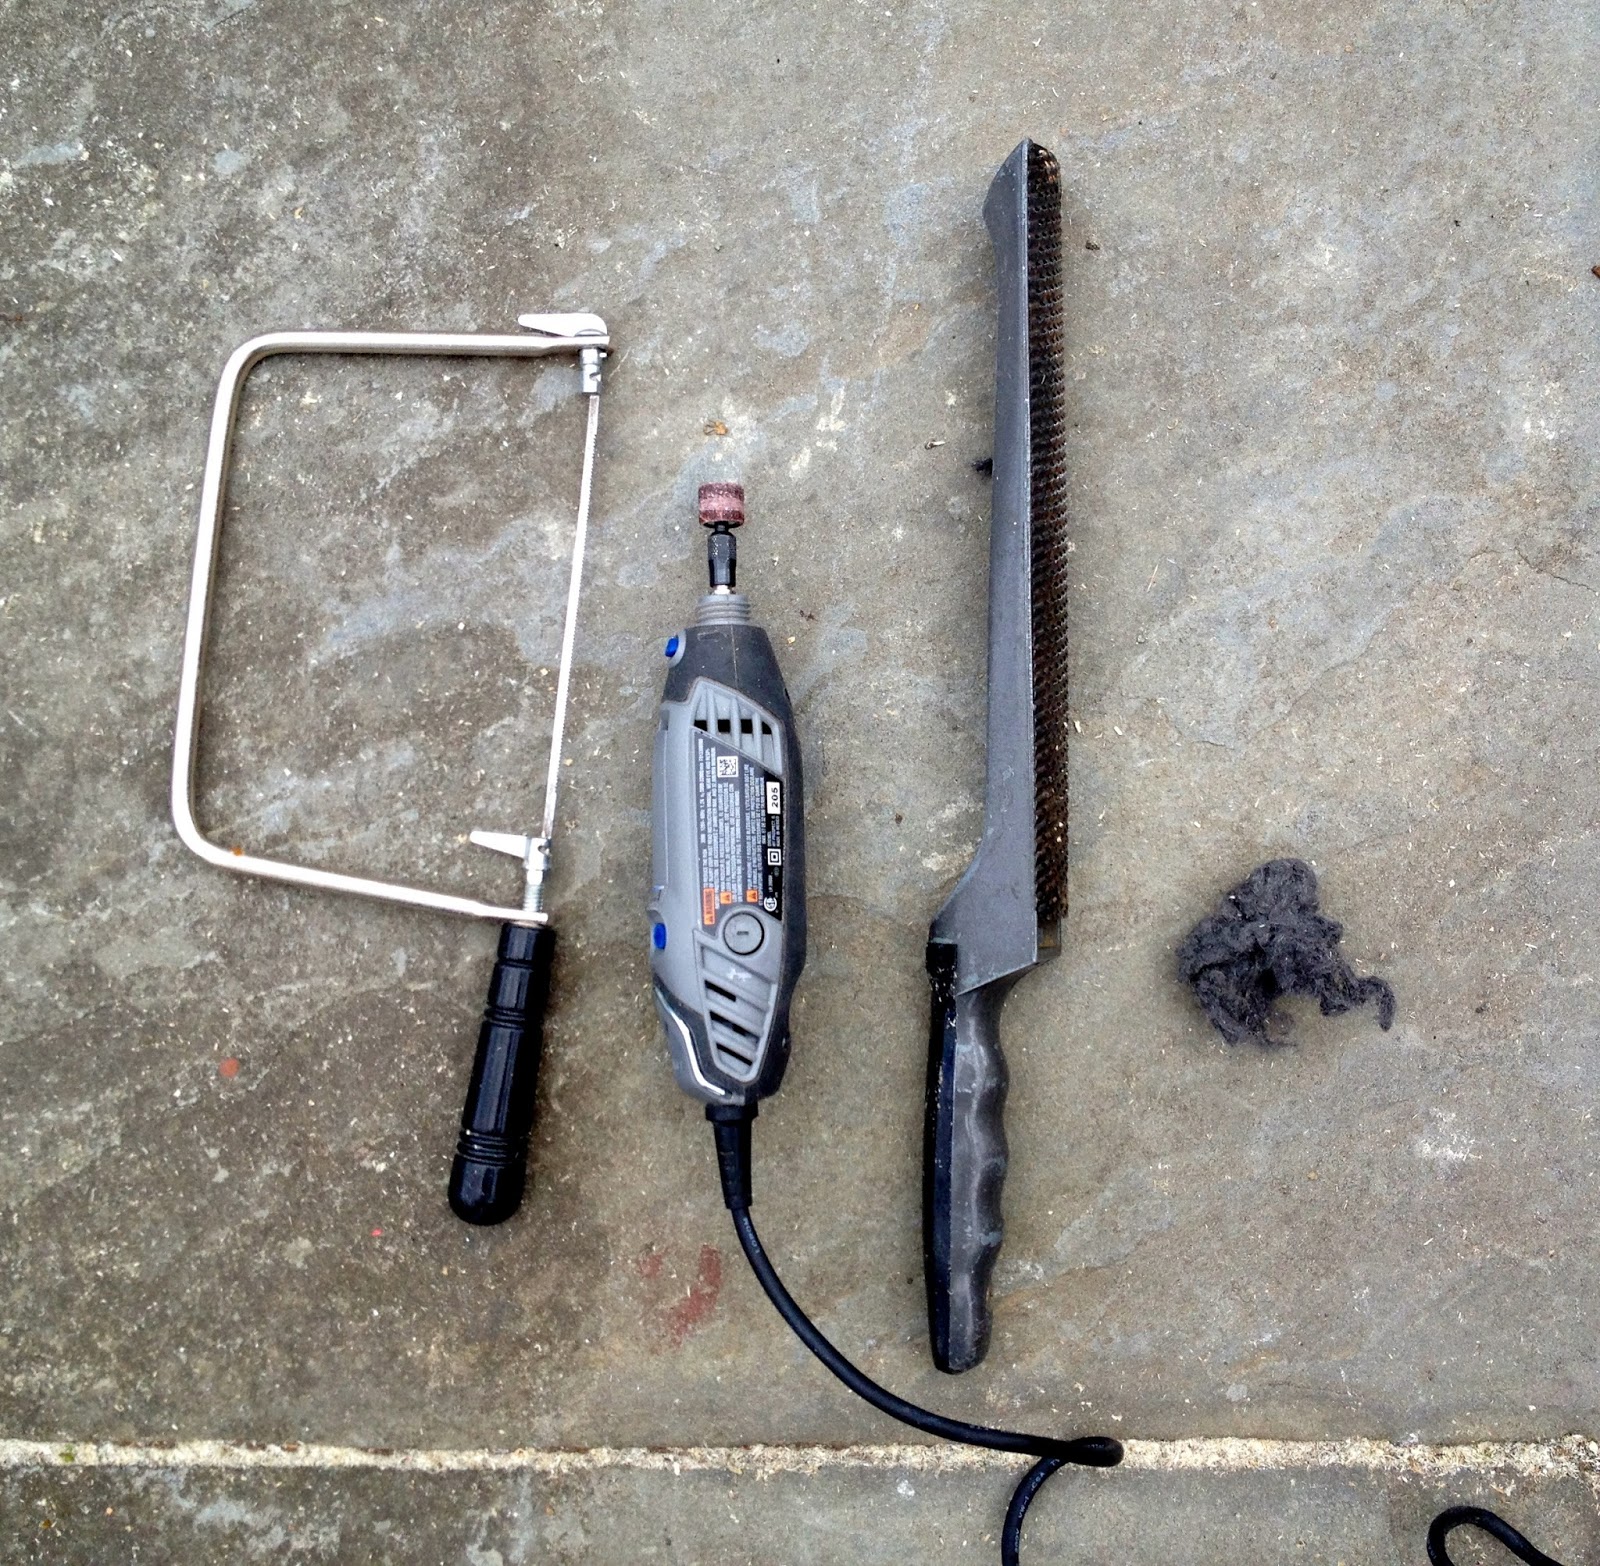
1. Cut the bar pieces as listed above.
This will not be fun.
Be sure to smooth any sharp edges.
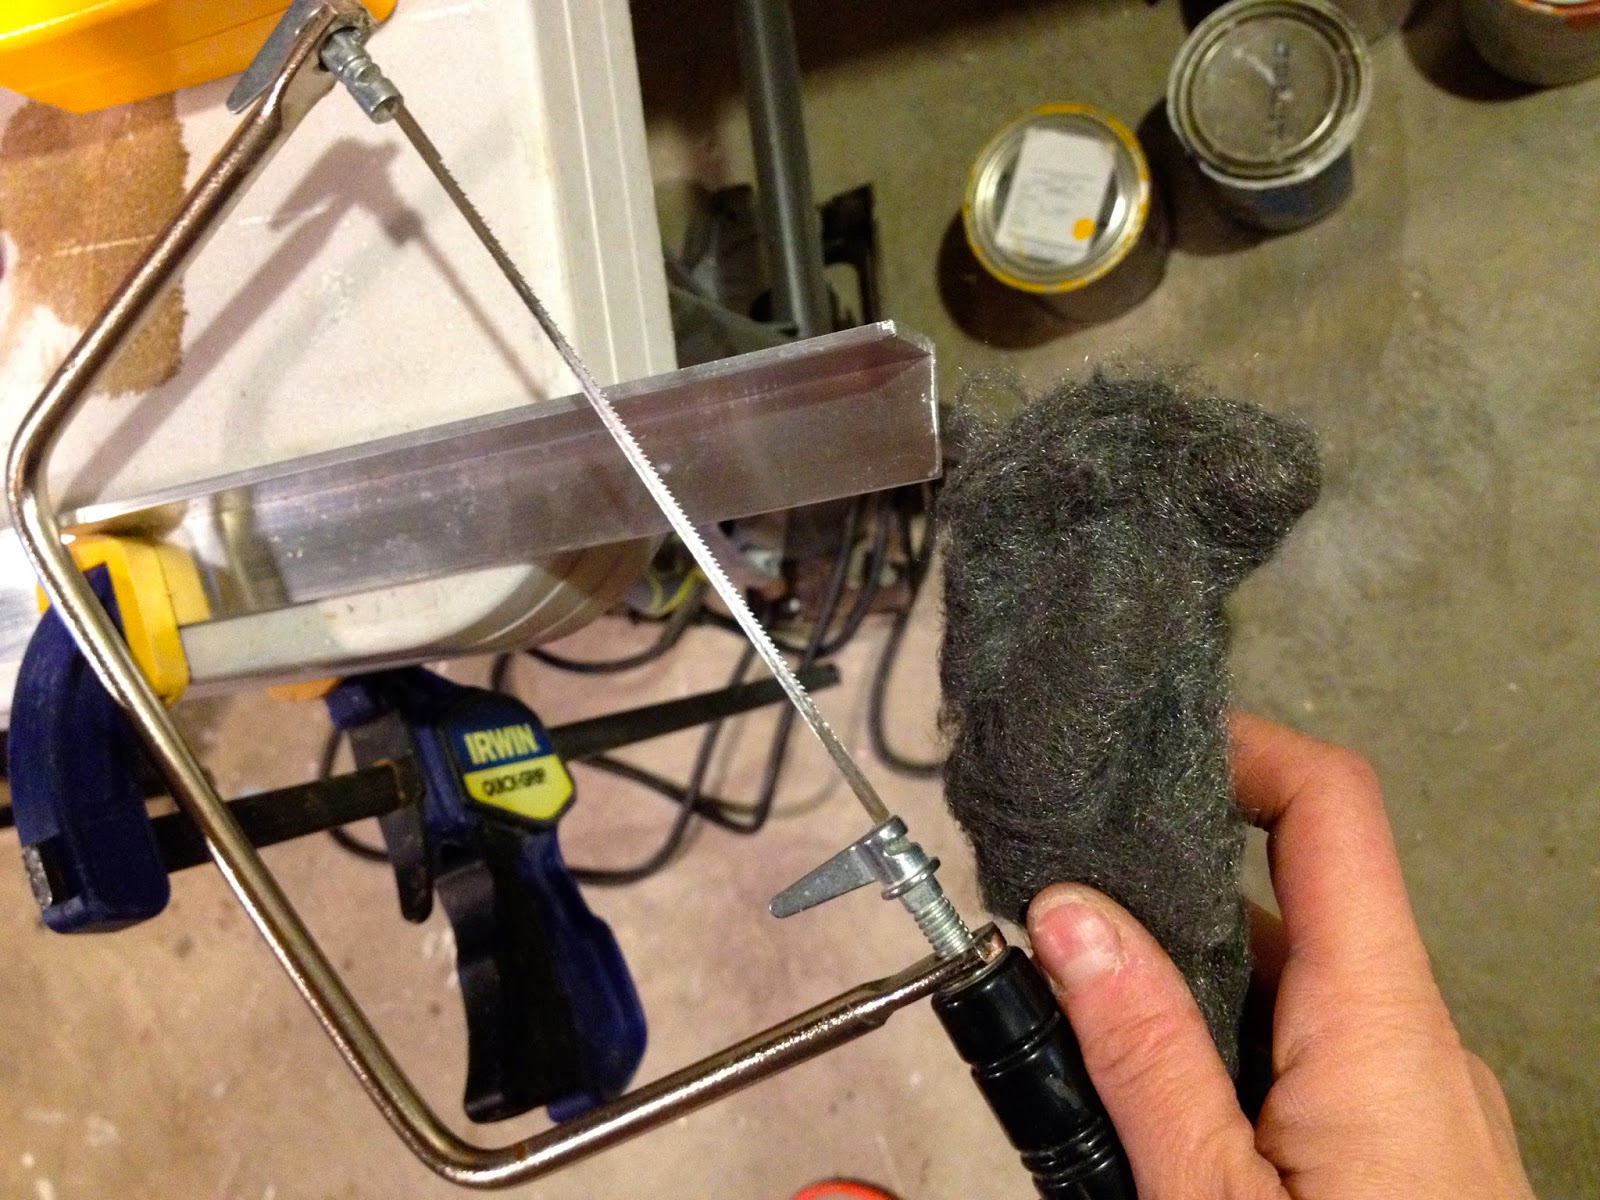
I used a combination of a coping saw, dremel drill, metal rasp and steel wood.
2. You need to remove the pulley wheel from inside the pulley mechanism:
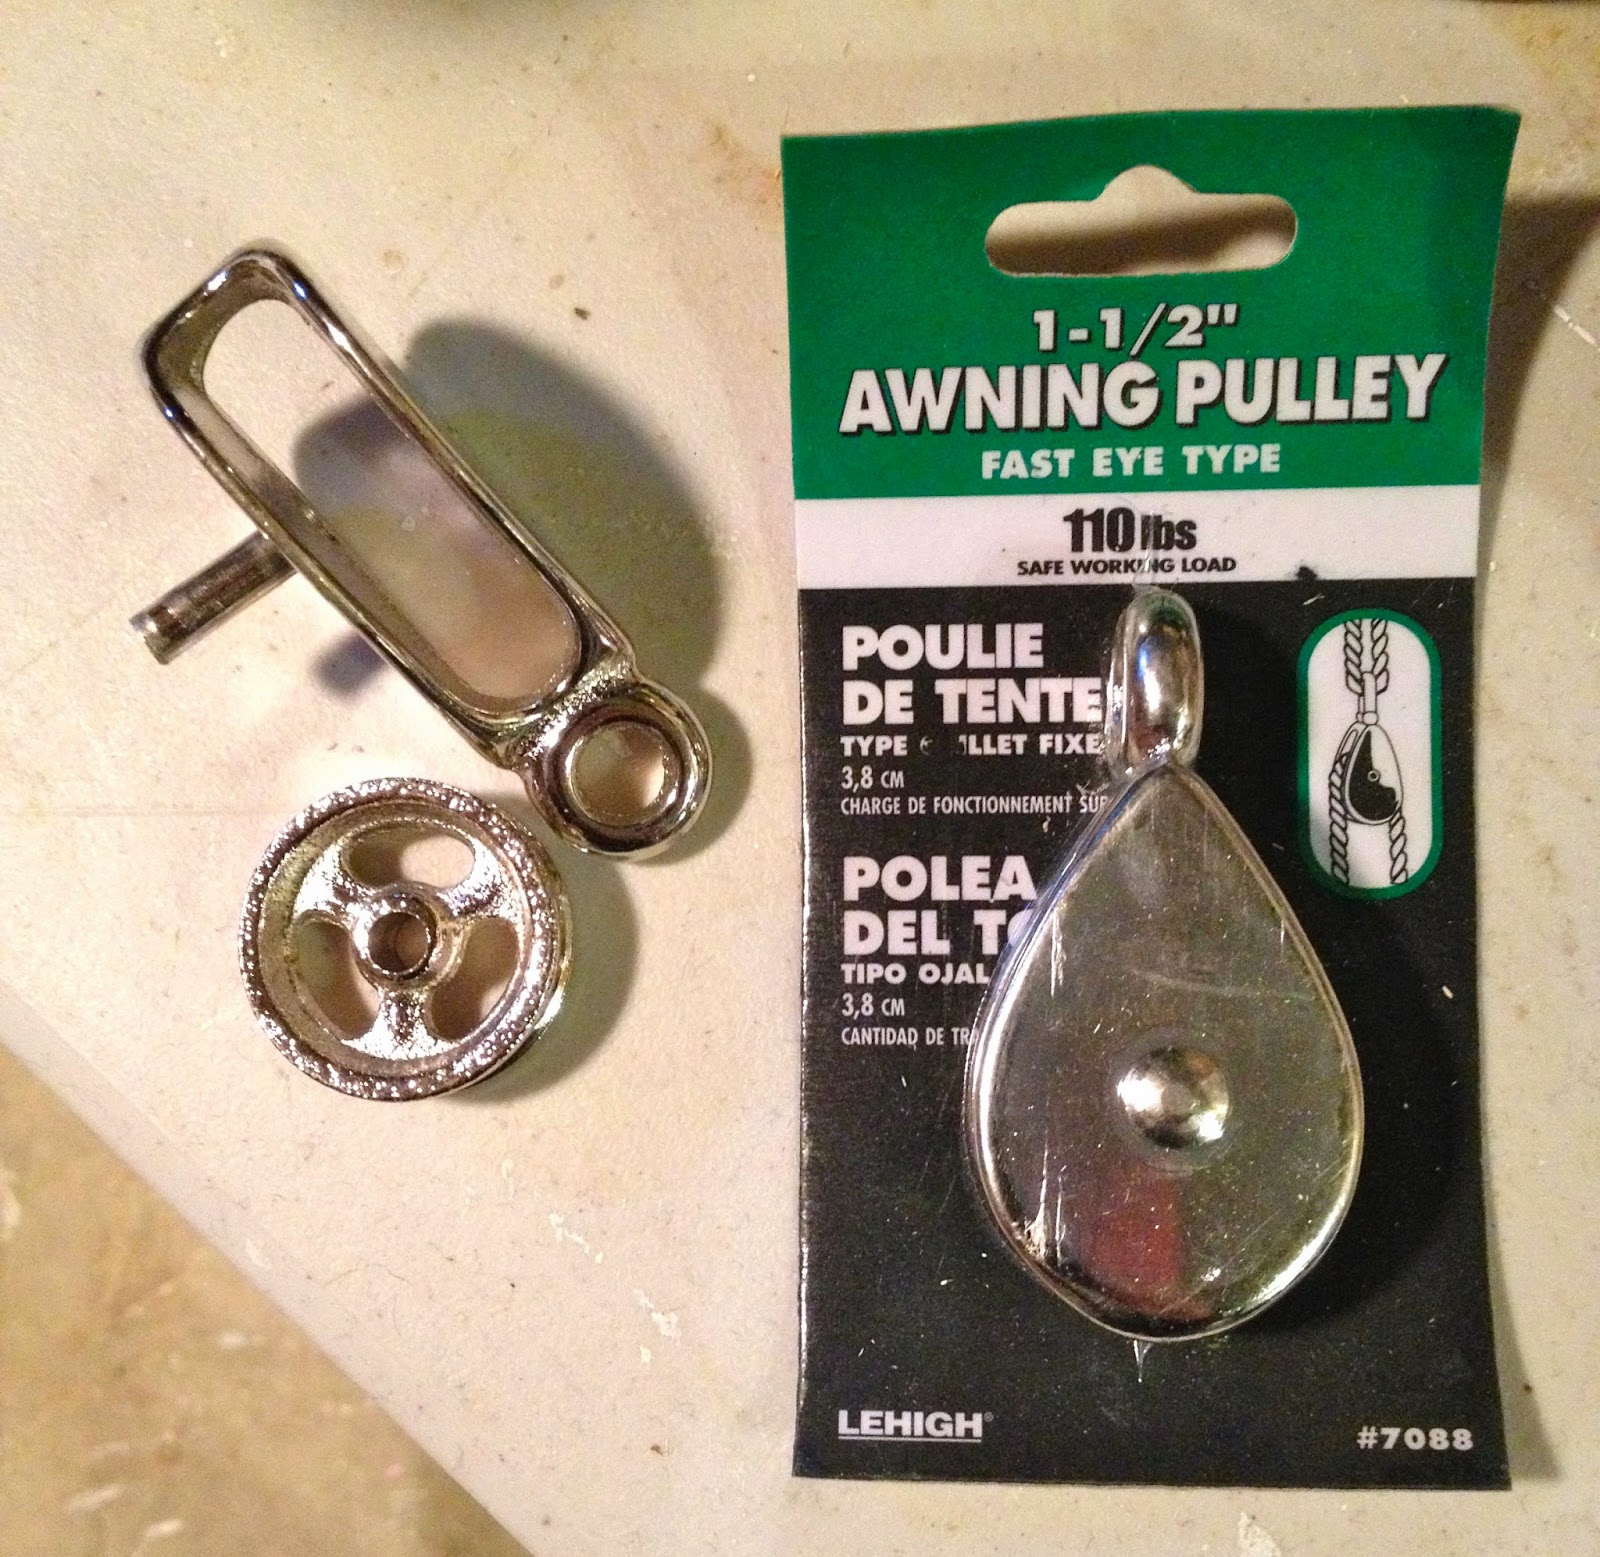
Again this will not be fun. I used my dremel to slice off the center ‘button’ on both sides of pulley then clamped it down and hammered away at the center pin using an old drill bit:
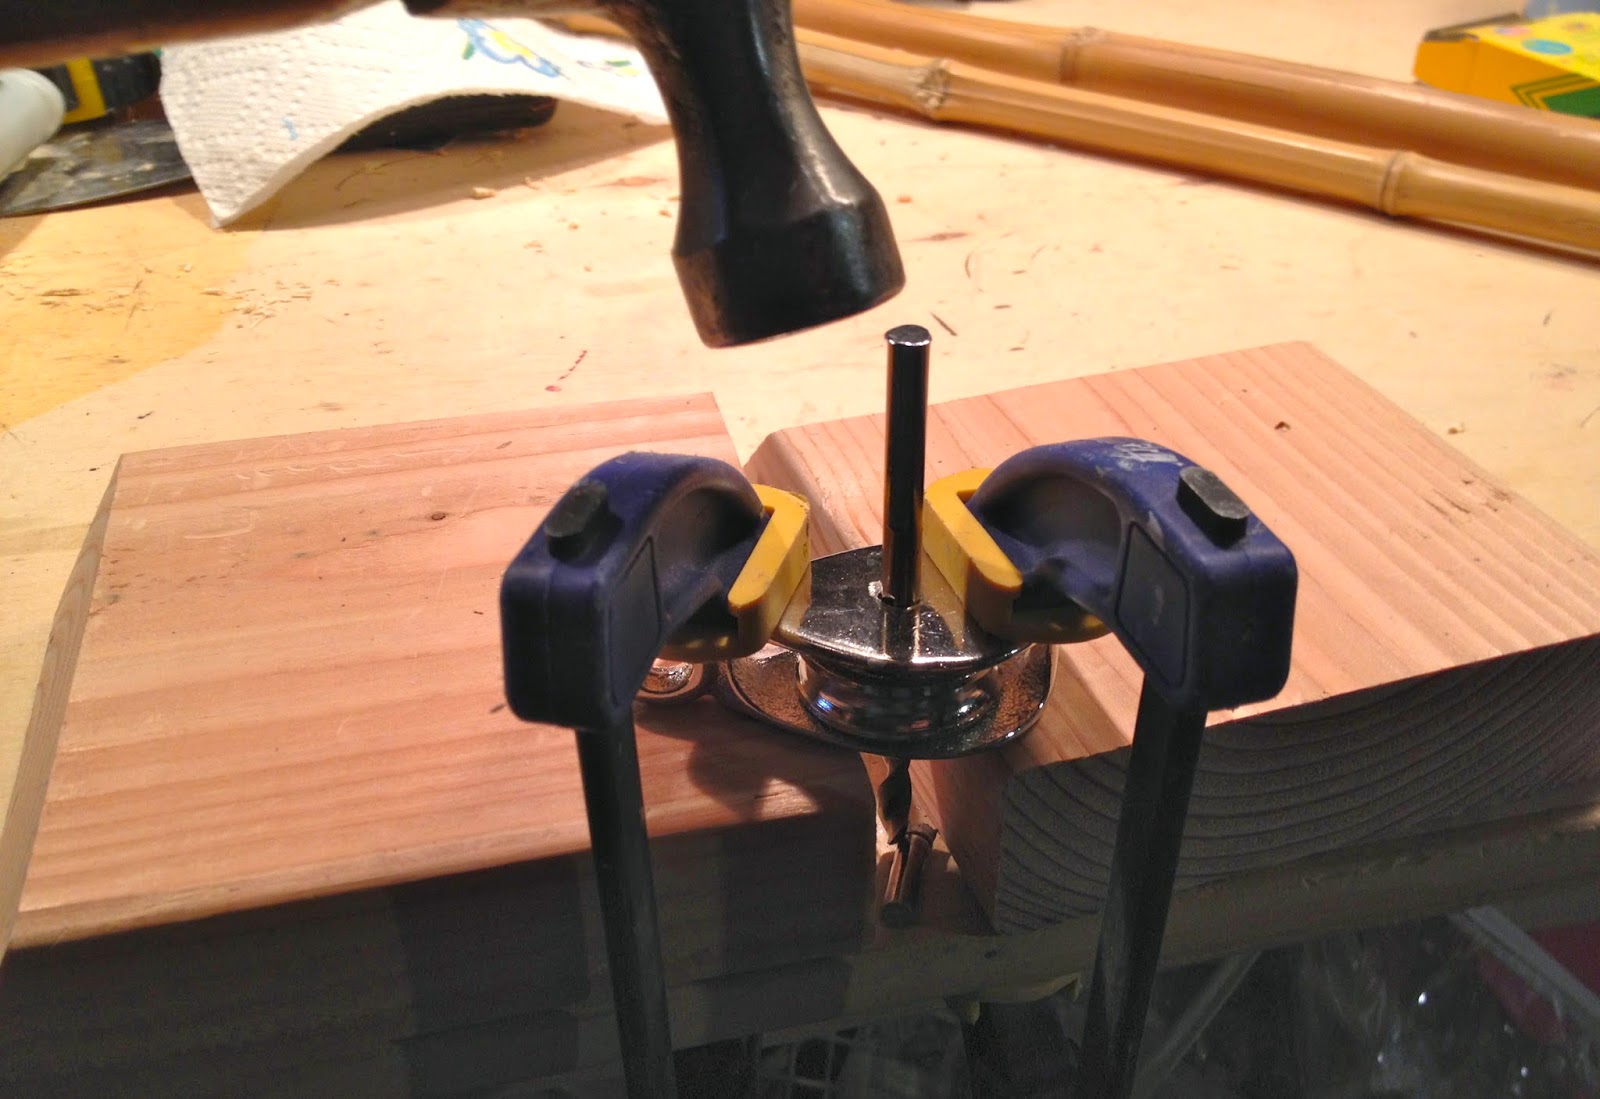
Tip: the pin will come out faster if the metal is cold (put the pulley in the freezer).
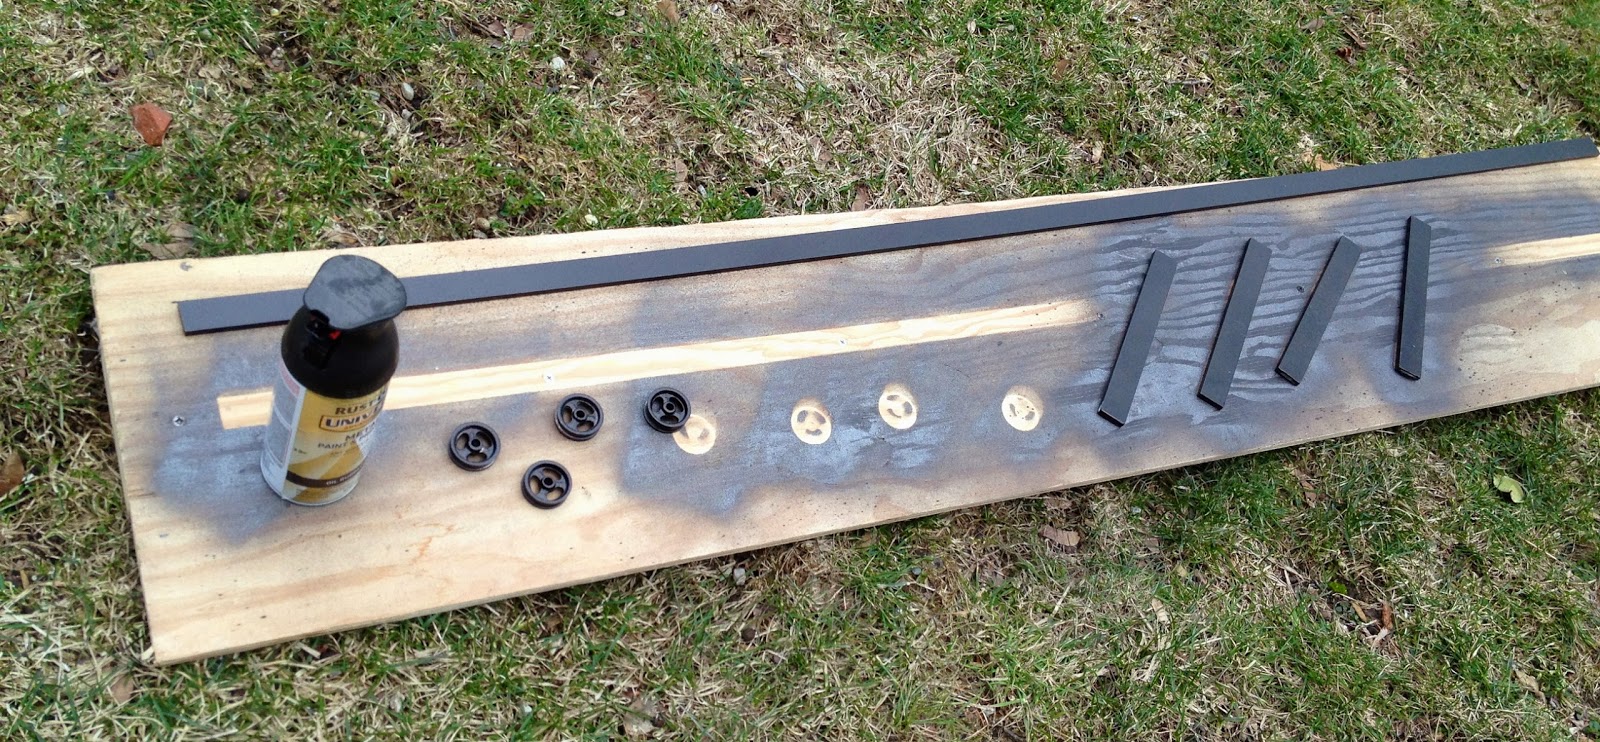
3. Spray paint all the metal pieces (I choose not to paint the screws & washers) using oil rubbed bronze:
4. Attach the base track first.
Center track and set the door in the track to be sure you have enough sliding space.
Predrill and use 2″ wood screws down into base molding:

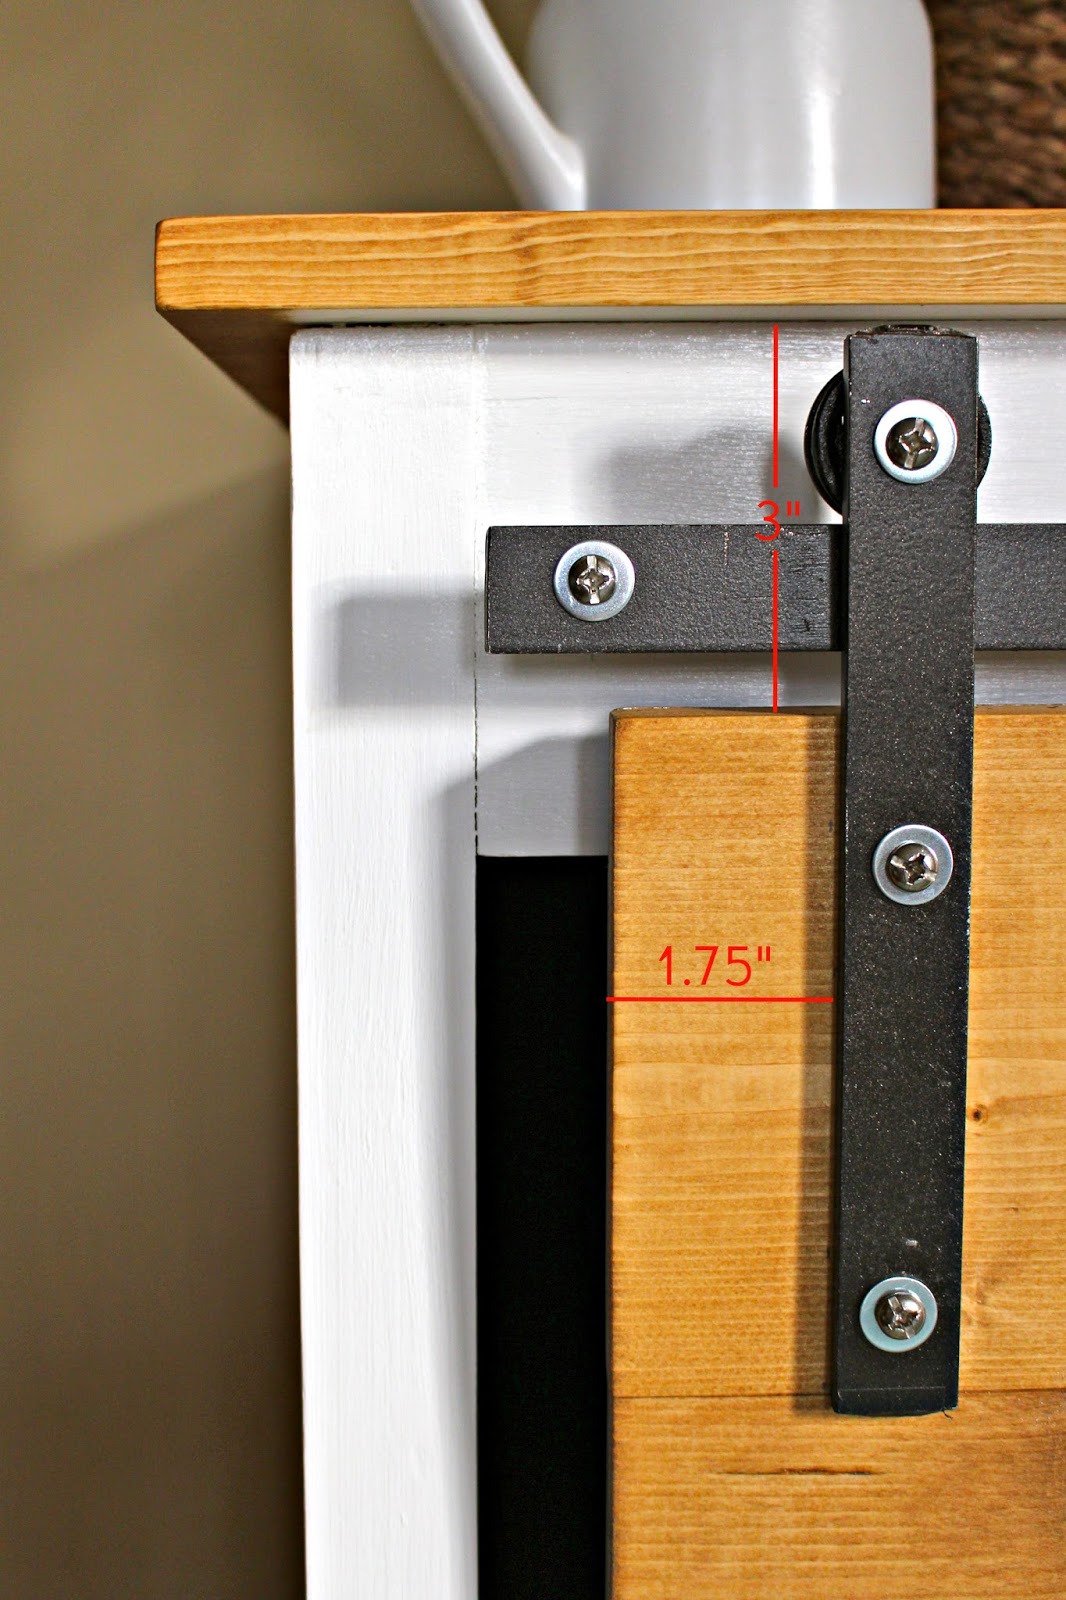
5. Attach the hanging track 1.75″ from top.
Mark the face frame and predrill holes all the way through the frame:

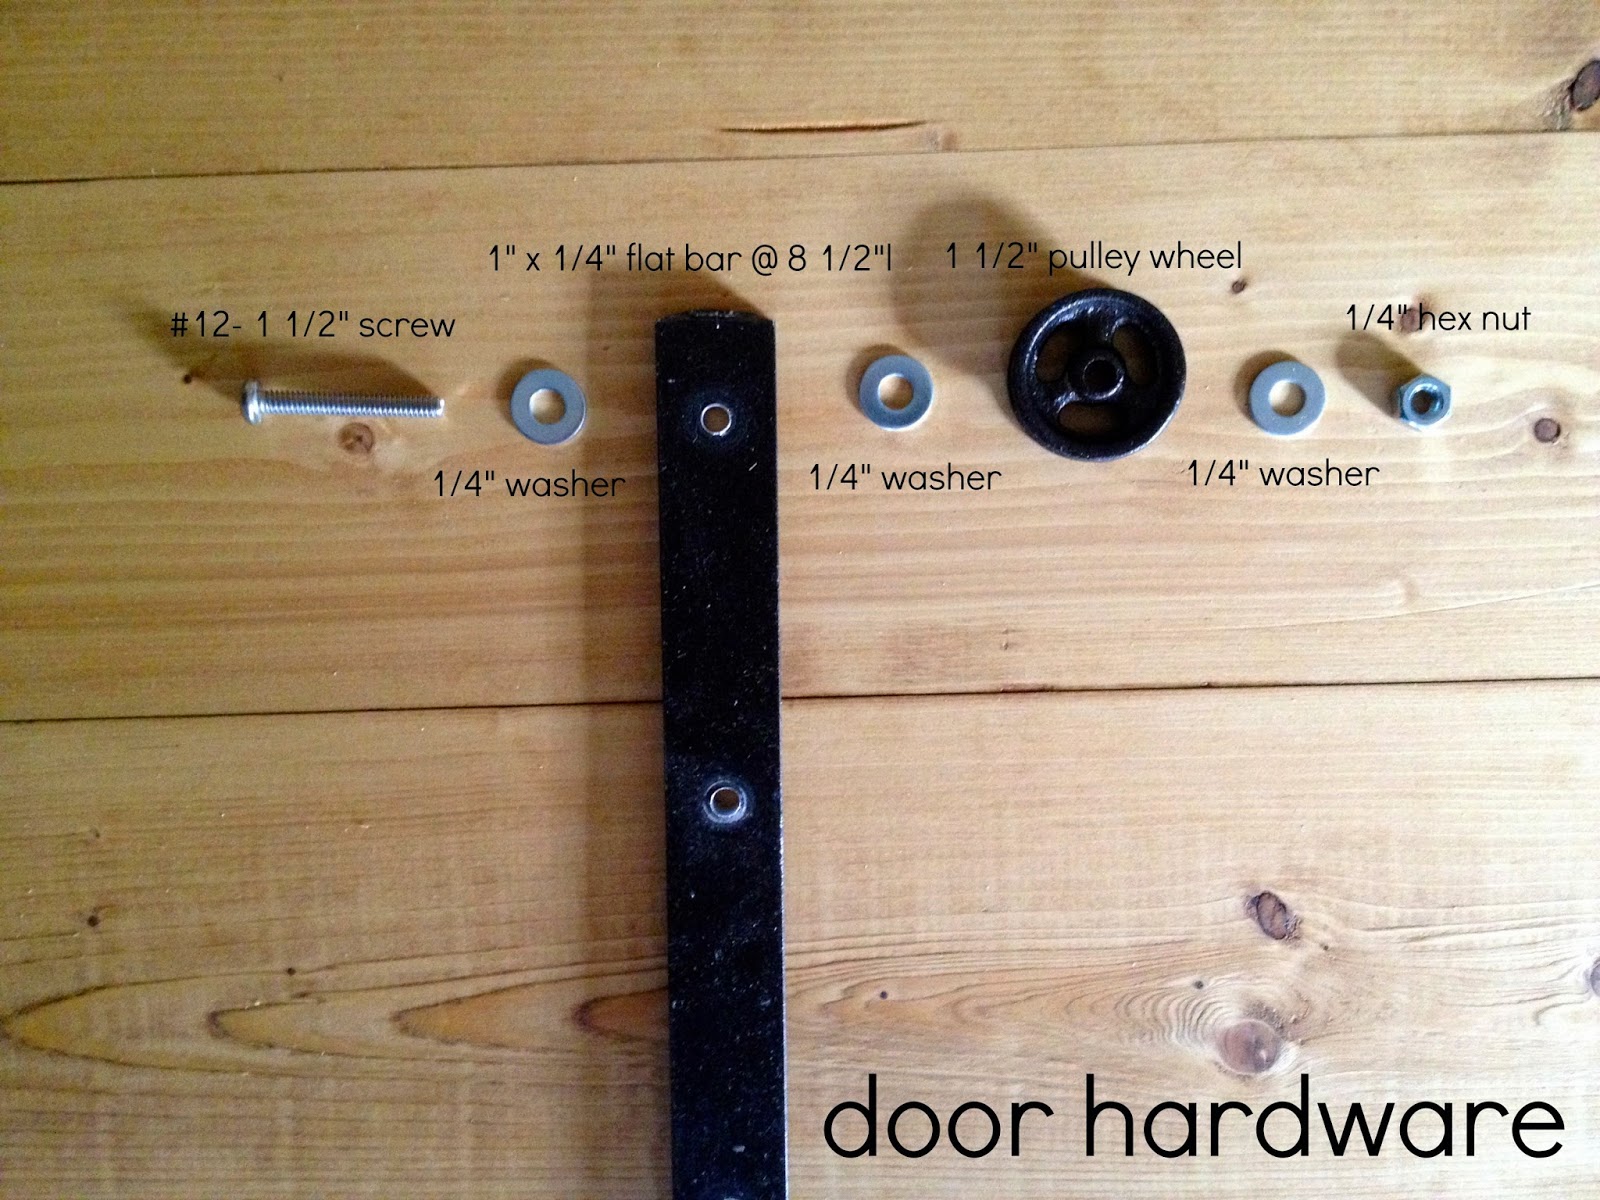
Set up the hardware in the order below:

Then secure the track to the face frame:
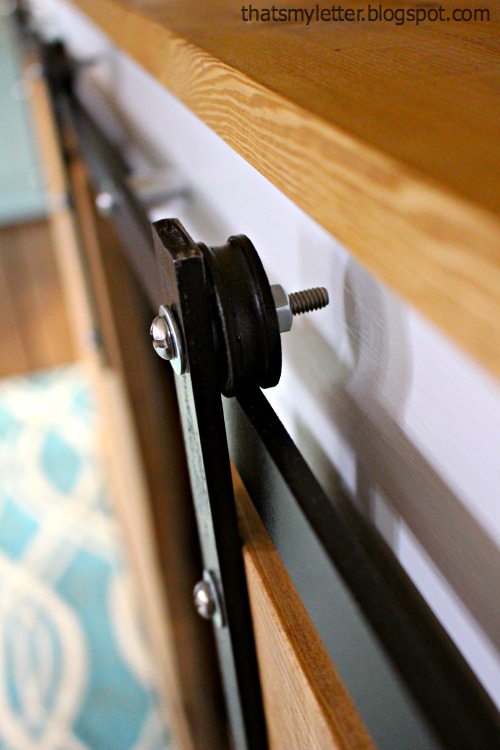
6. Secure pulley wheel to door hardware.
Set up the hardware as listed below:
(The 1 1/2″ screw could be shorter if desired.)
7. Place door in base track then lift 1/4″ or add a spacer, you need bottom clearance for the door to glide.
Now place wheel (attached to flat bar) in track and see where everything lines up.
Use dimensions below as a guide:
Predrill holes in door front for remaining 2 washers and 3/4″ screws then attach.
8. Repeat process for other side, be sure door is level.
9. Hang doors onto track.
The hex nut will allow you to adjust the tightness of the rolling wheel and enable you get past the middle screw head on the hanging track.
—————————————————————————————————————————————————————————-
Isn’t that crazy? And the workmanship is spot-on! A few weeks ago, I saw this image on Pinterest, not realizing that it was Jaime’s work:

I spent some time checking out her blog tonight and the girl has skills. Big time. You should definitely head over there and check out her blog and plan on being inspired to build something. You’ve been warned.
Did you know East Coast Creative’s Most Popular Blog Project of all time is now for sale?!?
Get Ready to Break Up with Your Bedtime Routine!
Check out our online store!


There is not one project that Jaime has completed that I was not in awe of her skills. She is so talented, and this piece is amazing!!
Jaime, this is amazing! I can’t believe that’s made totally from scratch. I want your skills.
Wow! Totally didn’t realize that was made from scratch. AMAZING!
[…] of Brooke Eva. (If you missed the sliding door console table that took first place, you can find it here!) I bet you didn’t know that Jacqui is competing in this contest all the way from Dubai. […]
My wife loves watching your blog and frequently shows me things you’ve posted.
From 1 DIY-er to another –
The coping saw is for detail cutting in wood and the wrong tool for cutting that metal. Use a hacksaw with a 24-tooth blade. A sharp/fresh blade with go thru that material pretty easily, although you may need to put it in a vise or clamp it to a work surface.
Also – use caution when using a drillbit as a punch. They are not intended for a hammer impact and could possibly shatter. A junk bolt or screw is an economical alternative and is far more rugged to a hammer blow.
[…] If you missed our 2nd and first place knock off projects you are going to want to check them out here and here! Becki and Chris are coming to us from Canada, hey! She is a freelance graphic designer and […]
[…] been an amazing week of Knock Off projects from Creating with the Stars (check out the top three here, here, and here), and now we have one more for you from the link up party! We’re so grateful […]
Hi! I am writing to you from Germany. I love that piece and would like to build it as well. But I am not sure if I understand the following:
2 – 3/4″ plywood @ 18 1/4″ x 63 1/2″(top & bottom)
Can you please once explain the abbreviations, so that I can apply accordingly? That would be great!
Thanks a lot for your help!
Best regards from Berlin
Anna
Hello Anna,
I am responding just in case she doesn’t get back to you right away about your question.
2 – 3/4″ plywood @ 18 1/4 X 63 1/2″ (top & bottom)
– Okay the “2” means you will need 2 pieces of the plywood, hence “top & bottom”, so after you cut one of the plywood boards to the stated dimensions, you will need to make a duplicate of the same board.
The following are the dimensions the plywood board(s)
– 3/4″ is the thickness of the plywood, you will find common thicknesses to be 1/4″, 1/2″, and other approx sizes, but for this project you will need 3/4″. 3/4″ = 0.75 inches
– 18 1/4″ = 18.25 inches is the width of the plywood
– 63 1/2″ = 63.5 inches is the length of the plywood
So in terms of l x w x h it would the same as 63.5 x 18.25 x .75
Hope this helps,
Apryl
i love the design and i am almost done with my own. my only question is did you put anything at the end of the top or bottom rail to keep the doors from rolling off the end of the track?
Hi Dan,
We’re so glad to hear you are making the sliding door console like Jaime made. She can tell you more about the doors, here is her blog link http://thatsmyletter.blogspot.com/. Thanks again!
Could you please identify the type and grade of lumber that was used for this project (pine, oak, poplar,cedar)?
Just had a question about two of the cuts:
1 – 5/4 x 4 @ 66 1/2″(front – hidden) – 5/4 x 4?? Trying to find out where this piece is located in the pictures… I know its hidden
1 – 5/16? @ 66 1/2″(front) – 5/16?? Trying to locate this as well.
Thanks! Looks great!
Ted
I made a smaller version of this for a tv stand, but my wheels won’t turn properly. If the hex nut that secures the wheel is even slightly loose, it spins with the when and loosens up to much and the door sits odd on the track. If the hex nut is too tight it doesn’t allow the wheel to turn. Not sure if anyone else had this problem or has any idea on how to fix it.
Aaron, I am having the same issue. What did you do to alleviate this issue?
I used the nylon nuts and those are pretty tight when you screw them on because the nylon forms around your bolt. But for extra strength I also used some hardware metal grade locktite glue. Works perfect
I’ve followed the hardware instructions but when I slide the door the hex nut loosens up and eventually comes apart. If I tighten too much the wheel won’t turn. Remediation?