

![]()

Well, our 12 contestants killed it this week with unbelievable, insanely good knockoff projects for Round 1 of #CWTS2014. If you haven’t seen the projects or cast your vote, do that right now! Go ahead, this post will wait. And if you’re new here, welcome! You can catch up on all the latest and greatest Creating with the Stars news here.
Last year, Monica and I played along each round and did our own projects that we shared with all of you. Unfortunately, with our crazy TV schedule, we knew we couldn’t do each round justice, so we invited our pal (and last year’s Creating with the Stars winner!) Sarah, from Sarah M. Dorsey Designs, to create a project each week to inspire you. She said yes! Woohoo! This girl is so incredibly talented- we sang her praises last week, so we’ll keep it short, but you guys are in for a treat. So, hey there, Sarah, the floors all yours!
—————————————————————————————————————————————————————————-
Hi East Coast Creative friends! It’s Sarah from Sarah M. Dorsey Designs and I’m SO excited that EC2 asked me to share a knockoff project here! After all, I LOVE knocking things off! There is nothing better than getting a similar look for less!
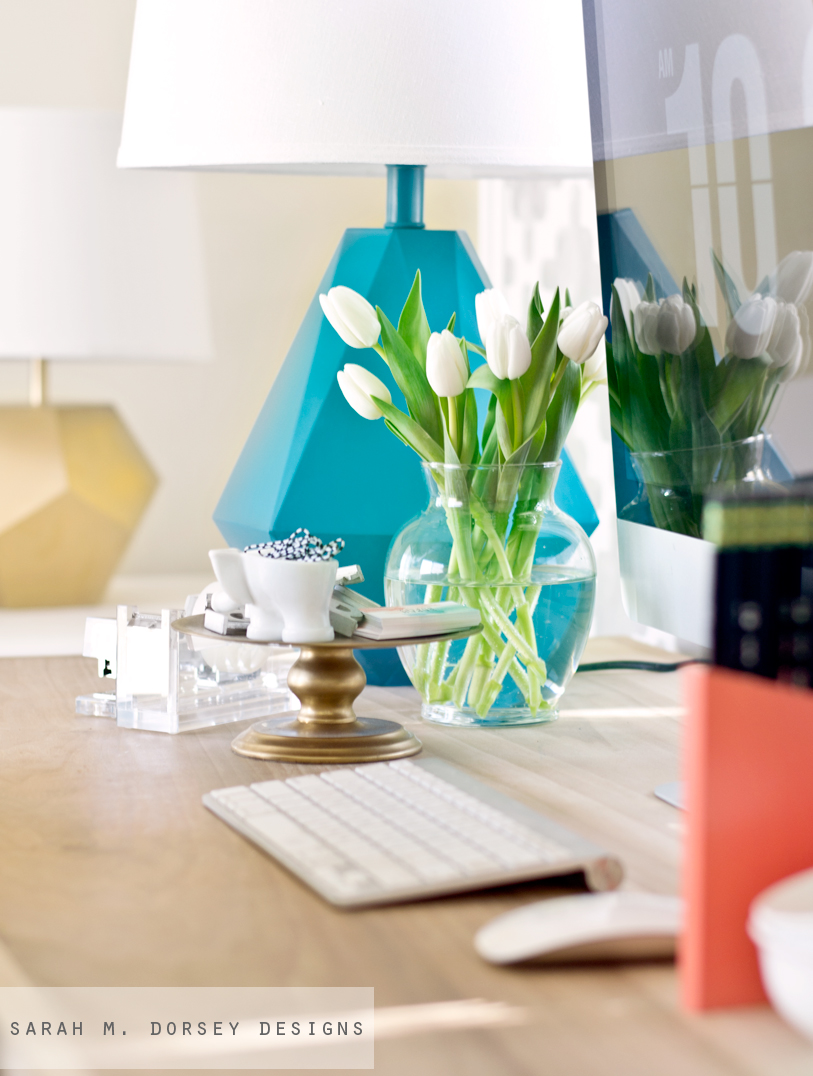
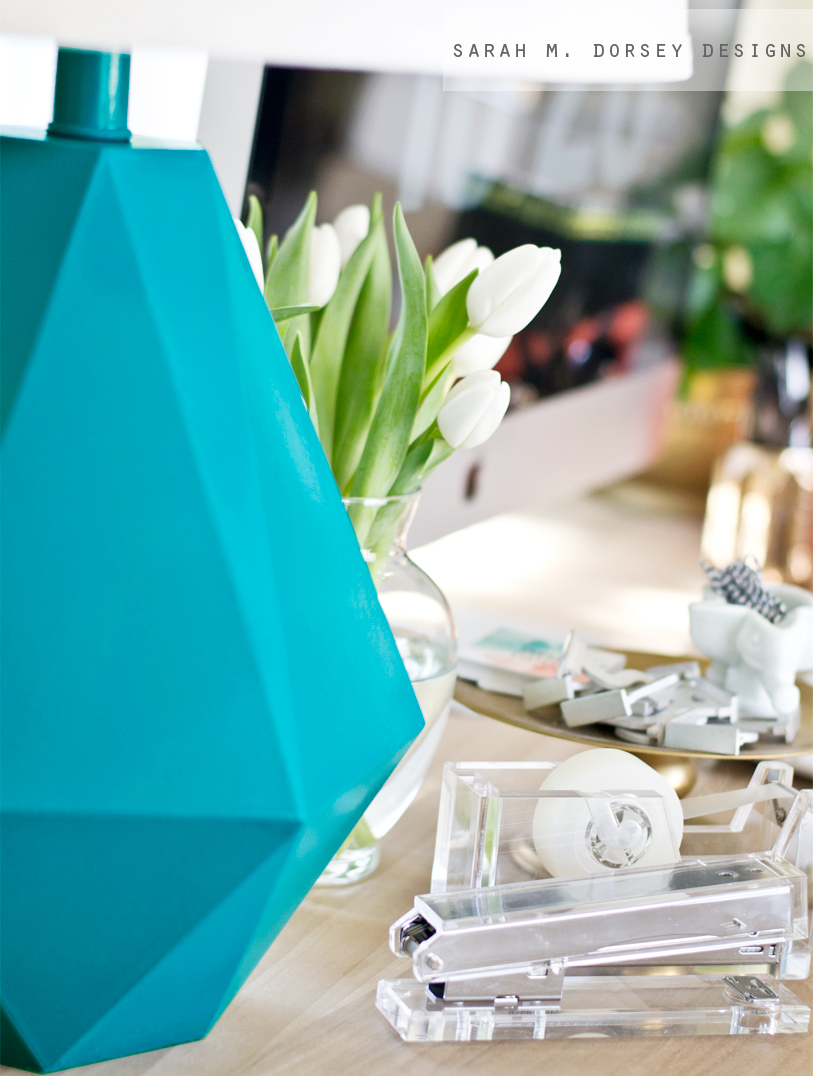
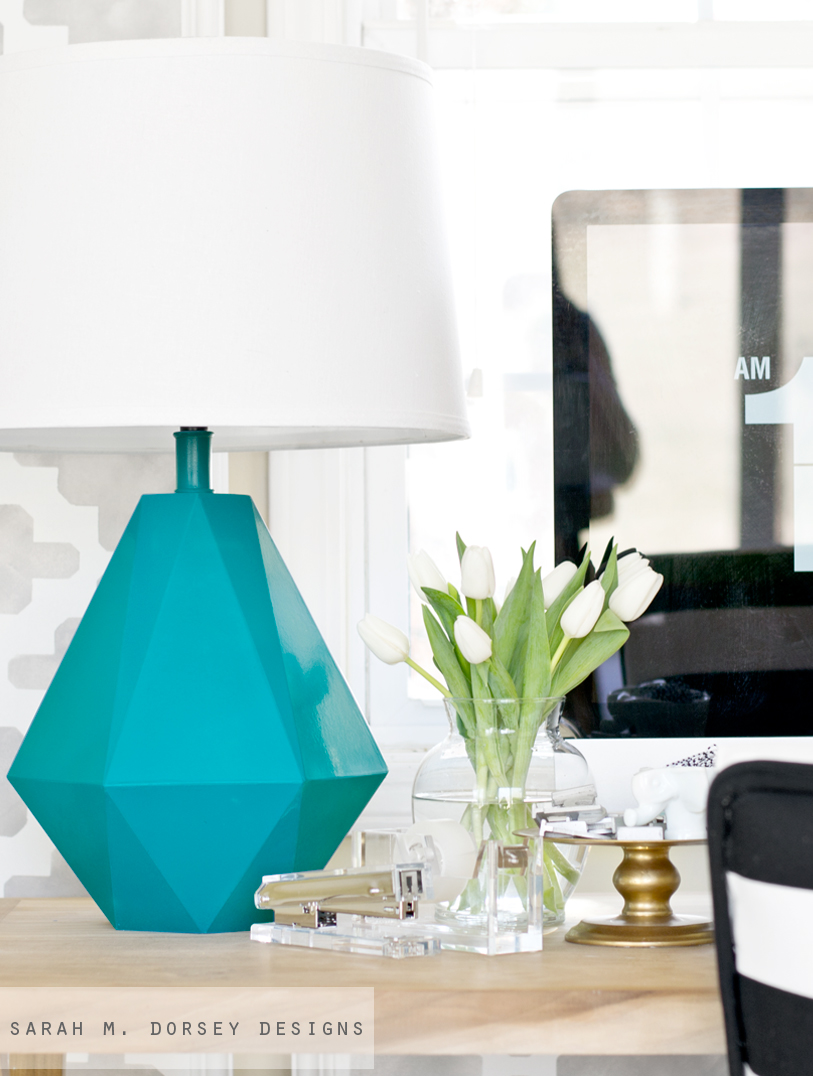
When I first saw Robert Abbey’s Delta table lamp, it was love at first sight! The shape is amazing, I also love that it comes in a variety of bold colors.

I recently made a few office accessories out of mat board, which got me thinking… since the accessories were surprisingly sturdy, why not a lamp base too?

The lamp is constructed using a $2 thrifted lamp, a custom designed template – referencing the Robert Abbey lamp, and mat board.
Here’s all the supplies used:
materials:
– old lamp or lamp kit
– template
– mat board(20″x30″)
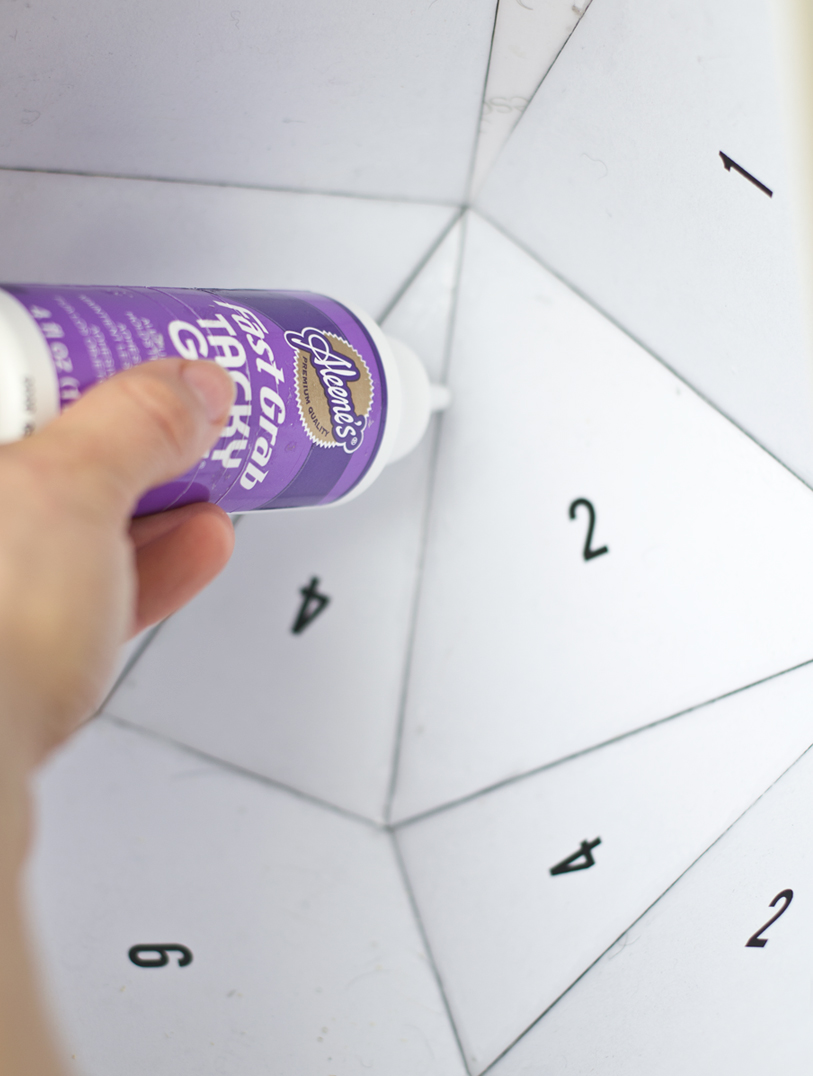
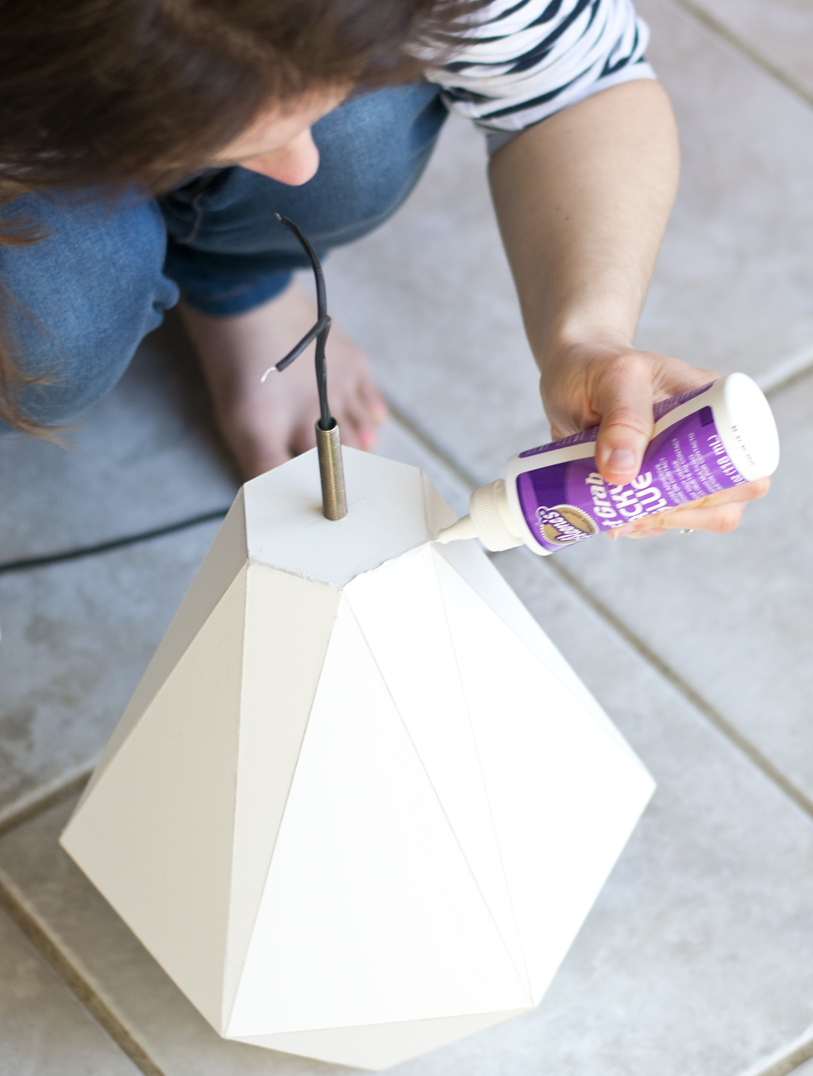
– glue
– wood filler
– sanding block (medium + fine)
– wood block (add weight to base)
tools:
– painter’s tape
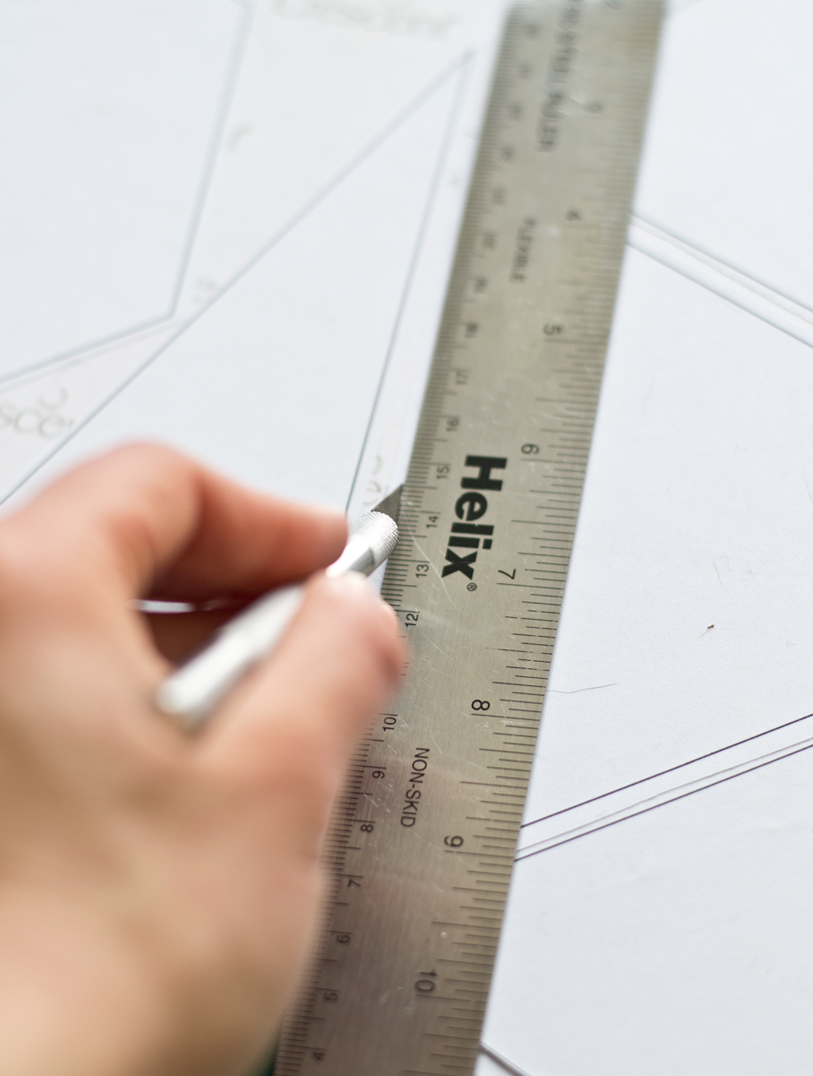
-metal ruler / xacto knife
– drill (optional can substitute xacto knife)
Here’s how we did it!
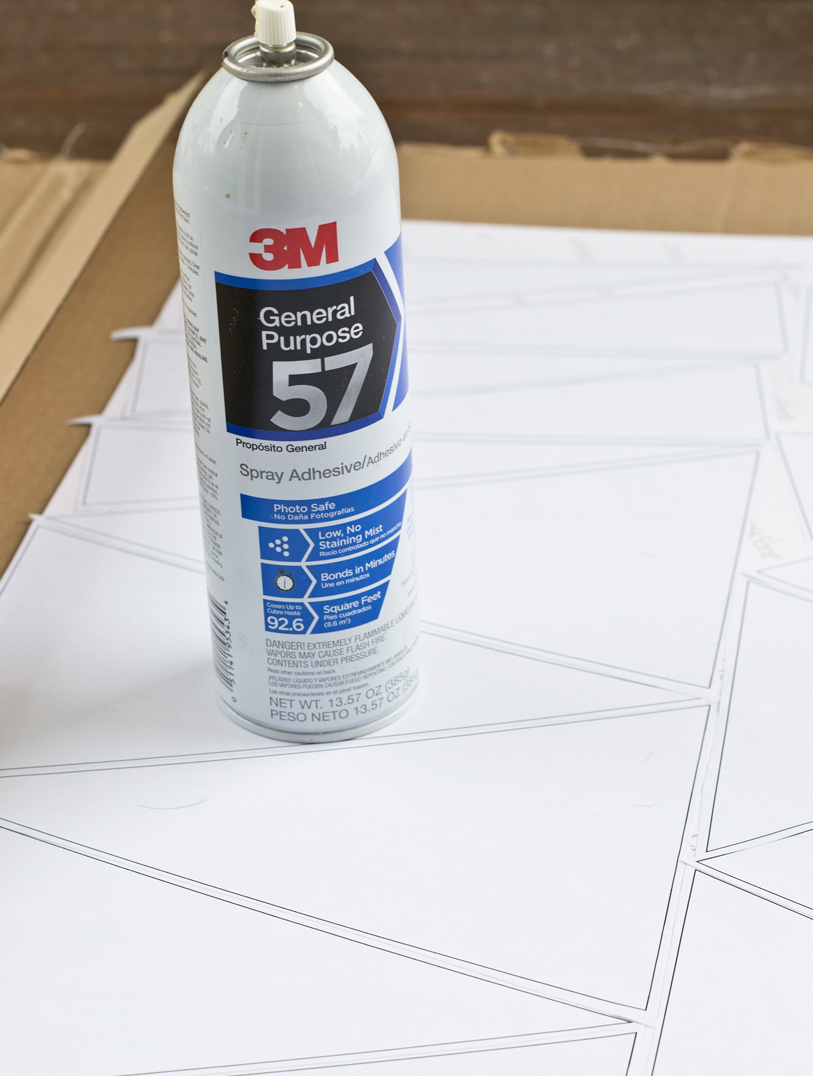
First, we printed the template (6 of each triangle) (1 of each hexagon). You can download our template, here (print on 8.5″ x 11″). I roughly cut the shape out so they would fit tightly on the mat board. Then we used spray adhesive to attach the pieces to the back of the mat board.
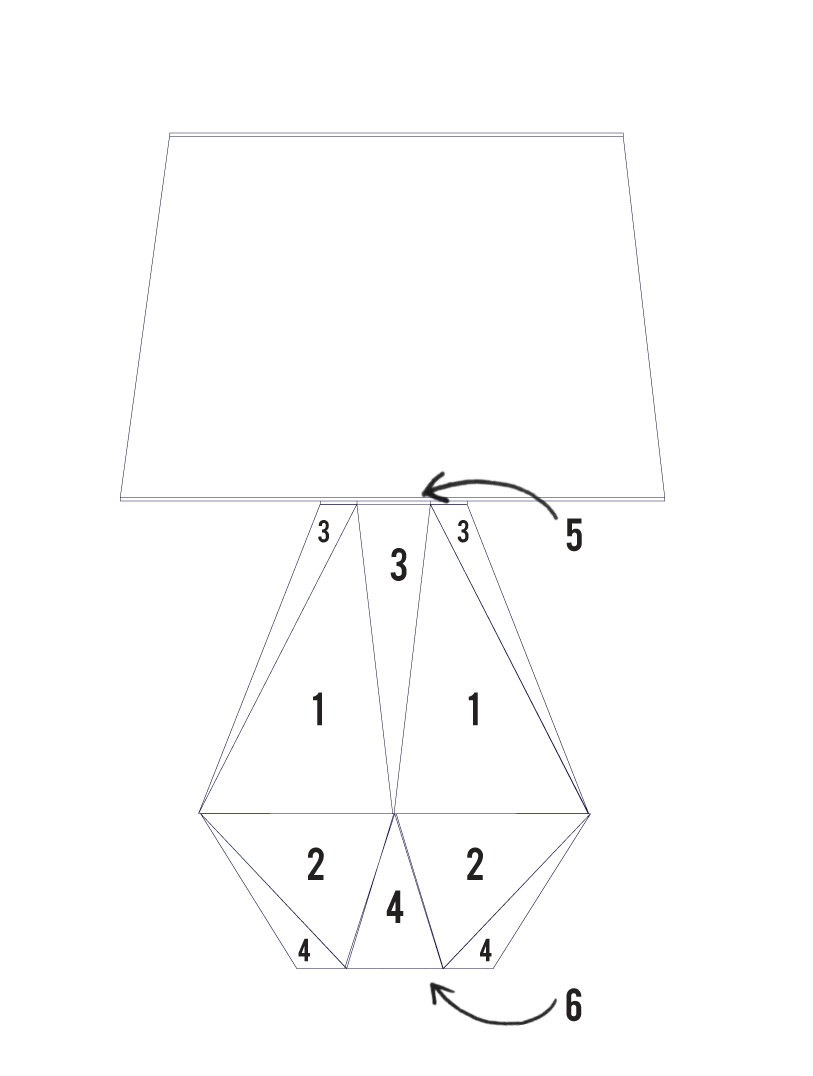
Here’s how they fit together.


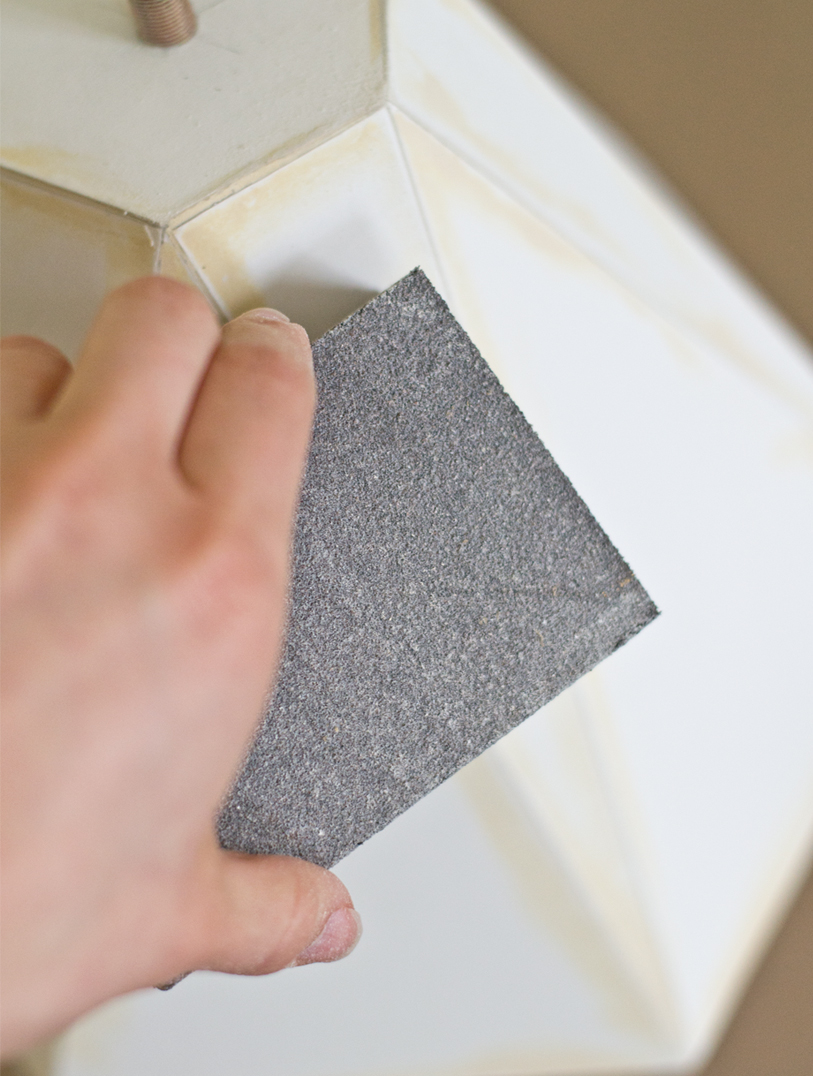
Sand the wood filler with a medium grit sanding block, and finish with a fine grit sanding block. At this point, you’ll notice how sturdy the base it. I pressed fairly hard and sanded a good bit to make sure that the wood filler was even. I didn’t have any issues with it caving in or breaking.
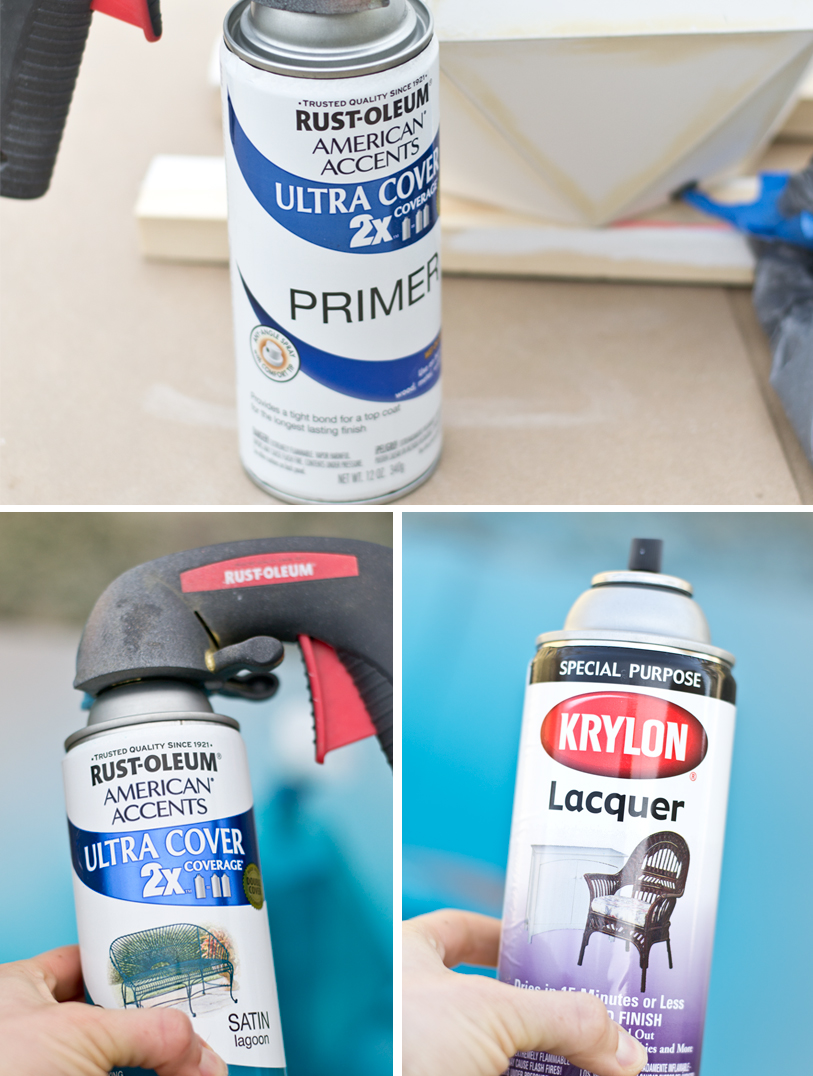
After removing the dust, finish with paint! To cover the top of the threaded rod, we used the top of an old lamp – it just slide over the rod. We then reattached the socket and that was it!
I paired it with Target’s large drum shade.

I’m obsessed!! LOVE it!!
Here’s the breakdown of cost and time.
Cost:
Thrifted lamp $2 (plus a few lamp parts from other thrifted lamps)
Mat board $3 (20″x30″)
Spray paint ~$6 (used about half of each can)
Wood filler / glue / sandpaper $0 (on hand)
1×4 ($0 from scrap pile of Home Depot)
Total $11, ($35 with lamp shade) pretty good compared to the $183 Robert Abbey version!
Time:
Preparing template + cutting out the mat board 1.5 hrs
Gluing mat board 2 hrs
Assembling the rest of the lamp .5 hr
Wood filler and sanding 2 hrs
Painting + drying time 2 hrs
Total 8 hrs, so not a huge time investment!
I’m so glad that we tried DIYing before buying! I love how our version came out!
—————————————————————————————————————————————————————————-
We love that lamp and the color she chose. So so pretty! Another awesome project to add to the 12 ridiculously good knockoff projects from this year’s CWTS contestants.
Now it’s your turn!
We want to see your best knock off, so link them up below. You’re playing for a chance to be featured here on our blog later this week and for an awesome prize pack! Don’t forget to link back to us on your post to let everyone know that you’re playing along with #cwts2014!
Only a few more hours to vote for your favorites! Check back tomorrow to see which 9 contestants are moving forward to Round 2!
Also, even though you may not be competing this year, don’t forget to enter to win a dream vacation of your own!


I love it! Sarah is so creative – I’m always blown away at how she envisions and executes her projects! Genius!
First of all, Sarah’s project is beyond amazing! She is such a rock star! Second, thank so much for the fabulous link party! I cannot wait to see all of the projects that get linked up!
So so good, Sarah can do no wrong. Everything she does is amazing!
[…] East Coast Creative Blog […]
Cannot believe that’s made out of mat board! Amazing!!
Oh wow, that lamp is simply gorgeous!!! So creative, I’ve never worked with mat board, but I may just give it a try!
Love it, as usual.
Thanks so much for having me!! 🙂
[…] Linking up to Work it Wednesday, Wow Us Wednesdays, Inspiration Gallery, Creativity Unleashed, Weekend Bloggy Reading @ Serenity Now, Remodelaholics Anonymous , The DIYers, Link Party Palooza, and EC2 CWTS Knock-Offs […]
[…] with Show Me What Ya Got at Not Just a Housewife, Creating with the Stars Knock Off Link Party at East Coast […]
Absolutely AMAZING!!! Love the shape and color!!
Even though I don’t get picked, I look forward to still participating. Thanks!
Shannon ~ bohemianjunktion.com
Absolutely love the lamp! Mat board…who would have thought? Thank you for giving us the chance to link up! My sister and I will be following the competiton closely this year and we love it. You can count on us entering the 2015 competition!
[…] to make those glamorous x-benches that came in a close second! Also, there’s still time to link up your best knock off for the chance to win a prize pack from Ryobi and be featured here on EC2! Finally, don’t […]
Thanks so much for the fun CWTS2014 adventures!! 🙂 Sarah blows me away with her fabulous projects every.single.time!
[…] in the paint round, did you guys see what she created for our knock off round? How gorgeous is her Robert Abbey Delta inspired lamp?! We can’t wait to see what she has in store for us next week for the upcycle round! Alright, […]
This is amazing! You’re very creative! I love that lamp and it’s in my favorite color too.
[…] linking my project up to “Creating with the Stars“! Have you seen all the freaking AMAZING projects? It makes me feel A-OK about not being […]
[…] if you haven’t linked up your own DIY Knock Off, you still have time. We’ll pick a fav and that project will be featured on […]
I love this lamp; I want to make two of them and either put them in the bedroom or the living room. I do have a few questions though… How tall was the original lamp base and do you have a video on how to make this lamp?
Hi Jasmine,
Thanks for stopping by the blog. This is a guest post from Monica’s friend Sarah, I really love the lamp she created as well. You can find her blog herehttp://sarahmdorseydesigns.blogspot.com/ , I’m sure she would be happy to answer your questions.
[…] can create this geometric lamp DIY project by just using mat board, a thrifted lamp, and glue! Who would have thought that with just a few […]