It’s kind of a bummer that kitchens are usually the hub of a home and at the same time, they’re the most expensive room in a house to remodel!! The good news is that we found ways to DIY almost every item in this galley kitchen and did the entire makeover on a tiny budget.
Today we’re going to share with you how we took the kitchen cabinets from dated, pickled wood to classic, crisp white!
To watch this full episode online Click HERE!
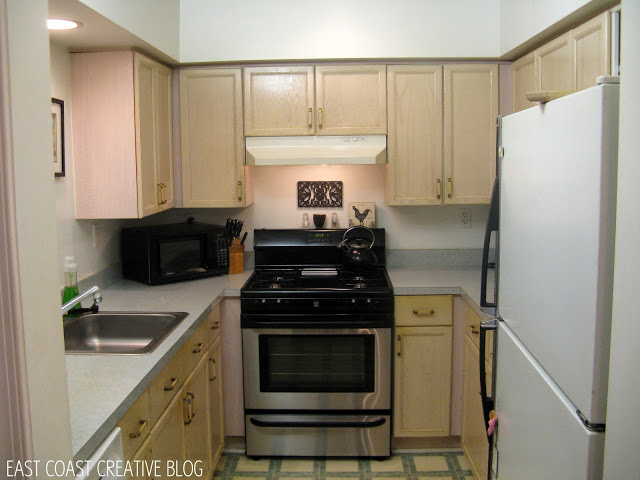
This was the cabinet situation when we arrived. I really wonder why on earth pickled wood was ever a trend?!? I’m sure in a few years, we’ll look back on lots of our design choices and wonder the same thing. 🙂
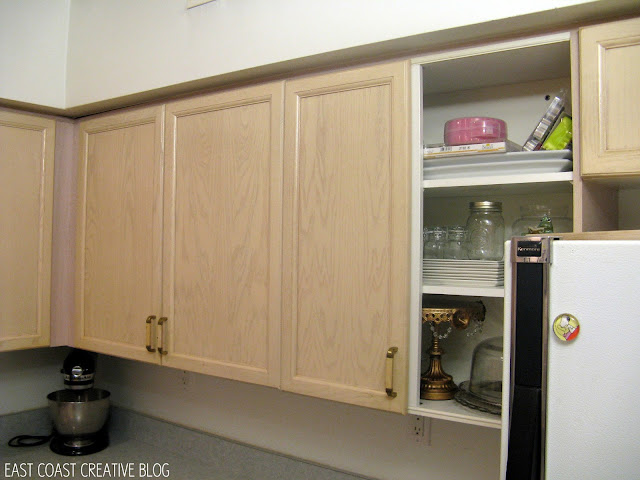
Other than this one cabinet, all the rest were in good working condition. We also got lucky that the style of these cabinets was pretty simple and classic. No crazy scroll lines, just clean and straight- perfect for a paint-pick-me-up!
The hardware however… that had to go!
The finished look was insanely different!!
Now, we’re going to share some basic tips for painting your cabinets, but Jess also did her entire kitchen white last year, so at the bottom, be sure to click through to her post for a really detailed tutorial!
1. Remove the cabinet doors from the frames. Take off all of the hardware at this time and put them in a safe place, if you’re going to be reusing them. We did reuse the hinges for the cabinets, but that was it.
2. Set up a work station where you can lay out all of your cabinets at once- this is the fastest way to get all those cabinets painted as fast as possible. We like using plastic folding saw horses with 2x4s laid across. They’re light and easy to move around. We got ours at Lowe’s for $49 for a set of 2.
3. If you’re cabinets aren’t super glossy, you can use regular old steel wool to rough up the fronts of the door. You just want to make it so that the paint adheres. If you’re cabinets are glossy, go ahead and sand them. You won’t regret doing this step right- it will determine if you have paint chipping in 6 months or not.
4. Wipe down the cabinet doors to remove all dust. Make sure you use paint plus primer to get the best coverage . Using foam rollers designed for cabinetry, roll on the paint in even coats, making sure to not drip!
For Linda’s kitchen we used Valspar’s Summer Grey in Semi-Gloss.
It reads like a white, but looks just a little moodier 🙂
5. Once the paint has cured for the recommended time, flip them over and repeat the process on the insides of the doors.
6. When your doors are drying, head back into the kitchen and rough up the frames of the cabinets with steel wool and paint them, as well. Once they’re dry, rehang your cabinet doors.Reattach the hardware, or install new hardware. This is when you can step back and admire the way your kitchen feels completely transformed!
Check out Jess’ kitchen makeover with a full breakdown on how to properly paint your cabinets.
It’s amazing the difference a coat of white paint can make! For about $30 you could completely transform any dated kitchen!!
To watch this segment or the full episode- click HERE!
Stay tuned for these other DIY tutorials coming to the KIO DIY Page soon!


Wow! Your cabinets looks so fresh in white! Great job. I have a dumb question- did you also paint the inside of your cabinets, or did you leave it in the pickled wood finish? I clearly have never painted cabinets. : )
What a difference!
I’m just curious what type of paint you use for the countertop (brand-wise) and how has it been doing since you painted them? I mean, I can totally see painting the cabinets, but counter top is like a whole ‘nother ball game for me, and I’m interested…
This kitchen cabinet is absolutely breathtaking! I love it