
Let me tell you a little something about me… I’m the opposite of Type A. I get stuff done and am really driven, but organization, discipline, and followthrough… yeah I don’t even know what they mean! About 2 years ago I scored a great dresser from Liberty Thrift Store (one of our local favs!) and I had all these big plans for refinishing it. Then, if you remember I was the “Home Expert” for P&G a while back and had to create DIY videos for them- I thought it would be a great idea to pull the dresser out into the yard and give tips on refinishing etc… I made the video, but failed to bring the dresser back inside… I mean I’d get to it later right?? WRONG! It poured that night and totally ruined the top of the dresser. It was a bubbly mess. But, I’m also stubborn, so when Eric was rolling his eyes at me, telling me to take it out to the trash I refused. I insisted I’d come up with something epic for it (he 100% didn’t buy that), so I dragged it back into my basement and there it sat for 2 years…
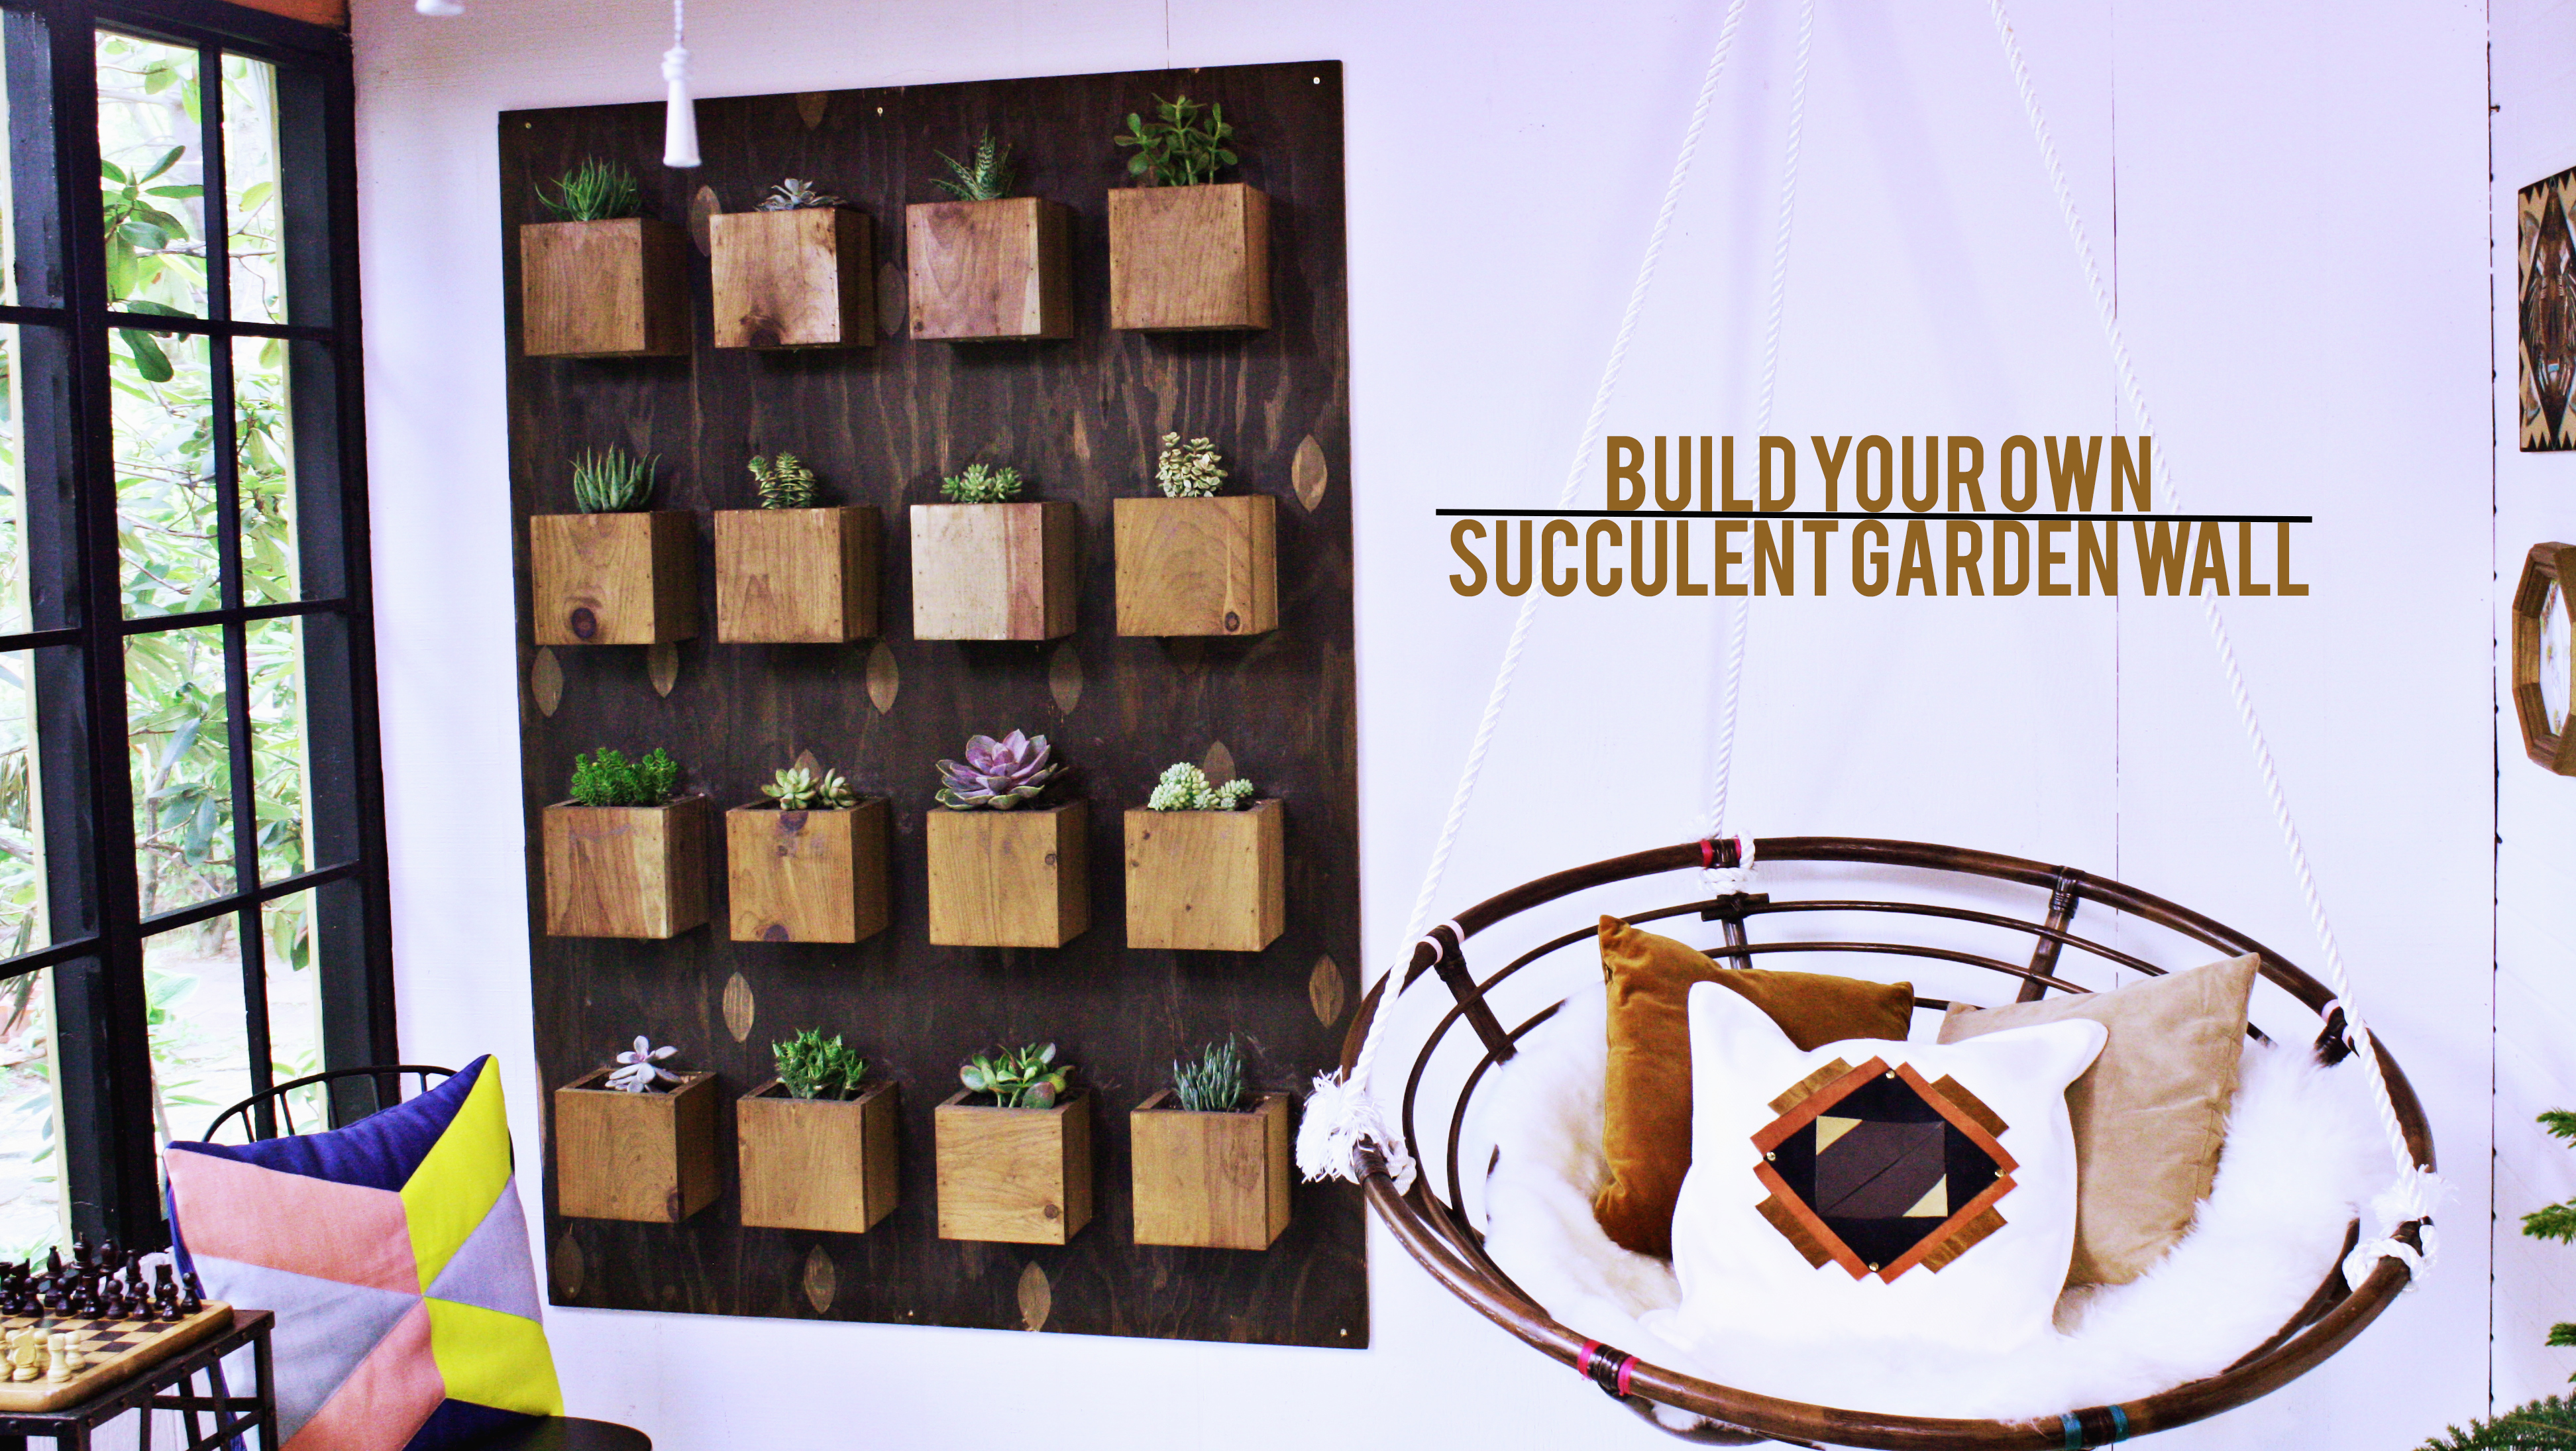
But guess what??? I came up with something epic for it! For our urban sunroom makeover we created a planting station and organization wall using the old dresser drawers. (What up now doubting husband!!)
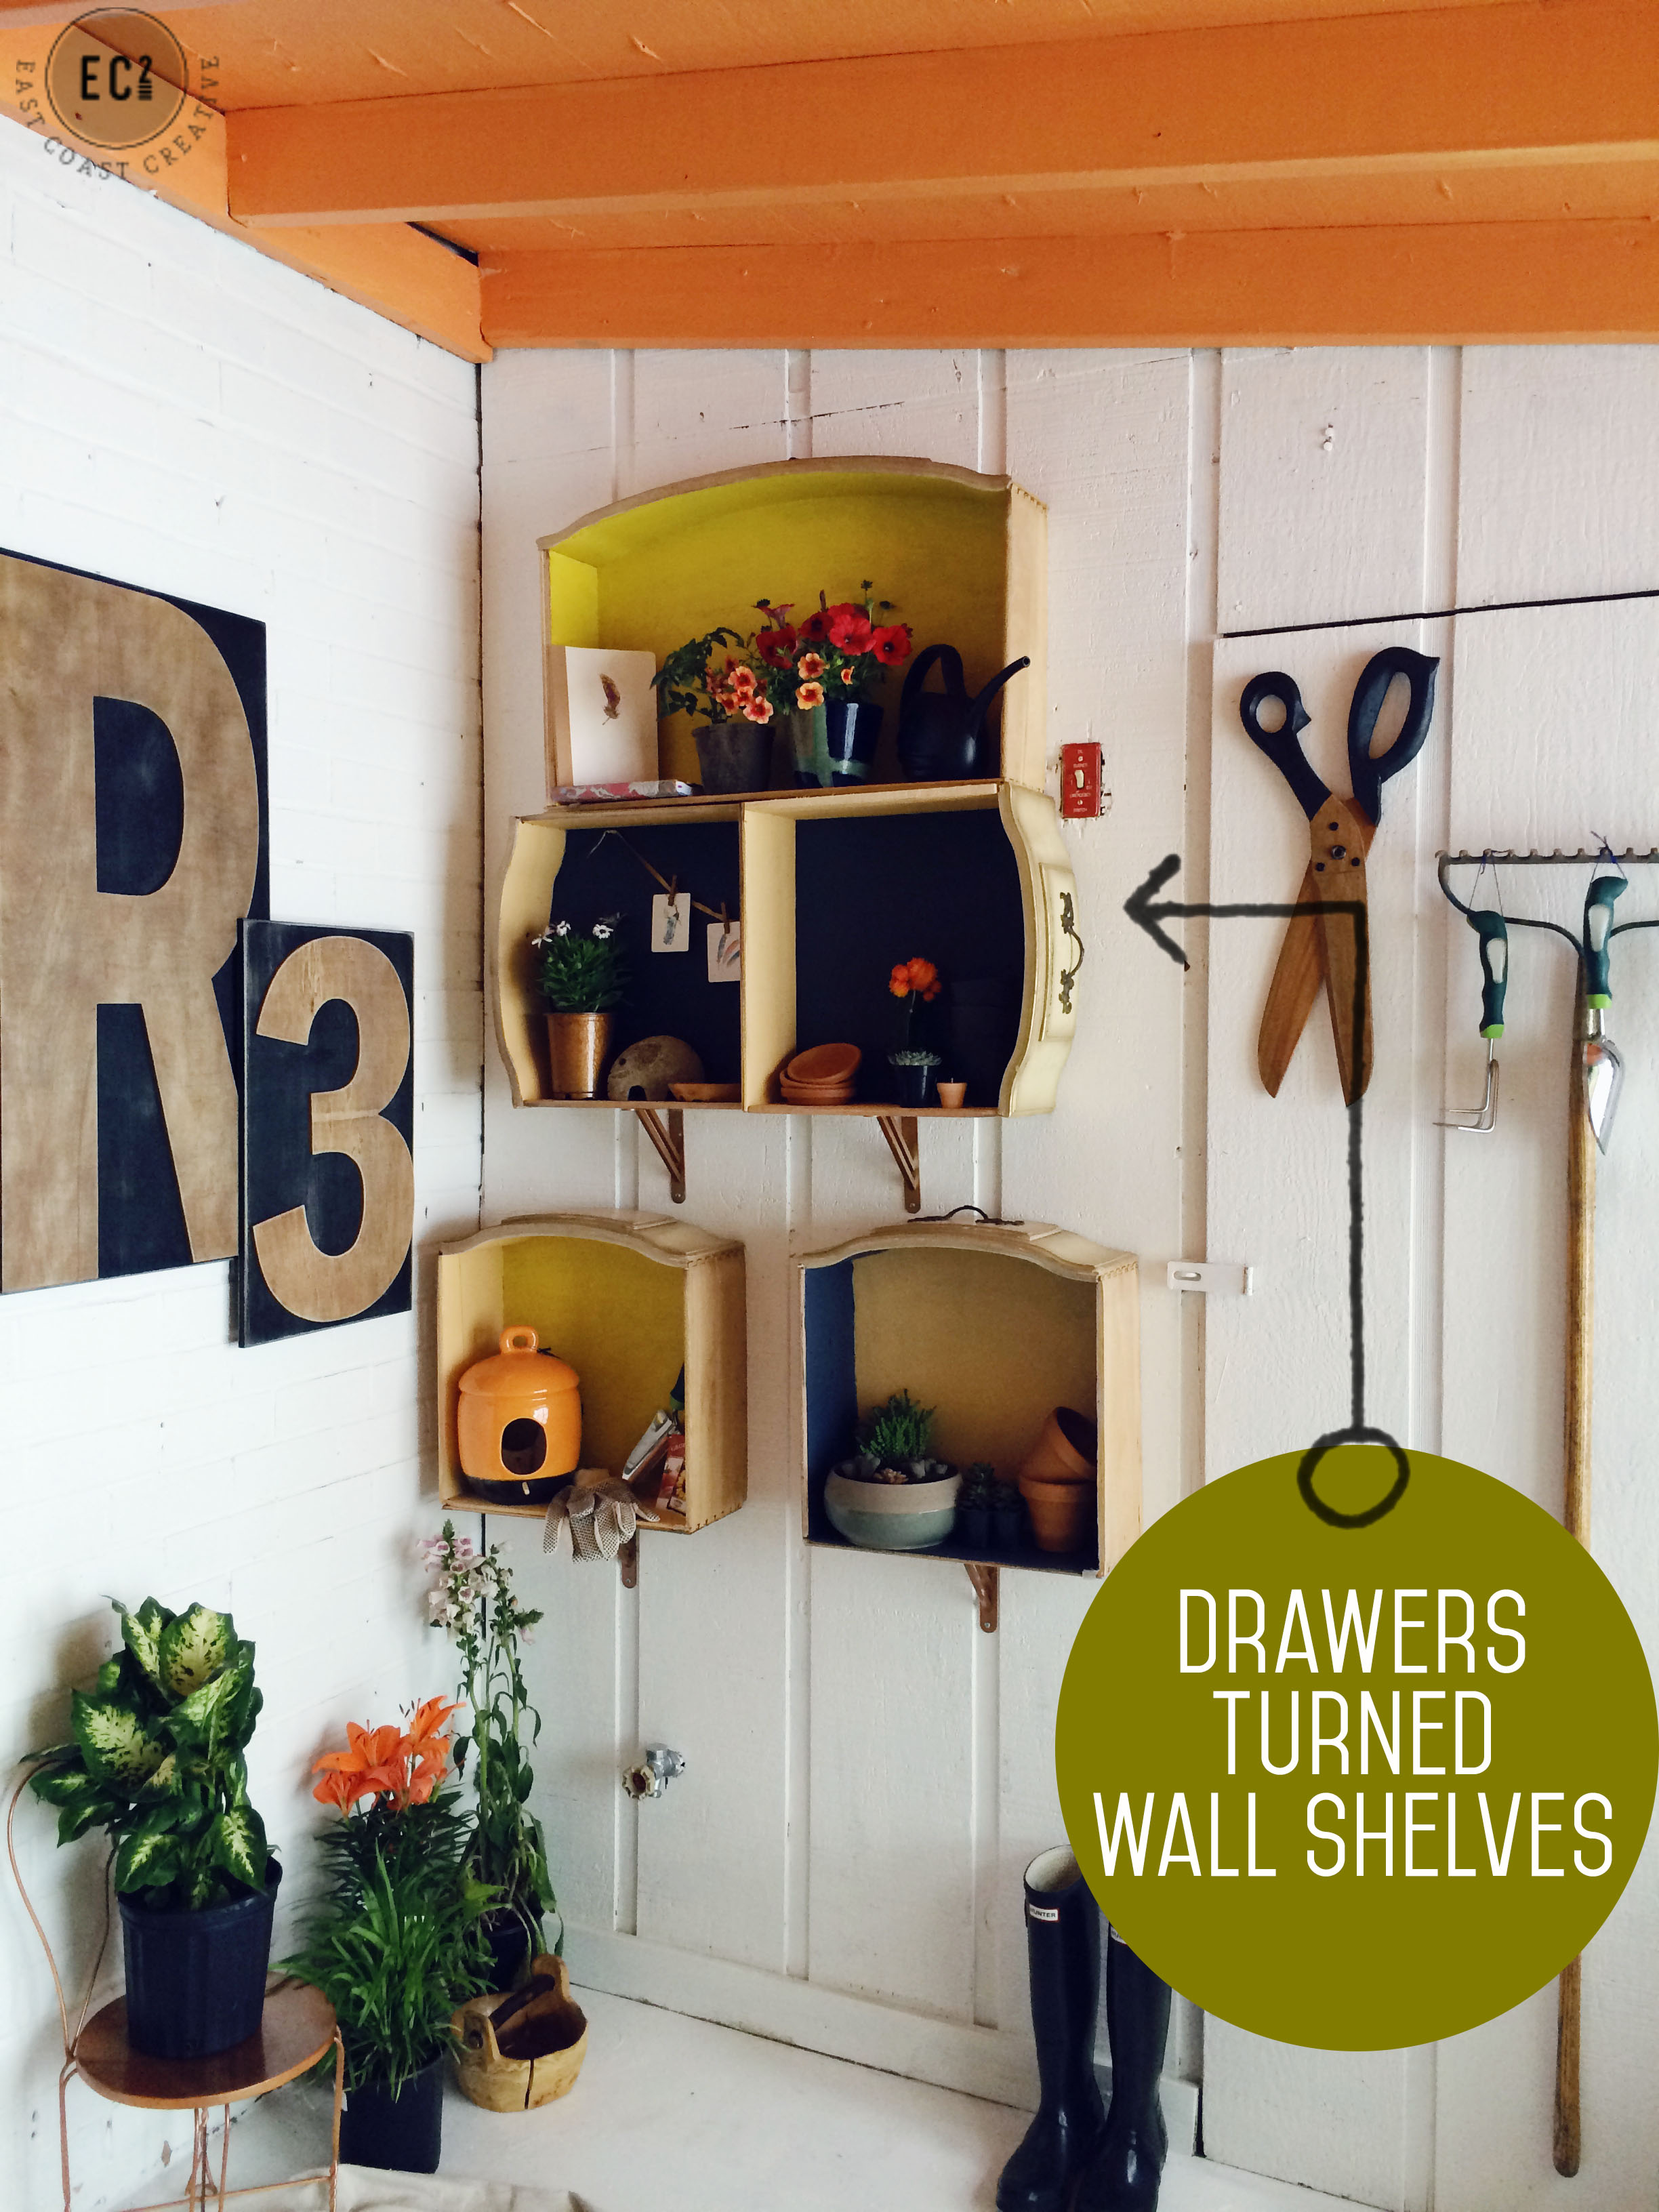
Isn’t that planting area so cute? Now, obviously we staged it to look all pretty, but it’s also really functional. All the homeowner’s hand tools, seeds and extra terra cotta pots fit nicely. If you missed the episode of “Knock It Off!” here’s what the room looked like before and after…
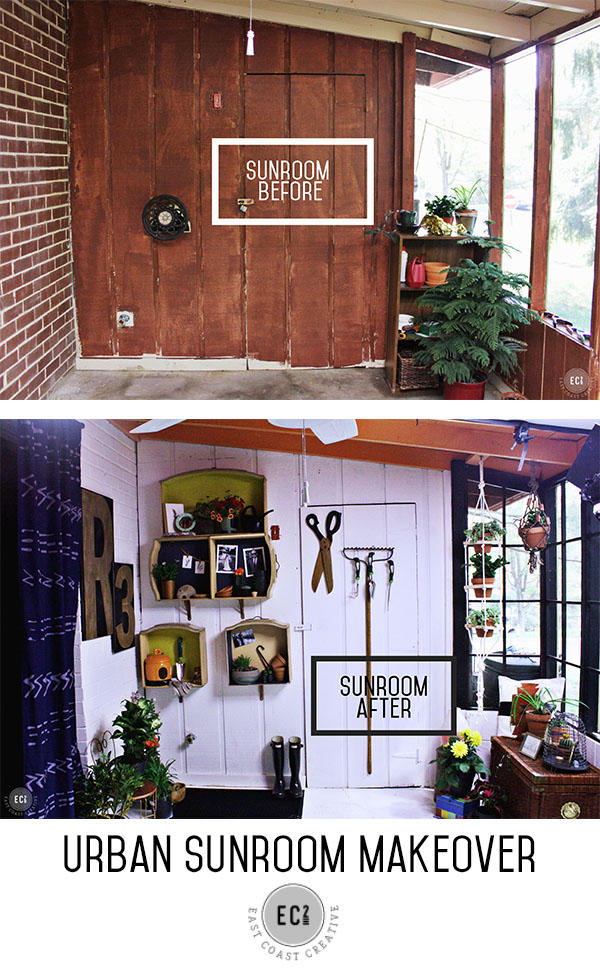
Yeah really big improvement! I can’t wait to share the easy peasy tutorial for the DIY window panes that completely urbanized this super suburban space- stay tuned for that later this week! But now, let me show you how insanely simple this project was!
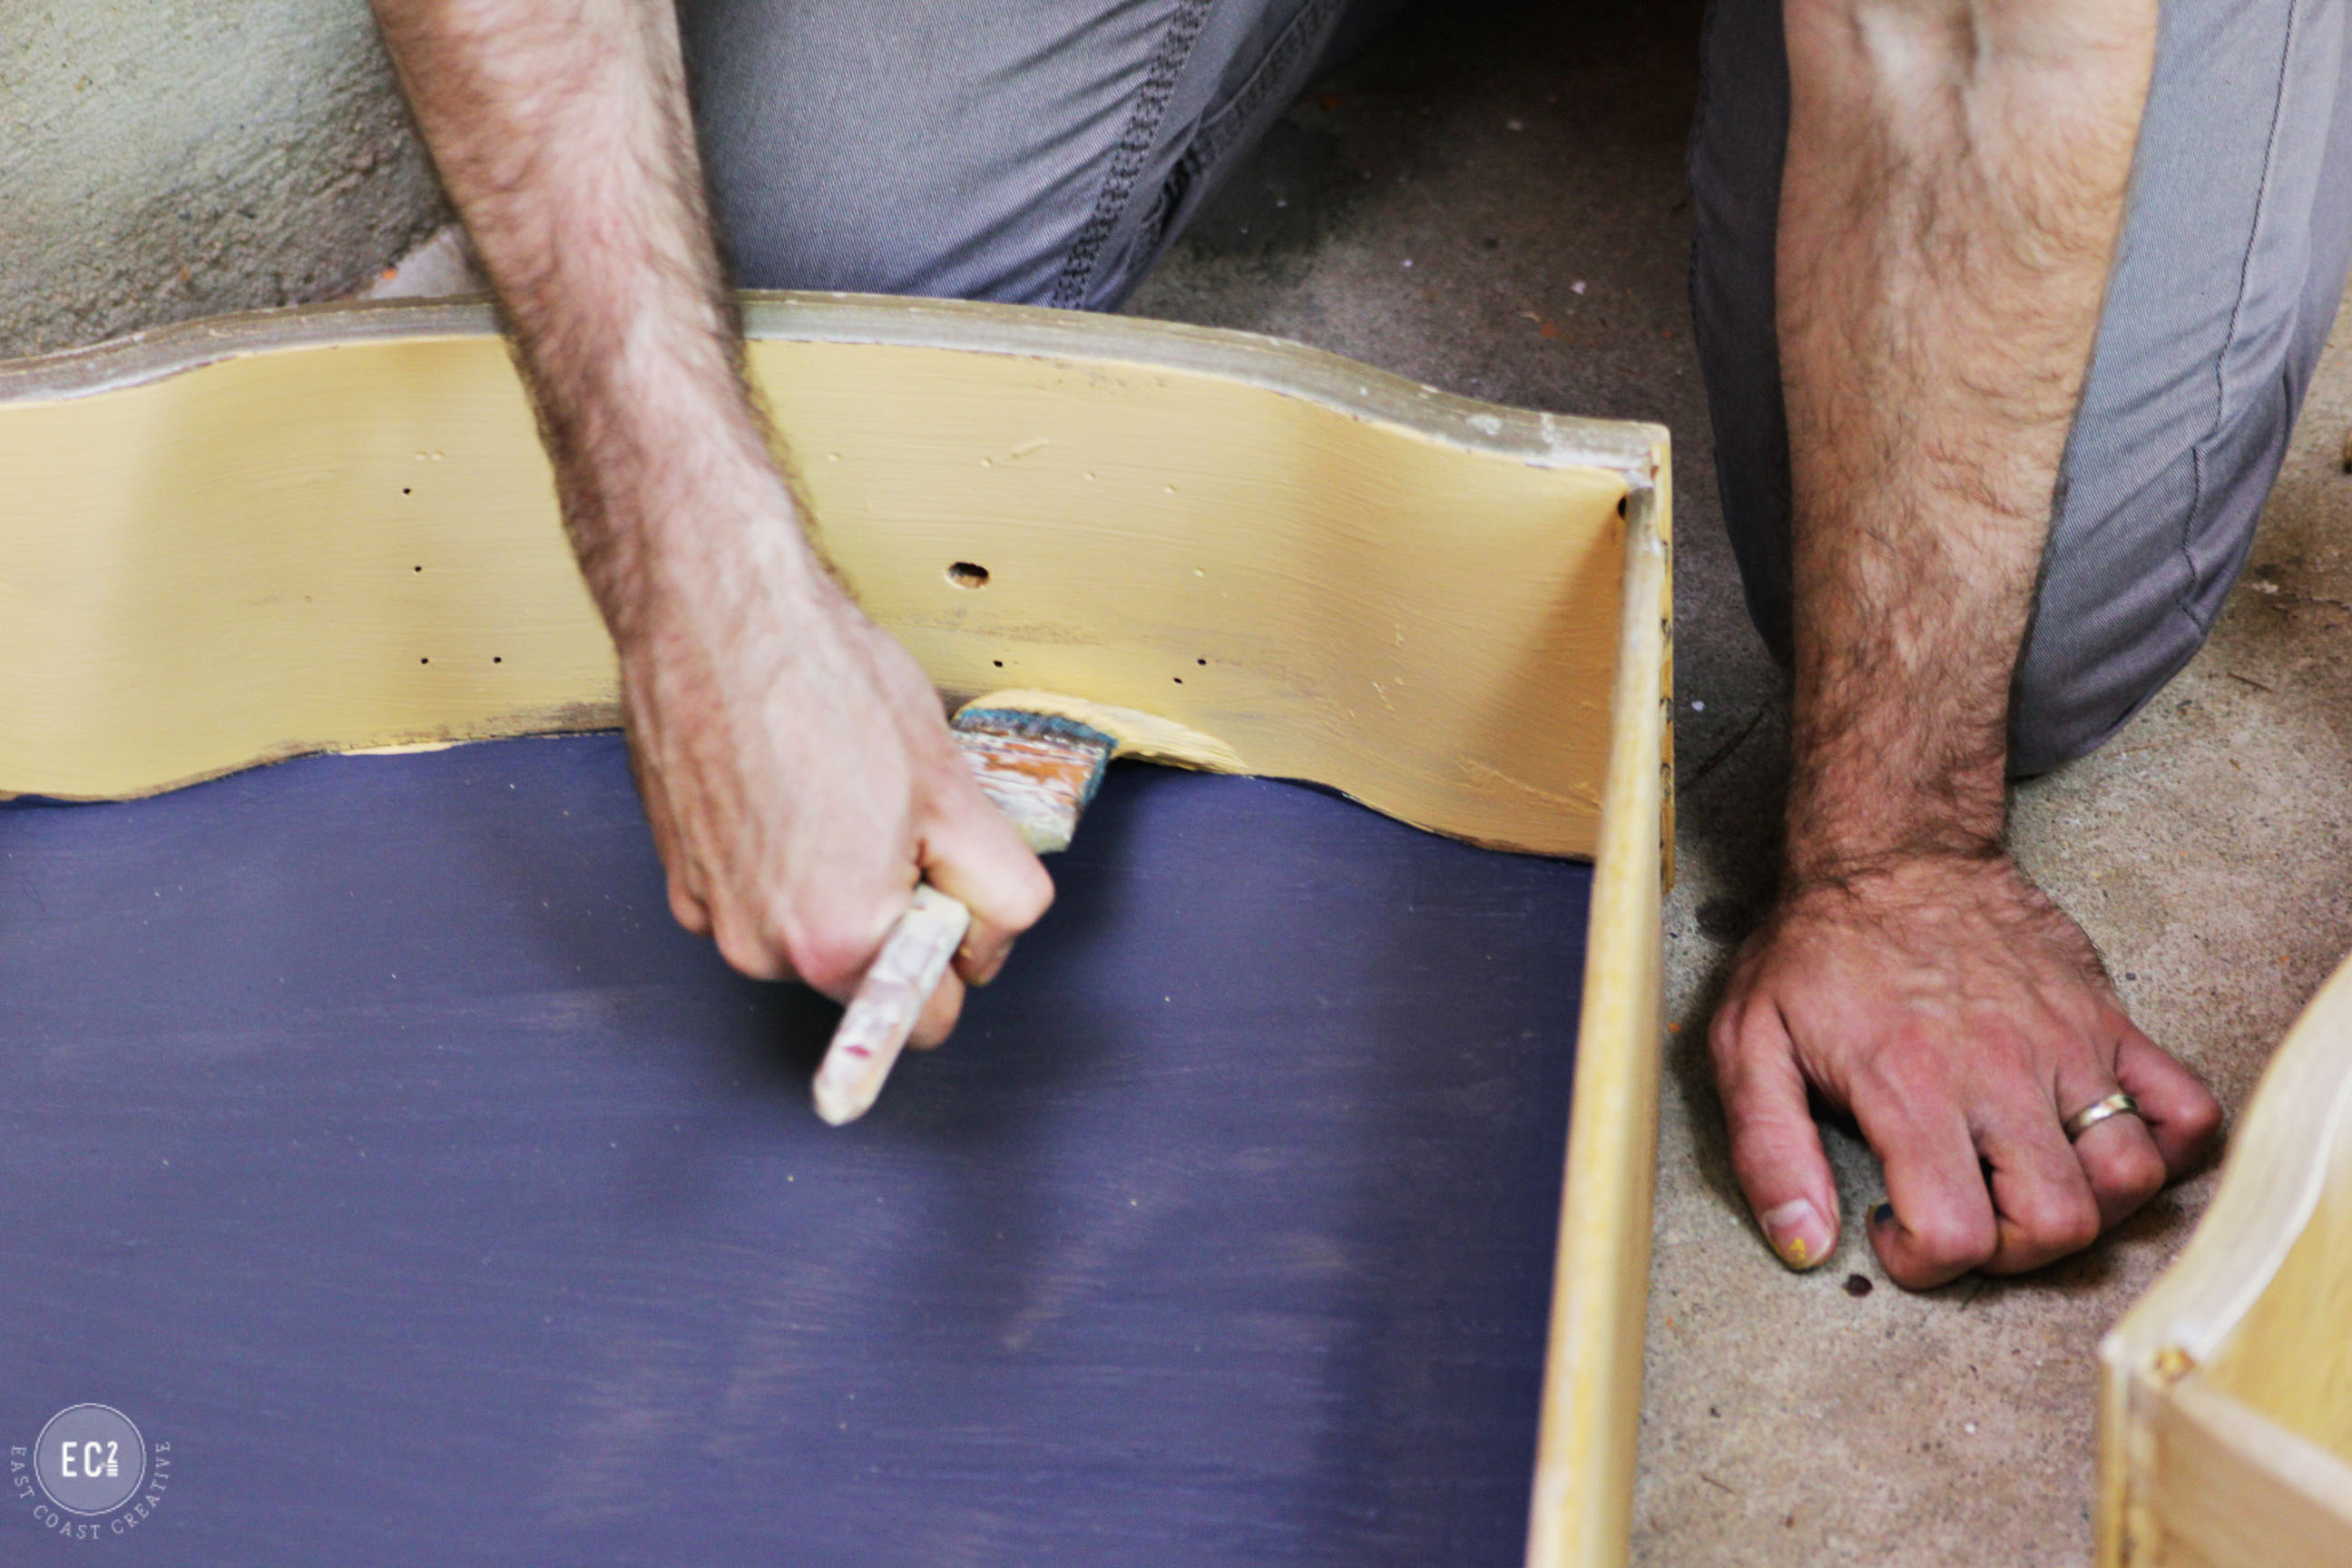
1- Paint the inside of your drawers.
We used a few different colors and contrasted the back and the side panels. You could also use really fun wrapping paper or wallpaper if you’re trying this project in an interior room. For us, since this is a sunroom with screens, we went with exterior paint.
2- Spray paint metal brackets
We used really inexpensive brackets, the uglier the cheaper it seems to be, but we spray painted them a nice copper and instantly they looked higher end. You’ll need one bracket per small drawer and probably two per wide drawer.

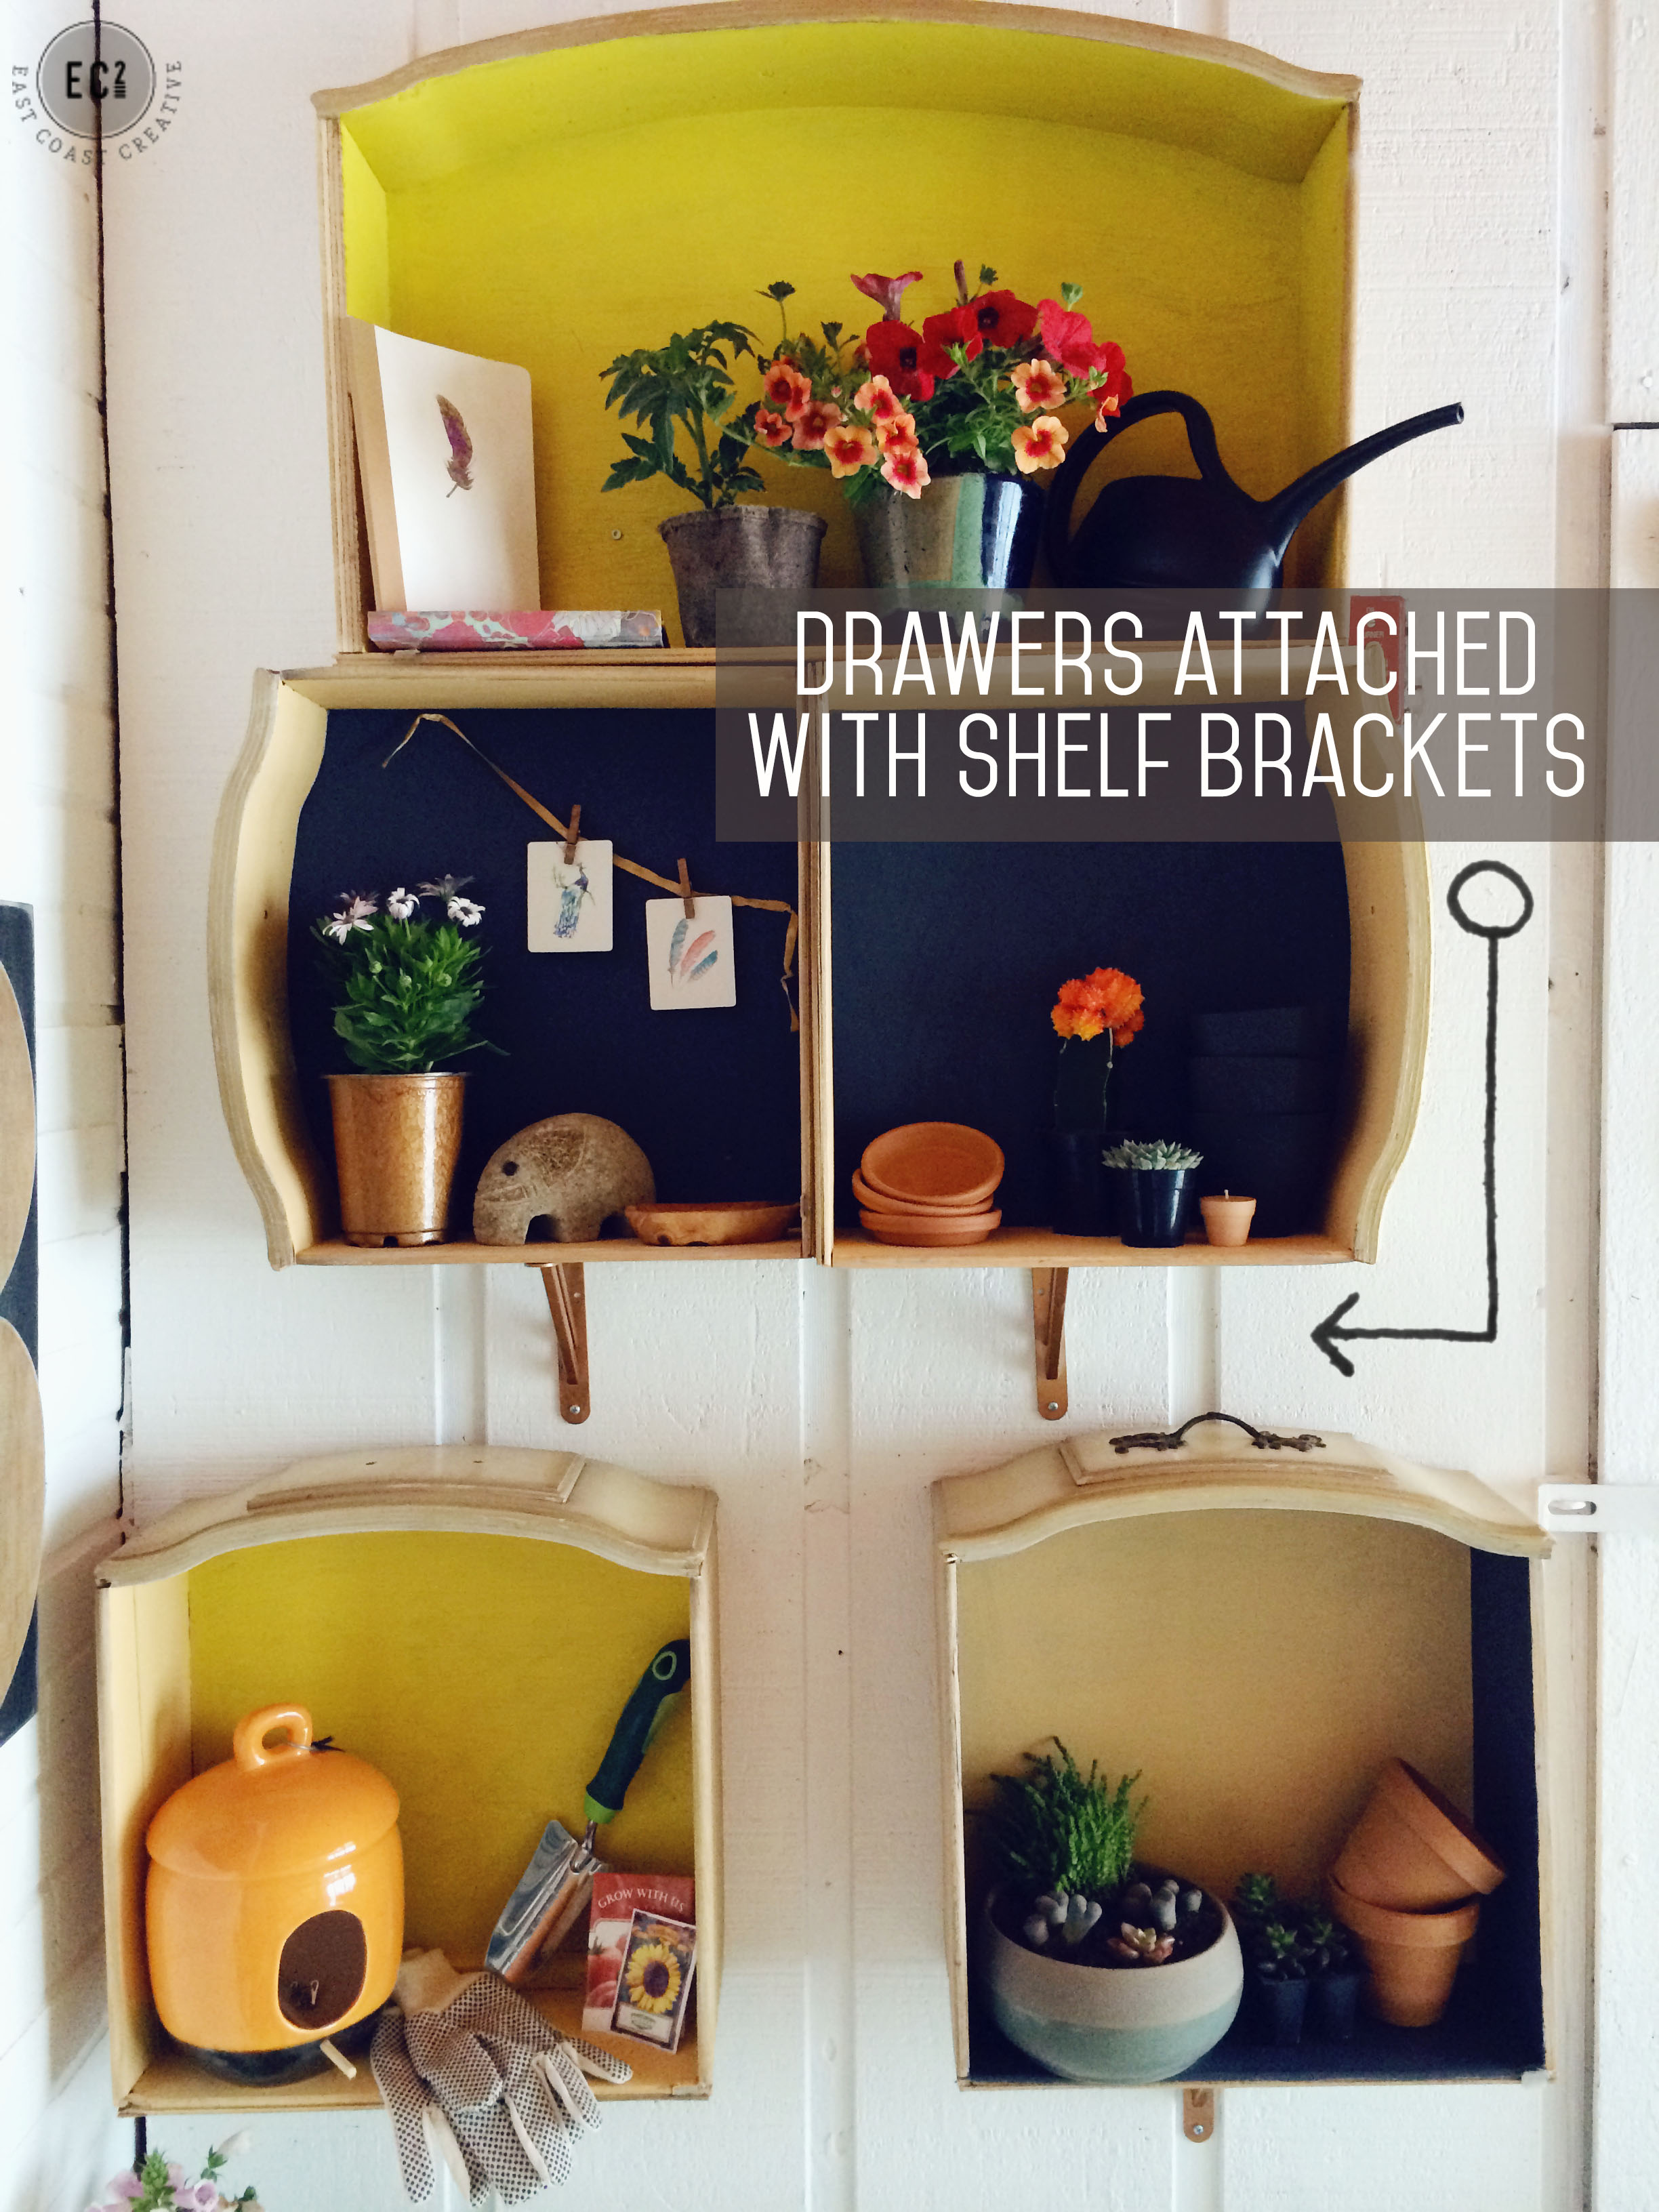
3- Attach the drawers to the wall using brackets
We used brackets for each shelf, but also put a few screws into the back of the drawers into the wall studs since we knew this area was going to be used for actual planting and heavy pots and dirt etc… For our arrangement, we liked the varied look of installing some drawers with the handle up and some to the side. Honestly, there are so many cool layouts you could come up with!
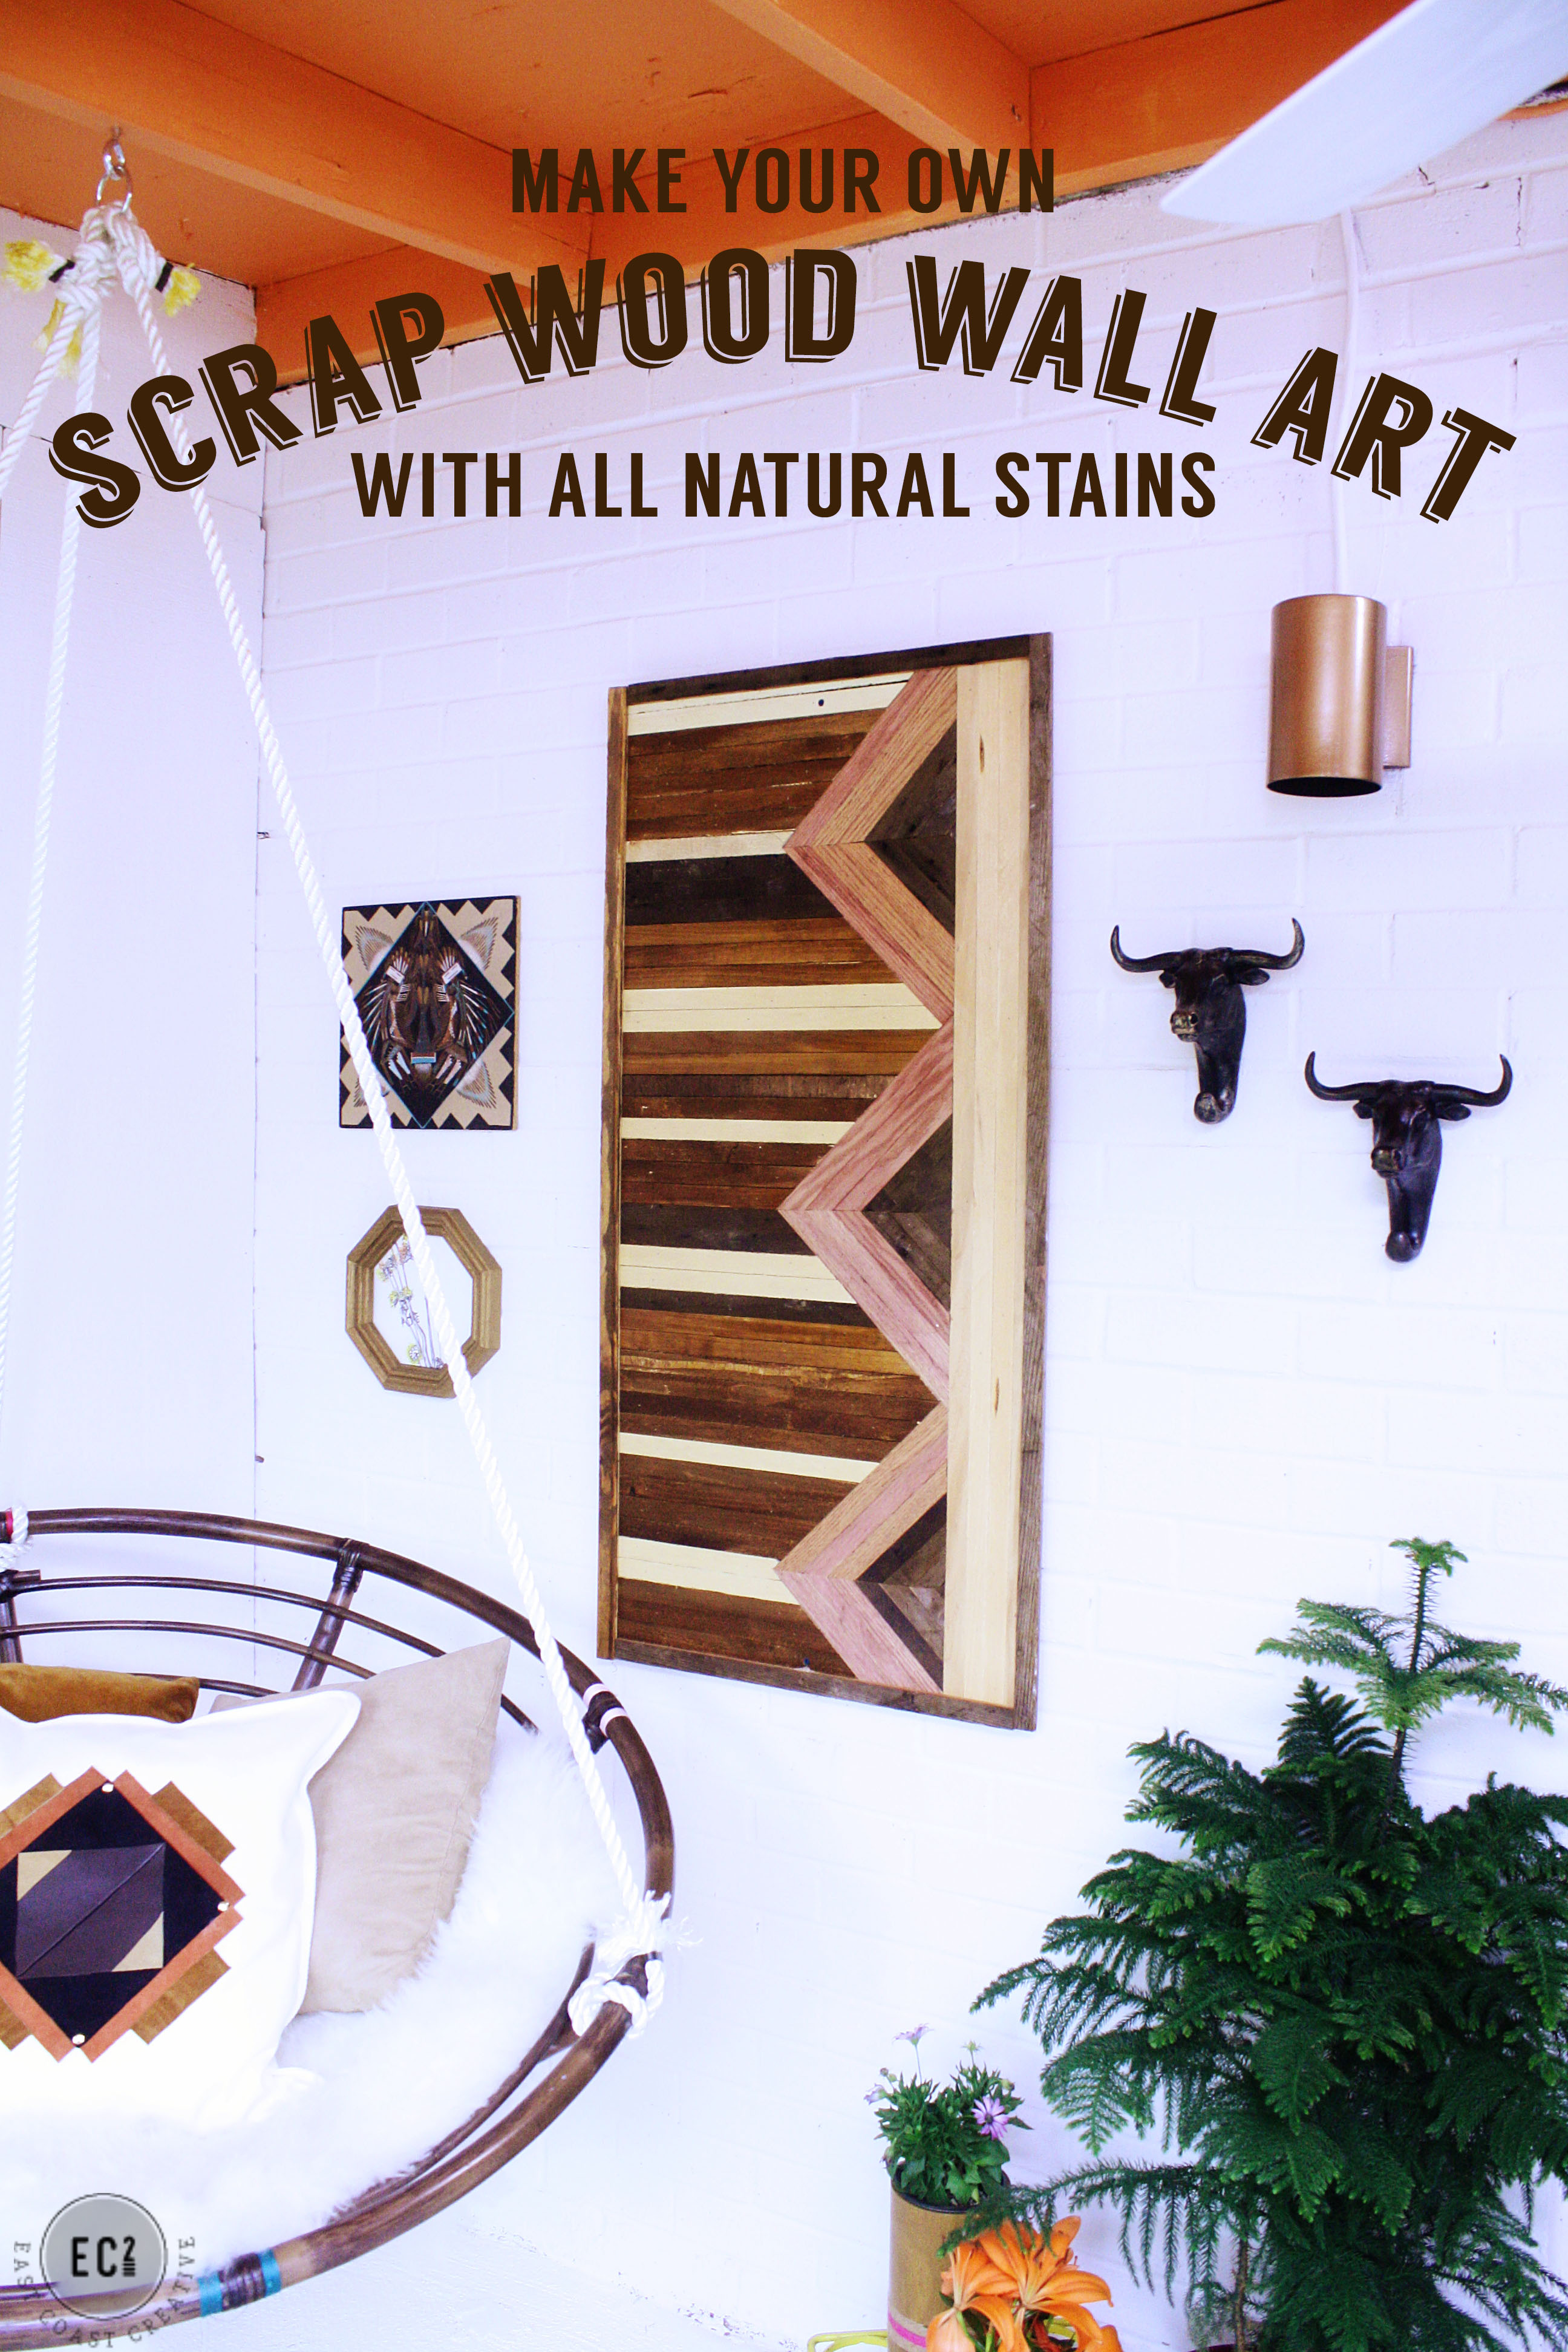
Did I mention that we loved working with these homeowners and that they’re super cool? (I’m pretty sure I did in my scrap wood art tutorial) We LOVED their wedding pictures, so we just pinned some up to add a little style to the functional shelves.

So, if like me, you’ve left a dresser out in the rain, you now have an awesome DIY project to save it from the trash! It’s also really easy to find hideous dressers at yard sales or on craigslist, so keep your eyes open and you can create your own DIY wall shelves.
If you missed the other tutorials from this makeover you can check them out below and you can watch the episode online HERE.
Thursday I’m excited to give you guys an update on The Well- it’s totally coming along and I can’t believe how generous you all have been. If you haven’t heard how we’re working together to fight human trafficking, you can get all the details here!


[…] Source: www.eastcoastcreativeblog.com […]
I just really love this show, it’s give me ideas. …
Cool wall shevles. really liked the ideas. I have some drawers to try this