
HEY GUYS! THIS POST IS PART OF THE WEEKENDER MAKEOVER SERIES. A DIY MAKEOVER WEB SERIES IN PAID PARTNERSHIP WITH LOWE’S HOME IMPROVEMENT. YOU CAN WATCH SEASON 1 , 2 & 3 ON YOUR STREAMING DEVICES OR BY SUBSCRIBING TO LOWE’S YOUTUBE CHANNEL.
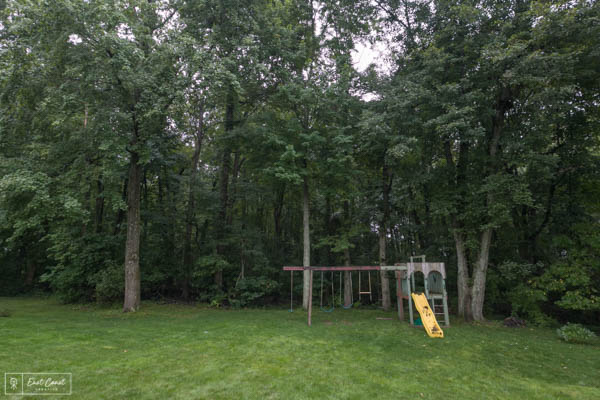
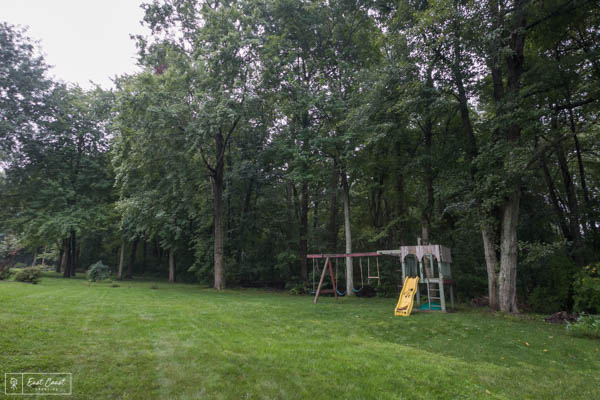
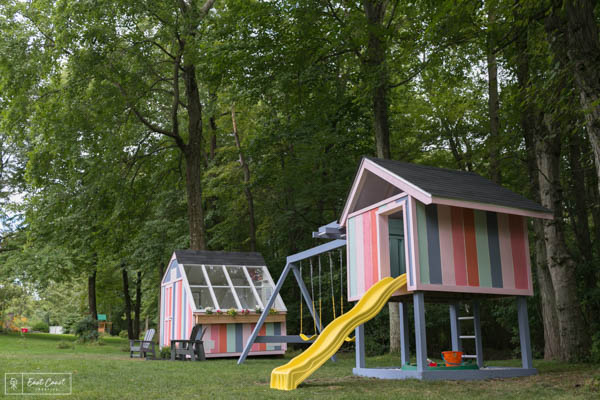
We took things outside this week with this young family and their three girls, and gave them a brand new outdoor play area! Sheri and Steve moved into this house a few years ago, and have quickly made it their home, but the outdoor area had kinda gone to the wayside. The girls love to play outside, and their play set needed a serious update to fit their fun style!


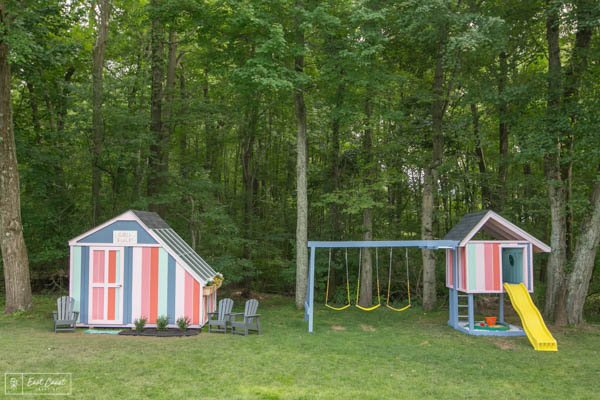
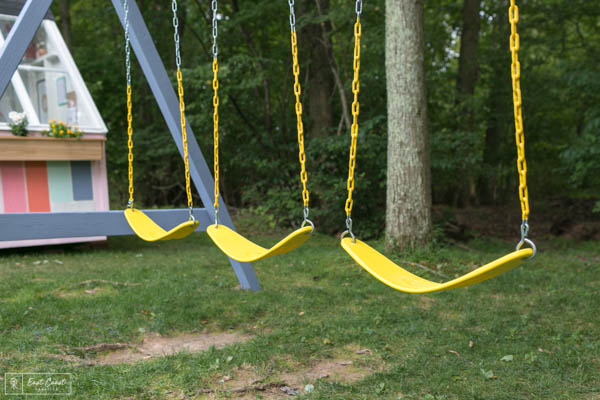
Since the play set was in decent condition, but definitely in need of some new paint and a few repairs, we decided to keep it, and add some other awesome features. Some awesome, funky colors, a bit of landscaping and a whole lot of kid’s inspiration is exactly what this weekend called for.

Before
After

Before
After
Before
After
Before
After


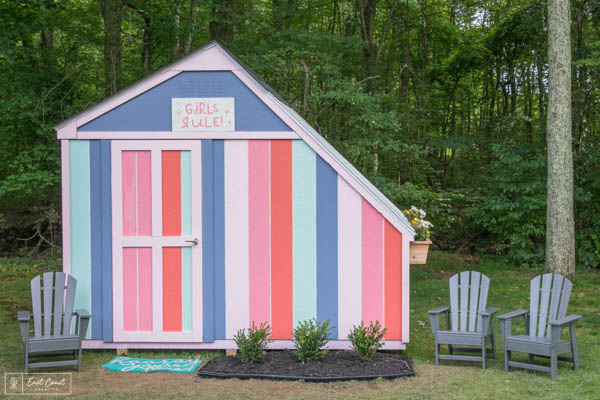
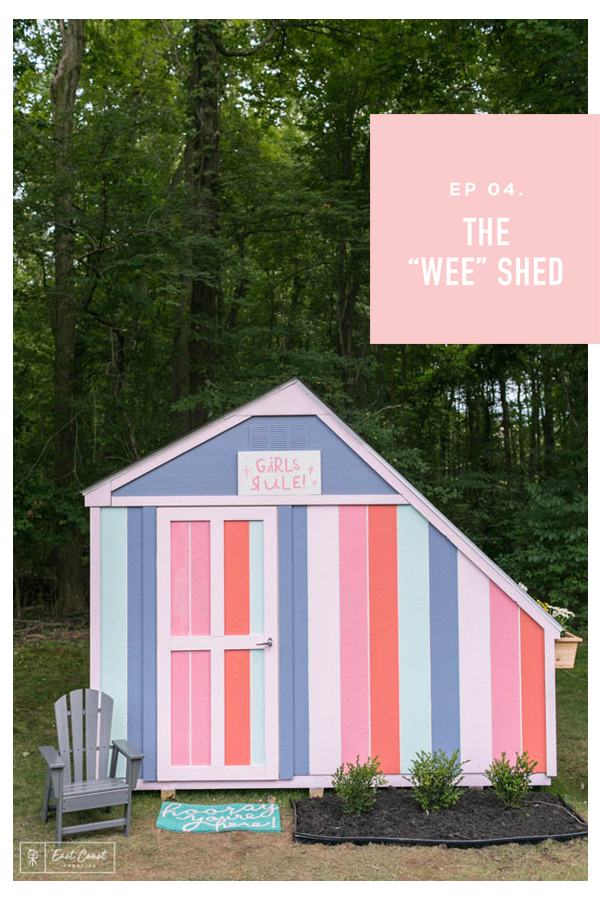
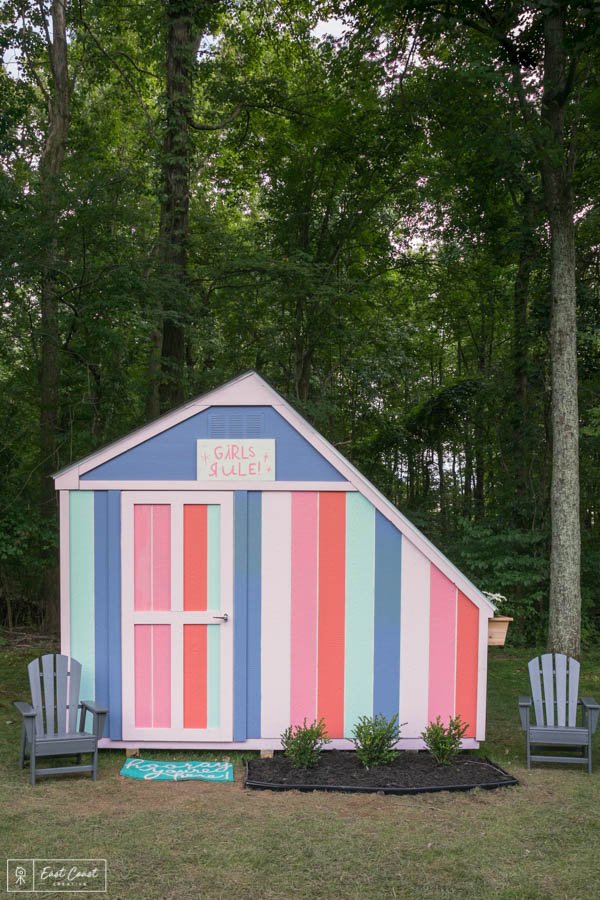
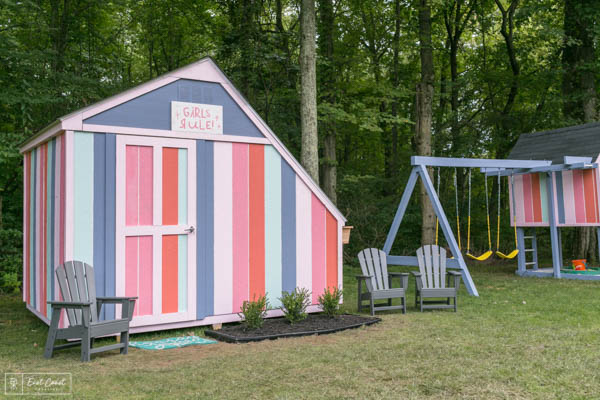
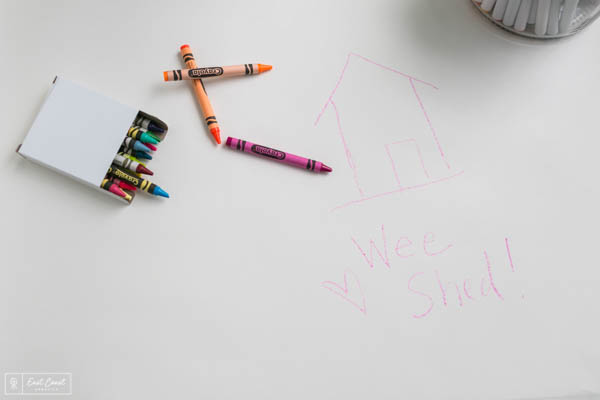
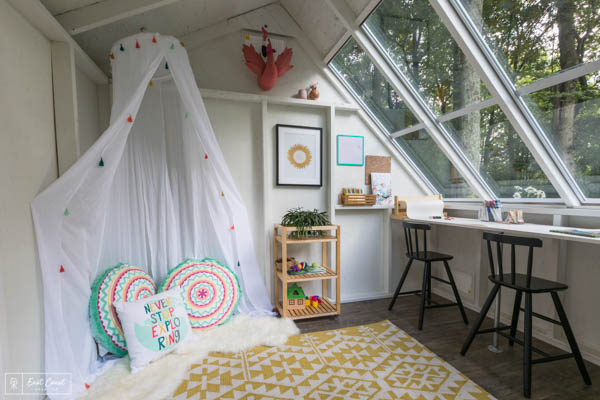
Let’s talk about this shed, shall we(e)? You’ve probably heard of a ‘she shed,’ but we took that concept and made it into a ‘wee shed’ for the kids! The two older girls love to play outside, and I wanted to incorporate this Heartland Saltbox Storage Shed into this makeover, and give them a cool little girl’s clubhouse to hang out in.
The best part about this shed install is that it came with people to install it for us! Lowe’s sent an awesome team of builders to the house to install the shed for us, and they legit did everything– framing to putting up the walls, even putting all the shingles on the roof! When they were done, we had this awesome little wee shed ready for some paint and personality.
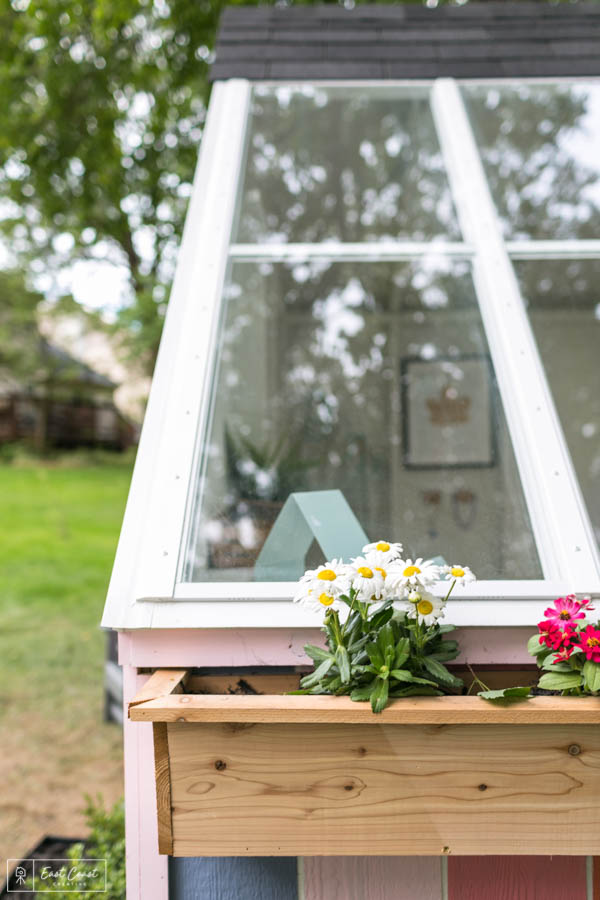
One of my favorite parts about this shed is its’ modern look– the asymmetrical roof lines and the side with window panes allow for tons of natural light for inside the shed.


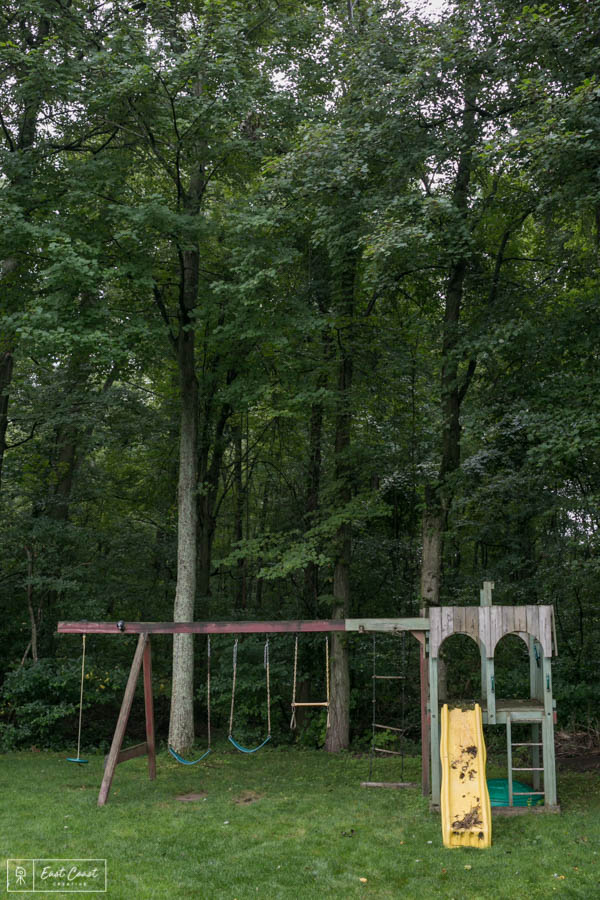
The current playset was pretty sad when we first saw it– muddy, peeling and fading paint, rotting ladder rungs… it was due time for an update.
We first used a pressure washer to clean off the entire playset, blasting off any excess paint or dirt that had built up on the set itself, giving us a clean surface to paint. Sometimes a little TLC goes a long way, and buying new isn’t always an option for people, so cleaning and tidying up is a great alternative in this case!
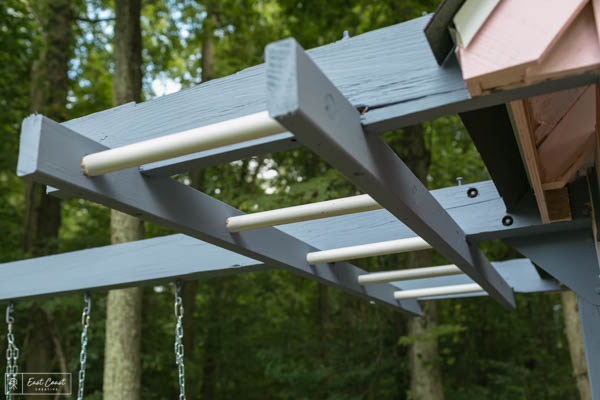
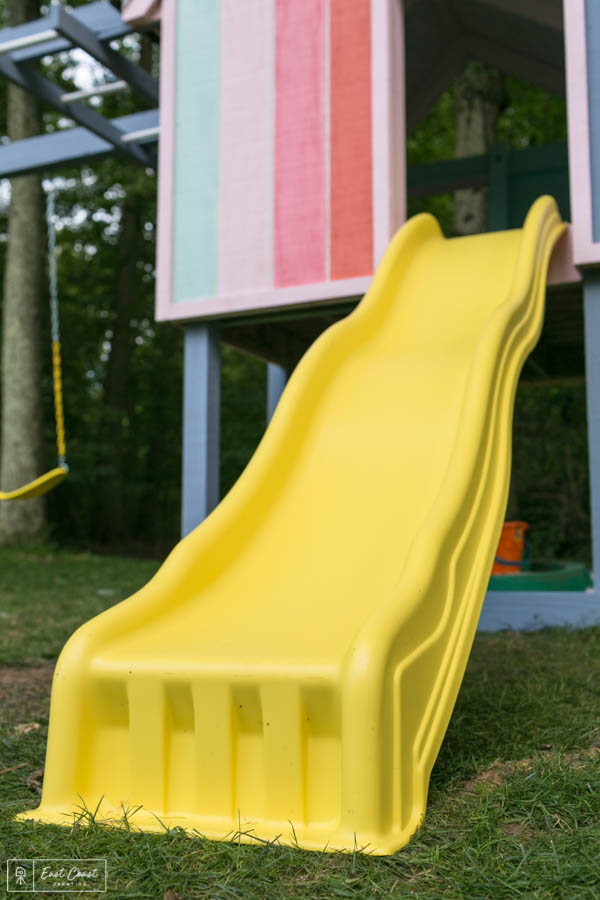
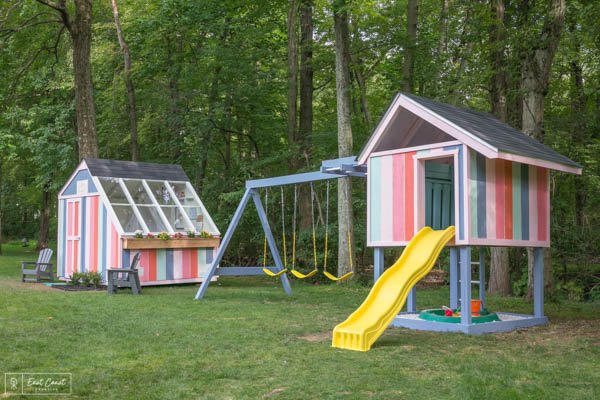
Since some of the ladder rungs were kinda rotting away, we wanted to replace them with something more durable and safe for the kids to play on. We used 1″ PVC pipe for the ladder rungs and monkey bars– sturdy and long-lasting; perfect for kids, anddd no more splinters!

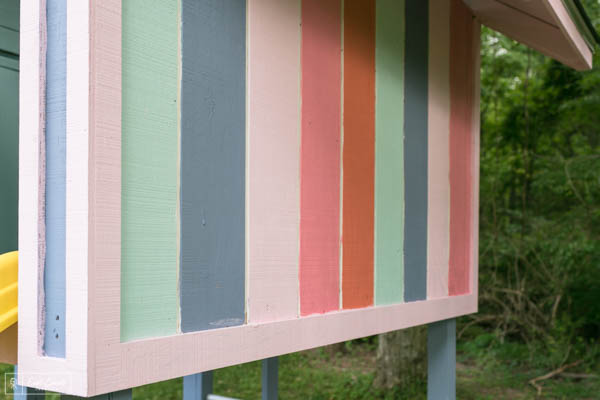
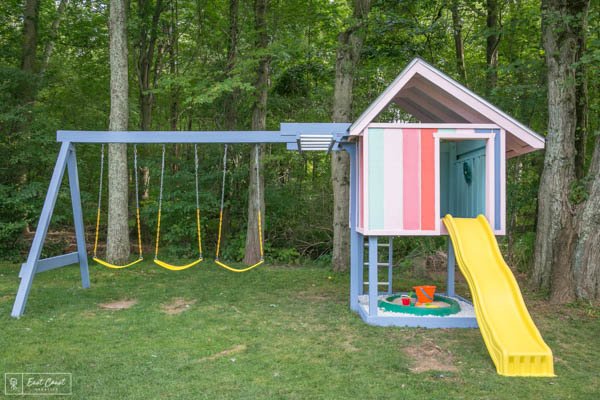
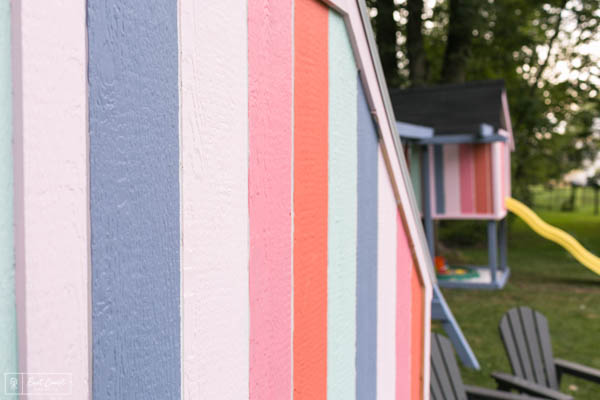
I’ve said it before, and I’ll say it again– paint goes a lonnnnng, long way, and this makeover was a whole lotta paint… 5 colors to be exact! These girls are super fun and girly, and I wanted to give them a place where they could be just that!
I know what you’re thinking– you want to paint your shed these same 5 colors… well you’re in luck– here they are:
We made sure to use Weathershield HGTV Paints to ensure long-lasting, bright colors that won’t fade over time, cause mom and dad are busy enough taking care of the girls and ain’t got time to re-paint that shed!
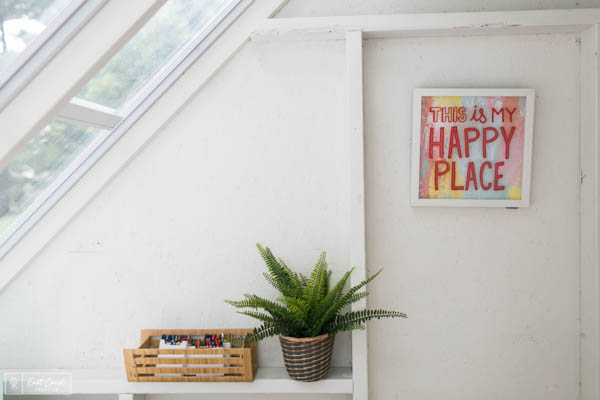
We chose a neutral, bright Alabaster White for the interior of the shed to really amplify all that natural light that comes in through the side panel of windows, and allows the girls to fill the walls with colorful decor and artwork of their own! (The outside of the shed was colorful enough, might I say?!)
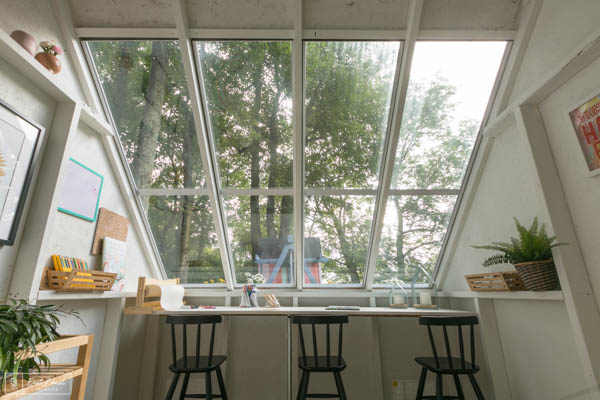
I mean, check out that full panel of windows! I’d kill for that many windows in a space! To utilize that awkward space under the windows, we built a desk that stretched the width of the shed so the girls could have a creative space as well! Using a standard project panel from Lowe’s, we attached it to either side of the shed, and secured it in the middle with a vertical galvanized pipe. Finish it off with a fresh coat of paint to match the interior of the shed, and the girls now have a new space to get creative!
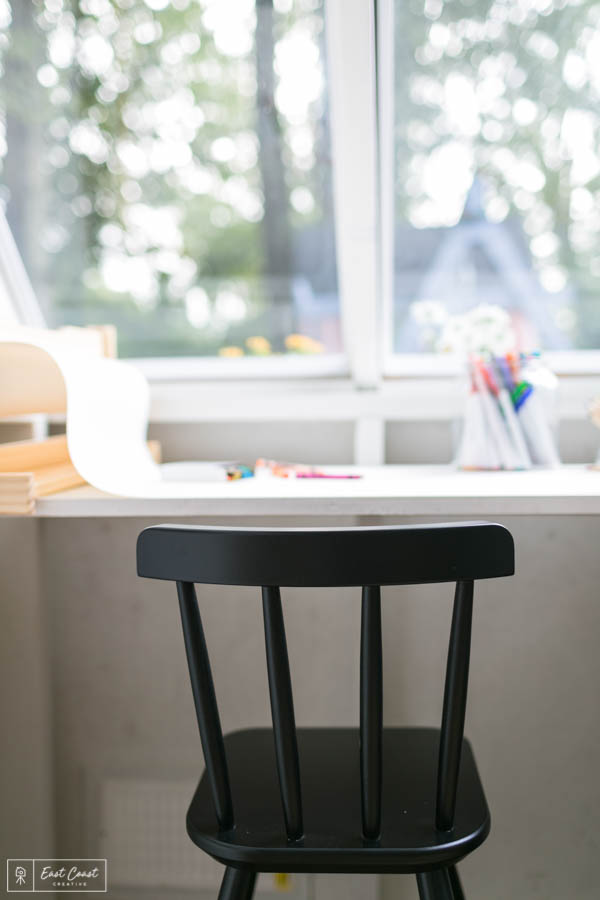
Oh, and these adorable, wee little chairs are just adorable.

So if you’re going to make your wee shed into a place where the kids actually want to hang out and not get splinters, the plywood flooring isn’t gonna cut it…
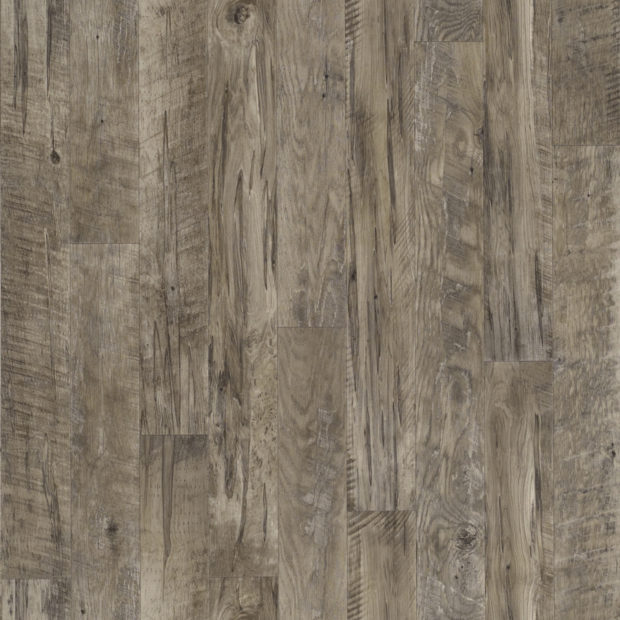
We went simple and durable with this Stainmaster SoftStep Plus Wood-Look Vinyl Flooring. It’s super easy to install, and it looks like weathered hardwood… the best of both worlds!
As far as installation goes, all you have to do is cut it down to the size of the room, even a bit larger so you can have a nice, tight trim and fit, then apply the vinyl flooring adhesive to the base of the floor with a trowel, thickly and evenly applying. After the adhesive is down, lay your vinyl on top, and smooooth it out with a floor roller to get all the bubbles out. And that’s it folks!

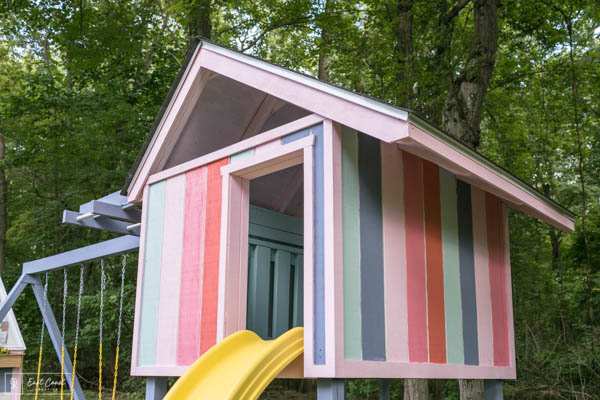
You almost can’t remember what the old play house looked like, right? Well it definitely wasn’t as cool as this new one! To mimic the angled roof of the wee shed, we created an asymmetrical roof on the play set as well!
Using some 1-by’s, we framed out the roof, making the one side longer than the other. once the frame was in place, we cut down sheet of plywood to fit each side where we would then attach the shingles onto. When you’re making things mini-scale, it really doesn’t seem as scary as it could be, so go ahead and challenge yourself!

This backyard makeover had some pretty awesome little goodies, check em out below…
[print_responsive_thumbnail_slider id=”36″]
-Mon
Don’t miss a single Weekender Episode of Season 3! You can watch all Season 1, 2 & 3 Episodes right HERE!
*The Weekender Series is a paid collaboration with Lowe’s Home Improvement. I’m thankful for the brands that believe in the mission of East Coast Creative and support my work!*


Beautiful, this is so fun-the paint colors are just perfect together!! The product links at the bottom aren’t working. I LOVE that rug!