

When you’re working with a small budget, but desperately need new chairs for your dining room table, what do you do? Well, you go thrift shopping of course, and you find unique mis-matched chairs that can fit well together after a quick little makeover. This is a skill that every DIYer should have, so today I’m going to show you How to Reupholster Dining Room Chairs
The BEFORE…

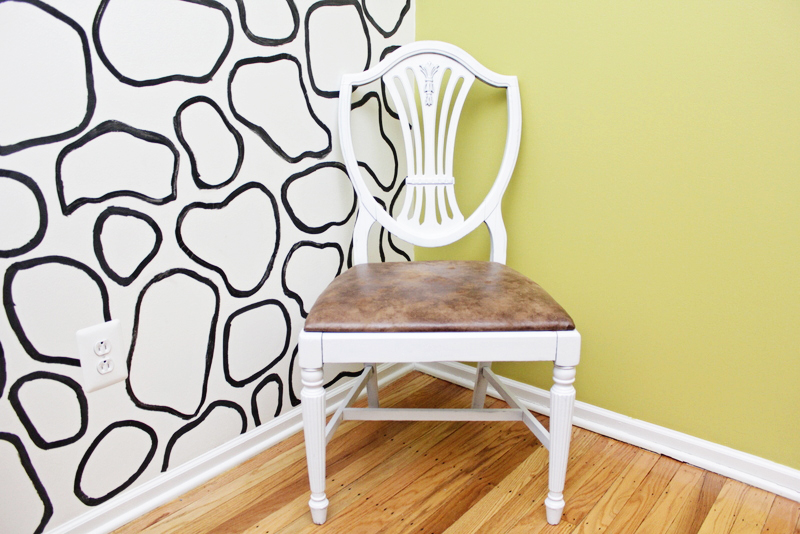
and the sleek, modern AFTER…
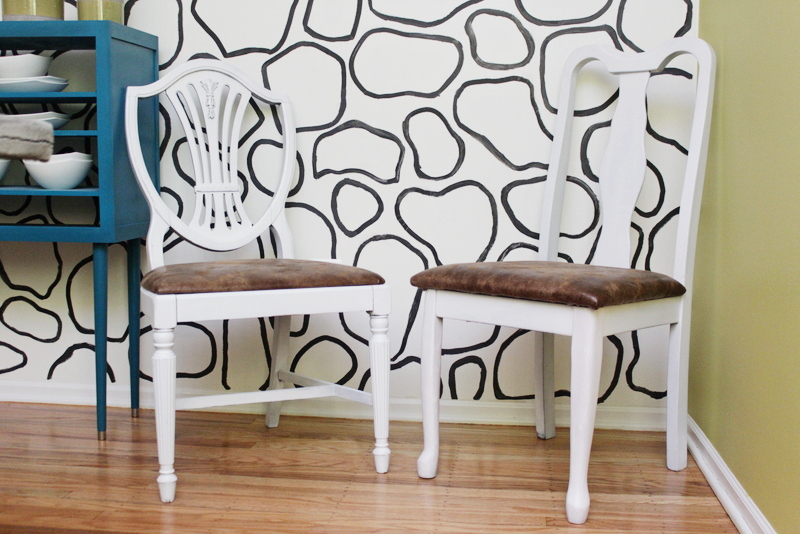
It really didn’t take much to turn these outdated dining room chairs into new, modern masterpieces that fit the style of the ultra contemporary dining room I was working on! Here’s what you’ll need to makeover your own chairs…
Supplies
Thrifted Dining Chairs with a padded seat (or your existing ones that need a face lift)
Fabric {about 1/2 yard per chair}
Paint & Primer
Sanding Block
Screw driver
Staple Remover
Staple Gun
Scissors
Step 1: First, locate some old or outdated dining room chairs that have removable seat cushions (Pro Tip: if you’re thrifting chairs, make sure you try them out by actually sitting in them, to make sure they’re sturdy!). Next, use a screw driver to remove the seat, making sure to hang onto the screws you took off. To remove a seat cushion, just look for one screw in each corner under the seat. You might need to move the old fabric out of the way to get a good view!
(I actually dig this vintage fabric, but it didn’t work at all in the room I was designing)
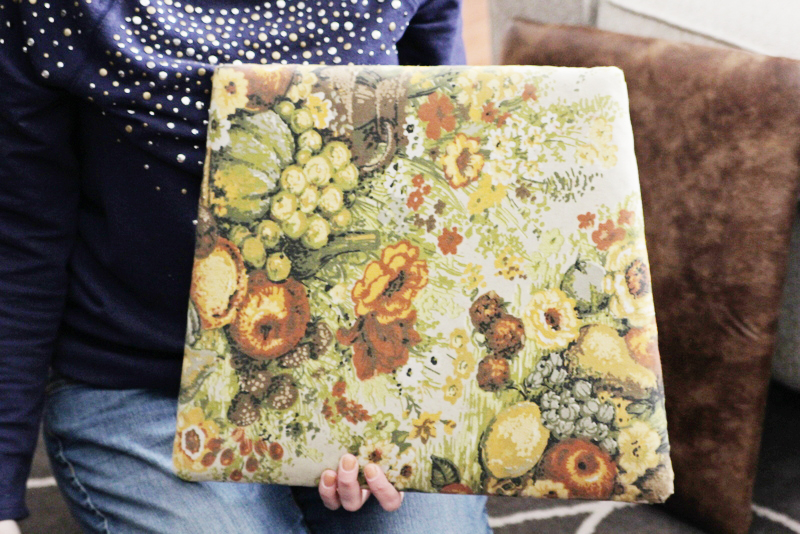
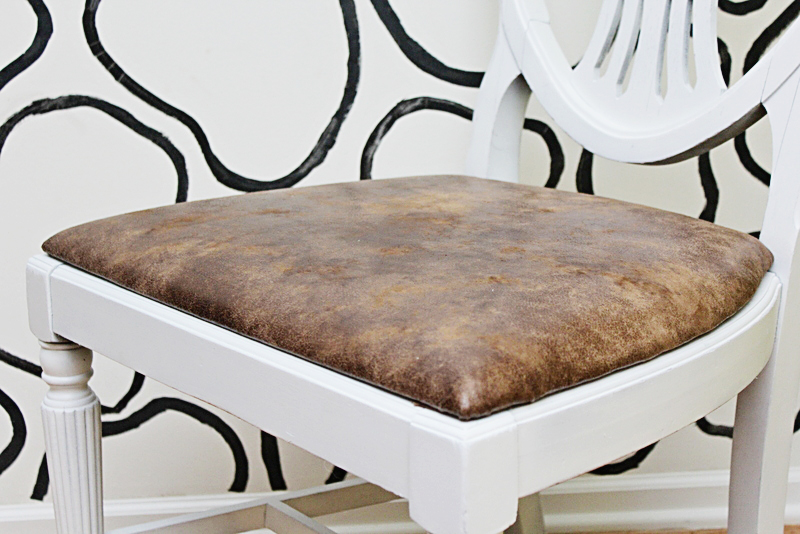
Step 2: Lay your seat upside down on top of your new fabric, I went with a warm, brown faux leather to contrast with the new white paint I was using on the chairs. If you have too much fabric, cut it down to size and leave 1-2 inches of overlap on each side. {If the old fabric on the seat is too thick, use a staple remover to remove the staples, and take off the outdated fabric but leave on the cushion material. Then lay upside down to continue with this process.}
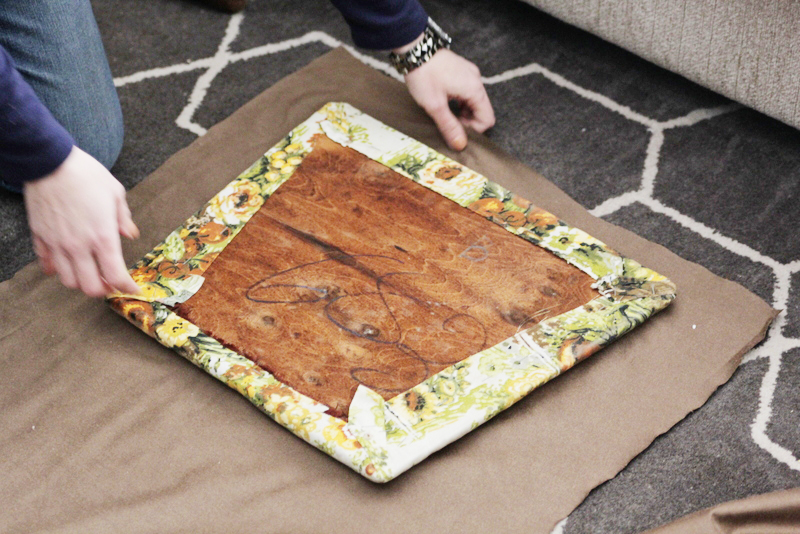
Step 3: Starting on the side of the seat, pull the fabric tightly towards the center and using a staple gun tackle the fabric into place.

Step 4: Continue all the way around the seat until you come to a corner. Fold the corner fabric towards the center, staple, overlap the side flap and staple again.

Step 5: While the seat is still removed, use a sanding block to remove any glossiness on your chairs, wipe down with a rag and begin painting. Since chairs get a lot of use, I recommend 2-3 coats of paint allowing for dry time between each. You can choose the finish of your paint depending on your style. I used a satin on these chairs.
Step 6: After your chairs are completely dry, which may take 24 hours, reassemble the seats using the screws you took out earlier. Next, step back to take a look at your new updated dining room chairs and be amazed by how simple it was to give them a gorgeous makeover! Then invite your family and friends over for dinner so they can enjoy them too!
Check out the accent wall tutorial HERE…

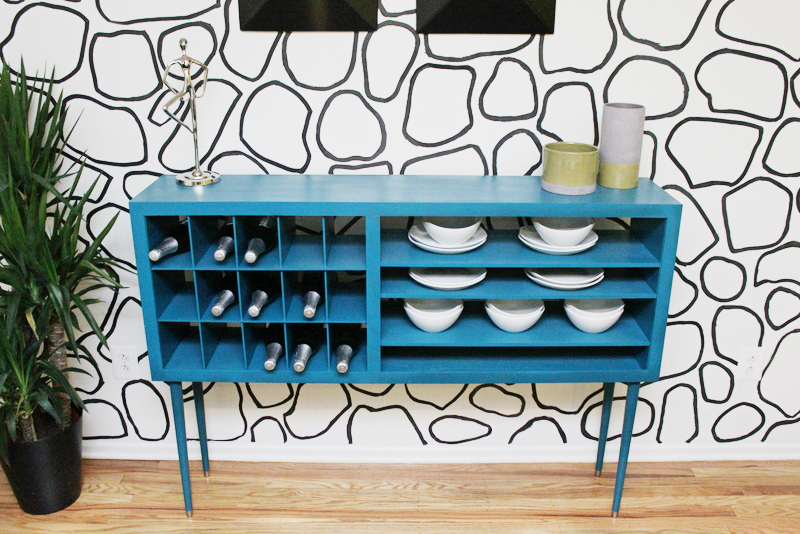
Plus the tutorial for the dining room buffet HERE…


The comments +