
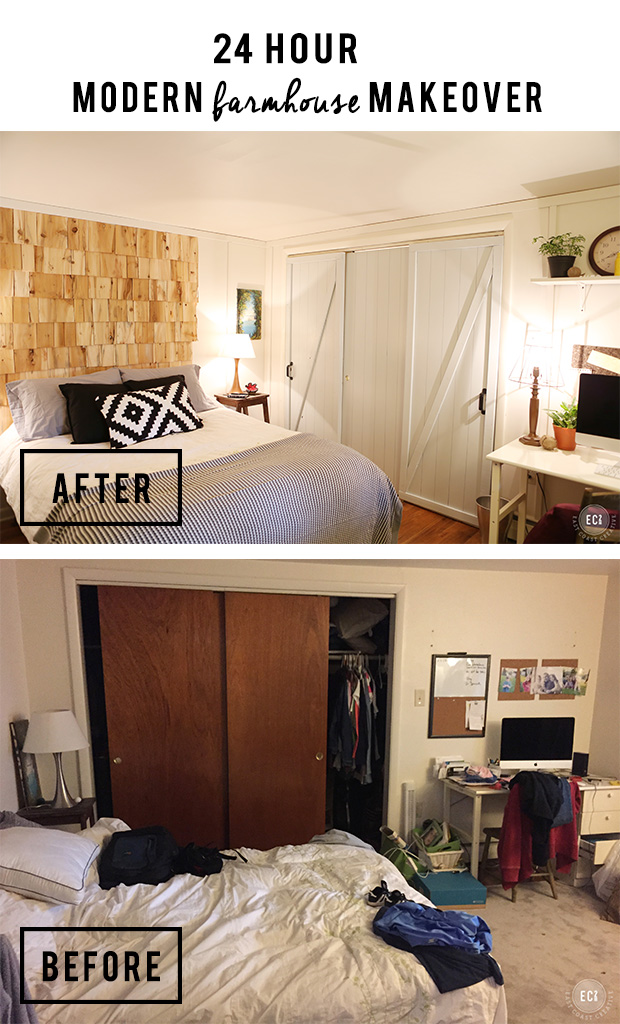
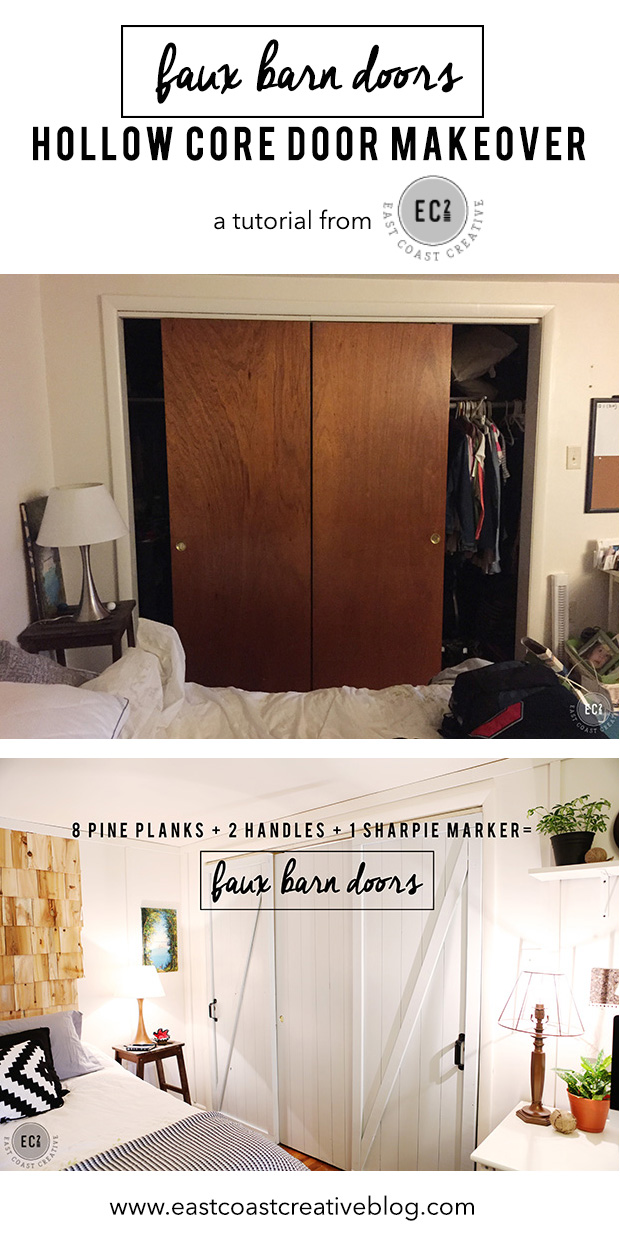
Hey Guys! If you’ve been under a rock this week, then you might not know that I’m in the middle of sharing project tutorials from my 24 hour Modern Farmhouse Makeover. Today I’m giving you the details on the DIY Headboard made from Cedar Shingles. If you missed the before and after post you can check it out here or the Faux barn door tutorial here.
So, I’ve gotta be honest for a second… I’m feeling kind of shady about this tutorial. This project requires very little instruction. Lots of you said you were so excited about the tutorial and I’m thinking “Oh crap. How can I make this seem like rocket science!” Well, it’s not rocket science and I’m not going to pretend it is. I’ll just be sharing the easy peasy details.
Let’s take a quick trip down memory lane shall we… back when I was in high school, living in New England, my parents owned a small cottage on our property that they rented out. I was 16 or 17 and was dating a nice guy, but as all good parents do (even though it was annoying at the time) they limited the amount of time we could spend together. The rental cottage needed to be re-shinged, and I realized that if said boyfriend did the work for my parents (he was incredibly handy) we could hang out day in and day out until it was finished! Teenage Genius, I know. Well, long story short, he and I worked hard and removed all the shingles on the cottage and re-shingled the whole thing. It was around that time that I really got the bug for building things and making stuff, so it was a lot of fun! Come to think of it, I think my parents might have totally been onto my scheme of letting me and the boyfriend do projects together, because they got us to paint a lot of rooms, shingle the cottage, and put a new roof on our house… hmm maybe they were the smart ones! Ha! Anyhow, that little New England cottage inspired my use of shingles in room design.
This isn’t the first time I’ve used cedar shingle in an interior space. If you watched the “Knock It Off!” episode where Jess and I made over my parent’s family room, we did an entire cedar shingle wall. We were going for a New England vibe and it really looks awesome in their house.

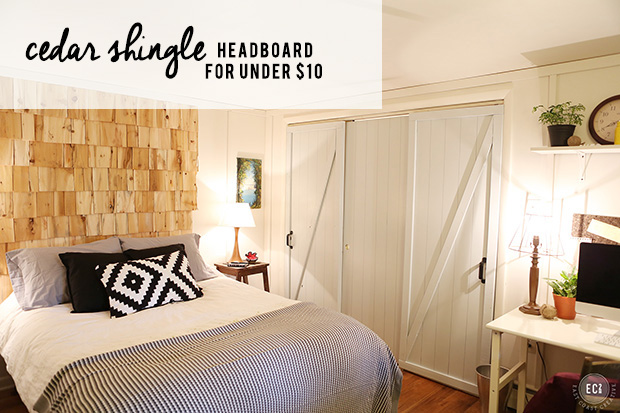
For this modern farmhouse makeover, I had to keep time and money in mind, so instead of doing an entire wall, I focused just on the headboard area. I was able to do the entire headboard with just one bundle of cedar shingles, which costs… wait for it… 8 BUCKS!! (Technically 8.98, but that didn’t have the same dramatic effect)
Here’s what you’ll need to make your own
1 Bundle of Cedar Shingles
Measuring Tape
Level
Nail Gun (or hammer & nails)
First, I measured out where I wanted the headboard on the wall. I used some painter’s tape to give myself general guide lines to keep the sides straight.
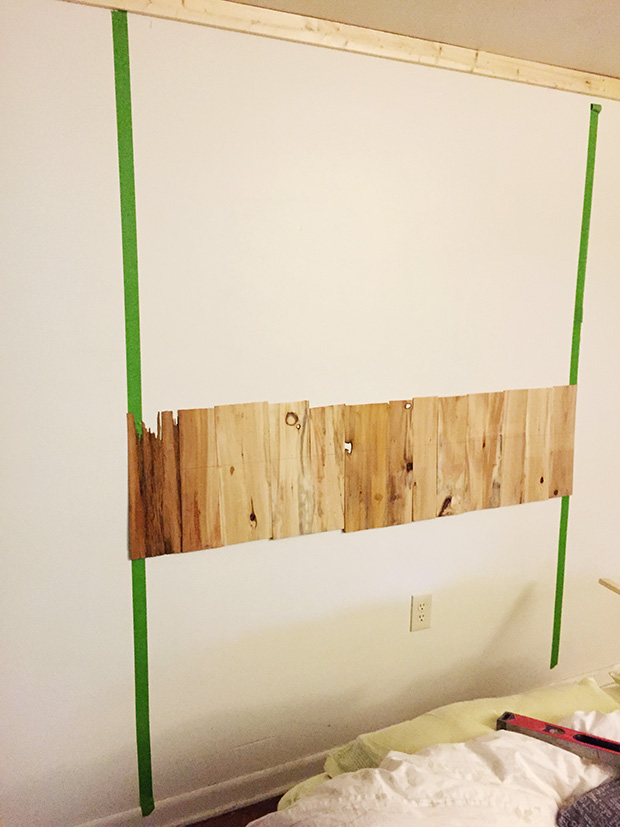
Using a level is essential for this project, nobody likes wonky shingles. Start at the bottom of your headboard (make sure it’s below where the mattress will be) and use your level and a pencil to draw a guide line.
Attach your first row of shingles along the level line. If you’re not familiar with shingles (or didn’t get a tutorial from a high school boyfriend) you want the thick side of the shingle towards the bottom. I used my Ryobi AirStrike Nailer, but a hammer and nails would work too (that’s what we used back in the day).
After the first row, use your tape measure and level and draw your next guide line. I spaced my rows 7″ apart, because I wanted to complete the entire headboard with just one bundle of shingles, but you can do them closer if you’d like.

Just keep repeating the process until you get to the ceiling. You’ll probably have to trim your final row, but that’s about it. One important tip, stagger your shingles. You want them level, but not perfect, because then it looks strange. I made it slightly irregular along my level line and also on both sides.
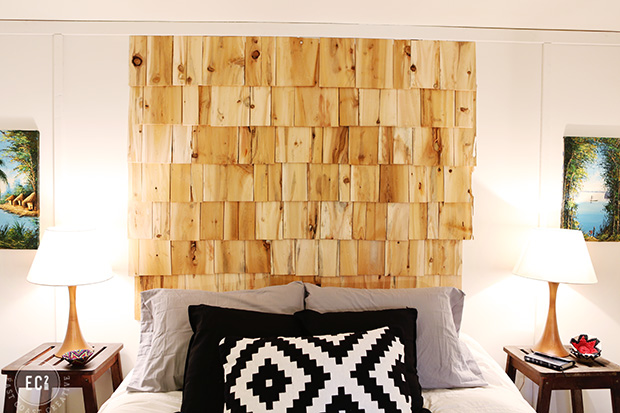
For this modern farmhouse style, I chose to leave the shingles raw. I liked how natural and bright they looked. For my parent’s house, I used a light grey stain to darken them up a bit. You have a ton of finish options to fit your style.
I like how the headboard adds so much texture to the room. I went with white walls in the room, because it’s not a huge space and we wanted to maximize the look, but the cedar shingles really warm up the space and make it feel homey.

So there you have it. A blast from the past high school story and an awesome, inexpensive headboard (that doubles as a selfie background).
Tomorrow I’ll be back with the inside scoop on my Ellen story!
Check out the entire makeover here
Check out the Faux Barn Door Tutorial Here


Love this! Wish I would have seen this before I made my headboard! I did old kitchen cabinets for 50 cents each from the Habitat store. Love the cheap DIY’s!!
This is great. I love the high school boyfriend story. It sounds like your parents did know what they were doing. 🙂
I love your blog and show Monica, but I also loved the interactions between you and Jess. Will she come back for a few cameo’s now and then?
I’m sure you are missing her at your side, every single day. Well at least you are still friends.
Change is our only constant.
Best wishes in the new year and in your new ‘sole role’. 🙂
This is so stinking cute! I would LOVE it if you popped over and linked this up! This is such a great DIY, the whole room you did was inspiring! I loved those doors! You are right just about every home in America has those lol.