
![]()

Wow, can you believe that we only have one week left of Creating with the Stars! It has been one crazy ride for our 12 contestants, and it has just gotten a little crazier! If you didn’t hear the big Grand Prize Round Announcement yet stop by our post from earlier today. Now, on to Becki and Chris’s Scrap Metal Sculpture. After seeing and reading their tutorial, you may just want to teach yourself how to weld too!

——————————————————————————————————————————————————-
Background
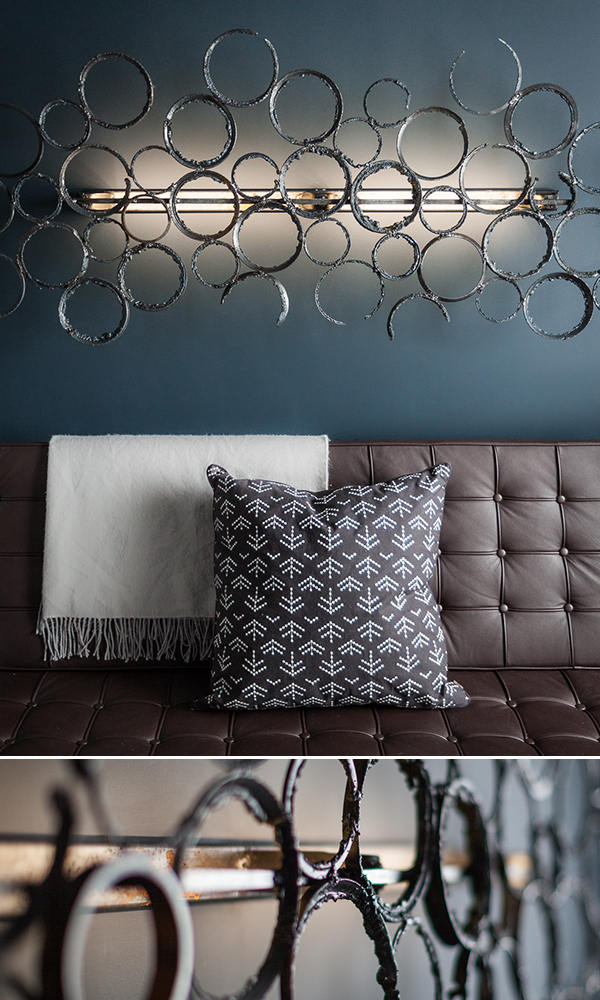
My office is a little bit different from the rest of the house, in that it’s one of two rooms that isn’t black, white or gray. We went REAL CRAZY and painted it navy (gasp). We’ve kept the modern feel with the classic Barcelona couch, but have themed everything a bit darker and more moody. At the risk of sounding sexist, we were going for “dark and manly” here.

The back wall art has been the final piece of the puzzle that we couldn’t figure out though. Like our living room back wall, we were stumped on what to put on the walls. I’ve always wanted to make a scrap metal sculpture but just never got around to A.) figuring out how to weld and B.) actually doing it. But what better motivation than CWTS! Forty-eight hours before the project was due, we hit up Youtube for some tutorials on arc welding basics and consulted a knowledgeable friend to fill in the rest of the gaps. Oh yeah, we also scored an arc welder kit on sale at Princess Auto for $119 (reg. $199)! Seeing that deal in the weekly flyer was an omen; this project was meant to be.
Tools and Materials
First and foremost, you need a welder. As mentioned, we bought a flux core wire feed arc welder, which came with a kit that included a mask, chipping hammer, wire brush and a spool of .030″ flux core wire. We also bought an extra welding helmet, one that actually straps onto your head rather than just holding it up. It was $14.99. We also picked up a pair of welding gloves for less than $5. You see why I love the Princess.
A wire brush attachment for your drill is optional or you can use a plain old manual wire brush. An angle grinder is optional, but required if you plan on cutting any of your metal or grinding down any high points. You’ll need a drill and bits to create mounting holes at the end.
Next, you need to source the metal. Try your local metal recycling depots, welding shops or welding schools. We hit the jackpot when we found a whole dumpster full of scrap metal behind the local trades college. Depending on what you find, you may have to buy a piece or two (e.g. you might have a difficult time finding a perfectly good four foot segment of uncut rectangular tubing for the wall mount).

The final thing you’ll need to source is a clear protective coat. We opted for a satin finish, to keep the project as matte as possible. Ideally we’d like to have left the metal as close to the original raw finish as possible, but brushing up against raw rusty steel will stain clothing so we had to spray it with something. While researching this topic, it seemed the most durable coating would be a clear powder coat. That’s expensive and requires a lot of messing around. People also seemed to like an aerosol product called Permalac, which we would have had to order. With 24 hours on the clock to coat this thing, good old Krylon it was.
Plan
You should probably have one. Anyone who knows us, knows that we will always plan before we start a project. Given that everything was so last minute with this though, we were really at the mercy of what we happened to find in that jagged metal death trap of a dumpster. We just sort of flew by the seat of our pants and hoped for the best with this one and I think that’s why it was so stressful. If you have time on your side, you can visit a few sources for metal, collect a bunch of items and then brainstorm with all the pieces in front of you to think of something really cool!
Technique
The process of welding essentially joins two metals by melting them and a filler material together. There are many different welding techniques; the one we will briefly address here is flux core arc welding. Arc welding refers to the use of electricity to form an electrical arc between the welding gun and your project (you connect a grounding clamp to your project to complete the electrical circuit). This arcing generates enough heat to melt the pieces you touch with your gun/electrode as well as the filler material fed out of the gun. The filler material in this case is steel wire with a flux core, the flux acting as a cleaning agent to keep contaminates and impurities out of your weld bead. Flux, ash and impurities will form a brittle coating over your weld bead called slag, which is a brownish material that you remove with a chipping hammer/wire brush after your weld is complete. I should note that welding emits UV light which can cause sunburns and damage your eyes. In fact a quick literature search shows that welders may be at higher risk for cataracts and melanoma (the more you know), so wear your proper protection!

OK enough nerdy stuff. Point your gun at the seem, pull the trigger, sparks fly and your metal is joined. The rest you can learn from Youtube.
Frame
The first actual step in construction was to build a frame that would provide both a mounting surface to the wall and a support structure for the circles. The wall mount is made from a four foot length of rectangular steel tubing. We welded three “V” shaped pieces of metal, that we found in the dumpster already bent, to the tubing which act as offsets to support two additional smaller pieces of square steel tubing. Held off the wall by the supports, this smaller tubing’s purpose is to hide LED strips and support all the circles.

The Circles
The circles we used are apparently scraps produced from bevel cutting the ends of pipes; the cutting torch used gives them a very rough and industrial look. Given there were lots of these in the dumpster of various sizes, we figured we could use them to make a semi-uniform pattern. We started by welding the circles to the square tubing in a row. The key is to vary the size and position of the circles so that it has a random look. Continue to add circles to make your sculpture bigger, making welds at all points where metal meets metal. Some of the circles were only partial, so we saved these for the outer most layers.


Finish
We wanted to keep the original raw rusty look of the scrap metal, so in order to seal in the mess, we sprayed a few coats of Krylon Rust Protector in clear satin. Note that this darkened the metal a bit, making it more of a gun metal colour.

Lighting and Mounting
We always feel that lighting is an under utilized medium. To highlight the sculpture, we used two adhesive 12V LED strips, cut to length, and stuck to the back of the small square tubing. This splashes a nice glow onto the wall behind the sculpture, effectively backlighting it.
Holes were drilled on either side of the centre support and centrally through the wall mount tubing. Two runs of primary wire were fed through these holes and soldered to each strip. The primary wire from each of the two strips were then connected in parallel to in-wall rated 2 conductor low voltage wiring via crimp on male/female quick connectors. By fishing the wire through the wall, no cables or plugs hang down from the sculpture to ruin the clean look. The in-wall wire comes out of the wall behind the couch where it connects to a triac dimmable 12V LED driver/power supply, which plugs into an outlet via an Insteon LampLinc unit so we can control it via our home automation system. We have a rule setup so that anytime the main lights in the room are turned on, the LEDs will be faded on.


Essentially a heavy hunk of steel, the sculpture needs to be mounted directly to studs. Since the stud positions are fixed, we first placed the couch where it needed to go, marked the stud locations on the wall and then figured out where the mounting holes needed to be drilled on the sculpture so that it was centered over the couch. A level, impact driver and 3.5″ wood screws got the rest of the job done.
The Finished Product
So that’s it! Not bad for a last minute, 48-hour scramble. It matches the feel of the room and we’re happy with how it turned out.
-Chris and Becki @ The Uncommon Common Law


————————————————————————————————————————————————————
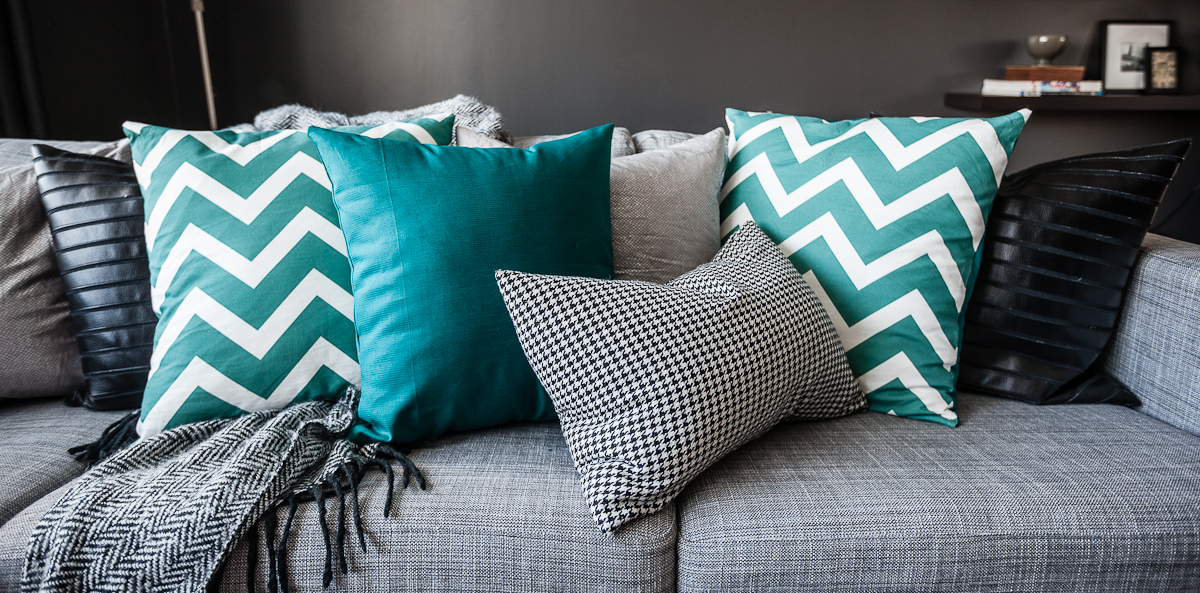
We’re excited to see what Becki and Chris come up with for the final round, each week they have been knocking it out of the park with their skills and details. Again, if you haven’t stopped by their blog, head on over to check out the changes they have been making in their new home. Did you know that Becki can sew too?! We love these DIY pillow covers she made…
Come back tomorrow to see how Lindsay created her Dough Bowl turned Coffee Table and Bath Mat turned Moroccan Wedding Blanket. Then on Saturday stop by to see Shannon’s Upcycled Barn Door tutorial. Oh, and if you haven’t checked out Sarah’s awesome upcycled coat rack yet, jump on over to see what she did and link up your upcycle project too, which may get the chance to be featured on Sunday!
Only 5 more days to enter to win a fabulous beach vacation to Punta Cana from Apple Vacations and Occidental Grand Hotel!
![]()


This is so impressive! I love that they literally picked up scrap metal, learned how to weld, and came up with something so fabulous!
this piece came out so amazing– kudos for them for looking like experts with just 48 hours!!
[…] in the flyer that week was an omen; this project was meant to be. Our full tutorial is being hosted here, so be sure to check it out if you’re interested in the […]
[…] Round 3: Upcycle This round was all about turning garbage or useless materials into something useful. We found a bunch of scrap metal in a dumpster behind the local trades collage and decided to learn how to weld in order to make an art piece for Chris’ office. He has been thinking about this for over a year so it was a perfect excuse to do it. We placed 1st out of 6 in this round. Tutorial here. […]