
We are so happy to have Jennifer from Dimples and Tangles here today sharing all the details on this stunning china cabinet transformation that she linked up last week in our final round of Creating with the Stars. Jennifer has great taste and impeccable style. We know that once you take a look at her blog, you won’t be able to stop!
———————————————————————————————————————
Well, here she is!

After almost two full weeks of work (off and on), it’s finally done, and I’m going to make you scroll through way too many pictures.
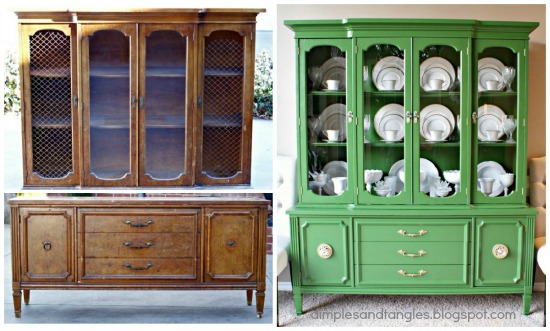
Let’s remember the very sad before…

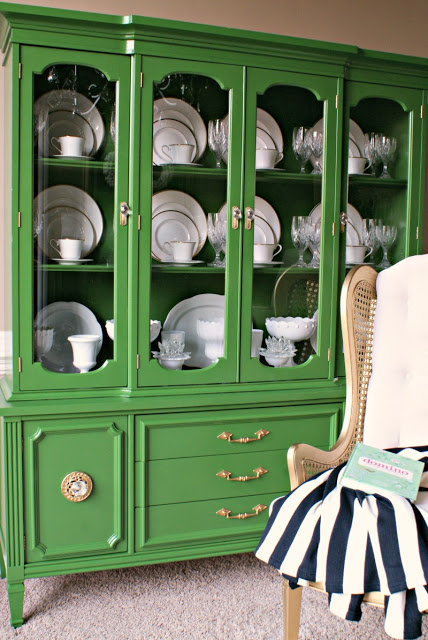
And the oh so fun after!

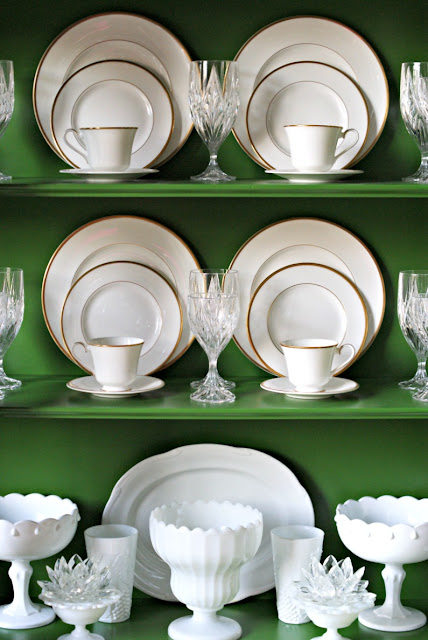
I wanted to create a glam, sophisticated look and lighten up the inside, so I used my wedding china, crystal, some other white dishes and thrifted milk glass I’ve collected to style the shelves.

I like symmetry.


Now for the details, I sanded, filled in gouges, sanded, wiped, and primed before painting three coats of color. Yes, I can confirm that dark colors are tricky and take more paint. The color I used was Behr’s Pine Scent in semi-gloss. I used a good Purdy brush for the corners and a foam roller for the rest. Also, a huge trick I’ve learned when painting with latex paint is to use a coat or two of poly on the flat surfaces that will have something sitting on top of them. Latex paint can stay tacky for up to a month, but with a layer of poly it’s ready to go after 24 hours or so…no tackiness!
.
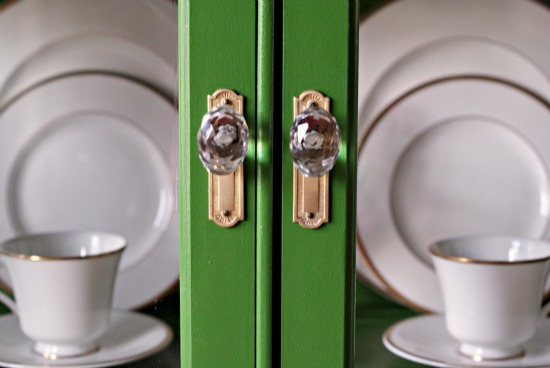
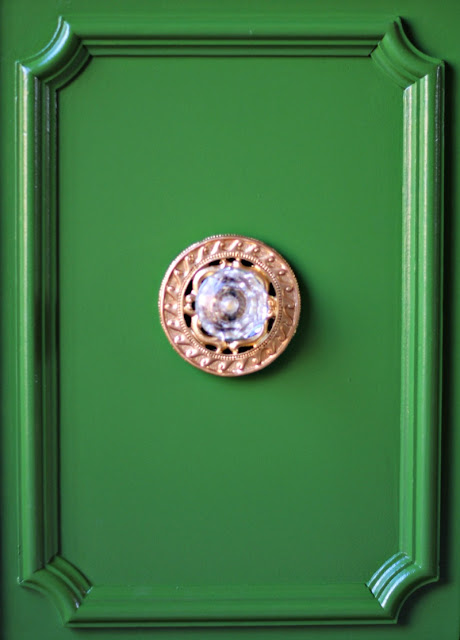
One of the knobs on the bottom doors was missing, and a few of the pulls on the top doors. I kept and cleaned up the brass backplates on the glass doors, and found these perfect glass knobs at Hobby Lobby. They are an oval shape rather than round so they fit nicely together where the doors meet.

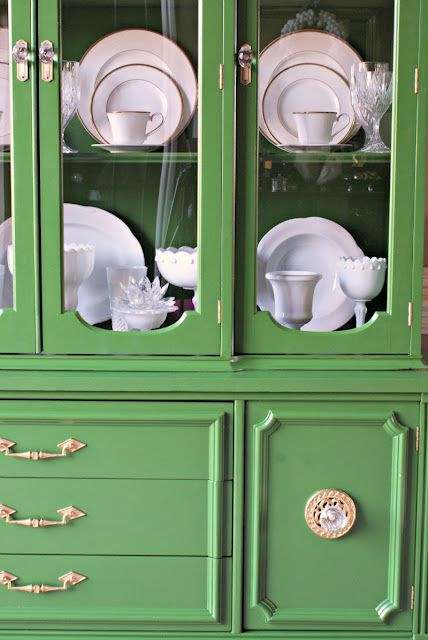
I also gave you a sneak peak at the chunky hardware on the bottom. The oversize glass knobs were out of my stash. Did you guess what the backplate was? I knew I wanted something big and was coming up empty looking online, and then I remembered I had these…
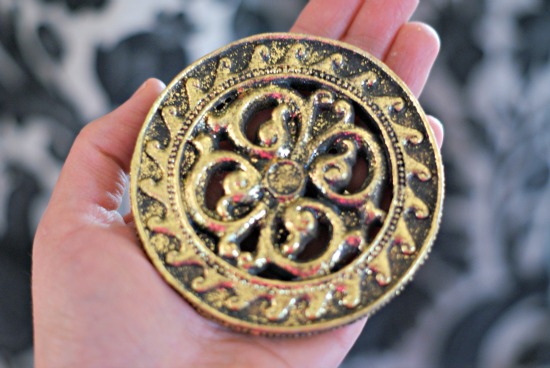
They started their lives as….Christmas ornaments! I bought them and used them as hangers for an old window treatment (seen here). My handy husband drilled a hole in the middle and they were perfect! Along with the original drawer handles, they got a coat of Rustoleum’s Metallic Brass spray paint, and then a coat of Rub-n-Buff in Gold Leaf.

I had planned to add height by adding an extending shelf in between the two pieces to house some cubbies for storage baskets, but I ended up just needing to get this piece d.o.n.e! I probably will still add that piece in the future.


With this project completed, I’m down to artwork and a new table for this room. I have the table but it needs some work so I am waiting for a streak of warm-enough days outside to work on it. That probably won’t be happening until later in the spring. Artwork, though, coming up!
Isn’t that gorgeous? We’re totally digging the kelly green and gold together and how smart was it to use Christmas ornaments as part of the knobs??!! If you think that piece is awesome, you just have to see the Accent panel wall in Jennifer’s office…it is to die for!
Thanks so much for sharing with us today, Jennifer! Check back tomorrow for an AWESOME Mother’s Day giveaway that you don’t want to miss!
P.S, We’re the ones in a contest now and if we win, we get to give $5000 to the charity of our choice! We need your help, though- you can learn more about our project and the charity we chose here, or go vote for us every day for the next two weeks right here. Thank you!


That piece certainly is gorgeous! What a great makeover.
Thanks so much for having me Jess & Monica! I’m totally mesmerized with your wood shim wall art…here’s hoping you get lots of votes!
I love Jennifer’s blog and her china cabinet is so original 🙂 Great feature! xo Kristin
So fun to see my stylin’ friend’s fabulous cabinet featured! You can always count on her for a something bright and creative!
Thanks for sharing! Looks incredible!
I absolutely love it! I have my great grandmother’s dining room suite and china cabinet. I love it but the chairs have seen their better days and all the wood has this stickiness to it from being in kitchens in the south for som many years and all the frying we do. I have been debating on refinishing it and repairing the chairs and other broken pieces. Thanks for the inspiration to work on my project!!
I don’t normally like green furniture, but WOW, this is beautiful!!! Great Job, Jennifer!!!
Debbie 🙂
Before I run off to vote for you. I just have to say that the Kelly Green is really amazing! Great color choice. Thanks for sharing some painting secrets.
This transformation is absolutely stunning. I can’t stop smiling. Beautiful.