
Just in case you missed it on Friday… we announced the 12 contestants for Creating with the Stars. Check out this post to see their insanely awesome projects!
.jpg)
We’ll be tweeting lots of updates, so click below just to make sure you’re following us on Twitter.
—————————————————————————————————-
I’m sure you know by now, but Jess and I are pretty obsessed with Instagram (you can follow us at @eastcoastcreative and @Jess_ec2blog) and lately we’ve started printing our pictures and using them within our projects.
We printed some Instagram pics on cool, wood tiles from InstaThis in this post.
Jess printed some Instagram pics from FoxGram and shared about them in this post.

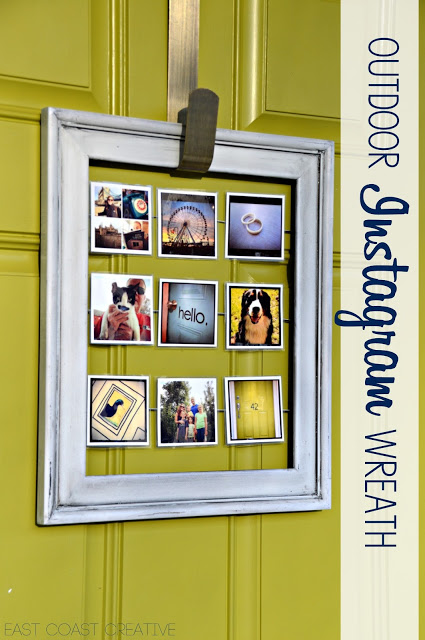
And since I’m a self-proclaimed wreath hater, I love to create what I’ve coined “The Anti-Wreath”…
Today, I bring you an Outdoor Instagram Anti-Wreath!
_

Here’s what you’ll need for this super simple DIY…

Many places will now print Instagram pictures, but I used Foxgram.com they offer three FREE pictures so definitely try them out! After getting my “grams” in the mail, I went to Staples and had them laminated. Since they’re going to be outside, I wanted them to be weatherproofed. It cost me $2.28 total!

I chose some of my kids’ favorite Instagram pictures and then a few of my favs too!
It would be super easy to swap this “wreath” out seasonally… these are a few of my favorite winter pictures if I wanted a winter look.

I took an old 11×14 frame from my basement, but it was kind of beat up, so I decided to glaze it for a distressed look.

My absolute favorite glaze is Martha’s Metallic glaze in the coffee grounds finish.

There’s no secret to glazing, I just brushed it all over and then used a paper towel to wipe it off.

The glaze helped hide the imperfections and toned down the white.

White it was drying, I trimmed around each picture. I used my paper cutter (one of my favorite Christmas gifts this year), but scissors would work just fine too!

I played around with the layout a bit before securing the pictures.

I added some leftover furniture pads to the back of the frame so that it wouldn’t scratch my painted door, and then I measured and marked where I wanted to attach wire.

I used leftover picture wire and my staple gun

Wire can be a pain to get 100% straight, but I knew I would be covering it up with pictures.
I originally planned to use mini clips, but I liked the clean look better, so I just hot glued them onto the wire.

Gah! I love it!

Seriously, who wouldn’t love a mustache cat on their door?
Did you notice that picture? It’s the craziest cat I’ve ever seen (it lives at the farm where my daughter rides) and our whole family is obsessed with it!

I’m pretty sure this “wreath” says, “Come on in, we’re fun, we love life and weird cats!”


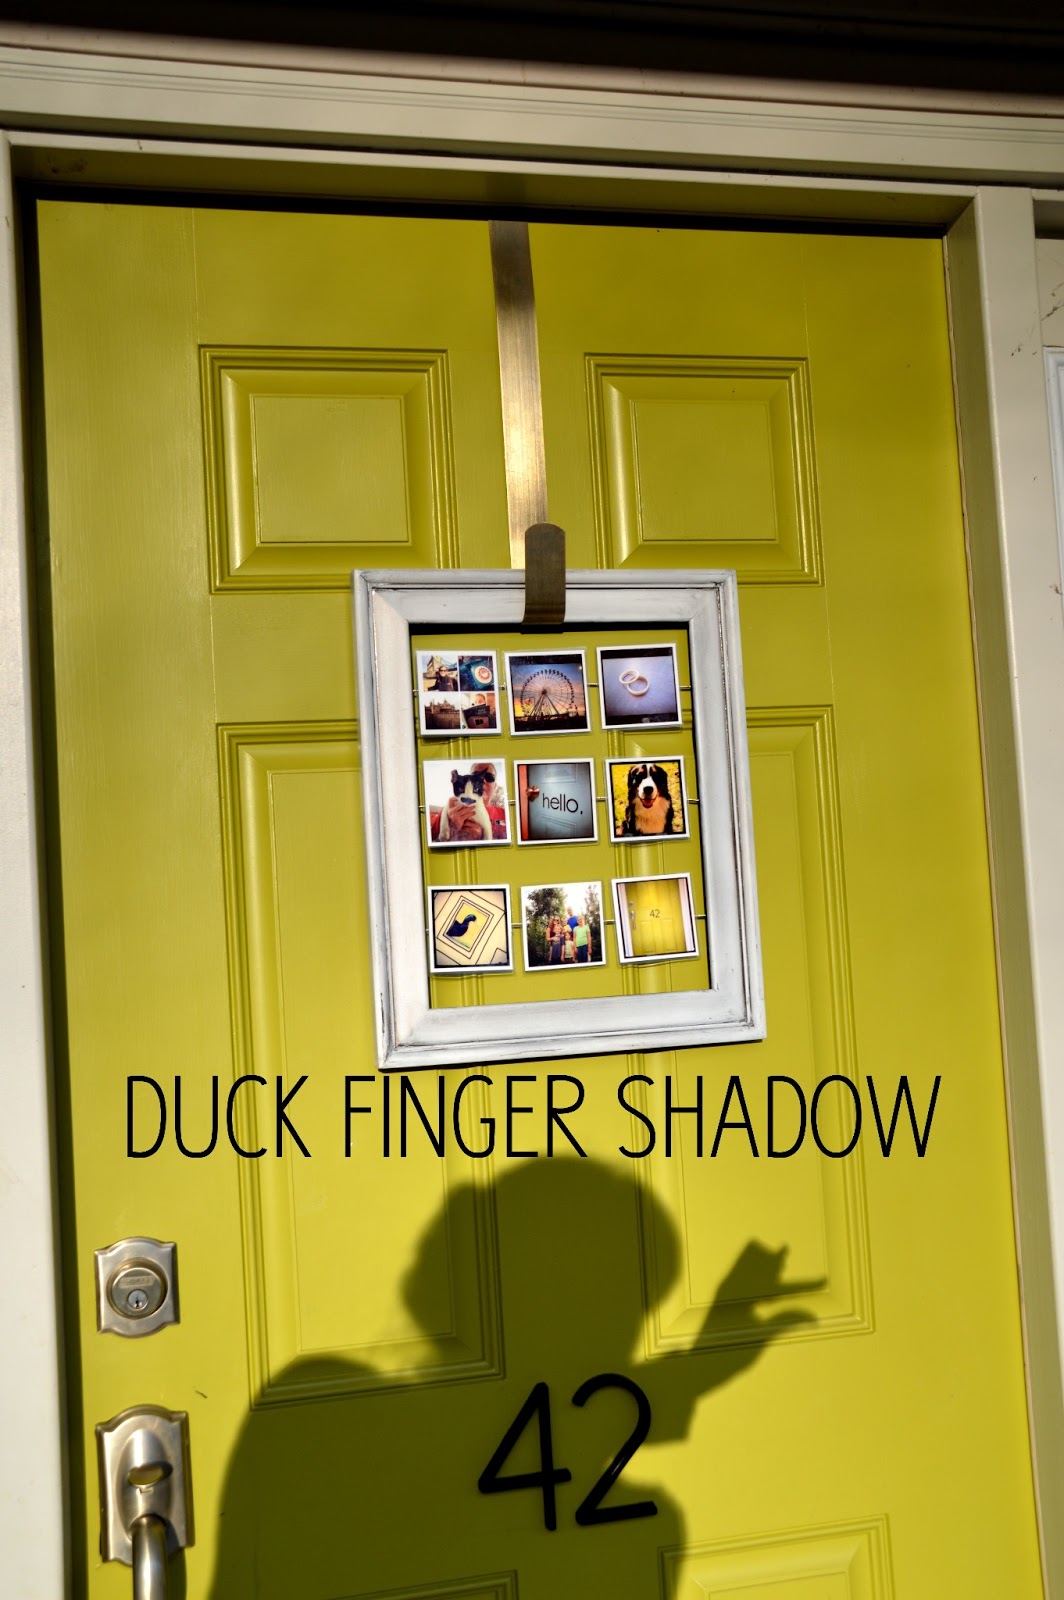
It’s tricky to take pictures when the sun is setting. So, if you can’t beat the sun, make finger shadows!
So what do you think of my Instagram “Anti-Wreath?” Are you as obsessed with Instagram as we are? I hope this inspires you to get those fun pictures off your phone and into your home!


What a cute and original wreath idea! My favorite photo was the finger shadow one…I’m usually trying every possible angle to avoid getting my shadow in the pic – – way to embrace it!
Such a creative alternative.
Such a great anti-wreath! Love the idea!!
Leslie
House on the Way
Now that you shared it, we will see it pop up all over. It is just that awesome!
Jenny @ http://jennylynndesignz.blogspot.com/
[…] showed off my Instagram anti-wreath project while Jess gave a great tutorial of how to turn a simple IKEA side table into an […]
[…] also made a wreath with IG photos, printed them on wood to hang on the walls, even turned them into a […]