If you missed my daughter Kira’s Colorful Bedroom Makeover, check it out
here. It’s interesting when you’re doing a room for a little person… there’s this part of me that wants to go all crazy blogger-designer-nutso on the space, and then there’s the realistic mom side that reminds me that her room will be a disaster of toys in about 3 minutes flat and that I don’t need to go over the top to make her happy. Honestly, I’d kind of be going over the top just for my own self-interest. So, with that being said, the mommy voice won out and I went with a fun, yet practical room makeover. I’ll guess I’ll save up the glitz and glam for the master bedroom (if I ever do tackle it!).
Today I’m going to share with you the focal point of the room…
The Mosaic Accent Wall!
I’m a total sucker for an accent wall. Honestly, since I was a junior in high school I’ve been whipping them up! My very first was a blue feather dusted wall in my parents’ house. Then, I did a pretty cool square grid wall (again at the ‘rents house) when I was a senior. Kenzie’s first bedroom had vertical stripes and stars, then I changed to a fun magenta gingham. We had an argyle bedroom too! I wish I had pictures of all of those, but it was in the film day and age- boo! Enough of the trip down memory lane, let’s get going with the tutorial!
How to Create a Mosaic Accent Wall
Since this is the room of my 5 year old, I asked her what she wanted, and she told me LOTS of colors. “Mommy, I want purple, blue, green, orange…” and the list went on and on. I thought about it and finally decided, I could give Kira exactly what she asked for- lots of color!
I bought a sample size of each color and a gallon of white paint to use as my base and for all the other walls. One word of caution, Valspar sample paints do not have the normal bonding agents that regular paint has. It will require more coats for solid coverage. Just keep that in mind when you’re planning a project. For me, buying 8 quarts wasn’t an option (this was a makeover on a budget) and I’d rather have to do a few extra coats of paint. I had JUST enough- it was close, but we stretched the samples far enough.
This unfortunate event occurred as soon as we got home with the paint. Grrr… I was sort of hoping Hurricane Sandy would wash some of the stain away a few weeks ago- No.Such.Luck!
Blogger Fail!
Here’s my supply list:
Valspar® Sample Paints
Base coat paint
Purdy® Paint Brush
Chalk-line (a DIYer Must Have!)
Tape Measure
Pencil
Frog Tape®
Mini Rollers
Paint Trays
I had to get rid of that BRIGHT aqua color and amazingly, the Valspar white paint & primer in one did the trick! I was left with a blank “canvas” and two weirdos (the hubs and my oldest)!
There are all kinds of approaches to getting perfectly straight painted lines, but I really think we use the BEST method. I’ll tell ya about it, and then you can be the judge…
1- Measure out your stripes and put tick marks on both sides of the wall.
2- Use a Chalk-line to get Perfect Guide Lines- Simply, put the string directly on the tick marks on both sides of the wall, pull the string taut, and snap that baby! It is so much MORE accurate and FASTER than using a level and a pencil. Let me remind you of something… you’ve seen how awkward I am at dancing… would you trust me to use a level on wall stripes? I think not.
These bad boys are crisp, straight and ready for some Frog Tape!
3- Use Frog Tape to Divide your Stripes. When I’m working on an accent wall, I know it’s going to be the main focus of the room, so I have to have crisp, perfect lines (yes, perfectionist tendencies admitted).
My hubs uses a few pieces per stripe, but I’m a one stripe wonder. I definitely prefer to do the entire stripe with one piece to make sure there aren’t any uneven seams. Also, make sure you tape off the two side walls.
I love me some stripes!
After all my horizontal stripes were finished, I randomly placed my vertical dividers. I toyed with using a mini level to get them perfect, but then decided I could do it well enough by eye. Please ignore the epitome of frumpy DIY clothes, no shower, and tape on the leg.
Whenever I’m working on a project like this I rip off a bunch of pieces the length I need and keep them on the wall so I can get to them quickly, if I’m not using that method, I keep the roll of tape on my arm. Works like a charm.
4- Paint the Edge of your tape with your Base Color. It’s one extra step, but it’s the MAGIC INGREDIENT to perfect, crisp lines. Frog Tape alone is excellent, but on an accent wall like this, I had to be sure everything would be perfect. Just take your base coat color (whatever color is under the stripes) and with an semi-dry brush (not dry, but not sopping wet either) paint over every edge. I don’t recommend using a roller for this step, I always use a paint brush.
It makes the wall look a little scary, but it will all work out in the end! Allow it to dry- I gave it about 40 minutes before putting color over it.
I had a tray and roller for each color. I wanted to work in a random pattern and that meant making decisions as I went along- no time for washing rollers and brushes.
Finally, it was time to put some color on the walls!
If you want a random look (like mine) I’d recommend working in one section at a time, mixing your colors as you go.
Because of the sample paints, it took 3 coats per square. It was a tad scary at first, but by the second coat, I was confident the coverage would be good.
Jiminy Cricket- Even before I removed the tape I knew I was in love!
Now, for the Moment of Truth-Removing the tape…
Once again Frog Tape & the Mangin Method = Perfection!
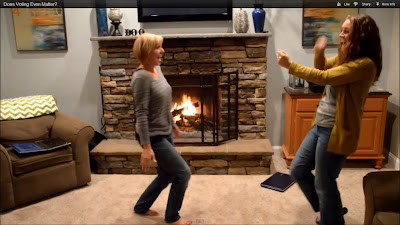
Seriously, I do a cheesy dance (you can picture it) every time I remove tape from a project!
I do recommend removing the tape as soon as you’re done-I don’t wait for the paint to dry, and I remove it VERY slowly and evenly.
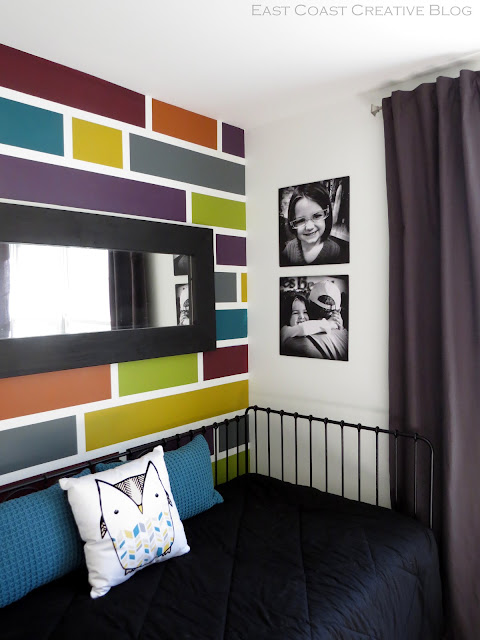
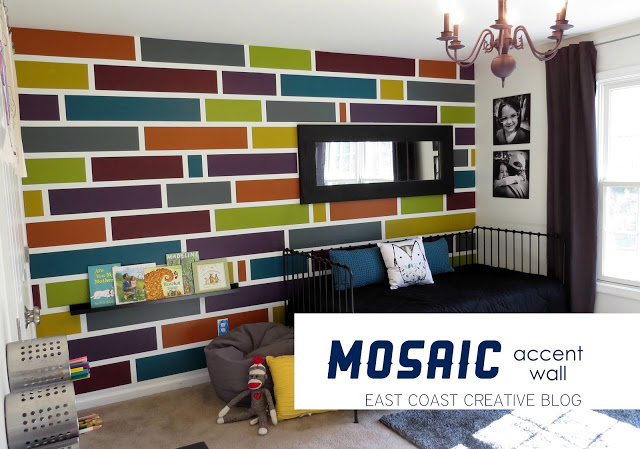
Here’s the finished product!
It was so simple and took me and Eric about 4 hours from start to finish.
Here’s a before and after…

It’s a lot of color (as requested by Kira), but I like the extreme contrast that the white walls bring. I also could totally picture doing this with muted tones or even all in one color with an ombre effect!

Almost every morning, I find KJ hunkered down reading books in her PJs… She loves her new room!
What do you think of the accent wall?
Have you ever tried something bold with paint?
Did you know East Coast Creative’s Most Popular Blog Project of all time is now for sale?!?
Get Ready to Break Up with Your Bedtime Routine!
Check out our online store!


Monica,
Great look! I saw it on FaceBook and had to read how you did it. Using your great idea, I have a new designing tool my dad invented called the “U-Stripe It & Design Tool.” This tool, your readers wouldn’t have to use chalk line, tape measure nor a pencil. Only the tool, Delicate tape and your ideas and they could have this done in a half day. Again, I love the design, great job. I enjoyed reading it.
Love the room! Thank you for the tip to prevent bleeding under the tape- SO wish I would have known that a few years ago when I did navy blue and dark red pin stripes on my son’s light tan walls lol- I was playing touch up for YEARS.
So fresh and so clean! Those paint lines came out so perfect – I think your paint/tape trick is the way to go!! Looks so good I wish it were my room.
Hi there!
I’m really new to DIY and design in general. Can you tell me how you decide which wall to accent and the process you use to decide on accenting it.
Thanks
Wow. Let me say it again. Wow. I’m in love with that wall…trying to figure out what wall to try it on in my house.
Great tip for clean lines! I love this effect and how easy you made it look! I am a big fan of making rooms for the people in them 🙂
It took you and Eric 4 hours from start to finish. It would take Kirk and I 3 years.
Just wanted to stop in and say hi, I love the mosaic wall! Awesome! I traveled around your blog a bit and love, love, the pallet wall too! We have a lot in commmon. We’re both on the East Coast, both DIY bloggers, and well I knew it was blog friendship right away when I saw that we both have the same wooden propeller in our living rooms, lol.
Helen
http://www.abritofhappiness.blogspot.com
I LOVE IT !! My 9 year old is insisting on a wall just like it, of her own.
I told her she should have it when she’s about 15. LoL .. MAYBE !!
Loving your stuff, as always
another housewife, just not buck county 😛
Danielle – Craft Play Love.com
This looks AWESOME! I bet your girl loves it!
It’s the same technique we use to paint backsplashes… it’s a lot easier than it looks, huh?!
http://www.sawdustandembryos.com/search/label/Backsplash
Beth
http://www.sawdustandembryos.com
This is really an accent wall! You did an awesome job!!
Judy
So excited to see your stuff.AMAZING! Coming over from Todays Creative Blogs!
Just want to say your blog is outstanding! Keep sharing more thoughts like this in future! Wall Panels
This comment has been removed by the author.
Hats off to you for this creative idea. lights4living picture lights
Pretty nice article. I don’t have words to thank you for this informative post. I like your blog very much. Sheila
It is nice to find a site about my interest. My first visit to your site is been a big help. Thank you for the efforts you been putting on making your site such an interesting and informative place to browse through
Wall Coverings
This is actually a fantastic blogs! More of these details are superb -it is nice to see one that current.
It was a nice blog and the stripes made on the wall by the paints is a wonderful idea, I will be using this for giving my living room an awesome look.
painters ashburn va
Hmm is anyone else having problems with the pictures on this blog loading?
I’m trying to figure out if its a problem on my end or if it’s the blog.
Any responses would be greatly appreciated.
Hey Eva! Sorry you were having trouble. No one else seems to be. Maybe try another browser? Thanks for reading!
I recently started doing this type of accent wall and wish I had seen this before I started. I had some difficulty with the paint bleeding under the tape and the paint peeling off with the tape. I’m going to try and fix it using your instructions. Looks great with the white woodwork!
How long did you wait for the white to dry until you taped the lines?
I just finished painting a wall in my baby’s playroom this way. Your suggestion of painting the edges of the tape white was AMAZING! This is now my favorite wall! Thank you so much for the step by step. I wish I could post a picture. 🙂
Awesome Kelly! Isn’t that extra step SO worth it?!? 🙂
Looks beautiful! Love it. I want to do the same for my fireplace surround that has tile. Came across your post when looking for how to do a faux mosaic. Lots of great tips.
I’m interested in seeing the after but the website is showing all advertisements and it doesn’t show the after of your project. I think this is a great idea and would like to see the outcome of your hard work.