
We share a lot of projects here on our blog. We’ve showed you all kinds of DIYs we’ve tried and loved! Today is NOT going to be one of those days… I’m going to keep things real, and show you a complete and utter Epic Fail. Ready?? Just remember, don’t try this at home.
Ombre Door Disaster
So ombre everything entered the scene in 2011 and it looks like it’s sticking around for most of 2012.
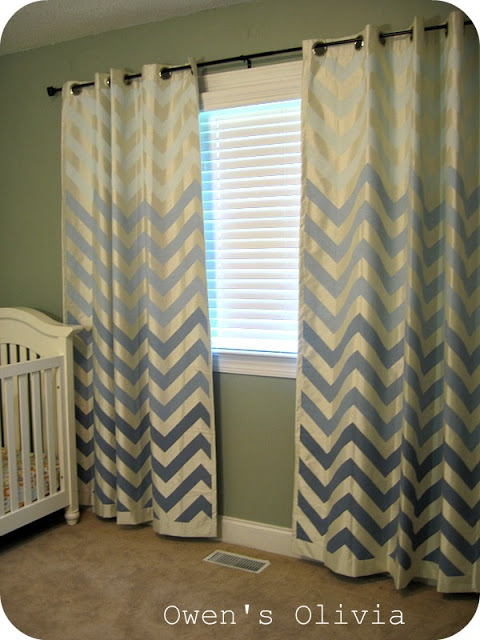
I love these ombre striped curtains.
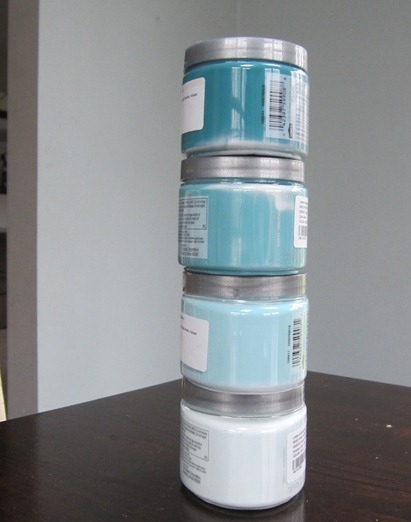
So, when I was thinking about what color to pain the interior of my foyer door I started thinking maybe I’d do something a tad “out there” and go with ombre! I found these four colors and thought they would be awesome to create the unique look I was going for!

I bought a sample of each color at Lowes. These colors make me so ready for summer!

See my blah foyer door? (The grainy pics make it look even bleaker than it really is.)

I also have plans to add some graphic art above the door, that’s a DIY for another time!

In my mind, this project seemed really simple, so I grabbed my trusty helper and got measuring. I made each section increase in size.

I was just using the tape to give me a line to mark a pencil guideline and then I removed it.

Here’s where it all started going downhill….
I painted the lightest color first and then went to the next darkest tone.

These two colors blended fairly well, so it was onto the next color. Then came my dilemma… how to blend the remaining colors. I could have left them with a clean line, but that would have been more like color-blocking than ombre.

I tried using a wet brush, a dry brush, sponges… I tried it all. Epic Fail.

Look at that hideously awful, splotchy door! HA! It’s really, really terrible isn’t it? The hubs said we could add a wooden seagull cutout and it would look like it came right out of a cheesy seafood joint.

Here are my lessons learned (So that you don’t have to make my mistakes):
1- Don’t try decorative painting on a door with indents and grooves. It’s nearly impossible to make things perfect.
2- When going for an ombre effect, get ONE color and then achieve your gradations by adding white paint. That way you won’t have 4 very different colors that you’re trying to blend. (This was my biggest mistake, and I should have known better!)
3- Don’t be afraid to try. Although this project might have driven me a wee bit crazy, it took all of an hour or so and hey, now I can at least say I tried an ombre door once!

So there you have it… we might have been given the title, “Nate’s Favorite DIYers,” but we still have a major flop once in a while. I plan to paint my door solid yellow in the next few days, but until then we’ll keep pretending we live at Larry’s Crab Shack!
Have you ever had a major DIY fail? Do tell! It will make me feel better about the great ombre disaster!


Eric’s seafood restaurant comment made me laugh! This is what happens when Kirk and I try to paint with just one color, so don’t feel bad…you are still way ahead of the curve!
i do not think i would like it even if you used one color and added white not on a door but mybe on a wall will look better.ang
I give you props for trying {and sharing!} such a hard project! I would have done the same thing with the 4 different colors, but the idea of one color and adding white makes sense now. Can’t wait to see how it looks yellow!
I wonder if you tried mixing the paint with a clear glaze medium, then maybe you could blend it better?? I love the idea!!
It’s not so bad from a distance…:) The yellow will be nice. Good luck!
Well, pat yourself on the back for giving it a shot. I consider myself a Professional Spray Painter, but recently threw away a gloppy, drippy frame. So it goes! The yellow will cheer you right up!
Great color choices regardless!
Thanks for keeping it real. For as many projects as you tackle, it’s OK if once and a while things don’t work out. Bravo to you for trying!
love that you shared this…thanks!! We all do silly things 🙂 It was a great idea!! 🙂
After reading this post yesterday, I stumbled across this post today over at Design Sponge: http://www.designsponge.com/2012/04/diy-project-shades-of-blue-ombre-chair.html#more-133390
Maybe this technique will work for your door?