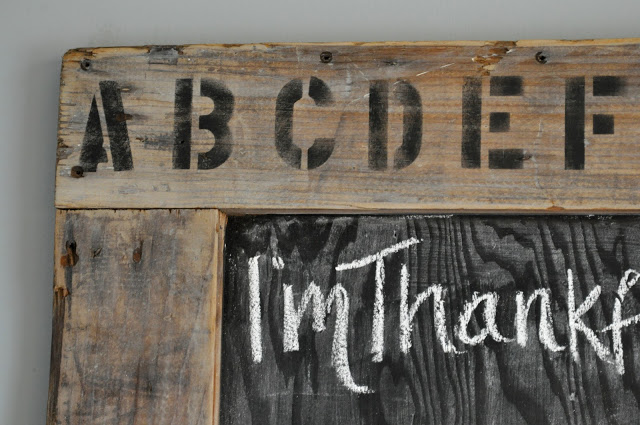
You probably remember (or at least we hope you do) our pallet wall room for my son Callen… If you missed that post, you can check it out HERE, but today I wanted to focus on the Wooden memo board we made.
We had the room about 95% done and we realized that there wasn’t anything over the bed… The original plan for the room was to put the bed on the pallet wall and then use pallet wood to create a platform-style base with all kinds of cool built-ins. It sounded amazing in theory, and looked great when we arranged it that way… BUT I had terrible thoughts of Cal falling out of the window (and it’s way up high- Yikes!).
So, safety over design! We switched the layout and now needed something on the left wall… Hmm…
Jess and I had this piece of barnwood sitting in my garage for a while, just waiting for some inspiration… I don’t know that either of us really had visions of it being in a toddler’s bedroom, but for CWTS, it was totally worth it.
The first step was to give it the same sort of whitewash we used on the wall, so that the wood tones matched. As you can see, I made about a 50% attempt to cover up my granite countertop… (the hubs wasn’t around to see! hehe)
See how much a simple whitewash can change the look of the wood?
Since this was an afterthought project, I used all supplies I already had on hand. This one quart has done so many projects. This one, this one, and this one! I decided one half would be a chalk board for the little man.
I really lightly sanded down the inside wood and then just slapped it on. It wasn’t perfectly smooth, but chalkboard paint is pretty thick and covers a multitude of sins!
Then I had to come up with something for the other side… I had a leftover roll of cork in the basement, and thankfully it was JUST long enough! Phew!
I did this the lazy blogger way… I pressed the cork in, made a crease at the sides and then roughly cut it. I DON’T recommend doing it that way… it was really wobbly and way far from perfect. I used my staple gun to attach the cork to the wood.
See, you end up with yucky, uneven sides. Now I had to cover the edges up.
I had this leftover Halloween ribbon, but clearly orange polka-dot wasn’t going to match. Have no fear, I’m willing to spraypaint anything and everything! I grabbed some metalic silver paint and went to town (sorry, no pic of that process… I really thought I took one??)
Originally, I planned on being finished once the ribbon was added, but just before we brought it into the room, we walked past the Anthro knock off dresser and thought adding some stenciling to this piece would be the perfect finishing touch!
I got these simple stencils at Lowes for under $4! Sweet!!
Of course I didn’t plan out how far in the alphabet I’d get, so we just started and ended where it ended. My hubs thought that was weird, but Jess and I had no problem with it.
Isn’t it super cool? Seriously, I hope this kid understands how awesome his room is. A 2 year old has my favorite pallet wall, our Anthro dresser, AND this wooden memo board! Ah, to be a toddler again…(actually, there is zero part of me that wants to be two, but it just kind of finished the paragraph)
So there you have it! I think it was the perfect accent for over the bed, and now I don’t have nightmares of little children falling from windows! Creepy!
I wanted to mention, that if you didn’t happen to have this exact piece of barnwood floating around (which I’m kind of thinking most of you don’t…) you could use some plywood and pallets to trim around the edges and make the divider. It would be easy peasy and then totally match the wall.
So, how many of you have awesome kids’ bedrooms, and blah master bedrooms?
(I know my master is still builder white with no furniture!)
P.S. Jess and I both had family pictures taken last night by the Amazing Stacy Salvatori and we’re so stinkin’ excited to see all the pics! Here’s a sneak peek that we got last night!
My oldest (and yes, she’s only 9!)
And Jess’ insanely adorable little family. Love those kiddos!


I’m totally guilty of having spent more time doing things for my kids’ rooms than my own…in fact, it’s getting to the point of complete disgust every time I walk into the master bedroom…and that just can’t be healthy. 🙂 Thanks for the great ideas!
@Kathy@mishmashmom Right now my bedroom is filled with tons of supplies from all the DIYs I did for our Nate Show taping this weekend… it’s a total mess! 🙂
I have a small (maybe 5 foot) wooden door that I picked up at a flea market. I haven’t figured out what I’m going to do with it yet. Tossing around some ideas: a headboard for a single bed, cutting it for an over the bed frame (like your post with initials), and now a message board. So many ideas, so little time. Thanks so much for your blog, I really enjoy it. PS Adorable photos of the kids
[…] Wooden Memo Board East Coast Creative Blog source […]