

My house has never been without some kind of stripes… EVER. I guess I just love ’em… Back at our old house I actually used all the old paint samples and leftover colors to do a crazy, random stripe wall in my basement office. This picture was before the ceiling went in, but in the end, it was pretty crazy and cool.

We’ve also done stripes in the same color, with different finishes. This was flat enamel with eggshell.

So, since we’re in a new house… we needed some stripes… I was feeling lost without them!
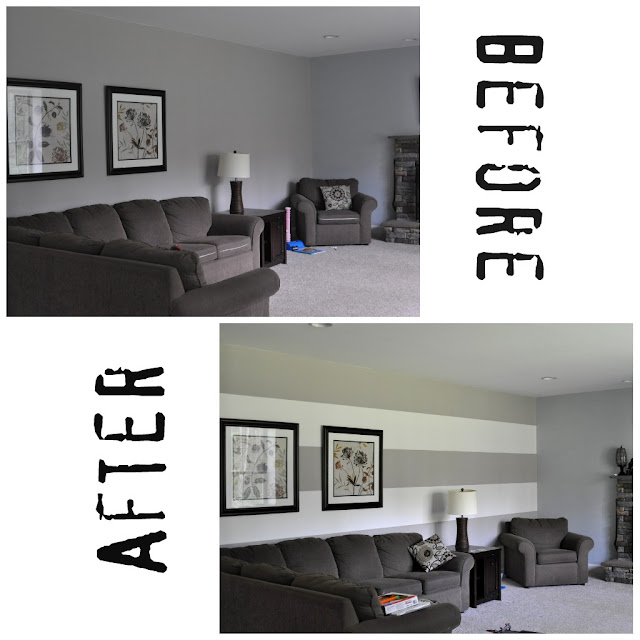
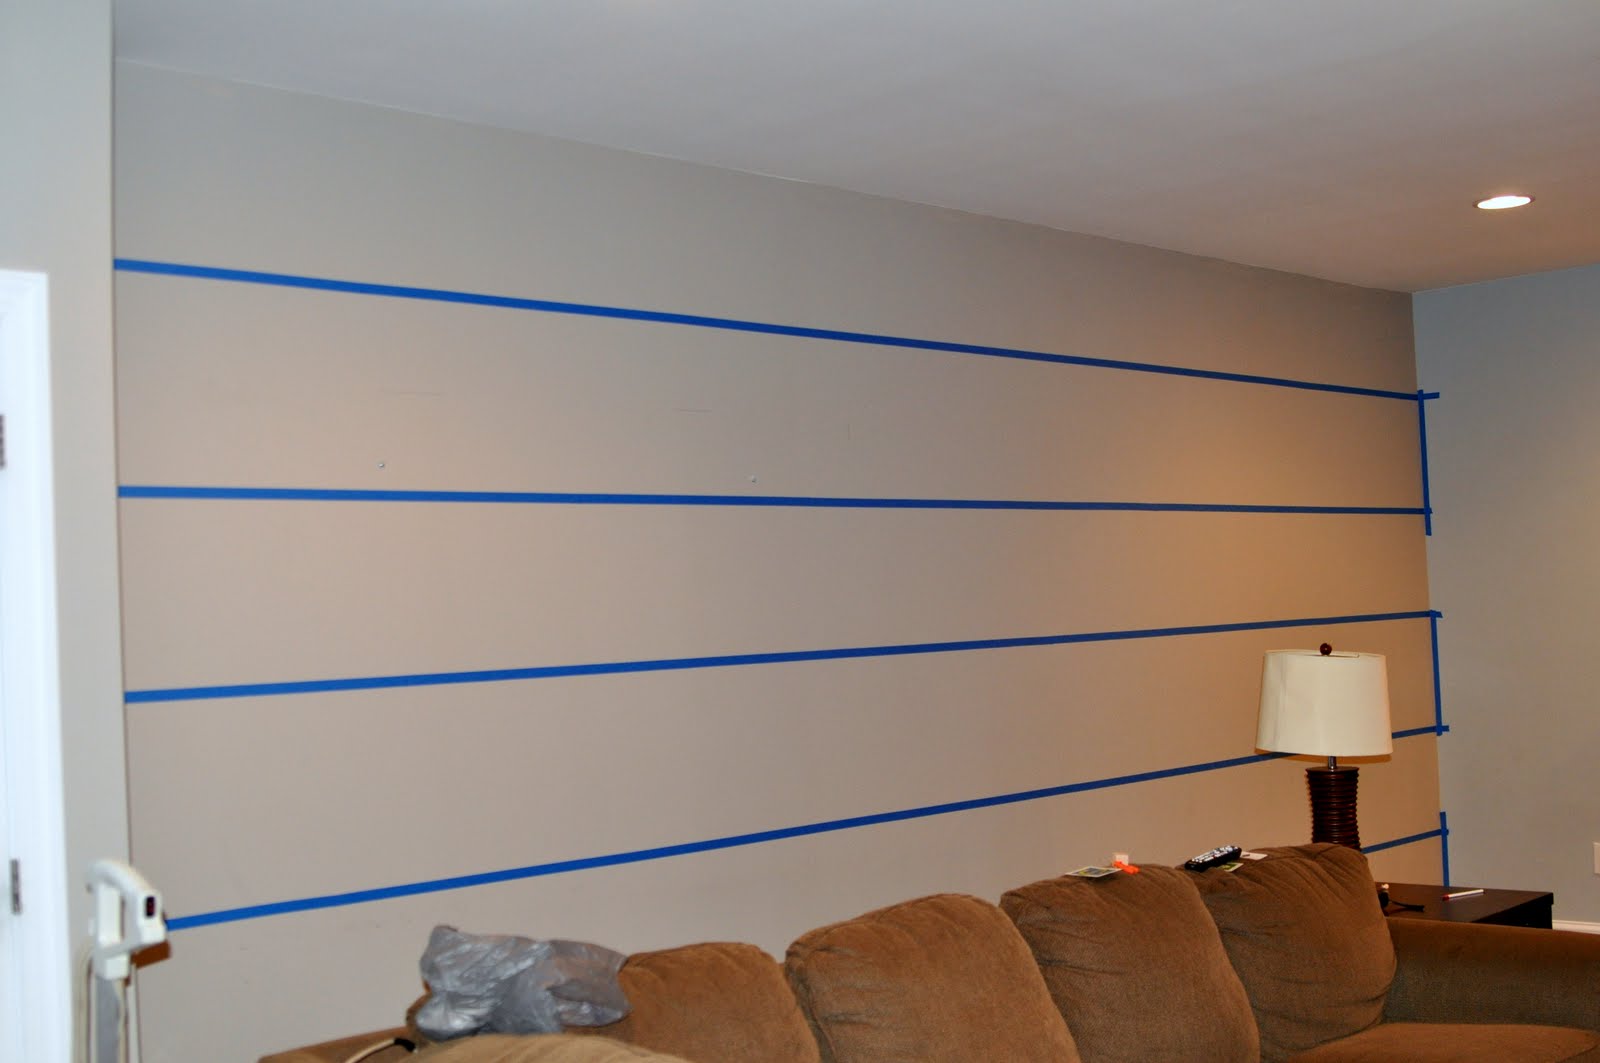
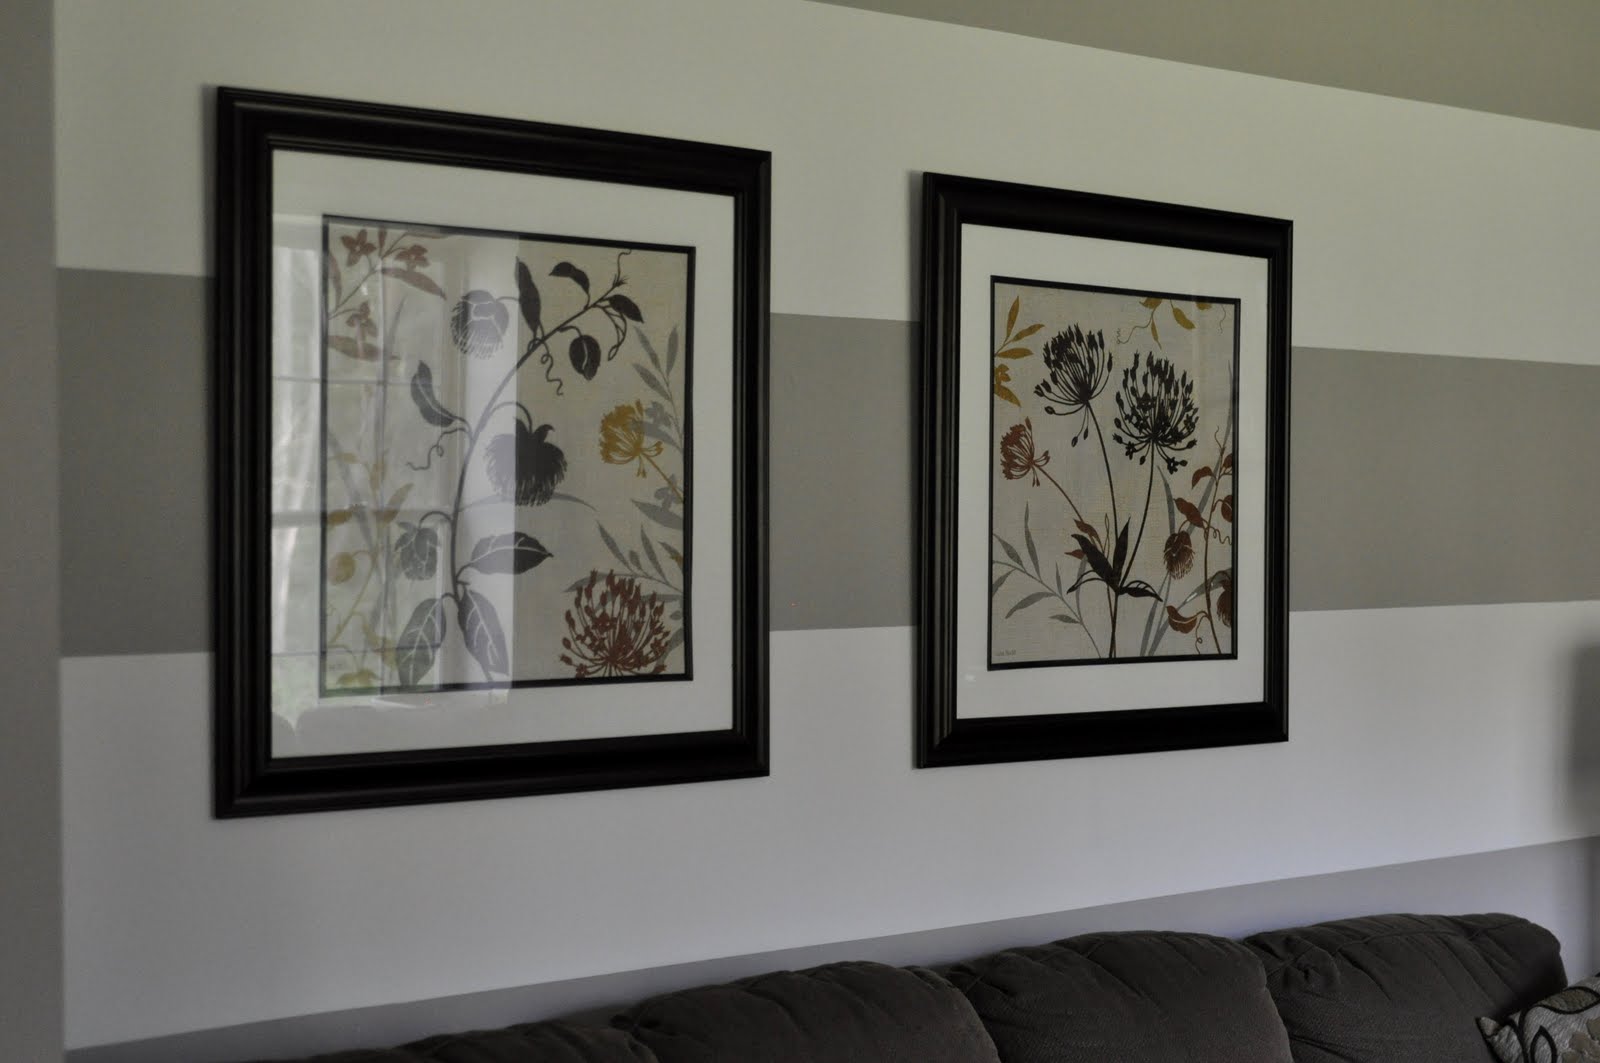
Family Room Stripes
 .
.Since we’ve done stripes many, many times we’ve learned a few things along the way. Nothing is more frustrating than crooked stripes or bleeding lines. I’ve told you over and over that I can fall into the perfectionist category… bleeding stripes are NOT COOL in the Mangin house.
How to Paint 99 percent Perfect Stripes
(It’s 99% because I thought Perfect sounded a little cocky!)
1. This step is optional, but I highly recommend it… find a handsome helper. It definitely is a 2 person job.
2. Determine the width of your stripes. For the family room I wanted BIG wide ones, so I did 18 inches
3. On both the left and right side of the wall, use a pencil to mark where your stripes will end. Just a little line will do.
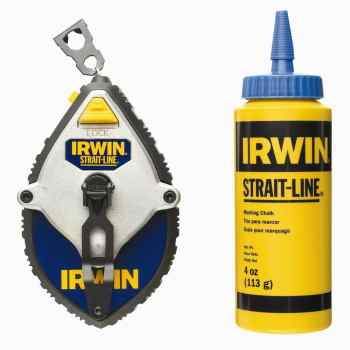
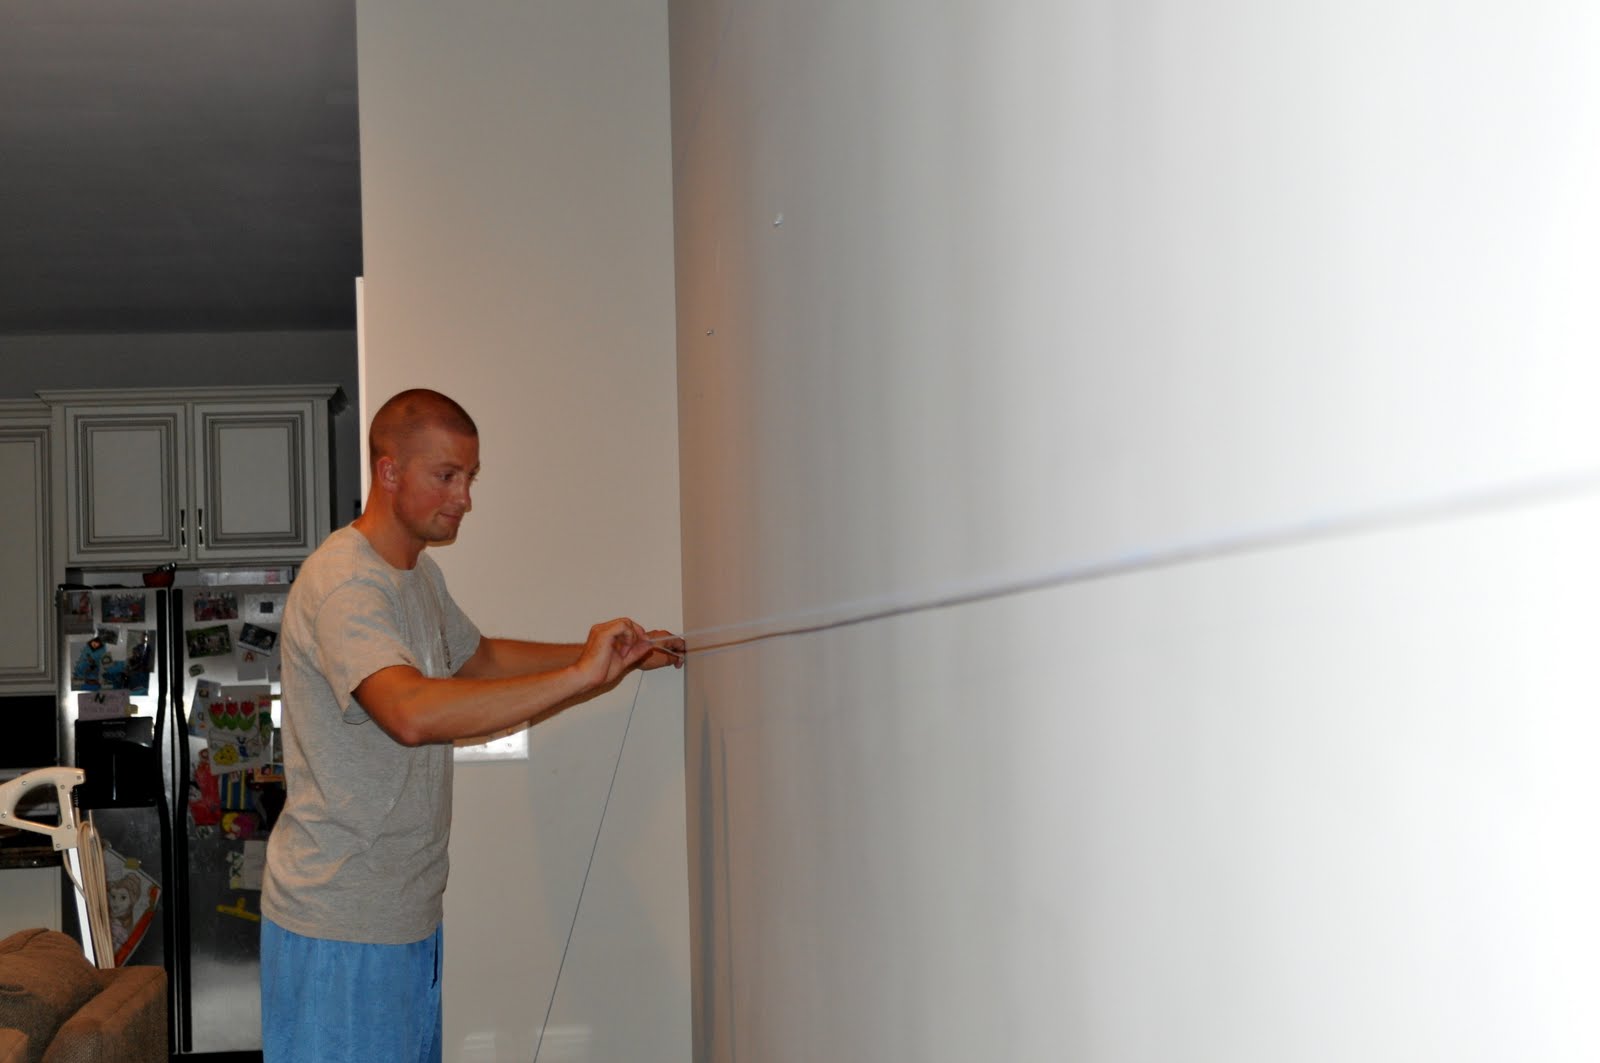
4. Get a chalkline. It’s the best thing ever for stripes. Just shake, pull tight, snap, and voila! Perfect guide to tape by.
Eric just loves when I’m supposed to be holding a chalkline nice and tightly and I have a camera in my hand at the same time!
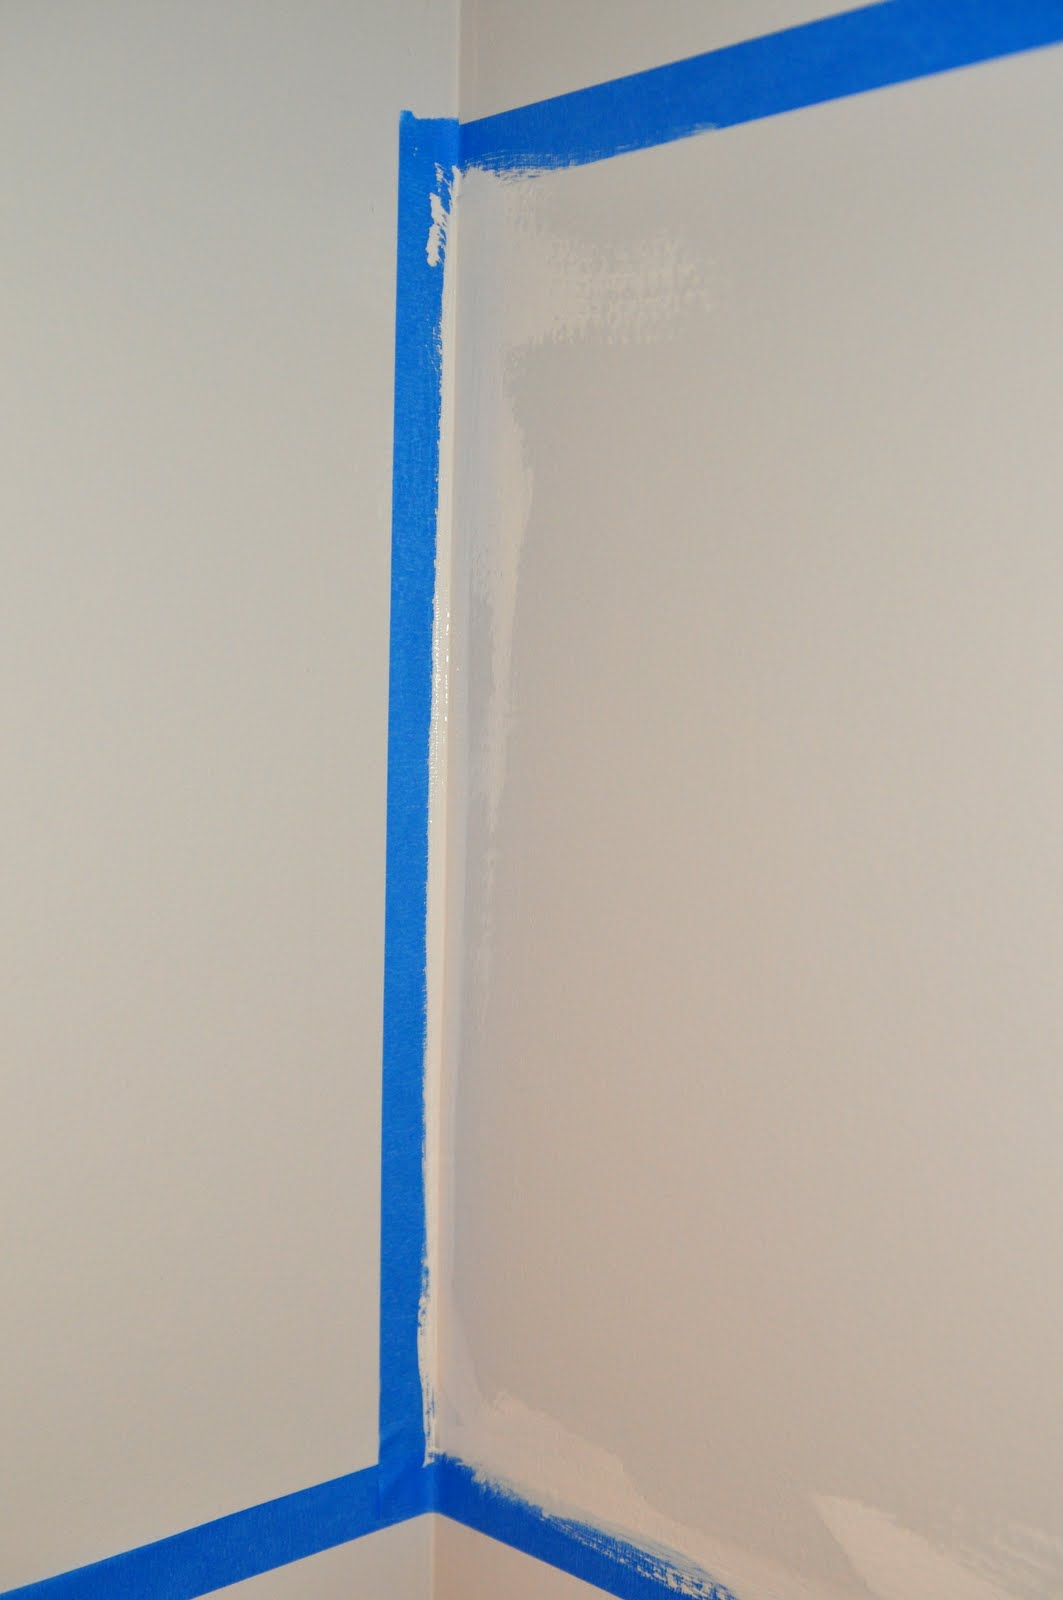
5. I’m the taper in the family. I will ONLY use Scotch blue tape. Eric like the blue tape with the orange inside because it’s extra delicate, but I like blue with the blue inside.
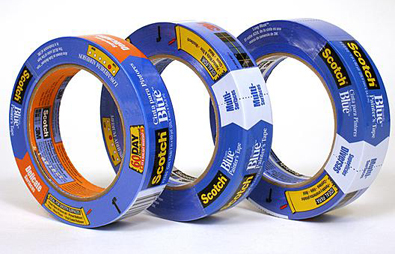
The key to taping is just making sure the edge of the tape is in a smooth line and not jagged where your pieces start and stop. I also take a credit card or wooden spoon over the tape when I’m done to seal it.
6. This is the magic step people… Take the current wall color paint (the color that your new stripe will touch, not the color of the new stripe) and paint along the edges of your new taped space. This will ensure that if your paint bleeds (which it will at least a bit no matter what you do) that you won’t see it because it’s the same color at the wall! It works like a charm!

You can see a difference in the color, but that’s because it was still drying. I’ll also add that we just let it dry for like 15 minutes, because it’s a nice, thin coat.
I’ve also heard of this technique using ModPodge if you don’t have leftover paint, but I can’t say I’ve ever tried it. Let me know if you have and how it turned out!
7. Roll your main color… this one needs no explanation

8. Remove the tape. We always remove the tape before the paint dries. We wait just long enough to be sure we’re done and don’t need another coat of paint, then we take it down. My technique is slow and steady and at a slight angle.
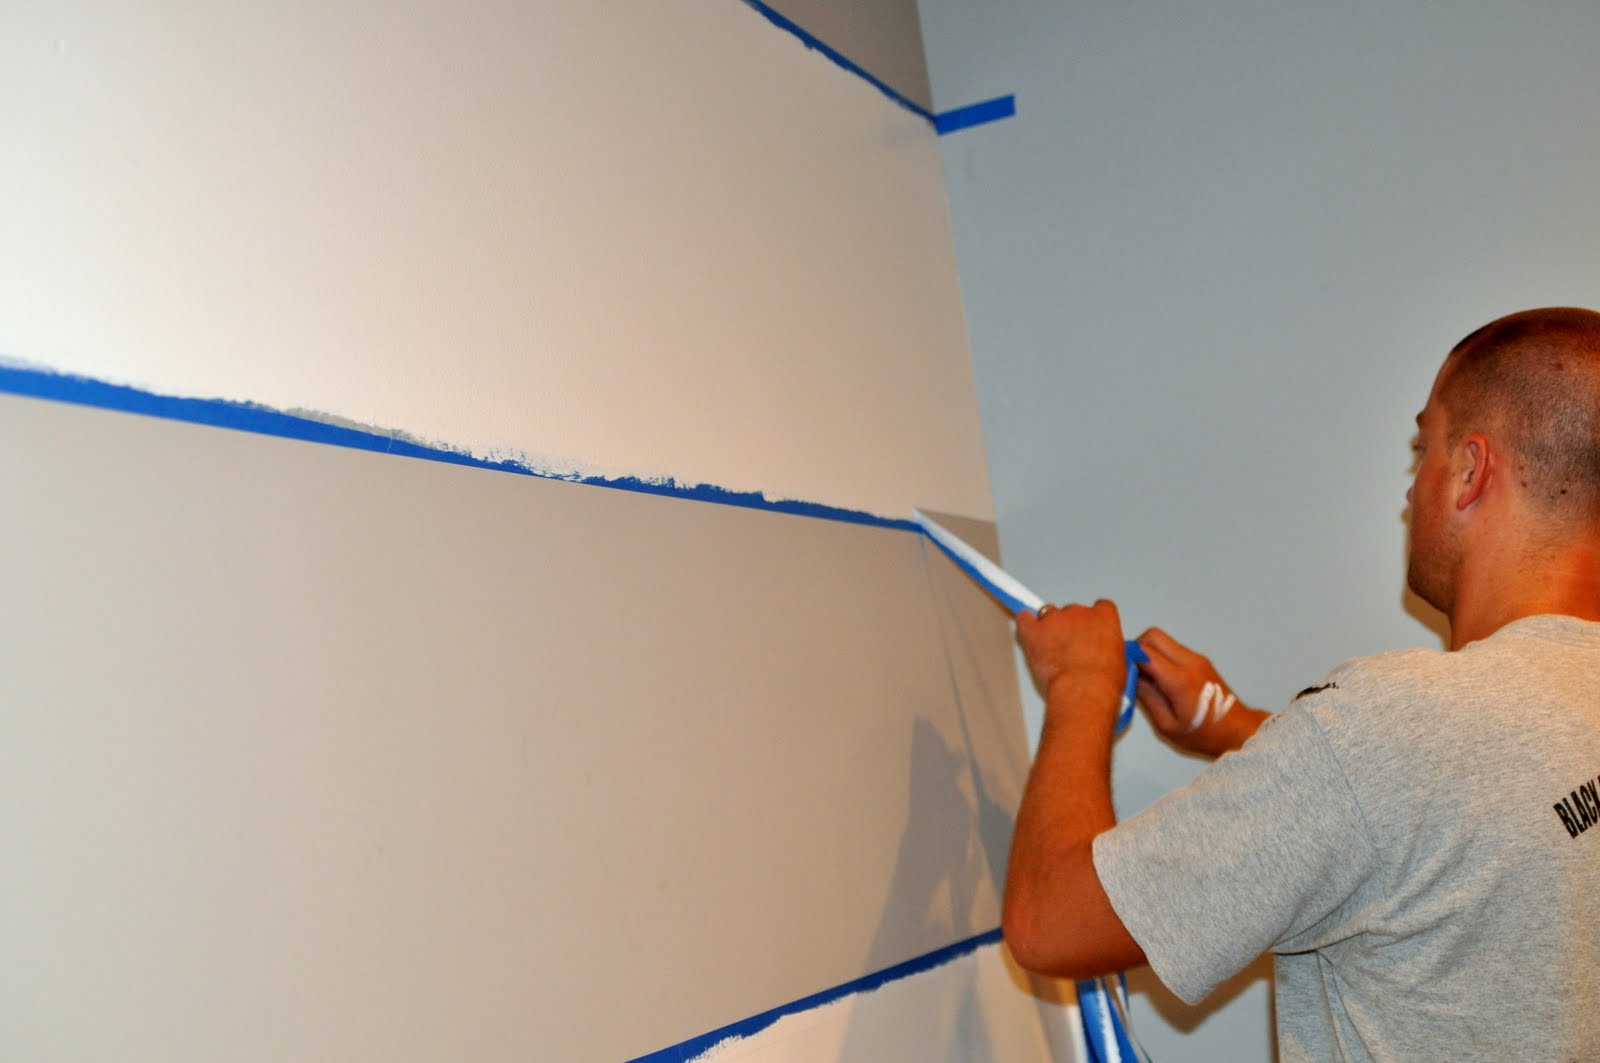
If you’ve done step #6 you’re guaranteed crisp lines, so this is no longer a stressful “I wonder how it’s going to look” moment!
Once the wall is totally dry you might need to take a damp cloth to get some leftover blue chalk off, but otherwise, you’re done!
Overall, I’m really in love with my new stripes!

But… I’m not so in love with the artwork anymore! I can feel my husband rolling his eyes when he reads this post. I like the shape, but they just don’t work anymore… and honestly, I’m not sure I ever LOVED them (and yes, I only bought them 6 months ago!)
The next part of this room re-do is to stripe curtain panels for the opposite wall. I’m excited to try this after my vacation next week!
So, are you a lover of stripes like I am?


I painted a chalkboard yesterday for my daughter. The paint ran under the blue tape…oh how I had read your step number 6 prior to yesterday!!!! ha ha
You sure know how to stripe a wall…looks GREAT!!!!
Blessings,
Linda
the stripes look great – and great hints for the novice (like me!)
thanks!
cheryl xox.
I’m in the process of painting some stripes right now and I”m going the Modge Podge route. It’s working great!
Great looking stripes. I have another way you can paint those “perfect” stripes. There is a new, amazing painting tool, invented by a 30+yr painter, called the “U-Stripe It & Design Tool. It allows the everyday person to create stripes and other designs like a pro, hassle free, saving you money. Using this tool and the ideas from Monica and Jess you can’t go wrong. http://www.ustripeit.com. Ladies great job!
we’re getting ready to cover up a harlequin pattern with a stripe! going from a nursery feel to toddler feel. definitely going with the wide ones like yours. great idea!
Can you please clarify step 6? I’m not sure which side of the tape (above or below)we are supposed to put the current color paint. (Maybe it will make more sense when I try it!)
Hi! Step 6… that’s the biggie. You’ll use the current wall color (so not the color of your new stripe) and paint all along the inside edge of where the stripe will be. Basically what you’re doing is allowing any bleeding paint to be in the color that will be touching the stripe. It sounds a tad confusing, but when you’re doing it, it will make sense. After step 6 dries, you’ll go through and paint your stripe the real color it will be 🙂 Hope that helps!
-M