
*I AM PROUD TO BE A 3M-SPONSORED BLOGGER, AND AS PART OF MY RESPONSIBILITIES, I GET THE OPPORTUNITY TO EVALUATE 3M PRODUCTS. OPINIONS ARE MY OWN AND ADDITIONAL PRODUCTS USED IN THE PROJECT WERE SELECTED BY ME. THANKS FOR SUPPORTING THE BRANDS THAT MAKE EC2 POSSIBLE! *
Hey guys! I teamed up with Command™ Brand to bring you some fun DIY projects featuring their line of home and organization products- We’ve got some awesome ones headed your way over the next few months as a part of our Small Space Summer Series, where we’re focusing on those hard-to-tackle small spaces, and bring some serious style to them. This week we’re continuing the series with a little more kitchen organization, and this time we’re going under the sink!
Everyone has that messy cabinet or multiple cabinets in their home, and one of them is probably your under sink space. It’s small, messy and unorganized, and it’s begging for a little makeover. With just a few Command™ Brand products, you can easily transform your under sink area into an organized storage solution.
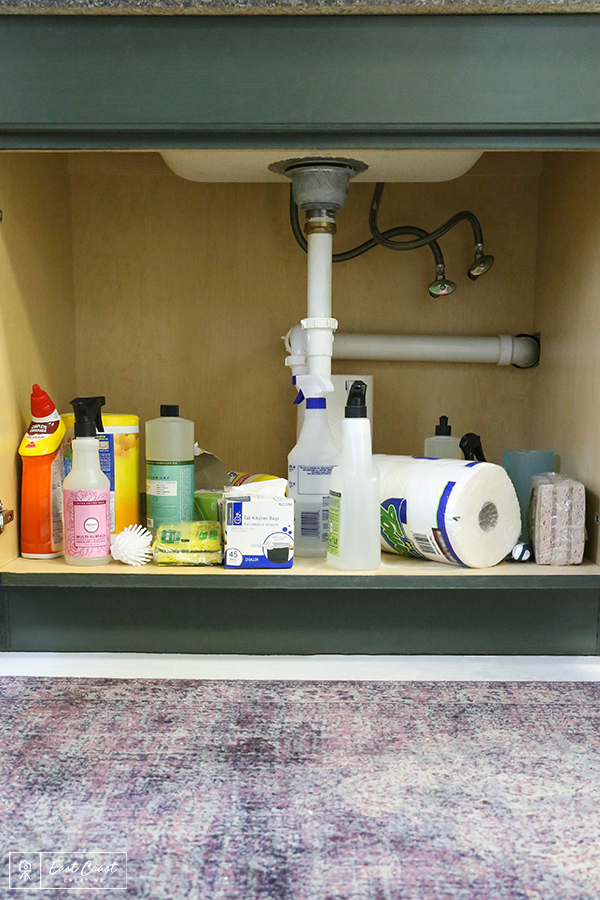
Before
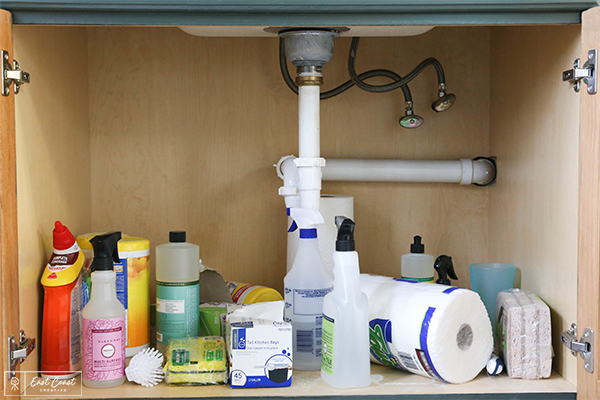
Just look at this mess!
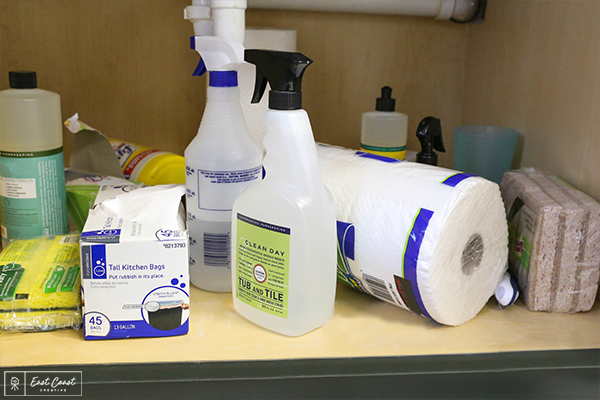
Definitely a desperate plea for a mini makeover!
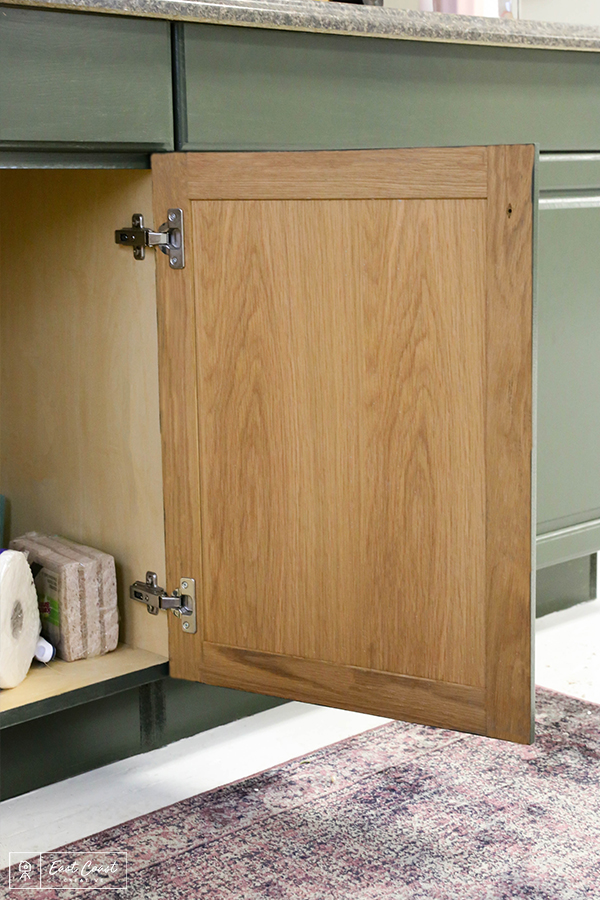
Ugh, and these plain cabinet doors have got to go!
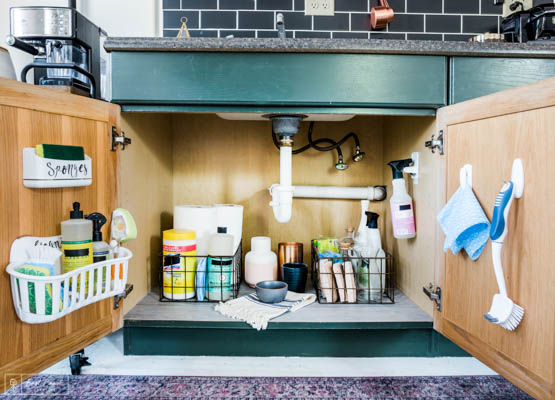
andddd… after!
Muchhhh better, don’t you think?!
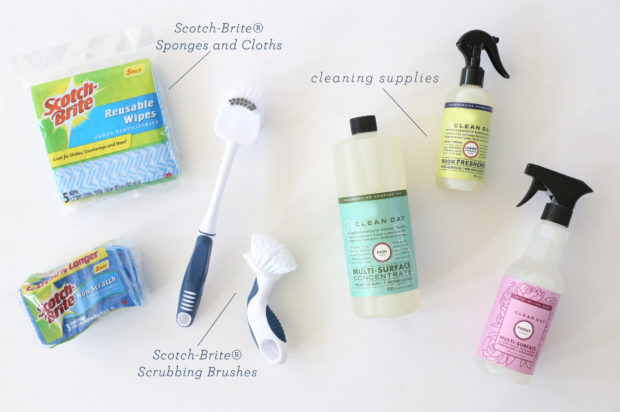
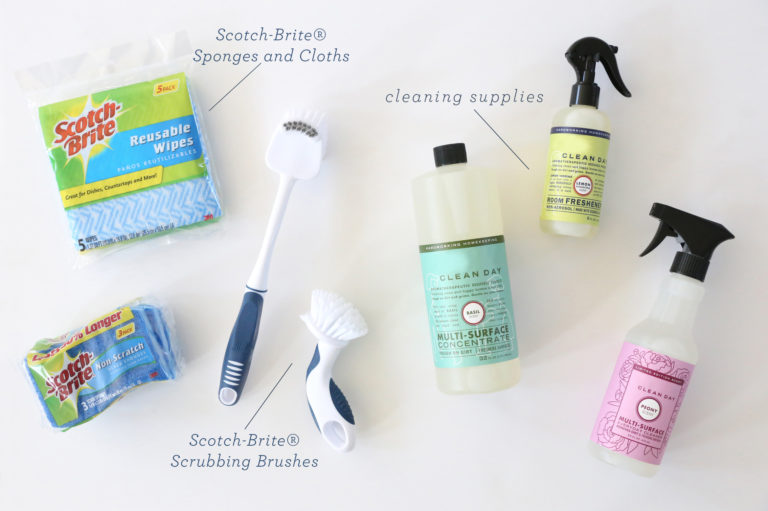
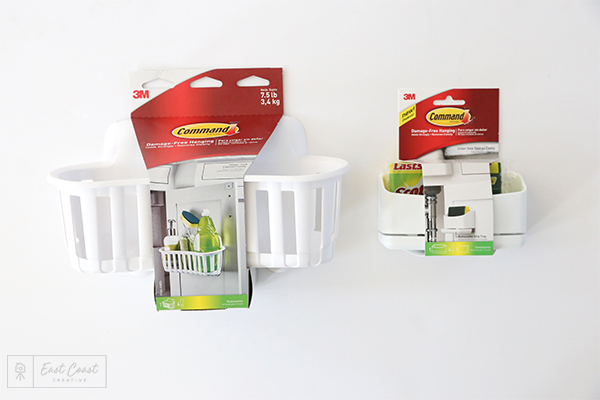
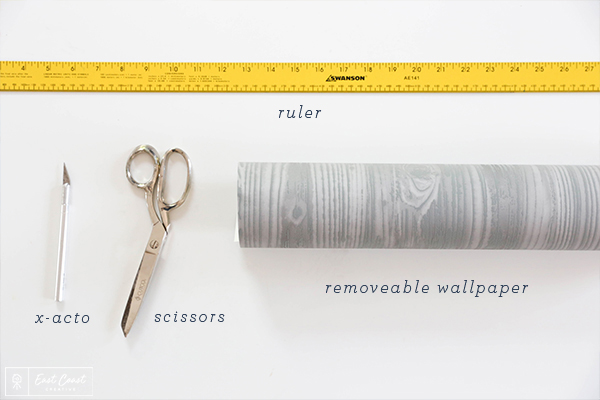
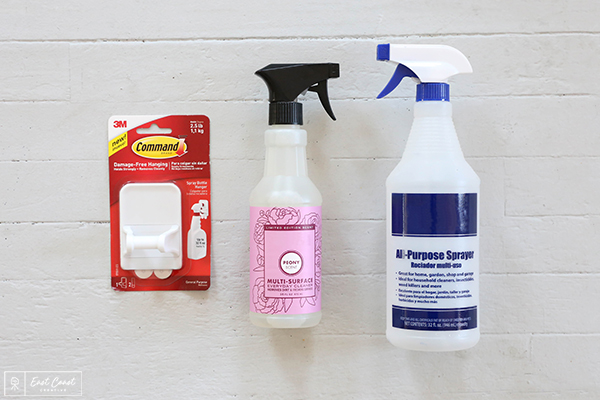
Materials: Various Cleaning Supplies | Scotch-Brite® Sponges & Cloths |Command™ Under Sink Cabinet Caddy | Command™ Spring Clip | Command™ Spray Bottle Hanger | Command™ Sponge Caddy | Scissors or X-acto knife (for wallpaper, optional) | Ruler (for wallpaper) | Storage bins (optional) | New Cabinet Hardware (optional) | Removable Wallpaper (optional)
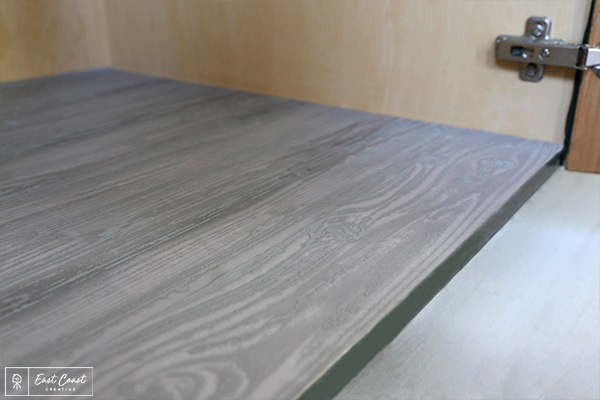
Step 1: Clean out your under sink storage– this is not the most glamorous part of the project but it’s 100% necessary for kitchen organization, and you’ll thank yourself for it later. The inside of our cabinets were plain, so we wanted to cover the bottom with something a little more visually appealing. We chose to use a removable vinyl wallpaper as it’s super easy to cut down to the size of your cabinet and it peels off just as easily as it goes down! Covering the bottom of the cabinet with this wallpaper also makes it nice and easy to wipe off and clean if needed.
This step is totally optional, but it’s also a total game-changer when you’re making over your under-sink space.
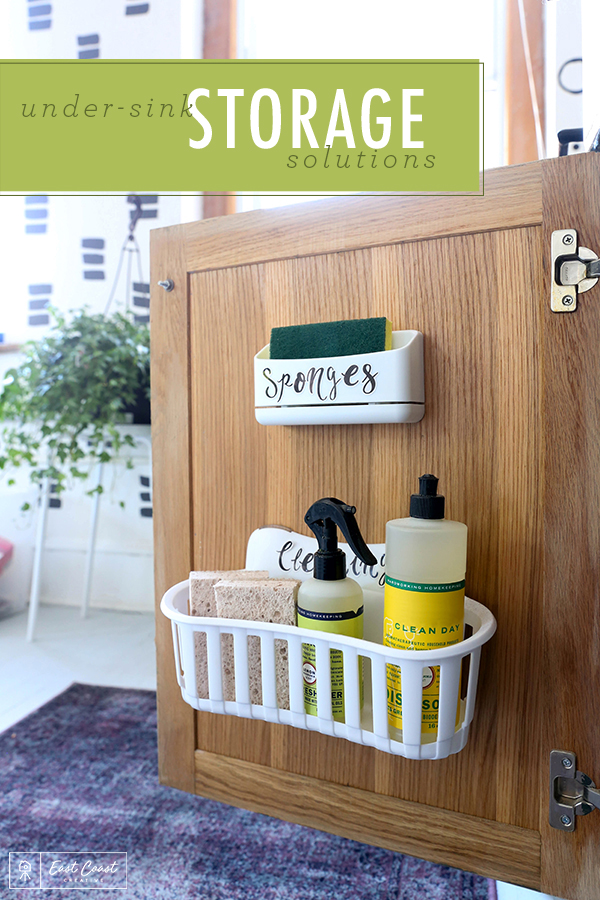
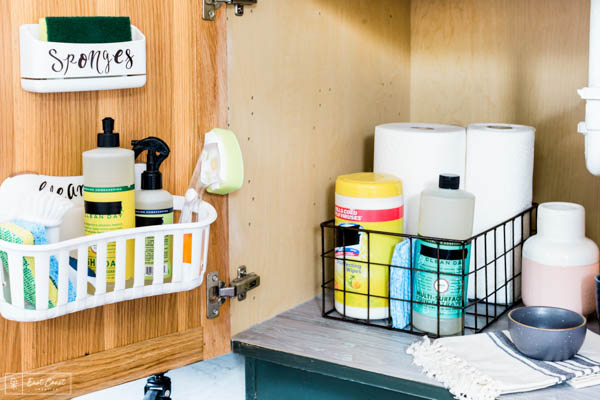
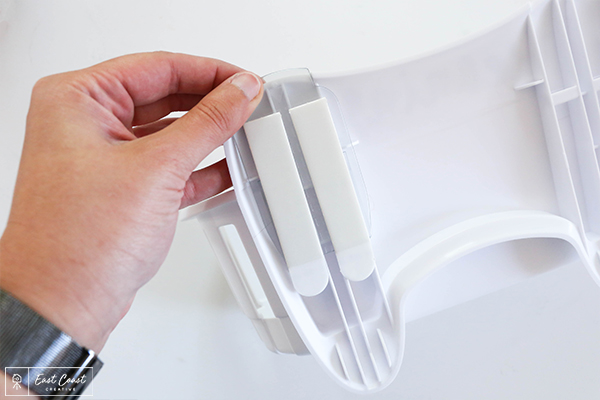
Step 2: Next we’re going to transform the doors of the cabinets with some Command™ Under Sink Cabinet Caddys and Command™ Under Sink Sponge Caddys. Make sure you are applying these products to the finished wood surface of your cabinet for the best adhesion.
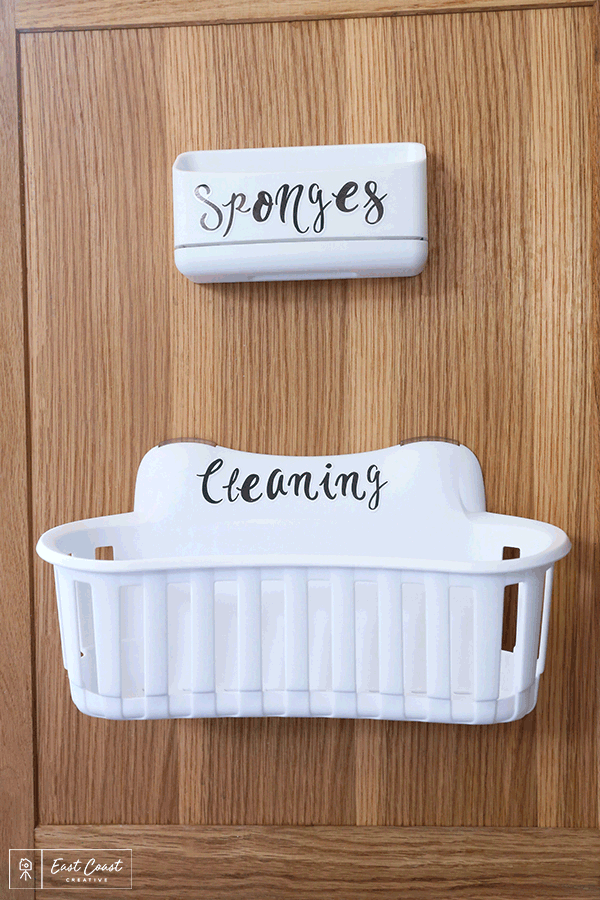
Step 3: Following the packaging instructions, clean the inside of the cabinet with rubbing alcohol. Then, remove the product side of the Command™ Strips and apply the strips to the caddy. Once all the strips are in place, remove the wall-side paper on each strip and apply to the inside of the cabinet door. Be sure to follow all package instructions when applying for best adhesion. We used a Command™ Under Sink Cabinet Caddy with a Command™ Under Sink Sponge Caddy above it, and the great thing about all Command™ Brand products– that they can easily be removed if you ever want to re-organize, so they’re perfect for ever-changing kitchen organization.
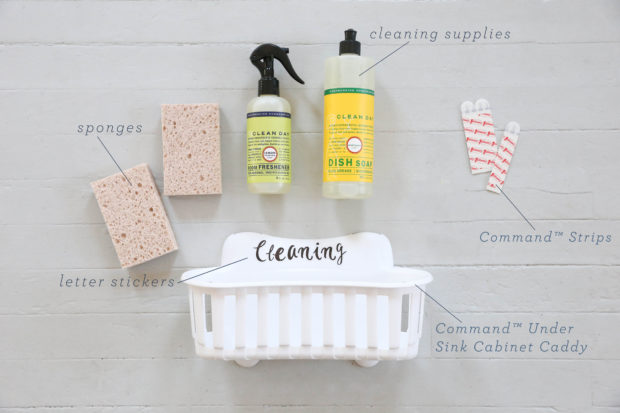
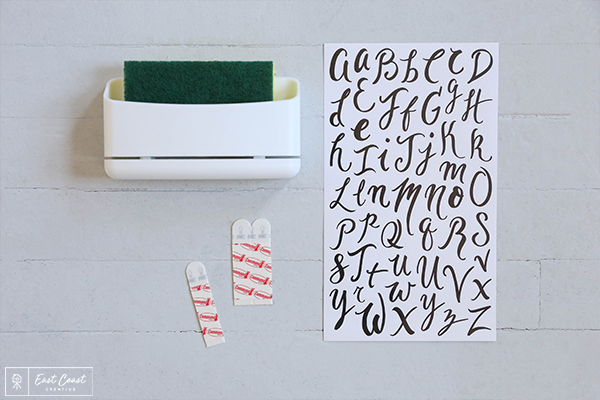
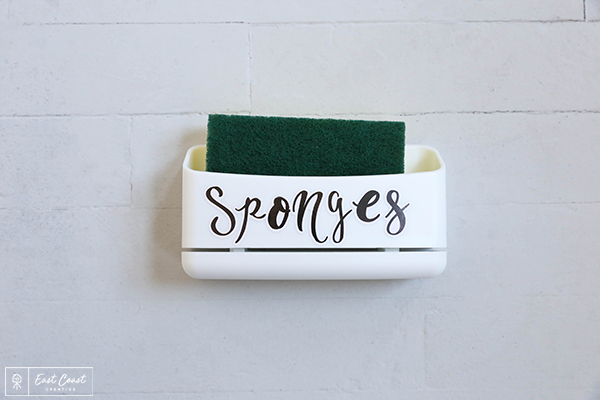
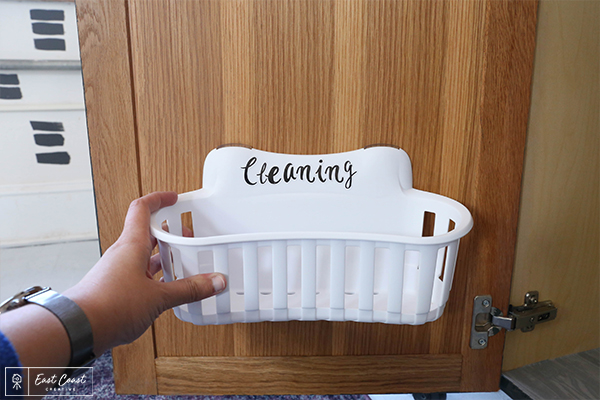
We added a little touch of personalization to the storage caddy using some clear letter stickers– optional, but cute and tidy!
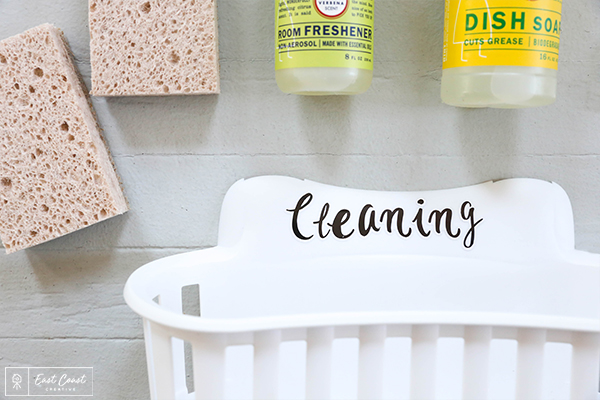
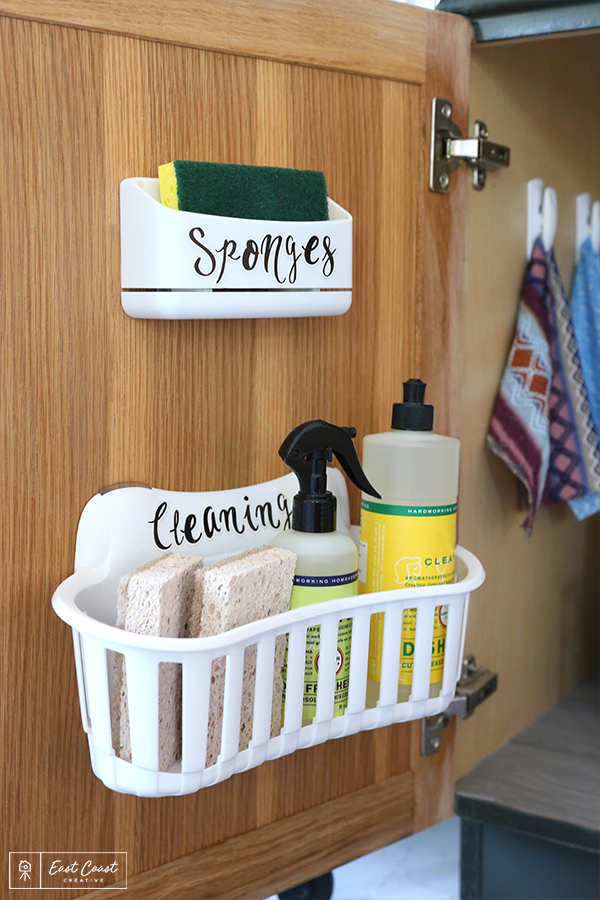
Add your cleaning supplies, and you’re good to go!
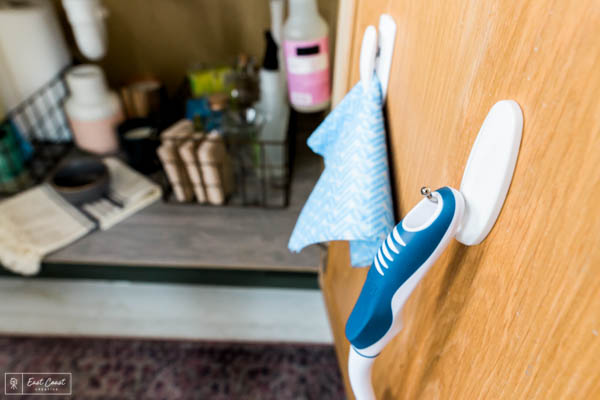
Step 4: On the inside of the cabinet, we used a Command™ Spray Bottle Hanger for spray bottle storage. We then used the Command™ Spring Clip and Command ™ Wire Hook to hold some more cleaning supplies on the inside of the other cabinet door. After cleaning the cabinet surfaces with rubbing alcohol, apply the Command™ Strips to the back of each product, and then secure to the cabinet. Press firmly for 30 seconds and then let the adhesive adhere to the cabinet for at least one hour before hanging up your supplies.

Cleaning up the inside of your cabinet isn’t the only way to spruce up this kitchen storage space, you can also give your cabinets a little facelift with some new hardware. Adding new hardware to the doors really took it up a notch and totally transformed our cabinets!
I hope this easy DIY helps you to stay organized and inspires you to get crafty with 3M! Stay tuned for more Command™ Brand DIY projects coming soon, and in the meantime be sure to check them out on Instagram for the latest products and projects!
-Mon
Photos by Keyanna Bowen of East & Lane.


I have an old Tudor style home which is adorable, but it has zero storage space. I literally have to build or buy the storage for this super cutie house. I love ideas like this to help organize the little storage space I do have. Love your work, Monica! Can’t wait for the new Weekender season to air!
Thanks so much Christina! I’m glad this project inspired you to organize your own space!
It sure looks good! Where did you get the lettering stickers from? Thanks!
Thanks Kathy! I just picked them up at Michael’s, but you can get them pretty much anywhere where craft supplies are sold!
I’m always down for DIY storage solution hacks, my apartment is already full of them. Thanks for the tips!
Hello, Ms Monica!! :))
I just move to a nice small place and need HELP getting it together, especially my bedroom and the kitchen. Im wondering if you girls can help me out make it nice with an area that work for my family and friend so they can come to enjoy and relax!!! Also that my grandbabies can have !!
Love you show
Thanks & God Bless!!
Mar
Adding caddies under the sink is a game-changer. Keeping your stuff organized leaves you with more space for other supplies. And yeah, it’s always better to add labels. So even if you’re not around, others can maintain the placement you desire.
– Novie
http://naturallypretty.info
Anything that helps increase kitchen storage on the cheap is fine by me! Thanks for the tips 😉