
![]()

We’re excited to have Becki and Chris from The Uncommon Common Law here today to share the tutorial for their painted place settings. We’re so glad they tried something unique with paint! Don’t get me wrong I LOVED all of the painted wall treatments, but I like that Becki and Chris stayed true to their love of all-things-white-and-neutral and decided to create something that they’ll use and looks so freakin’ amazing! I agree that is has a Scandinavian feel and right now I can’t get enough of that style- unfortunately I’m also a major color lover, so it would mean re-painting my entire house to get the look, so… I think I’ll just admire it from afar right now! Take it away Becki- thanks for sharing your process with us today!
—————————————————————————————————————————————————
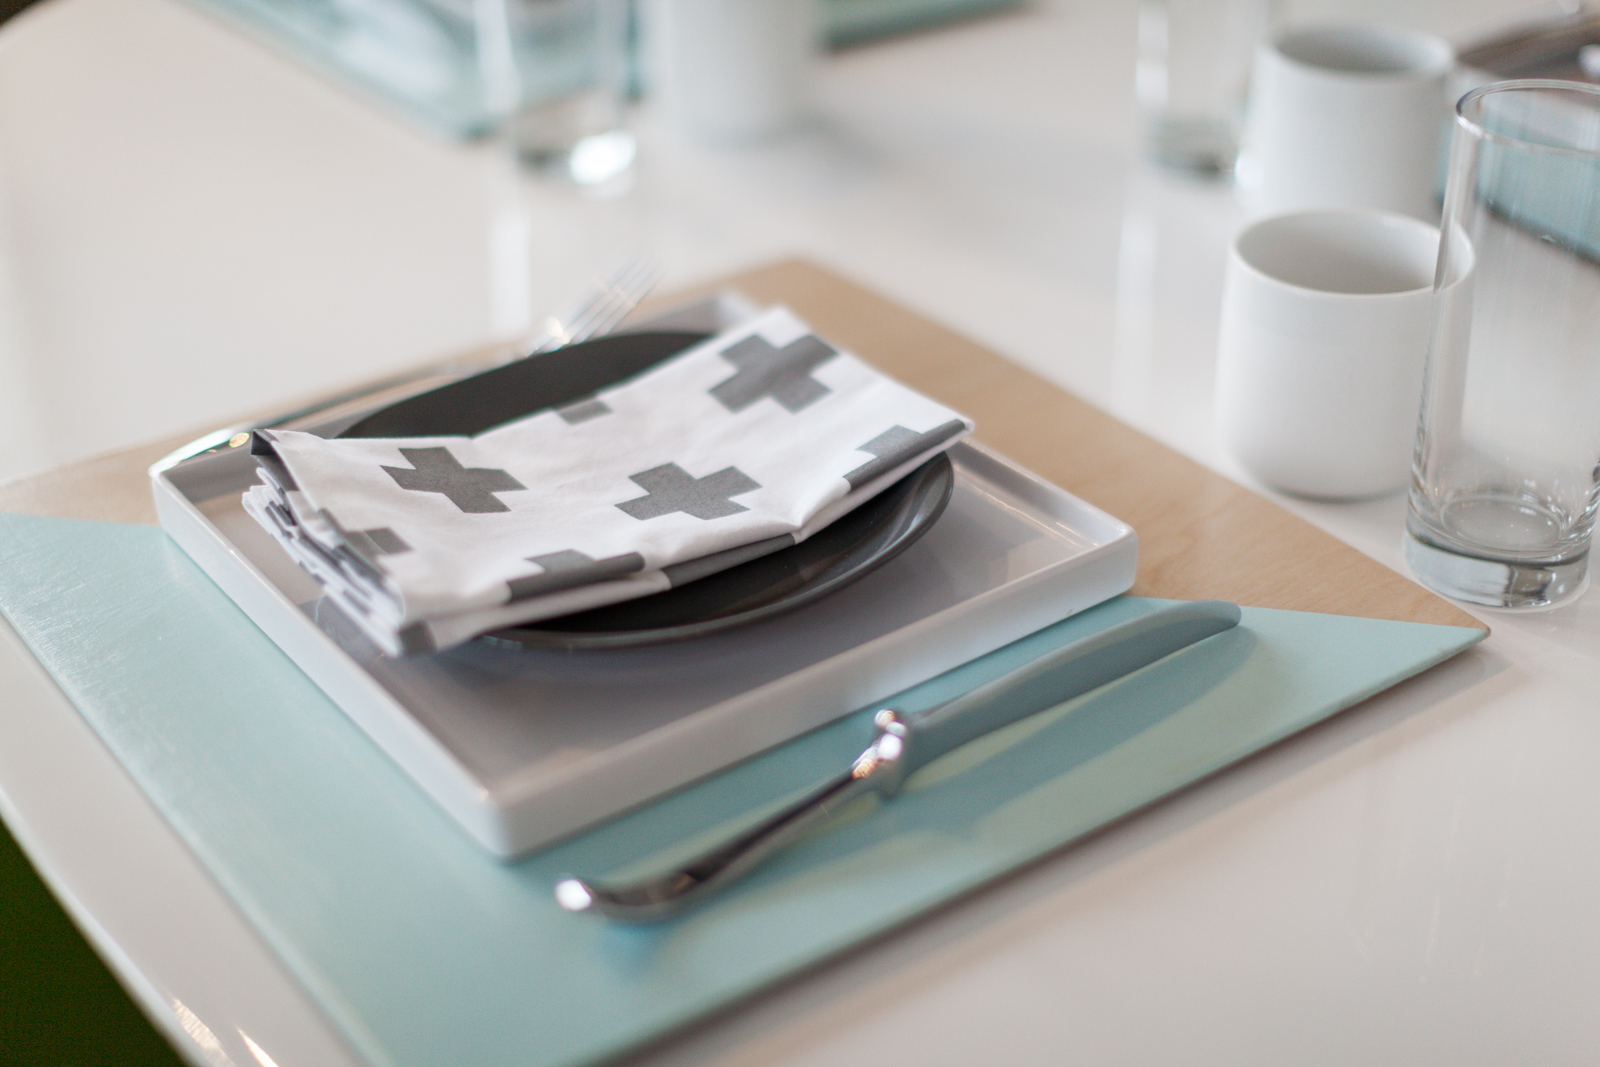
Round 2 of the Creating With the Stars competition required us to use paint. Now, we are not ones for a lot of colour; if you have seen our house you know that we love white, black and grey. In fact, when we moved into our house, we painted a wall in the porch bright red but within six months it was white! And it seems that the accent colours around our house are slowly being replaced with neutral colours. So how do we do a painting project that is cool/different but doesn’t commit us to a permanent wall mural or a piece of furniture which we don’t have room for? After brain storming for DAYS about what we could do, we decided on creating place settings with painted wood placemats and custom printed napkins. After all, we love to entertain and place settings are just so versatile (mix and match them with your existing items)! We created six painted birch placemats, six screen printed napkins and a vase – which together have a very Scandinavian feel.


Placemats
Materials:
1/4″ birch plywood
3/4″ birch veneer
Sand paper
Painter’s tape
Paint (we used Blue Haze by Martha Stewart)
Clear coat (we used satin water based Varathane)
Tools:
Table saw (or get your hardware store to cut the wood for you)
Paint brush or rollers
Iron
We decided on making the placemats 15″ square, which was based on the size of some existing placemats we have. We used our table saw to cut the plywood to size. Once six squares were cut, we applied the birch veneer to the edges. Note that we clamped together three placemats at a time and applied a single 3/4″ wide strip of veneer, then cut the placemats apart. The edges were then sanded down for a smooth, seamless finish.


We decide on painting half the square (from one corner to the other) a colour and leaving the other half natural. You could also choose to stain one side of the placemat and paint the other, but we opted for the light airy feel of natural birch. Tape off your design with painter’s tape and using a brush or a roller, paint your design. We used Blue Haze by Martha Stewart and applied two coats. We peeled the tape off while it was wet to ensure a clean line.

Once the paint was dry, we clear coated the placemats with a water based Varathane in satin. We did three coats on each, letting them dry for the recommended time between coats. We chose a water based clear coat because we wanted to keep the birch as white as possible, since oil based stain will darken the tone of the wood and give it a slight yellow hue. Typically we use aerosol clear coat, but in this case we used brush-on simply because we didn’t have time to get to the store and we already had an unused can of it in the basement.
Once dry, we added some bumpers to the bottom of the placemats to slightly float them off the table.
Napkins
Materials:
2 meters of white cotton fabric for the napkins
1 meter of plain sheer fabric for the screen mesh (should be about 150 “holes” per inch)
Paint of your choice (we used a cheap acrylic paint from Michael’s in slate grey)
Martha Stewart Fabric Base
1×3″ lumber
Adhesive vinyl or painter’s tape
Spray adhesive
1×2″ lumber
Sand paper
Wood screws
Tools:
Impact driver
Chop saw
Canvas stretching pliers (optional)
Staple gun
Plotter/vinyl cutter (optional)
Iron
Sewing machine
These napkins were a bit of a headache but once we found a printing process that worked things got much easier. We first tried hand stamping them with block printing materials. The results were awful. The design was bleeding and the print itself was very blotchy and uneven. We also tried taping off the design on the fabric and painting with a brush but that was equally as terrible and very time consuming. Our vision of the napkins was a print with perfectly crisp and solid lines and we quickly realized that screen printing was probably the only way we were going to achieve this. Chris and I used to own a screen printing studio so this process was fairly familiar to us, however, we had only ever printed with a fully equipped studio, which we sold long ago! Nonetheless, we know all the steps like the back of our hand so we devised a method to screen print with common supplies. Anyone can do this! You do not need screen printing experience to get the same results.
Step one was to wash and dry the fabric you are going to use for the napkins. Iron the fabric and cut out your desired size napkins. The final size of ours was 19.5×19.5″, with 1″ seam allowance added to each side (the edges will need to be turned in twice for a clean look). We cut out seven and used one for test printing.
The basic premise of screen printing is you use a squeegee to drive ink through a tight mesh screen and onto your fabric underneath. The mesh screen is covered/masked out in certain areas that correspond to your design. The mesh sits just above your fabric (“off contact”) so that as the squeegee makes a pass, the mesh peels away from the fabric below, leaving a nice uniform print.
To make the screen, create a frame out of 1x3s and screw the sides together. We made our frame 26×26″ (inner diameter), giving us 4.5″ of wiggle room around our 21.5″ fabric. Once the frame is made, sand it to remove any sharp edges that might damage the mesh. The best way to attach the mesh is by stapling it, much the same way you would stretch a canvas except instead of wrapping the mesh around the edges of the frame and stapling, you only have to staple it to one side. Start in the centre of one of the longest edges and place a few staples, then move to the opposite side, stretch, and place a few more staples. Canvas stretching pliers are helpful but not required. Then turn the frame 90 degrees and repeat. Slowly work your way to the edges, always switching to the opposite side of the frame before you stretch. The important part of this step is TENSION. You want a very tight mesh (which should sound like a drum when you tap it) but be careful not to split/tear the mesh.


To make the squeegee, we used a piece of 1×2″ lumber and eased the edges with sandpaper so they were not sharp. We also sanded the corners so they would’t accidentally pierce the tight mesh.
In actual commercial screen printing, transferring your design to the screen is accomplished by coating the screen with UV sensitive emulsion in a dark room, printing your design on transparency film and then shining UV light through the transparency, which selectively cures the emulsion on the screen. The uncured areas are washed out with water which reveals your design in the mesh. Since all we need to do is mask out the parts of the mesh where we don’t want paint on our fabric, one can accomplish this simply by using adhesive vinyl or painter’s tape! This should be applied to the fabric side of the screen because if you apply it to the squeegee side, the squeegee pressure will rip off the tape. We happen to have a vinyl cutter/plotter, so we mocked up our design in Adobe Illustrator and sent it to the plotter which made all the cuts on the adhesive vinyl for us. One could simply make the cuts manually with an X-acto knife or simply tape off the design directly on the back of the screen with painter’s tape. After you transfer your design, the inside edges of the screen (squeegee side) can be taped off to keep ink out of the crevices.


In actual screen printing, plastisol ink or water based ink is used, which needs to be cured in a special conveyor dryer. To get around this hurtle, we used Martha Stewart’s fabric base additive and mixed it with some plain craft paint. This allowed it to air dry like normal paint and only required ironing afterwards to cure. Note that your paint should be the consistency of a milkshake. You may need to adjust the ratio of fabric base to paint to achieve this.
Now for the printing! We placed a large piece of melamine on the floor to work on. We applied spray adhesive directly to the melamine and stuck down the first square of napkin fabric.
In order to get the gap between the screen and the fabric, we placed a nickel under each corner of the screen. Again, this will allow the screen to pop off the fabric as the squeegee passes over it, rather than sticking to it.
It is important to line up your design with the fabric underneath. Once you are happy with the design placement, mark it on the melamine work surface underneath so you know where to put the screen every time.
The print technique we always use is the “push technique“. Pour a fairly generous amount of paint/ink along the far edge of the screen (edge furthest away from you). Don’t go overboard though, you should not have paint overflowing into the middle of the screen where your design is. Next, “flood the screen” by lifting up the edge closest to you and lightly pulling the ink towards you with the edge of the squeegee closest to you. This will fill the open mesh holes with paint/ink which is very important because it prevents the mesh from drying out and clogging. Now lower the screen back down, making sure it’s still lined up with the fabric below, and get a friend to hold the screen firmly in place. With the screen’s mesh already flooded/loaded, perform your print stroke by applying downward and forward pressure as you push the squeegee across the screen. This will shear the ink through the mesh and onto the fabric. I find two push passes, one after another, (without flooding the screen in between) makes sure all the ink is transferred to the fabric.
Carefully lift up the screen, making sure you don’t smudge the paint on the fabric. Peel the fabric off the melamine and place it in a safe area to dry for 24h, wet paint side facing up.
Here is a little video of the printing process:
Repeat for all napkins. The edges don’t have to be perfect, remember we will be turning the edges after for a clean, finished edge. Once the napkins are dry you need to cure the paint. I used an iron on the cotton setting to run over the napkins.

Press (iron) the edges of each side of the napkins folding first about 1/4″ and then again at about 1/2″. Pin the fold. Repeat for all napkins.

Pop your fabric on a sewing machine and sew around the square.

The final step is pressing the entire napkin.

Vase
Materials:
Clear vase
Martha Stewart Multi Purpose Paint
Paint brush
This is a quick and easy one! With the same paint used on the placemats, we painted three coats on the inside of the vase. Painting the inside gives you a nice high gloss finish on the outside. The paint package recommends letting it cure for 23 days before putting water in it.

So that’s it, our three customized pieces, all created with paint!


—————————————————————————————————————————————————
We were thrilled that you guys, as voters could see the time and detail that was put into this project and voted them into the top three! The other top contestants better watch out, Becki and Chris are 2 for 2 now! But, in this competition you just never know…one week you could be top and the next week you could be out, it’s kind of like crafty version of Project Runway! If you haven’t already checked out the amazingness going on over on their blog The Uncommon Common Law, it’s a must…
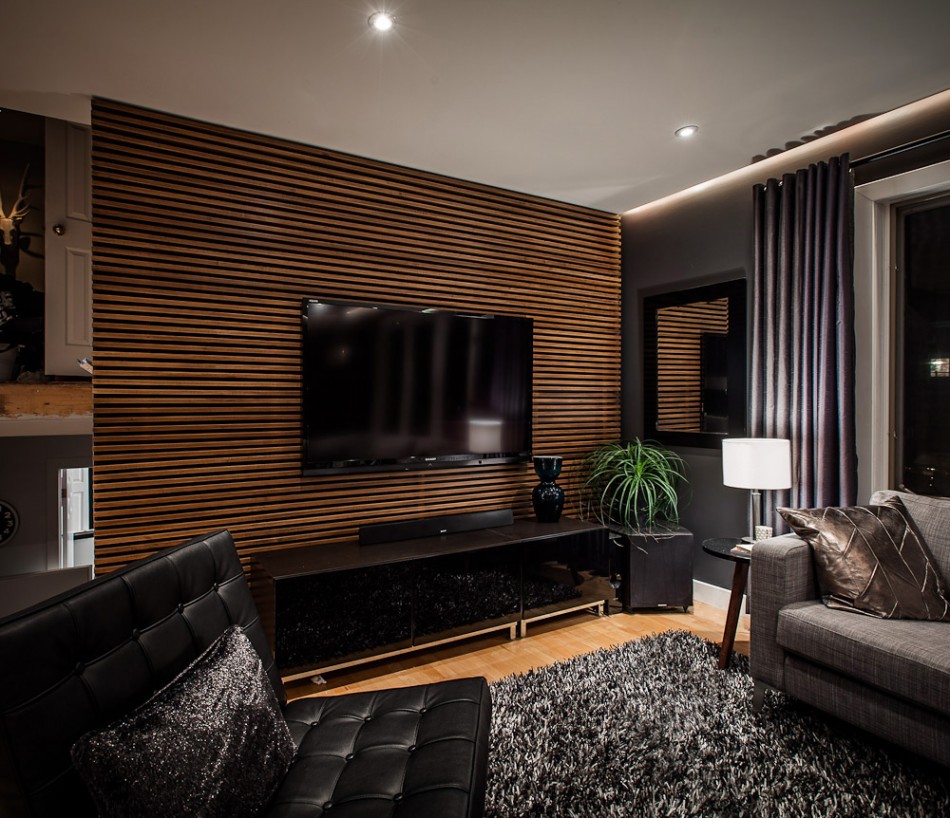
How much do you love this slatted wall they created?! Maybe they will come over and do this for us?! We can’t wait to see what they do for the upcycle round next week! Stop back tomorrow to see Tracy’s beautiful baby blues hutch tutorial and on Sunday we’ll reveal our favorite pick from the link up party, which you can still join. Also, enter below for your chance at winning a beach vacation to Punta Cana from Apple Vacations, only 11 days left to enter- you can enter once each day!
![]()


SO awesome! Becki & Chris continue to amaze and inspire me. I totally want to attempt to print my own napkins now…Can’t wait to see what they have in store for Round 3!
[…] If you have been following us along in the Creating With the Stars competition, you’ll know that we placed third in round 1 and were one of nine to advance to round 2 (for an explanation of the contest, see here). Well voting closed for round 2 and we got second place (and are one of six to move on to round 3)! The theme of round 2 was “paint” so we made painted place mats from birch plywood, screen printed napkins with fabric paint, and painted a matching vase. East Coast Creative blog is hosting our tutorial here. […]
[…] Round 2: Paint Using paint in the project was the only requirement. We created painted placemats and screen printed napkins with fabric paint. Thanks, SAM, for letting us shoot this in your store; we think our kitchen would have been pretty recognizable. We placed 2nd out of 9 in this round. Tutorial here. […]