
One of my 2012 goals was to make my family room reflect ME a little bit more. I’m not going for some adult, anti-kid room or anything… I just want the style to fit me a bit more. Okay, and if I’m being honest, the room currently has no style at all, it’s sort of a mish-mash of randomness. The first step in this direction is…
Stenciled Wall Panels
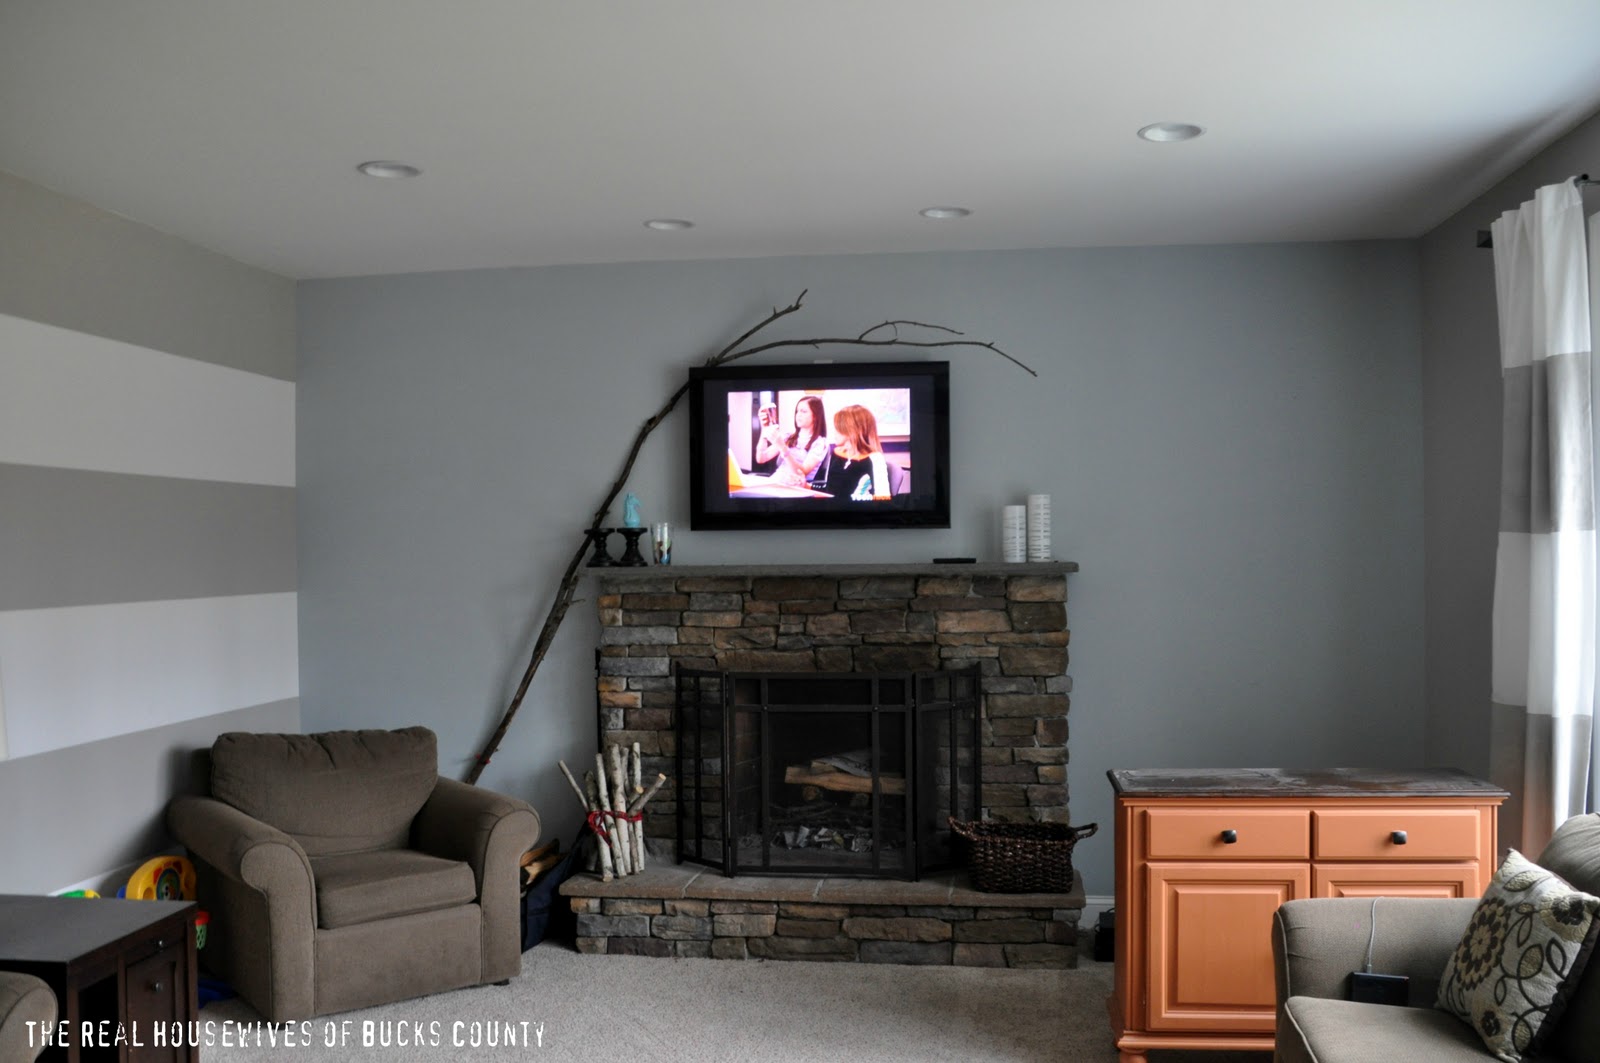
Since we moved in, I’ve never been sure of what to do on either side of the fireplace. I’ve never wanted to compete with the fireplace, because I love the stacked stone so much. We’ve talked about built-ins someday, but someday isn’t any time soon. So, we decided to try something a bit more creative.
Wall stencils have been around for as long as I can remember. I definitely stenciled a border of berries and leaves in our very first master bedroom. Gag! Well, thank goodness they’ve come a long way!
Royal Design Studio is my very favorite place to get stencils! Seriously, I bought a stencil a year ago from another unnamed company and it bled like crazy because it just wasn’t made of heavy plastic. Royal’s stencil was strong enough for a perfectionist like me!
Ok, so here’s what I did…
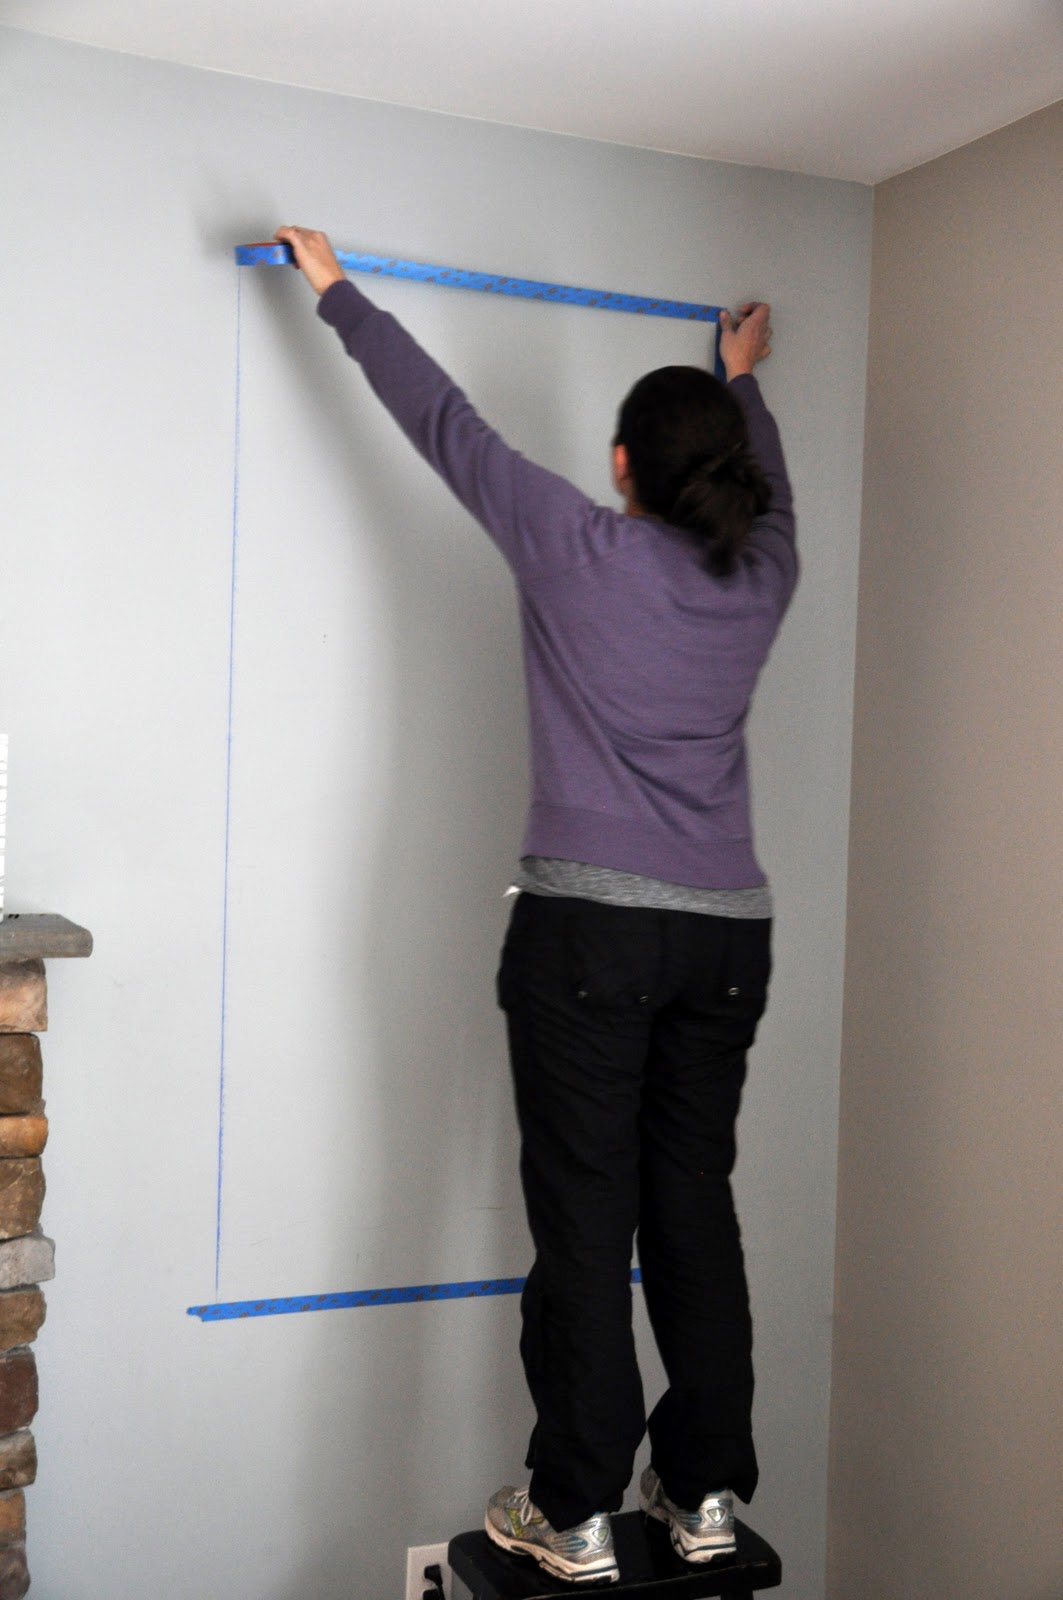
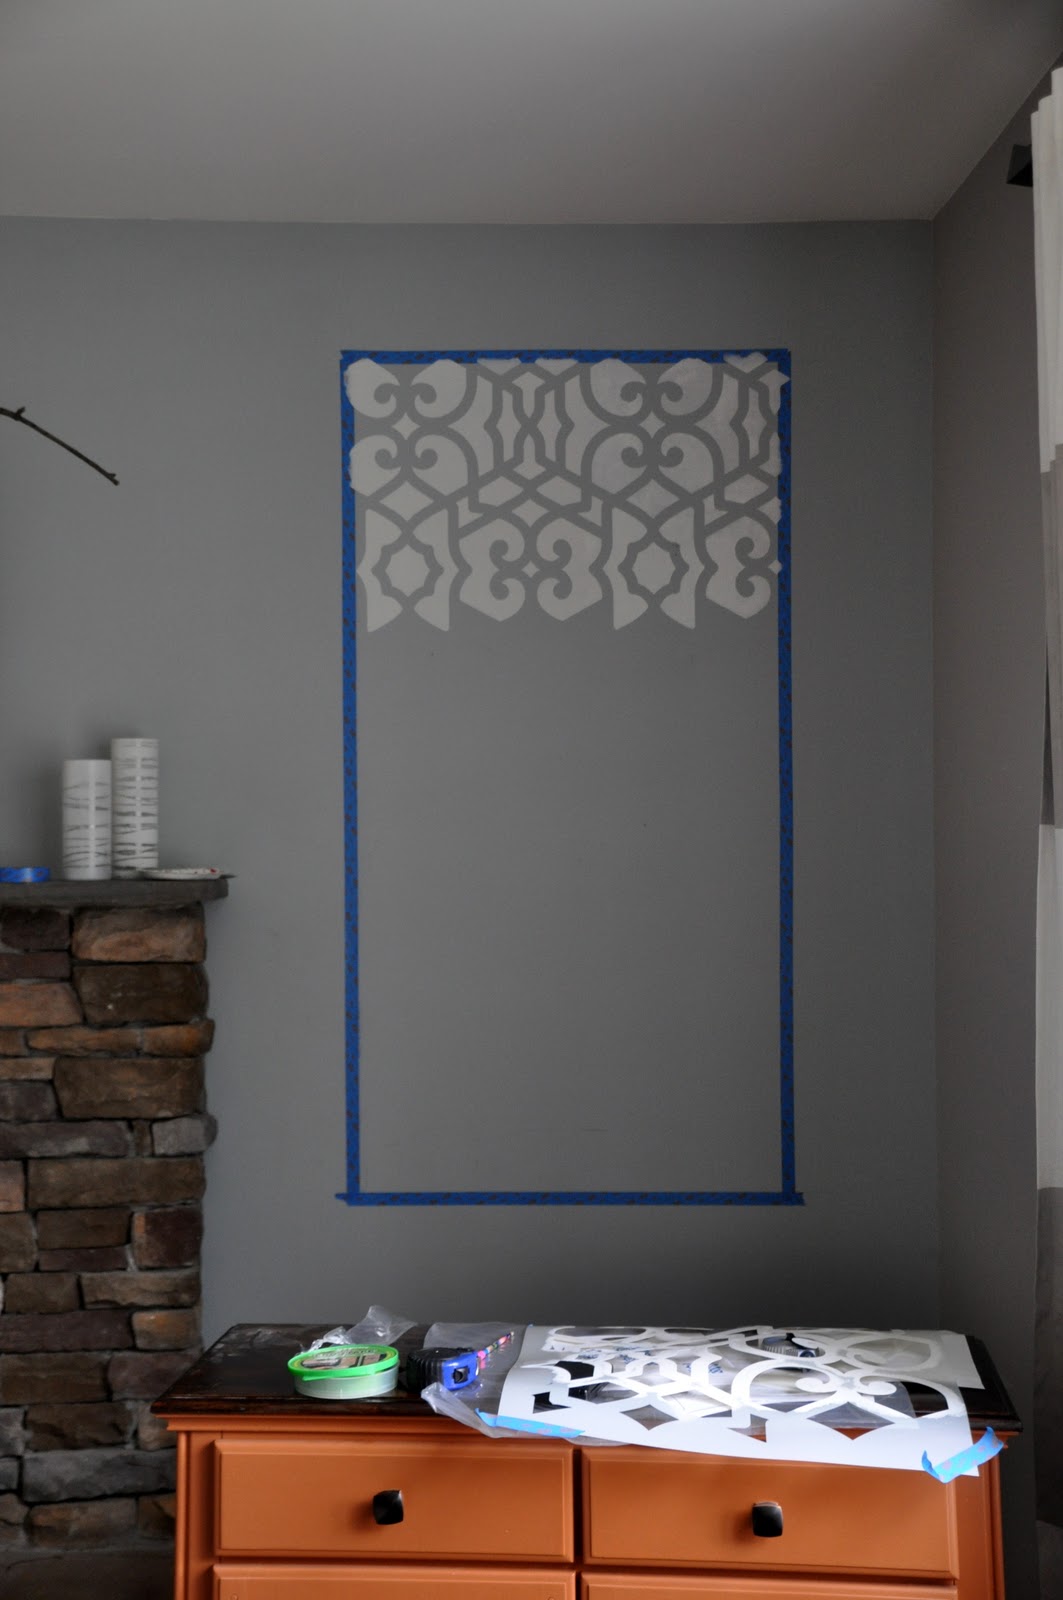
We measured out a big old rectangle on both sides of the fp and then used a chalk-line to get super straight lines. I love my chalk-line. I use it all the time!

Then, I used another favorite, Scotch blue tape to outline the shape. (Random note: Did you know Picnic.com has a “skinny” edit button. Of course I tried it on my butt for this picture, but it didn’t do a blessed thing. Drats!)
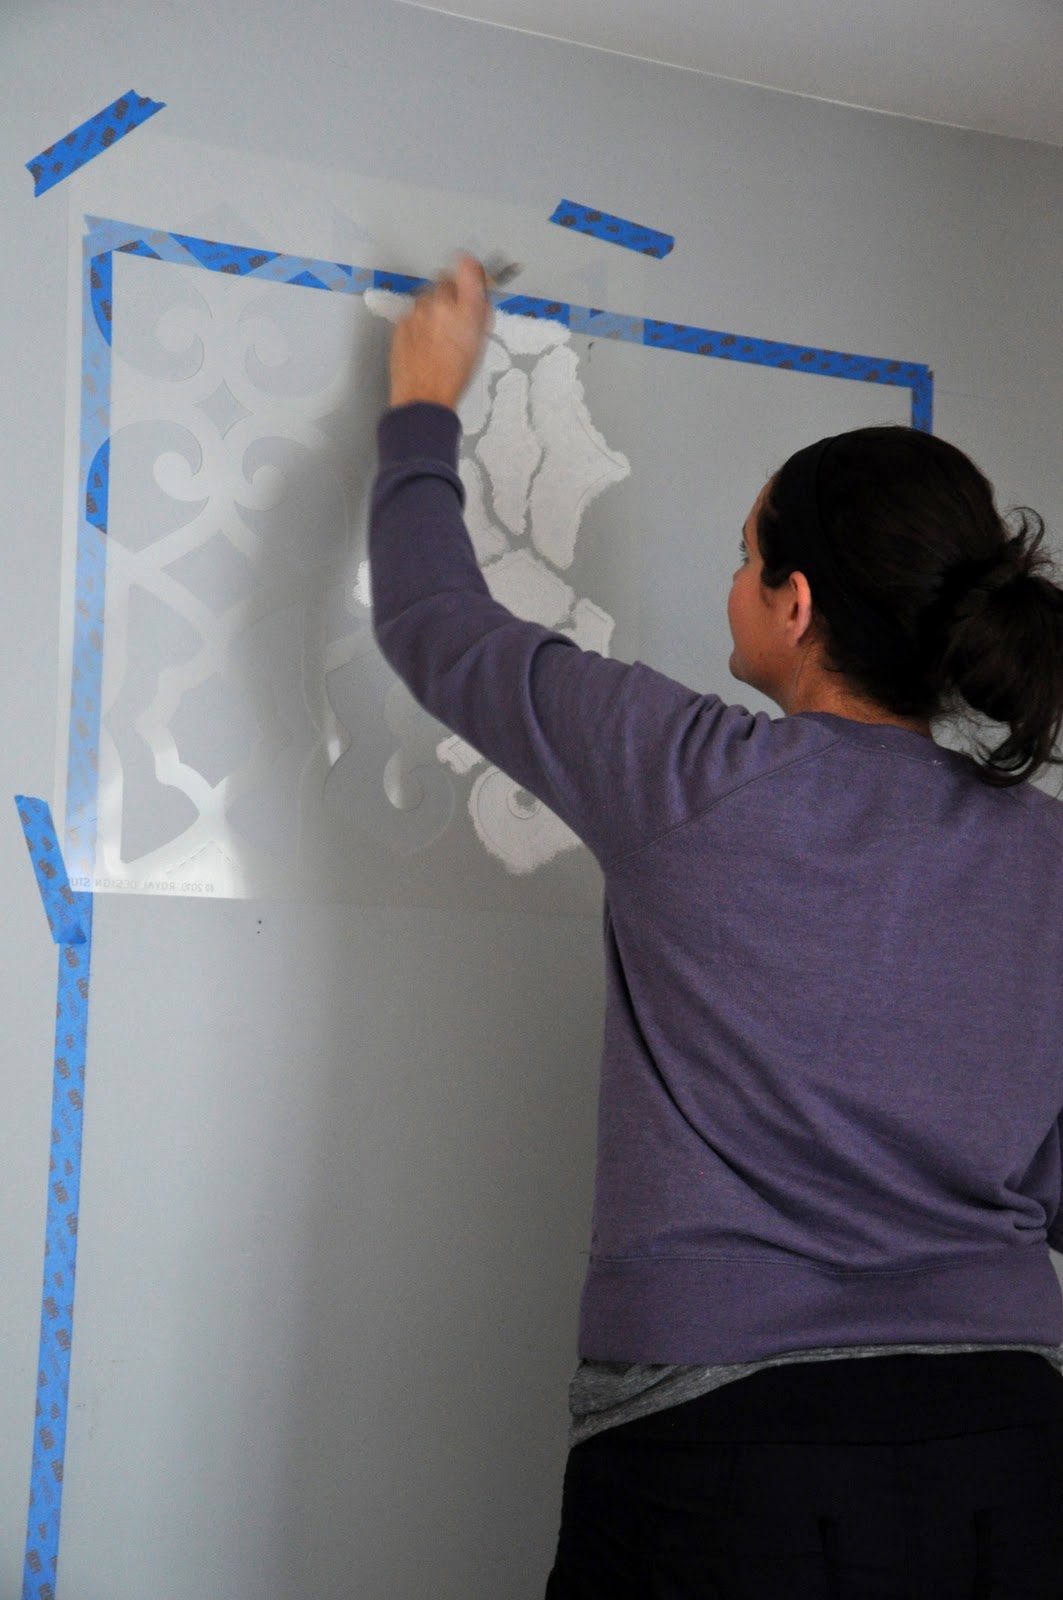
Then, it was time to line up my stencil and get painting! (Use a level to get the stencil straight. Royal Design Studio sells this cute little level that clips right onto the stencil. Genius!)

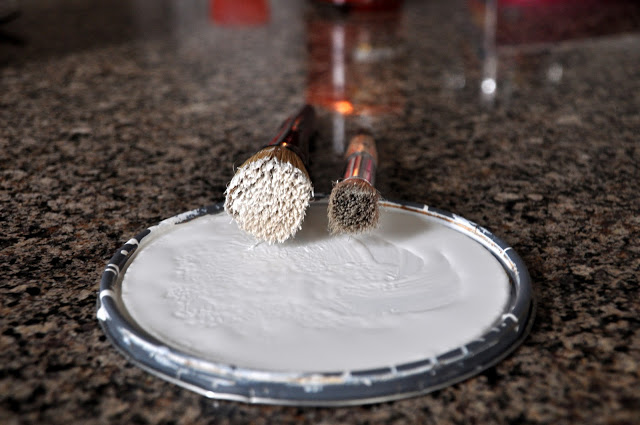
Rather than rolling this stencil, I used the brush method. Basically just tap the wall over and over and over again.
Darn that I’m easily distracted. Zoey 101… seriously?? I couldn’t focus at all until I knew if little Chase and Zoey made up! (yes, I’m a lame mom of 4 kids)
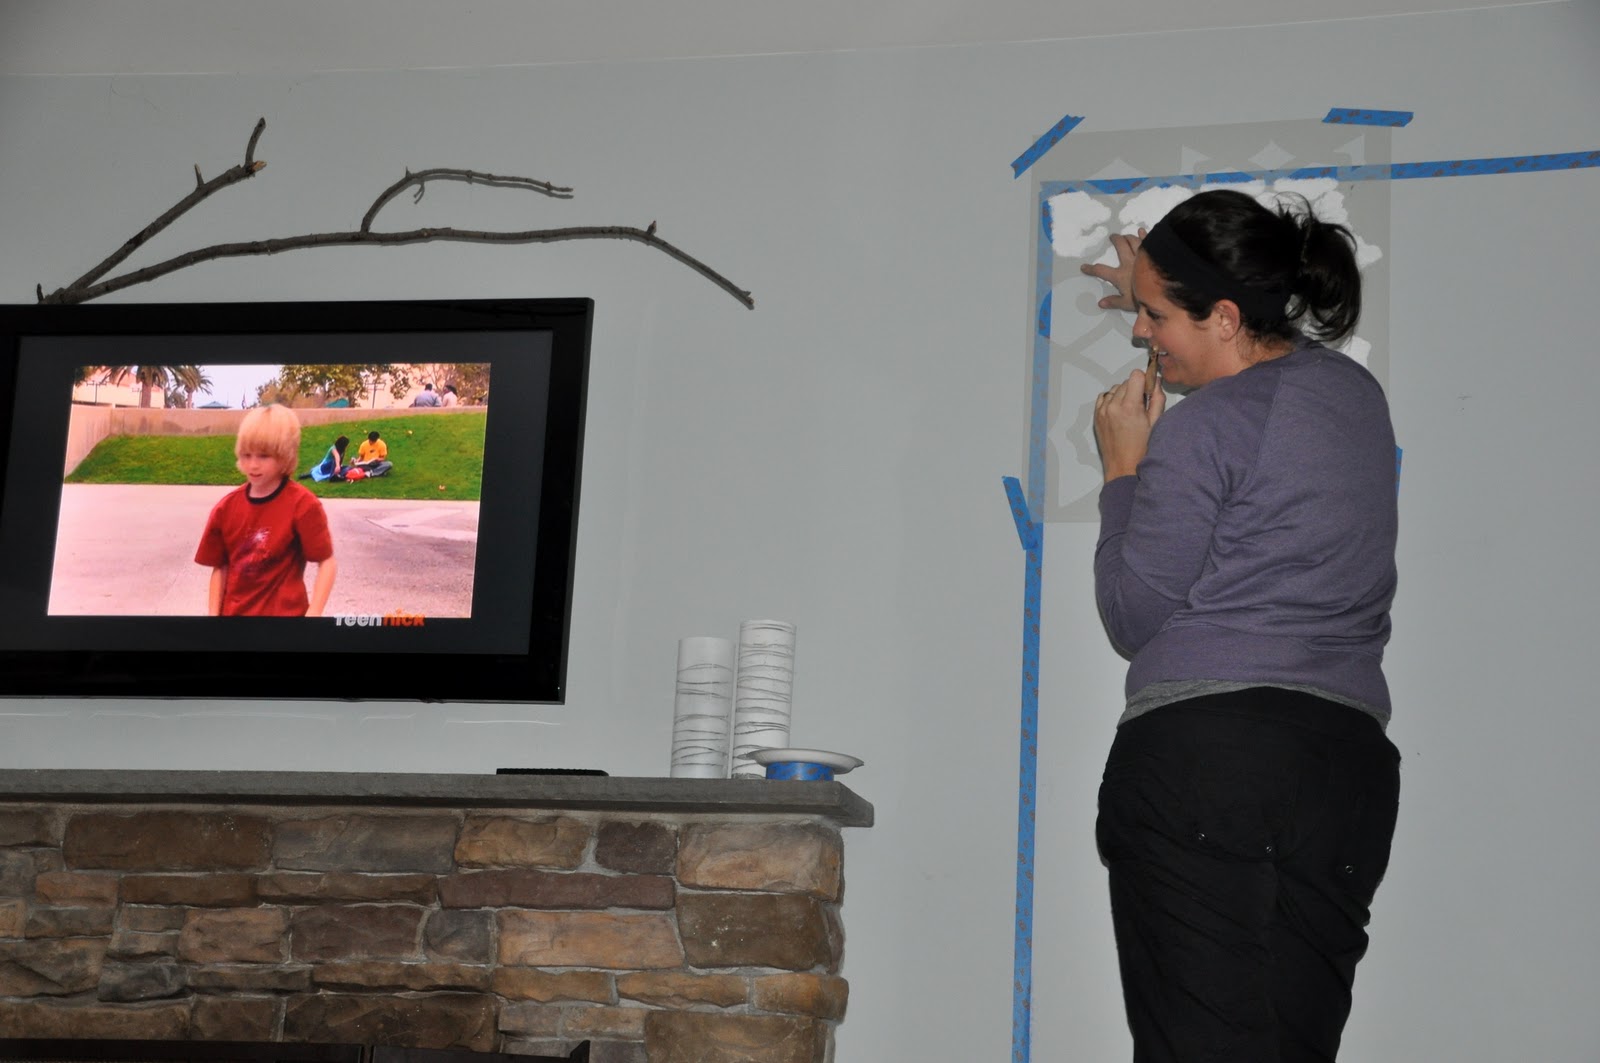
Thankfully, after Zoey ended, I was able to get down to work…
Whoa! Look at that fancy time lapse…
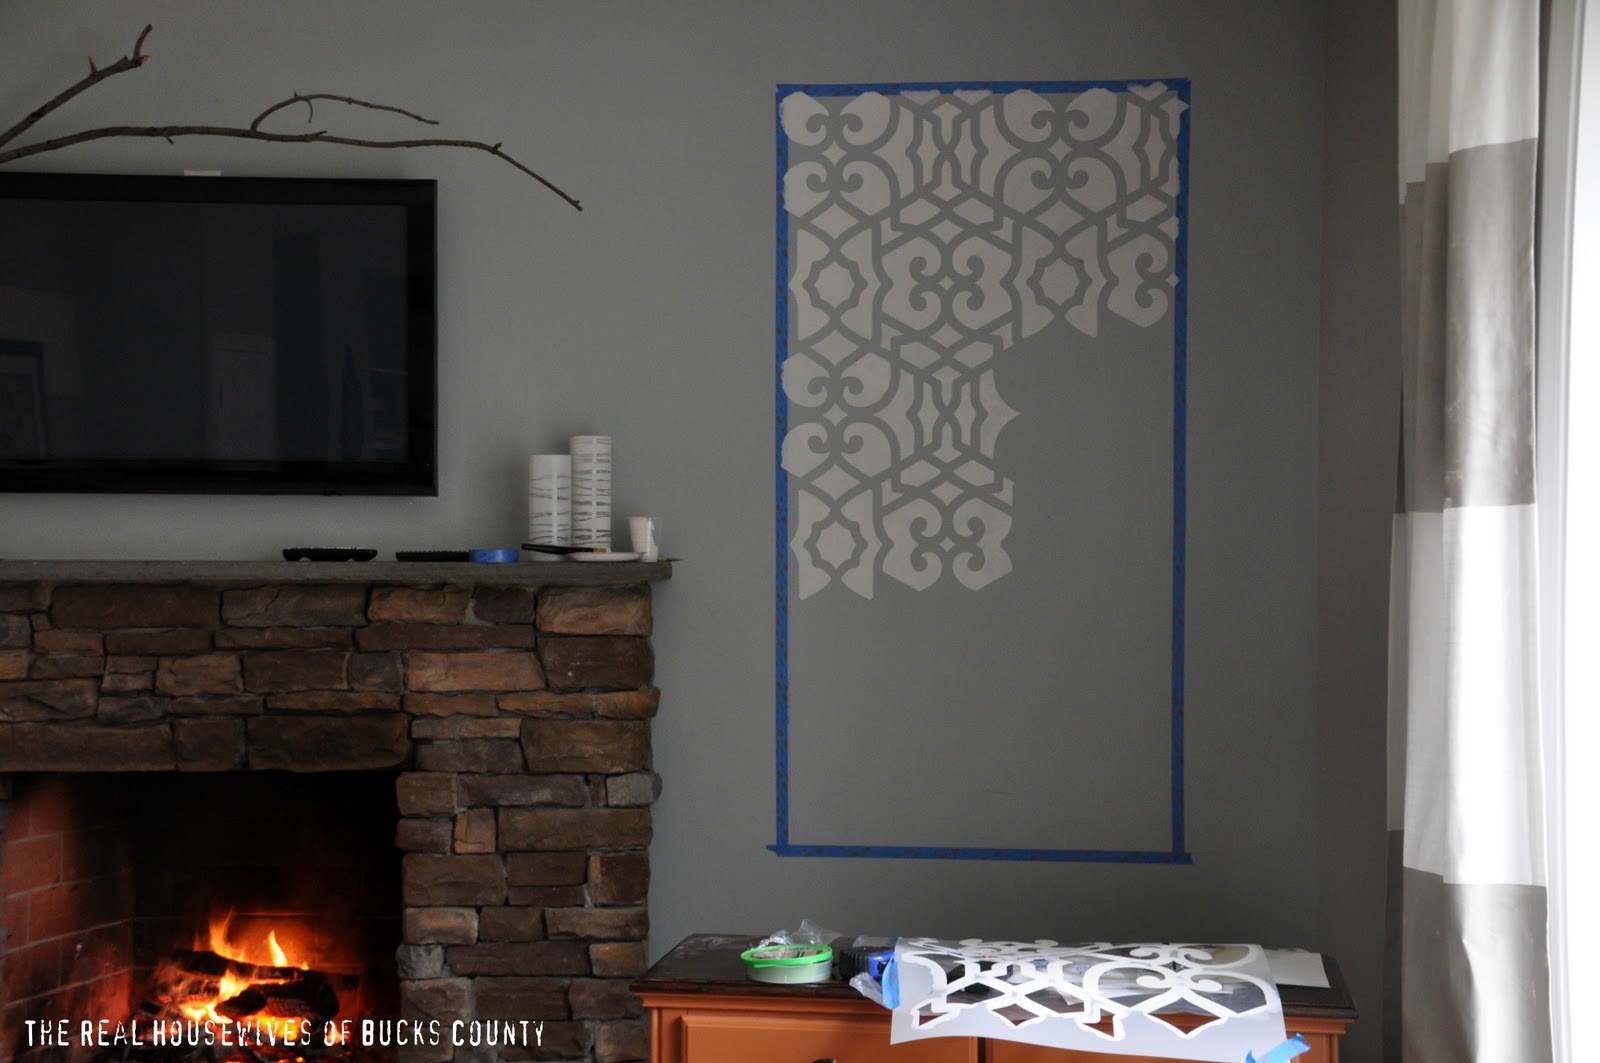
I’m a stenciling machine!
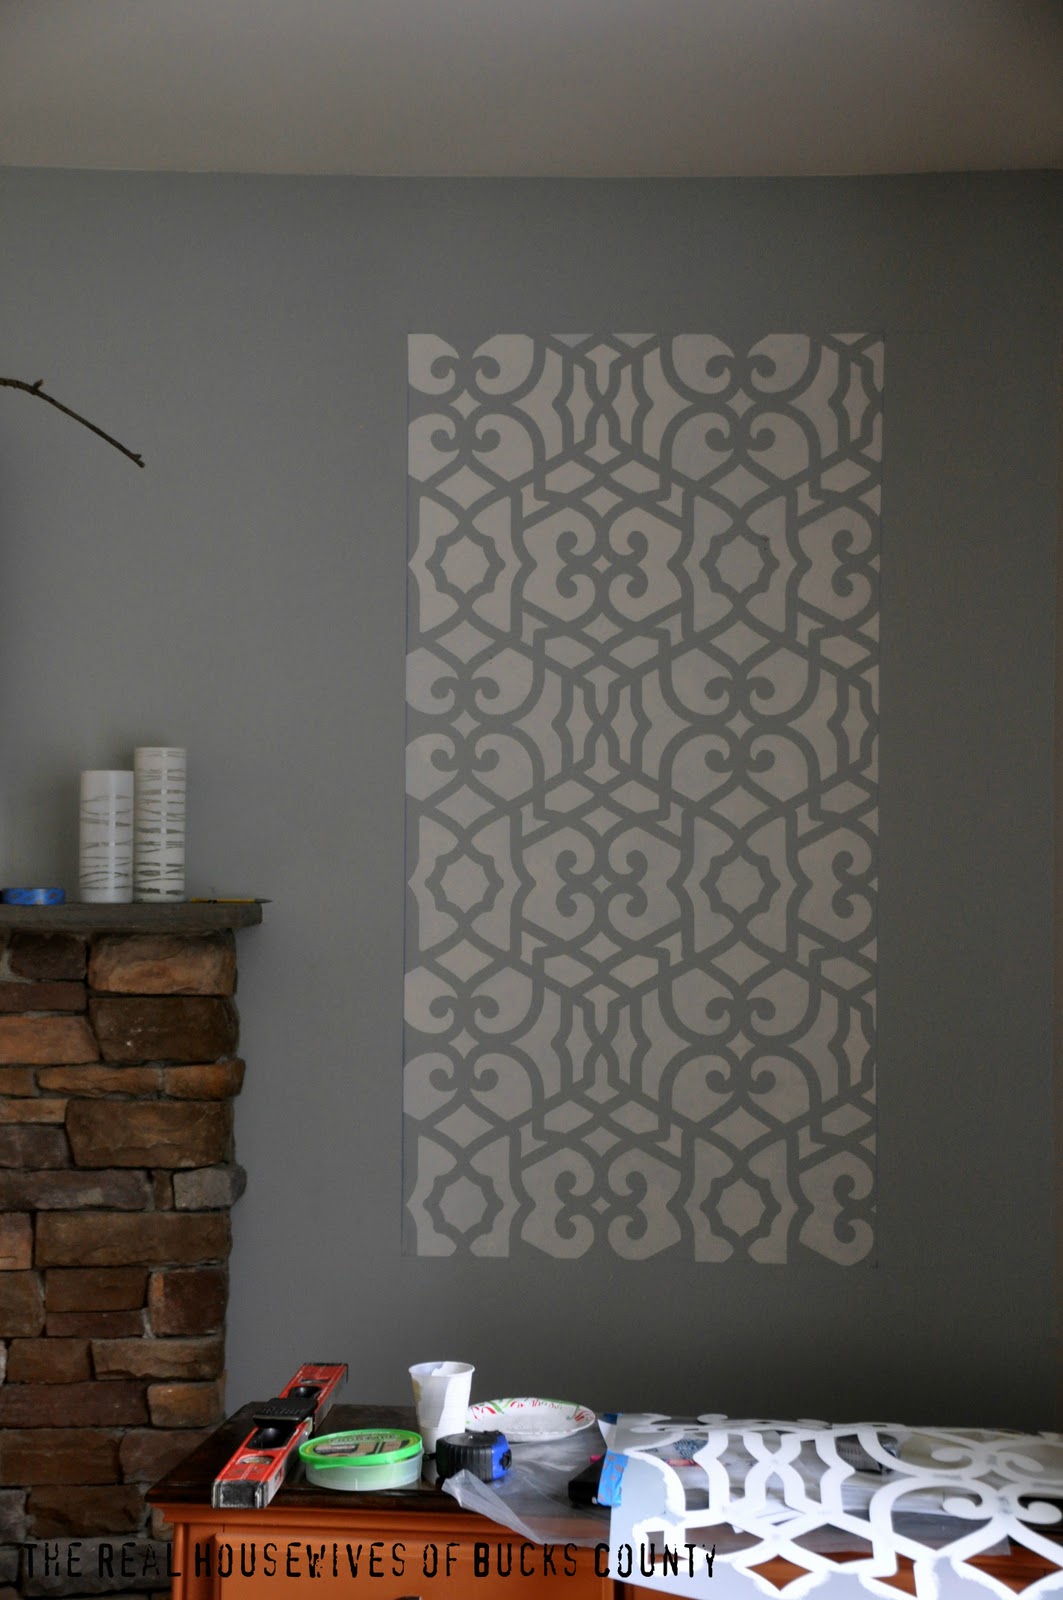
Then, it was onto the other side. The whole process only took me a little over an hour of stenciling. I have to mention that a good brush is essential. I can’t stress this enough. My Royal Design Studio brush was over at Jess’ house, so I started stenciling with a small, craft store brush and it was a waste of time. I did one section and then stopped and waited for my brush. The cruddy brush took forever, was leaving bristles all over the wall, and needed two coats. Once I got my big, Royal Design brush it was so.much.easier! Look at the difference…

Here’s how the room looks right now… and here’s where I need your help!
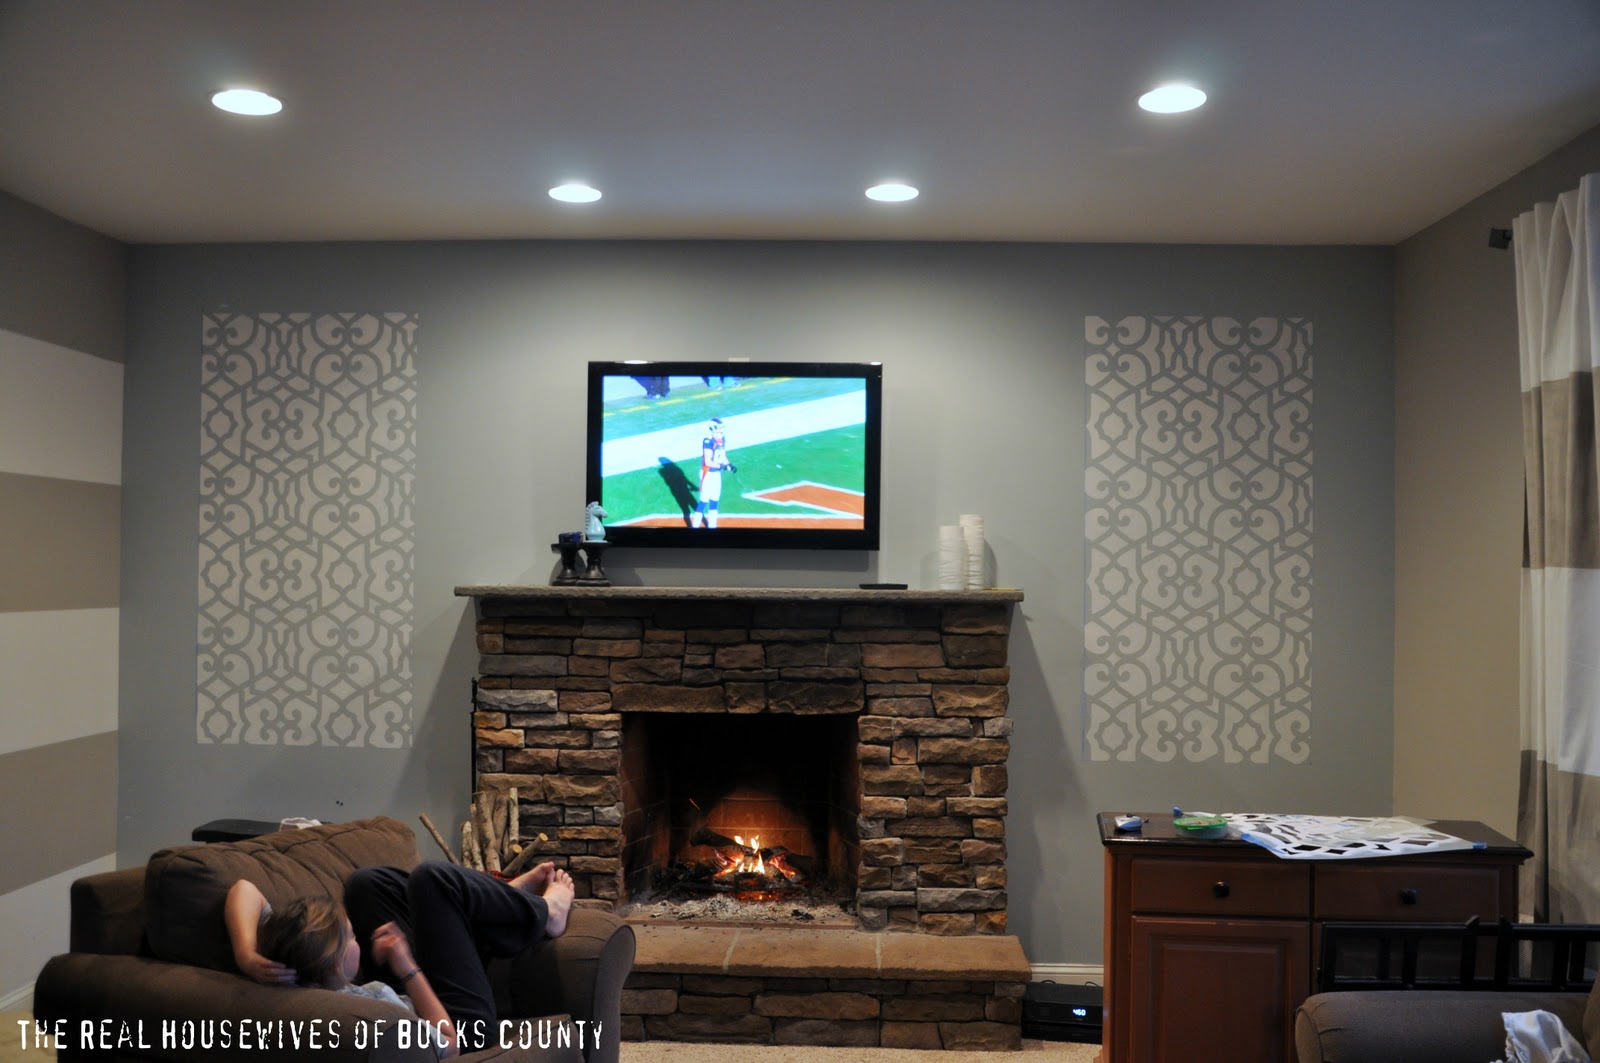
My original plan was to trim out the stencil with molding (the molding will be the same grey color as the stripe on the curtains and the wall), but now that it’s on the wall I’m unsure of what direction to go in. Here are my options…
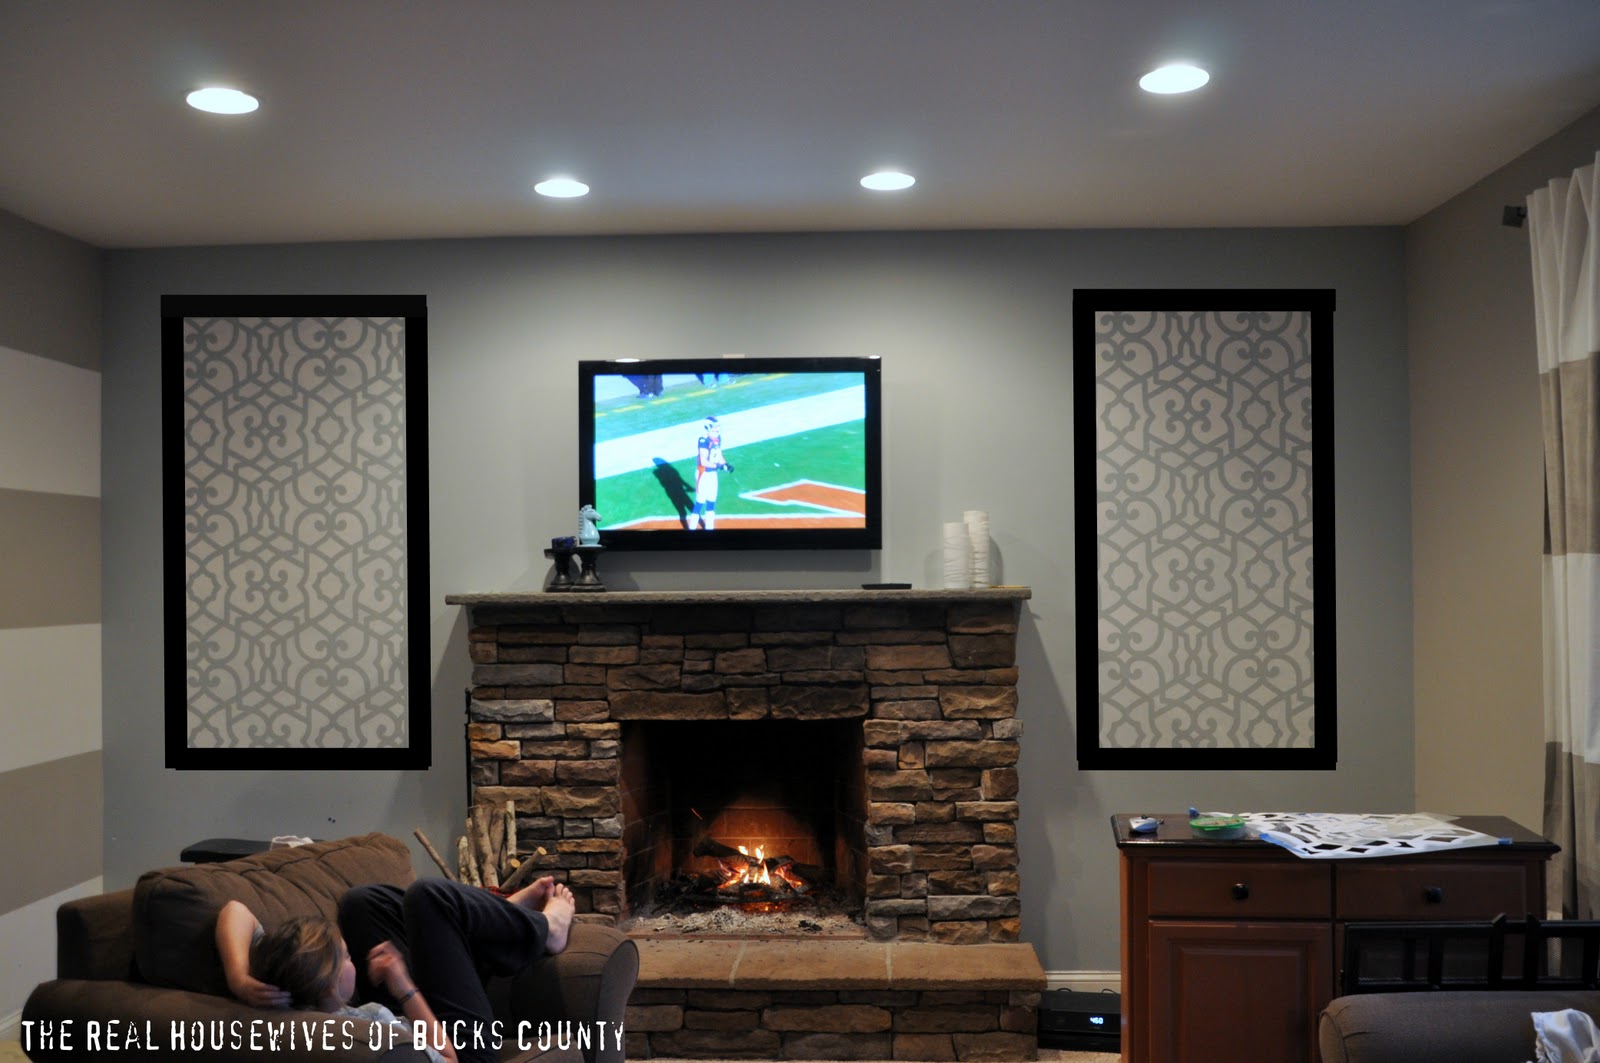
Option # 1- Rectangle Trim
Option #2- Square Trim
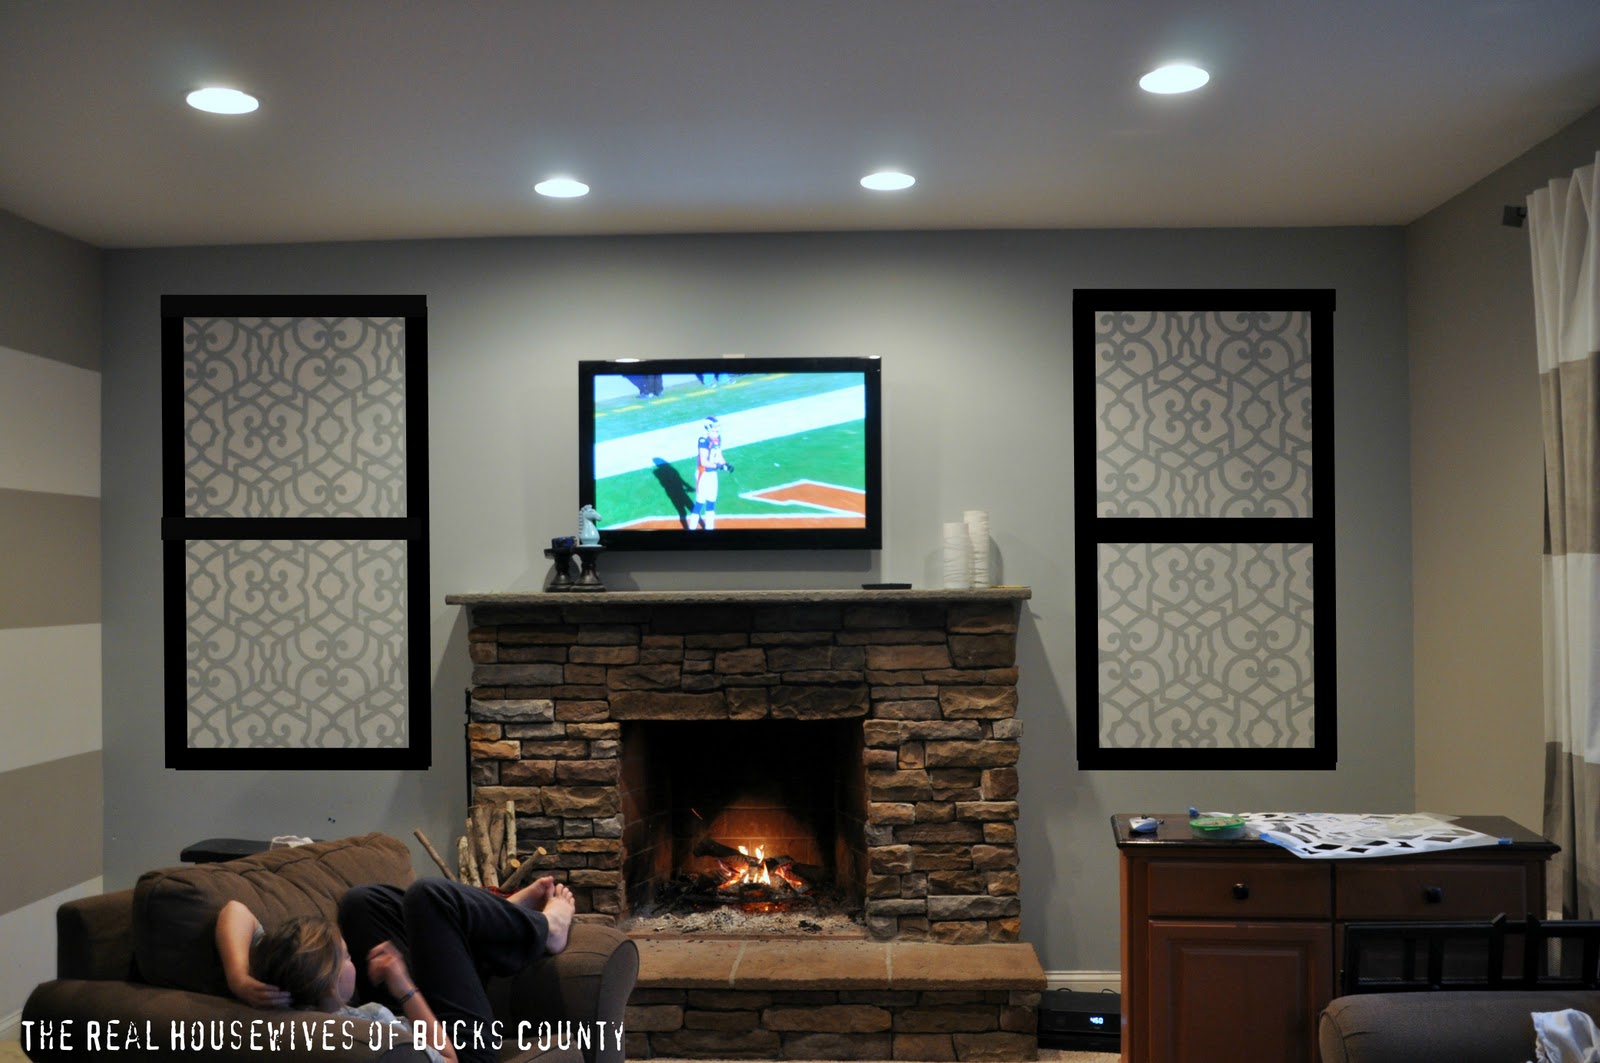
Option # 3- Rows of Trim

Option # 4- You Tell Me!
What other ideas do you have for me?
I can’t wait to hear your opinion and ideas!
I plan to finish the wall this weekend!
PS- Two things… 1- My mantle will be decorated one of these days… hopefully for the “after” pics. 2- My children don’t sit around watching TV all day…I took my pics over a span of two days!


Ohhhh pretty! I like the square trim best!
Thanks Megan! You were my first input!
Monica (and Jess)
LOVE the stencil. Inspring! I vote on the big rectangle…the lines would bug me if they didn’t line up with the stripes on the wall…a little OCD, maybe, but taht’s just me.
Hmm… Good point! I hadn’t thought about the lines matching up. I am definitely questioning if it’s too busy anyway, so that’s a great point! Thanks.
Mon (and Jess)
I like option one, square trim. The others look like you’re trying to cover up speakers in some sort of way.
Thanks Jen! Definitely don’t want it to look like I’m covering anything up! I appreciate your help!
Mon (and Jess)
Option #2- its gonna look awesome!
Thanks Girl! I think I pegged you as an option 3 kind of gal! It will be done nextime your here and you can lmk what you think!
Me
Option 4 would be kind of pretty if the trim were shallow ledges. I dud some in my dining room to hold platters. Yours could hold maybe black and white pictures or a few pieces of art. Here is the link to my dr post http://cleverlyinspired.blogspot.com/2010/10/where-should-i-put-this-platter.html
Tracie
Thanks so much for sharing your post. My hubs and I were discussing shallow shelves today and he wasn’t sure how he would hand them. The L bracket idea is really helpful. I’ll be sure to let you know what we end up with!
Monica (and Jess)
I like the simple square trim the best. There are a lot of lines in the room with the stripes and my OCDedness would make me twitchy if they didn’t all line up. However, that’s me and apparently Miss Anonymous above. 😀 It looks great.
Suesan,
I hadn’t thought about the lines matching up until you and Miss Anonymous had mentioned it- it’s a good point. I don’t want my guests getting all “twitchy” HA! Thanks for your help!
Monica (and Jess)
i like the rectangle trim. such a cool idea! I have a stencil from them I’m so excited to use when I move into my house!!
Hey Rebecca!
Thanks for your help! Send us a picture when you use your stencil. Which one did you get?
Mon (and Jess)
I say go with option 1. Later on down to road you could all candle or light scones in there or even mirros of your style to. There is so many design ideas you go make with just framing the outside later on down the road when you get board of it. The other styles you could get stuck with and would have to work around them if you want to change things up a little bit that don’t require alot of work.
Thanks for your ideas. I def need change. I get sick of things quickly, so I like your ideas of changing it up over time. Thanks a bunch!
Mon (and Jess)
I like option #1 the best! I think it helps to include the tv into the design and it doesn’t get so busy that you lose the fireplace! Have fun and we know what ever you decide it will be beautiful! As always!!
Thanks Shannon! I def don’t want to lose the fireplace. It’s my fav! Thanks for your help!
Monica (and Jess)
I like the four layers of trim!
Thanks Maury, I think I’m sort of leaning in that direction. I just can’t decided on this one!
Thanks for reading and helping out!
Monica (and Jess)
I like option 1 the best. I think the others are too busy with the stencil and the stripes on curtain and wall. The color will be lighter than in the example right (if I am reading right), which I think you should do because otherwise it has some weird kind of distraction with the black frame around tv. Hopefully that jumbled phrase makes sense to you 🙂
Judy, thanks for your help! I agree about it getting busy and I’m working to avoid that. The trim will be a light grey (color of the other walls) not black. I just wanted you to be able to see it in the post. 🙂 Thanks again!
Monica (and Jess)
I like Option 1 and Option 3! Love the stencil!! 🙂
I’m torn between 1 and 3 too! Thanks Taylor!
Monica (and Jess)
First….AWEsome job stenciling with our Chez Sheik stencil Monica. Glad you like the big daddy brush! 🙂 Second…I would go with option #1. With the pattern in the stenciling, the fireplace stones, and the horizontal stripes on the adjacent wall I think the simple option is better. Can’t wait to see it finished!!
Thanks so much Melanie! And yes, I LOVE your brushes, they’re such high quality! I’m excited to see how this project turns out in the end!
I also have plans to use the same stencil pattern on my kitchen table in an adjoining room.
Love your stencils! Thanks!
Monica (and Jess)
Hello Monica, I like the stencil you are using and I think it would look lovely with option 1. As has been said already you could add some art, wall sconces or mirrors on the stencils when you are ready.
Thanks for your help! I’m leaning towards 1 or 3 right now!
Monica (and Jess)
I love option 4, but then, its really a matter of preference. I love the oriental screen feel it seems to bring…
Thanks Shawna! I’m leaning towards the last option so far!
Monica (and Jess)
I’m going with Option #4, You Tell Me:
I like the look without the trim. The colouring is subtle enough that the stencil doesnt need the frame to ground it. Am I saying that right? And I’m saying it for the same reasons the others are saying you can add more trim, sconces, mirrors, etc.
And my next choice is number #1. I love the ‘print’. Thanks for the tips, I like learning from experience, especially somebody else’s! 😉
Hey Tanya,
Thanks for your help. I think I’ve stared at the wall too long to now leave it without trim. It would always feel unfinished to me. I do like the idea of adding something within the frame though!
Thanks again!
Mon (and Jess)
Monica,
I like option #1 maybe with not as thick outline, maybe just thin trim painted the same white and then I saw some cute ideas of pictures on ribbon, mirrors or such on Pinterest to put in the stencil space. Have fun, Brenda from MN
Hi Brenda! Yes, I’m thinking fairly simple trim, not chunky. I’ll need to look on Pinterest for some inspiration if I get stuck! Thanks for your help!
Monica (and Jess)
I like option 1 best. I think I would have the same problem as Anonymous with the lines matching those on the wall.
Thanks Emily- I totally agree about the lines bc I have a thing with symmetry! Thanks for your help
I like option #2 with the trim around the stencil. I think without, it looks unfinished and floating. If you don’t mind,I have a suggestion of painting the trim the dark taupe which you used on the other walls instead of the black. It may balance out the room a little more with out too much going on. Can’t wait to see the finished result and what you decide. You will do great with whatever you pick!!
Hey There! Thanks for your input. Yes, the trim will be the other wall color, not black (I just thought it was easier to see in the post) 🙂 I totally agree that it looks weird and unfinished now. I’m staring at it right now and it’s killing me. I need this project done asap! 🙂
Monica (and Jess)
I like option 1 rectangle. I think the other options take away from the stencil.
Thanks Liz! A bunch of readers agree with you! I appreciate your help!
Monica (and Jess)
Option one! I love the stencil so much I dont want you to cover it with all that trim….I say do the entire wall with charcoal crown molding. Wish I could help you stencil, I wanna stencil with someone before I attempt to do my own…..
Thanks Melanie! I guess I have to decide if I want the stencil to be bold or subtle behind some molding. Thanks for your input!
Monica (and Jess)
ok, you asked,,, i would choose # 1 , and i love the striped wall and the matching drapes, love that!! how ever,,,, the wall behind the great stencil doesnt match the other grey,, its a cold grey, the side walls are a warm grey,,, and that really bugs me!! lol! cinuck@hotmail.com
Thanks for your honesty. Here’s the back story. The Fireplace wall is actually a cool blue color (hard to tell in pics) and the other walls are a light grey with the one striped wall. So the thought is the molding around the stencil would be the color from grey walls. Hmm… to be honest I’m 100% still on the fence about it!
Thanks!
Monica (and Jess)
Well, since you posted a 2nd time on FB I thought I better vote! I think I”m leaning towards Option # 1.. clean, simple, sophisticated, and just nice! (they are all good options) but that would be my favorite! 🙂 Anything you choose will look awesome!
hmmm I think I like option #1 the best…clean lines that don’t “chop up” the space. LOVE the stencil! 🙂
I like the squares best, but think it could look amazing with one black shelf in the center of each, all the black trim in all of the options seems a bit….overwhelming. Unless you are doing it in gray still and I just missed that fact….love the stencils!
I think the black lines are too thick. If you make them half the width, it would be easier on the eyes and probably a little bit more elegant.
great job on your stencils…don’t cover it up…frame with the simple rectangle…I would lean toward using the same white paint for the trim that you used for the stencil…thinking it would fool the eye making it seem that the stencil and molding are actually one piece. So happy to have stumbled onto your blog tonight….I’m a blog-stalker in Bucks County also. Making it my goal to go thru the tutorials out there and learn how to master power tools….lots of projects and very little knowledge, but I’m going to figure it out!! I’ll be following you!
I love option #1!
I love the stenciling and I like Option 1 or 2 the best. It was really fun reading all of the option 4 comments though, some really great ideas. You are going to have a hard time picking!
Totally love this idea it really ROCKS! I love reading your blog this is the first opportunity I’ve had to comment, keep up the good work
Michalea
http://refabulated.blogspot.com/
Don’t use black, it’s too overwhelming. Use small, white trim pieces.
LOVE the stencil!! I like option 4 the best:-)
I like option #1 the best. I think you want to see all the great stenciling.