
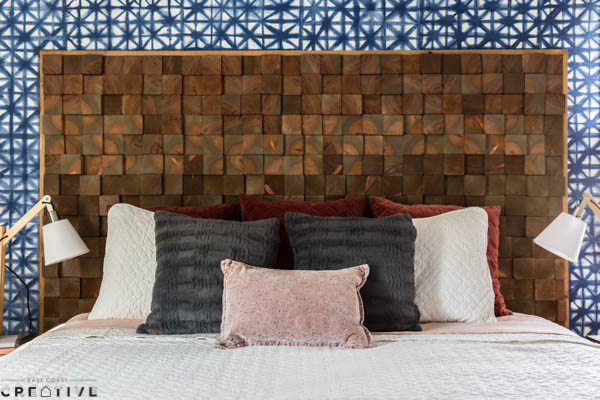
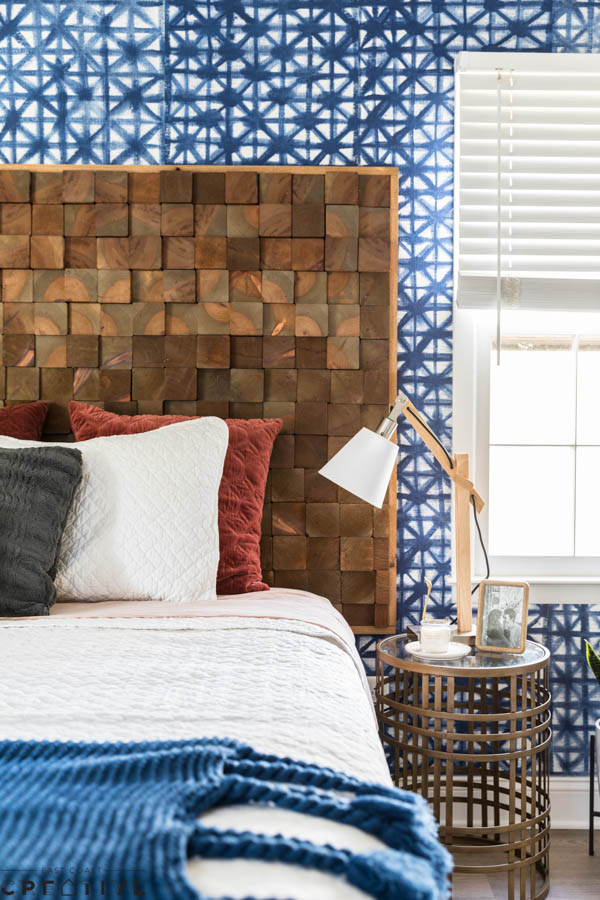
Headboards are a great way to make a huge statement in your bedroom and that was definitely the case with this wood slice headboard from Episode 1 of The Weekender (Watch HERE). This DIY woodslice headboard is one you can definitely conquer in a weekend and it has a really unique style too!

Here’s a video tutorial for you with all the steps included!
Here’s what you’ll need to make this standout piece:
Materials: Plywood | Cedar Fence Posts | Wood stain | Rubber gloves | Chop Saw | Nail gun | Wood glue | Sandpaper
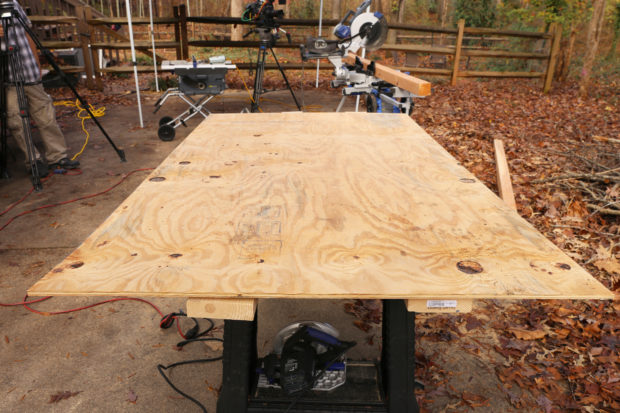
The size of the plywood piece will be determined by the size you want your headboard to be, so make sure you have your measurements before you head to Lowe’s- they’ll cut your wood down to size for free!
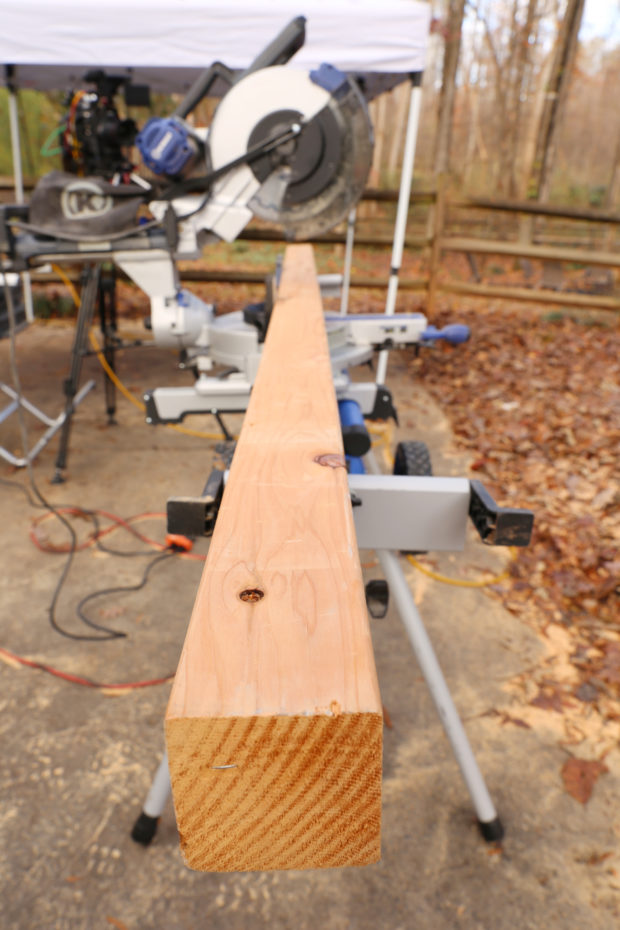
The wood slices will be cut out of Cedar fence posts (they smell amazing!) Since we wanted an organic look for this headboard, we varied the lengths of the blocks, ranging from 1-2.5″ at quarter inch intervals for each block. When all of the blocks are attached to the plywood backing, it gives us a nice textured, depth effect rather than having them all exactly the same.
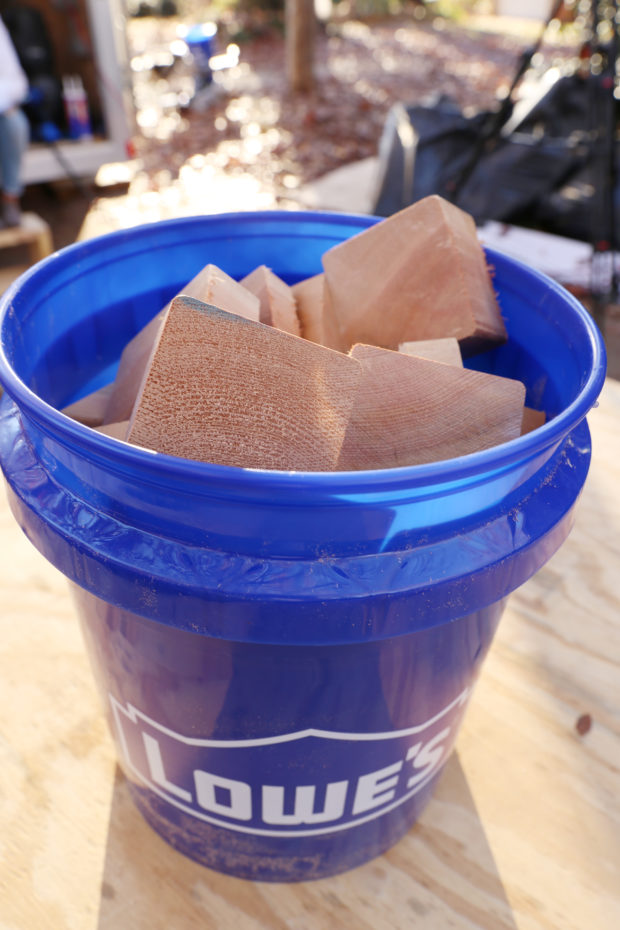
Disclaimer, we cut a lotttt of blocks, like maybe a million, but it’s a quick cut, and you’ll be a pro by your 5th or 6th cut! All these cuts also make for a great game of block B-ball might I add…
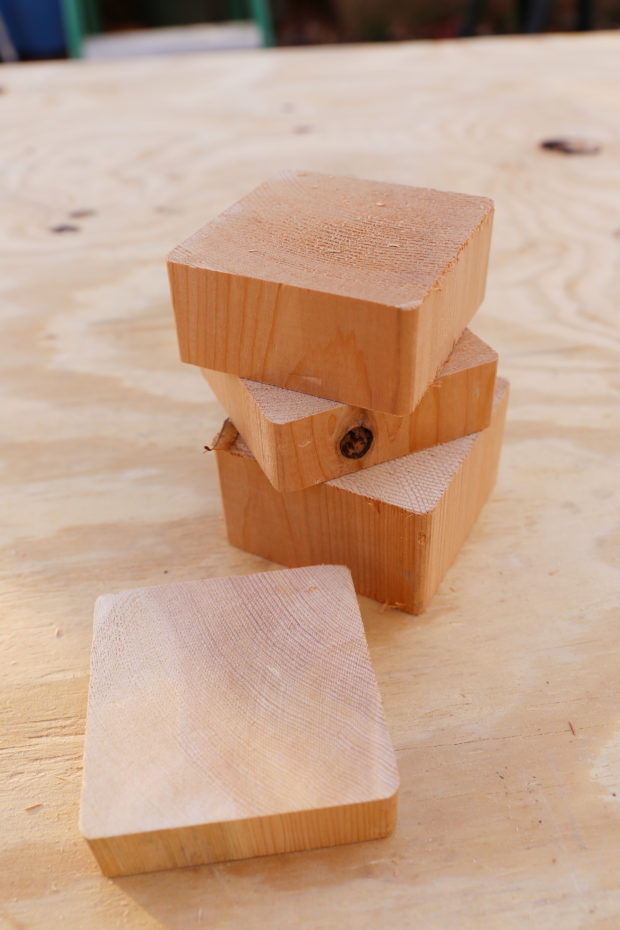
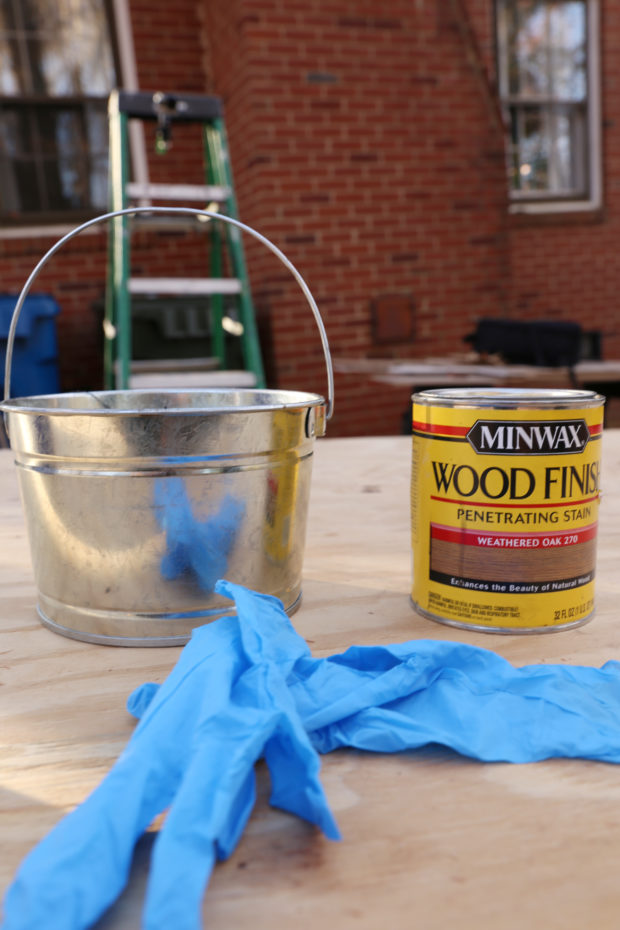
When you have all the blocks cut, make sure to sand any of them that are a little rough around the edges. If you’re using a nice, sharp blade you shouldn’t have to sand much at all. Now it’s time to stain! The best thing about this part is that since each cut is a little bit different, the stain will look slightly different on each block, and you can really see the woodgrain once it’s applied.
We found dipping the wood into a bucket of stain worked the best! We used Weather Oak as our stain color.
After all your blocks are cut, sanded, stained and dry, attach them to the plywood backing. This is going to be a bit of a jigsaw puzzle, but don’t try to make them fit perfectly– we’re going for imperfect and natural here, and we want a slight variation in heights as they’re attached to the board. Apply construction adhesive on the back of each block, then secure to the plywood with a nail gun- Each block should only require one nail due to the super strong glue.
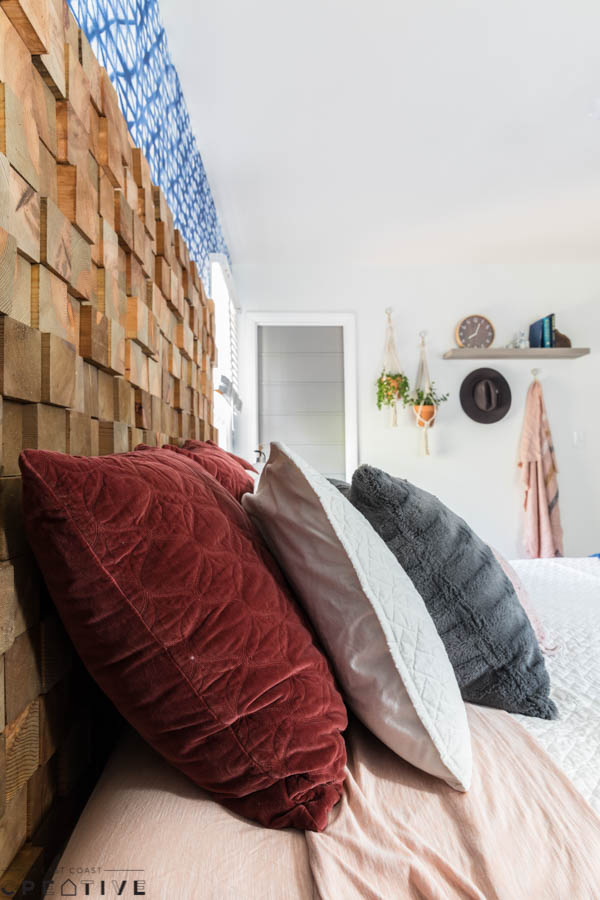
To finish it off and add a little class, we added a thin frame using 1×2″ pine on the outside to cap off the blocks and even everything out. Use a nail gun to attach your border to the outside, and you’re good to install!
One installation tip- figure out where you’re hanging this bad boy (he will be really heavy) and mark out your studs. Then, to completely hide your screws, pop off a few wood blocks where the studs are, attach the headboard to the wall directly into the studs (we used long lag bolt type screws) and then reattach those few blocks. Easy peasy and gives the headboard a seamless look!
For more DIY projects from this episode, check out the full post here, and be sure to watch the full episode below!
-Mon
Don’t miss a single Weekender Episode of Season 2- You can watch all Season 1 + 2 Episodes right HERE!


Awesome job on the head board! So happy you’re back for season 2!!!
I love the Weekender, I love Monica, and I love every single episode and project for her developed. Of course, no need to say I love, love, love this headboard. My bedroom is not really a big one, so I am not sure if this would fit my bedroom, besides, there’s so much to do in my fixer-upper that that would be one of the last things to take care of.
However, I keep wondering if this style would look that great over my French doors, or would it make it look smaller.
What do you think? In my mind looks great, but of course, I am not always right, lol. I look forward to your input.