
Hi Guys! Today is a super fun day for East Coast Creative! I’m sharing 12 Make-It-Yourself Holiday Gift Ideas with Kelly Ripa and Michael Strahan on Live! with Kelly & Michael. Hopefully, you can watch the segment (9am EST), but even if you can’t, this is your lucky day… I’m sharing all 12 project tutorials so that you can give some fabulous handmade gifts that your friends and family will love! You can check out the other 11 projects HERE, but first let’s chat about these string art projects!
String art is a simple way (that looks impressive and complicated to your family and friends) to create great wall art and decor for any space, and these designs are perfect for the holidays!
Here’s what you’ll need to make these string art designs:
There are 2 ways to do this… use a pre-made kit
Materials: String Art Kit
This string art kit had everything I needed to complete the project all in one box!
Or you can make it from scratch. The perk to making it from scratch, is that you can create any design you want!
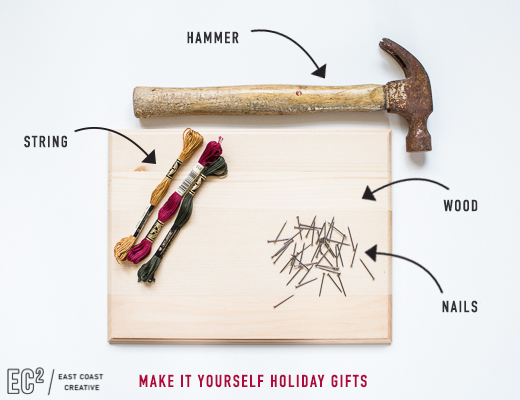
Materials: Wood Board | Nails | Embroidery Floss | Scissors | Hammer |
I picked up all of my materials at Lowe’s and JoAnn Fabrics for this project. You might even have a hammer and nails on hand already!
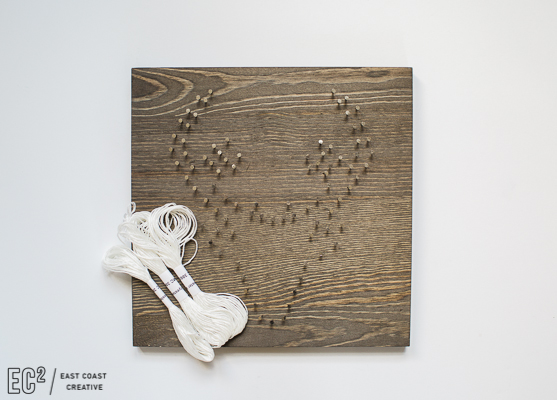
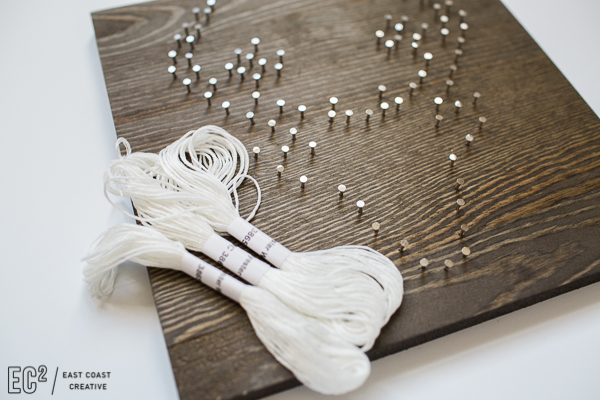
Step 1: This design was already made when I pulled it out of the box, so I could skip right to the string.
Tie a knot at the first nail, and then start weaving in and out of the nails.
Go across, around the edges, and all over!
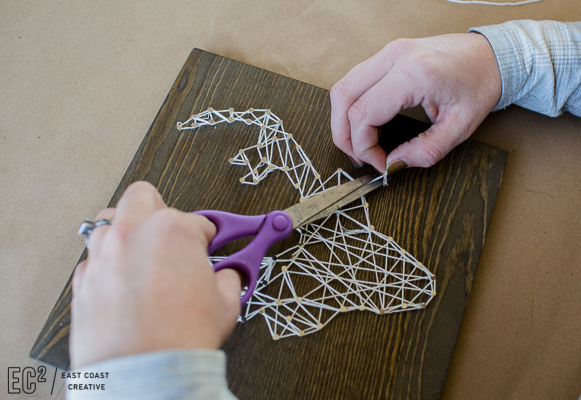
Once you reach the end of the string (or feel like you have enough pattern), tie a knot onto one of the nails, and cut the excess string.
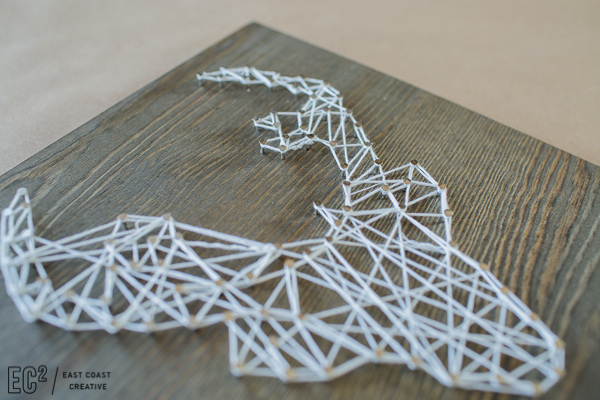
Voila! Here’s our Stag String Art! It was the perfect activity to do in front of the TV, watching a holiday movie!
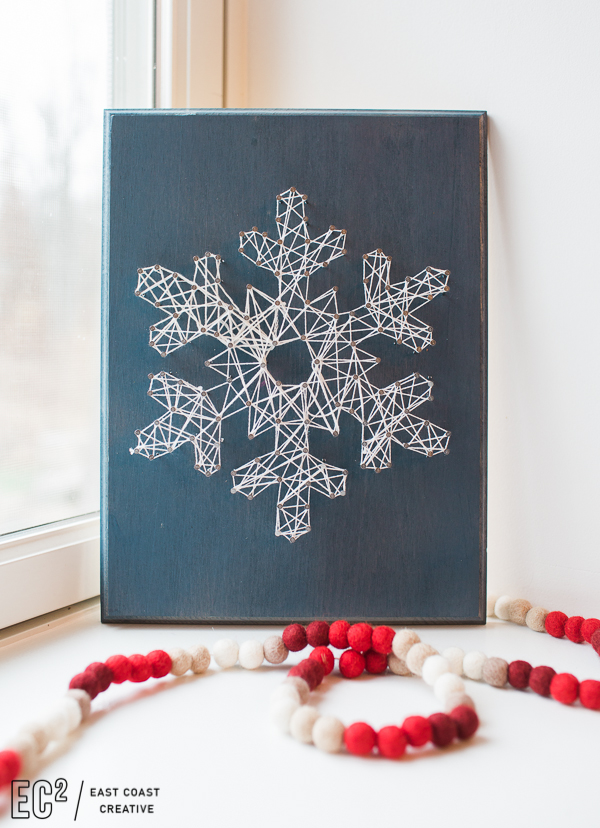
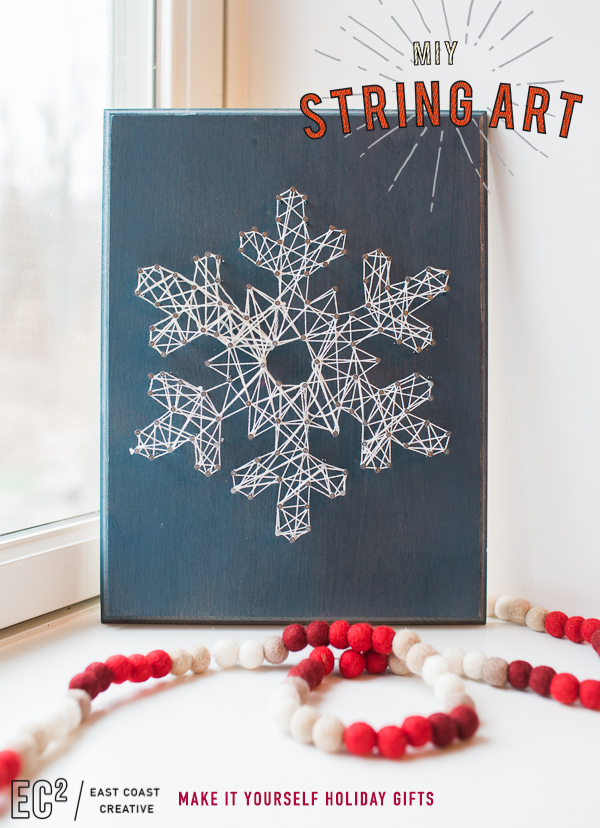
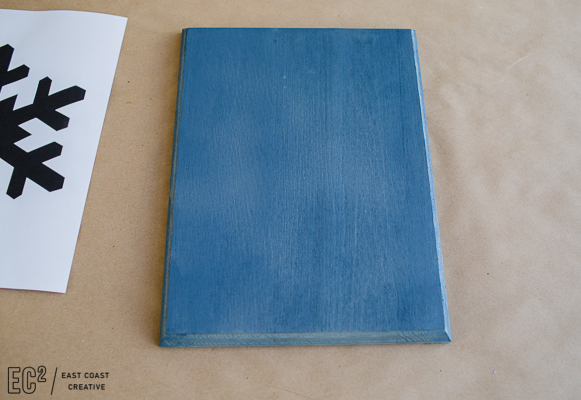
I also wanted to show an option that’s a complete MIY… so start with a piece of wood (I spray painted mine blue for the holidays)
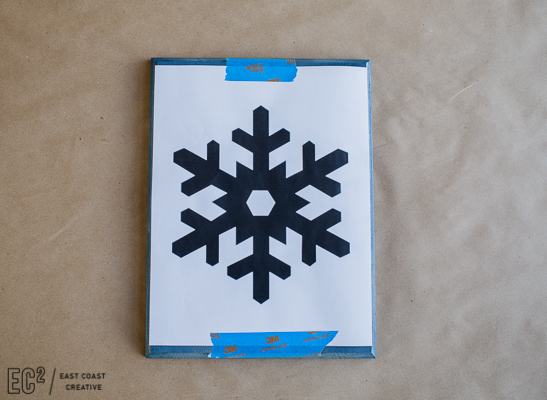
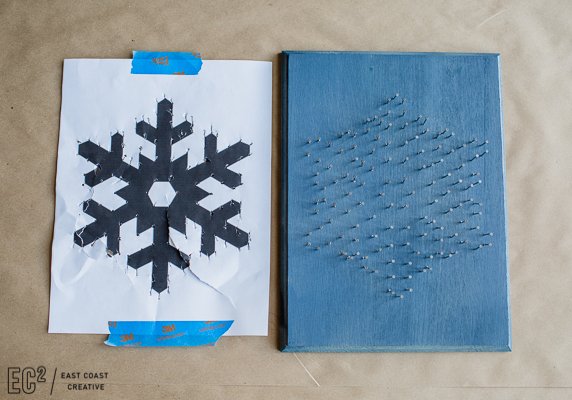
Step 1: Print out a design (I googled SNOWFLAKE, because I’m fancy like that), or draw one on your board. This will be a guideline for where you will place the nails.
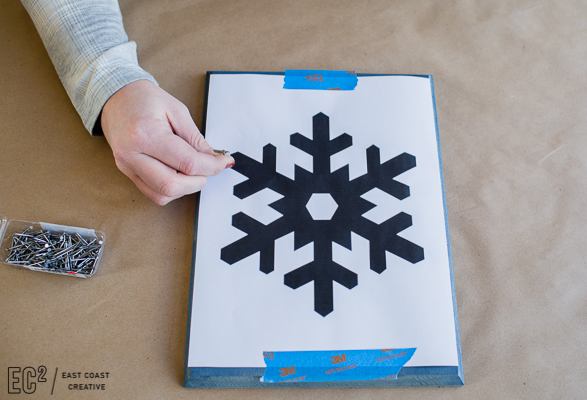
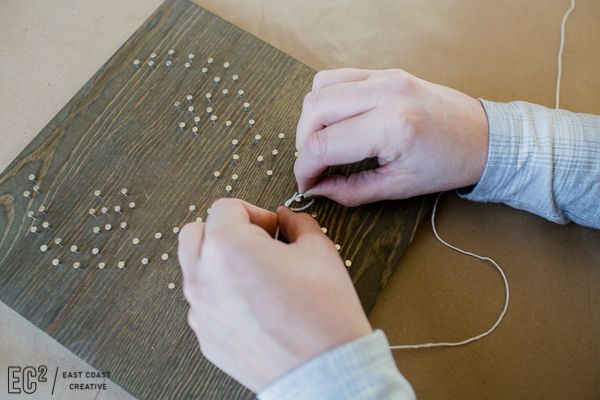
Step 2: Start placing the nails around the design you printed out.
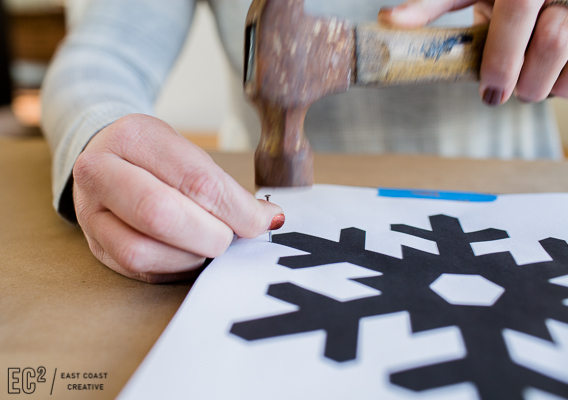

Make sure to get the nails into the wood enough to stay, but don’t hammer them in too far.
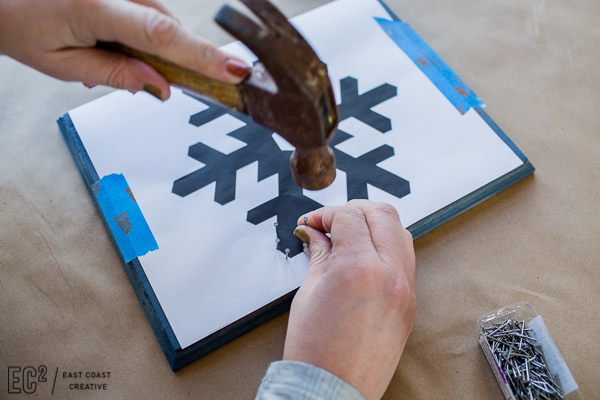
Keep nailing and nailing…
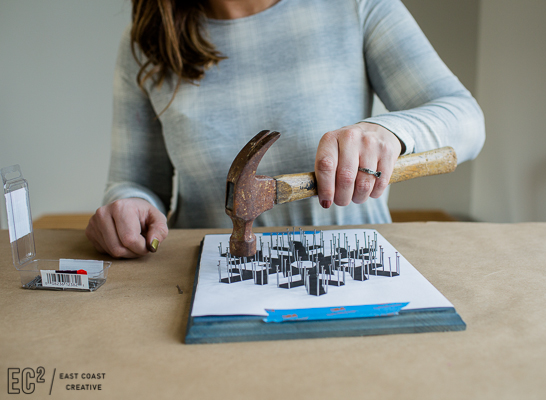
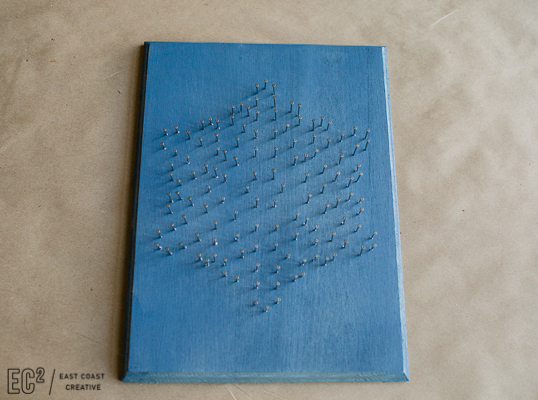
It looks a little crazy once it’s fully nailed!
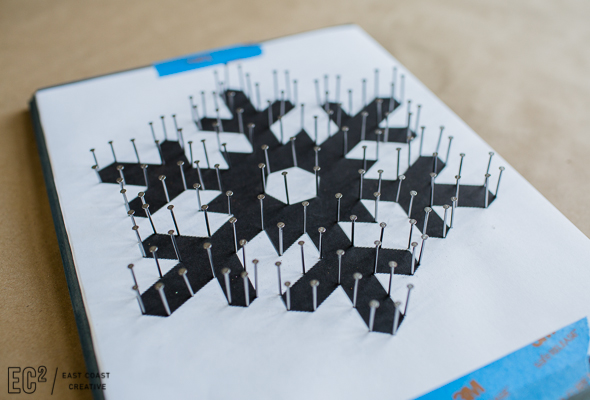
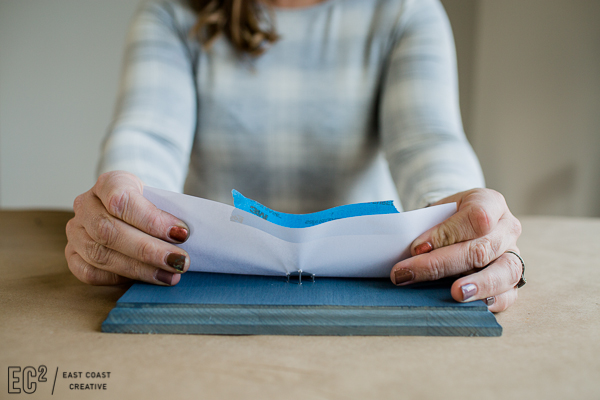
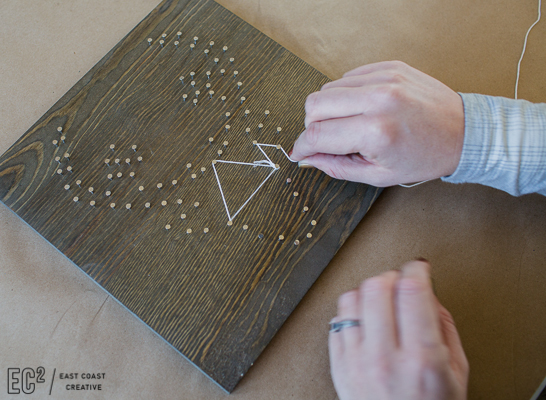
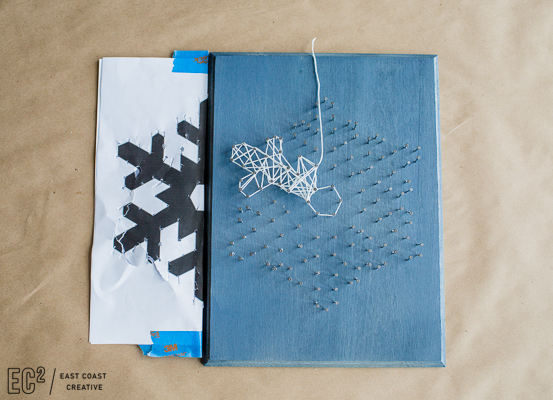
Step 3: Now that your nails are in, remove the paper guide and gently tear it off the nails.
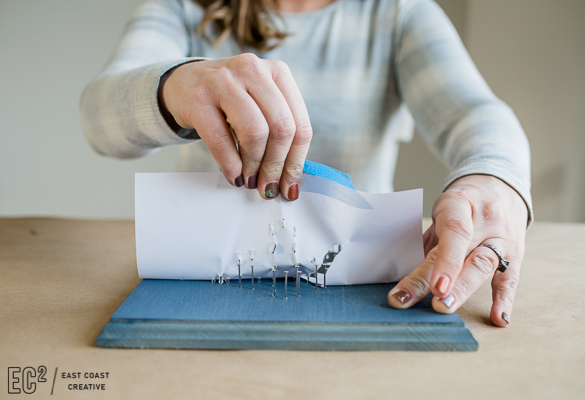
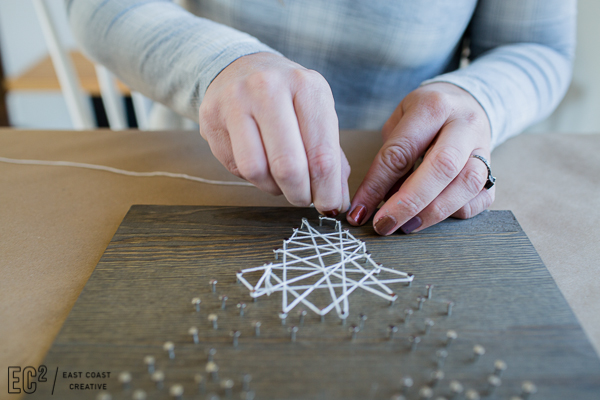
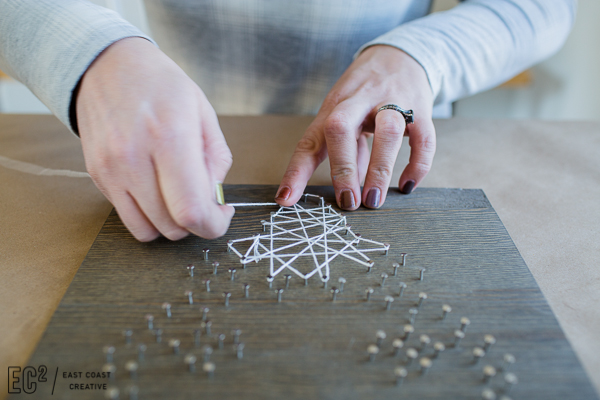
Step 4: Grab you string, and again, start with a knot on one nail. For this one, it’s helpful to keep the snowflake picture next to you as you work. You want to make sure that you string all along the outline first. That way you have the snowflake shape and not a hot mess of string!
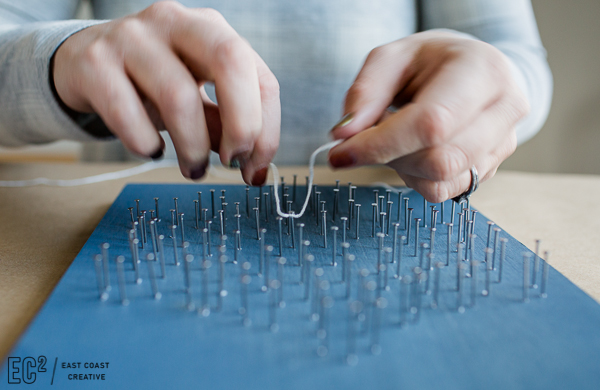
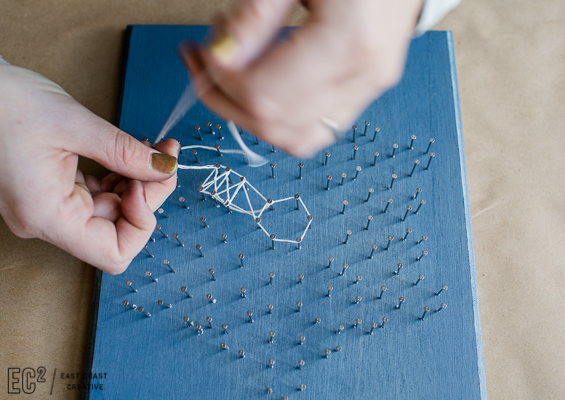
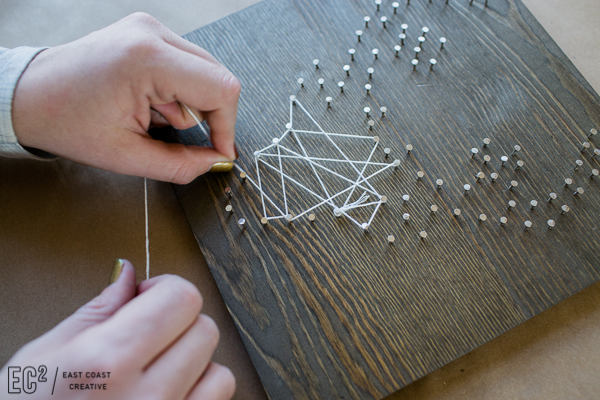
It’s starting to take shape!
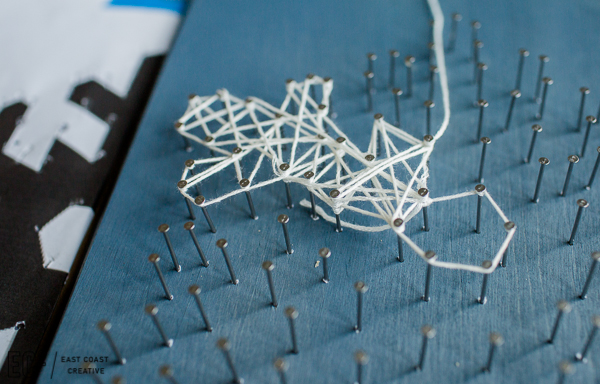
It took me about 30 minutes to string the snowflake, but the effort is totally worth it!
I love these string art projects so much, I might just leave them up in my house all winter long! It’s a simple and pretty way to add some personality to any wall- your friends and family will love this gift!
Make sure you check out the other 11 Make-It-Yourself gift ideas I’m sharing today!
Click HERE to see them all!

Happy Holidays Everyone!
-Mon


I saw this on Live With Kelly & Michael, great ideas!
And…speaking of holiday.. I’m obsessed with fall. Call me crazy but I change my iPhone background each season! Being that Christmas season is almost upon us, I’ve decided to share some of my favorite holiday backgrounds! Enjoy!
http://www.cassandraann.com/#!Holiday-Phone-Wallpaper-Free-Download/clb4/564f8a060cf29d581a41aeb5