
My kids headed back to school yesterday and it means that for the FIRST.TIME.EVER, all 4 kids are in full-day school! I think I’ve already been more productive in one day than a full week of half-day kindergarten! With 4 kids in school, homework is a serious undertaking. The littles (what we call Kira & Cal) don’t have too much, but it’s still nightly, and the older two get more and more each year. Before school started, I wanted to create a designated homework supplies area to help me manage the chaos, so Kira and I came up with this DIY Homework Caddy that they’ve already started using!
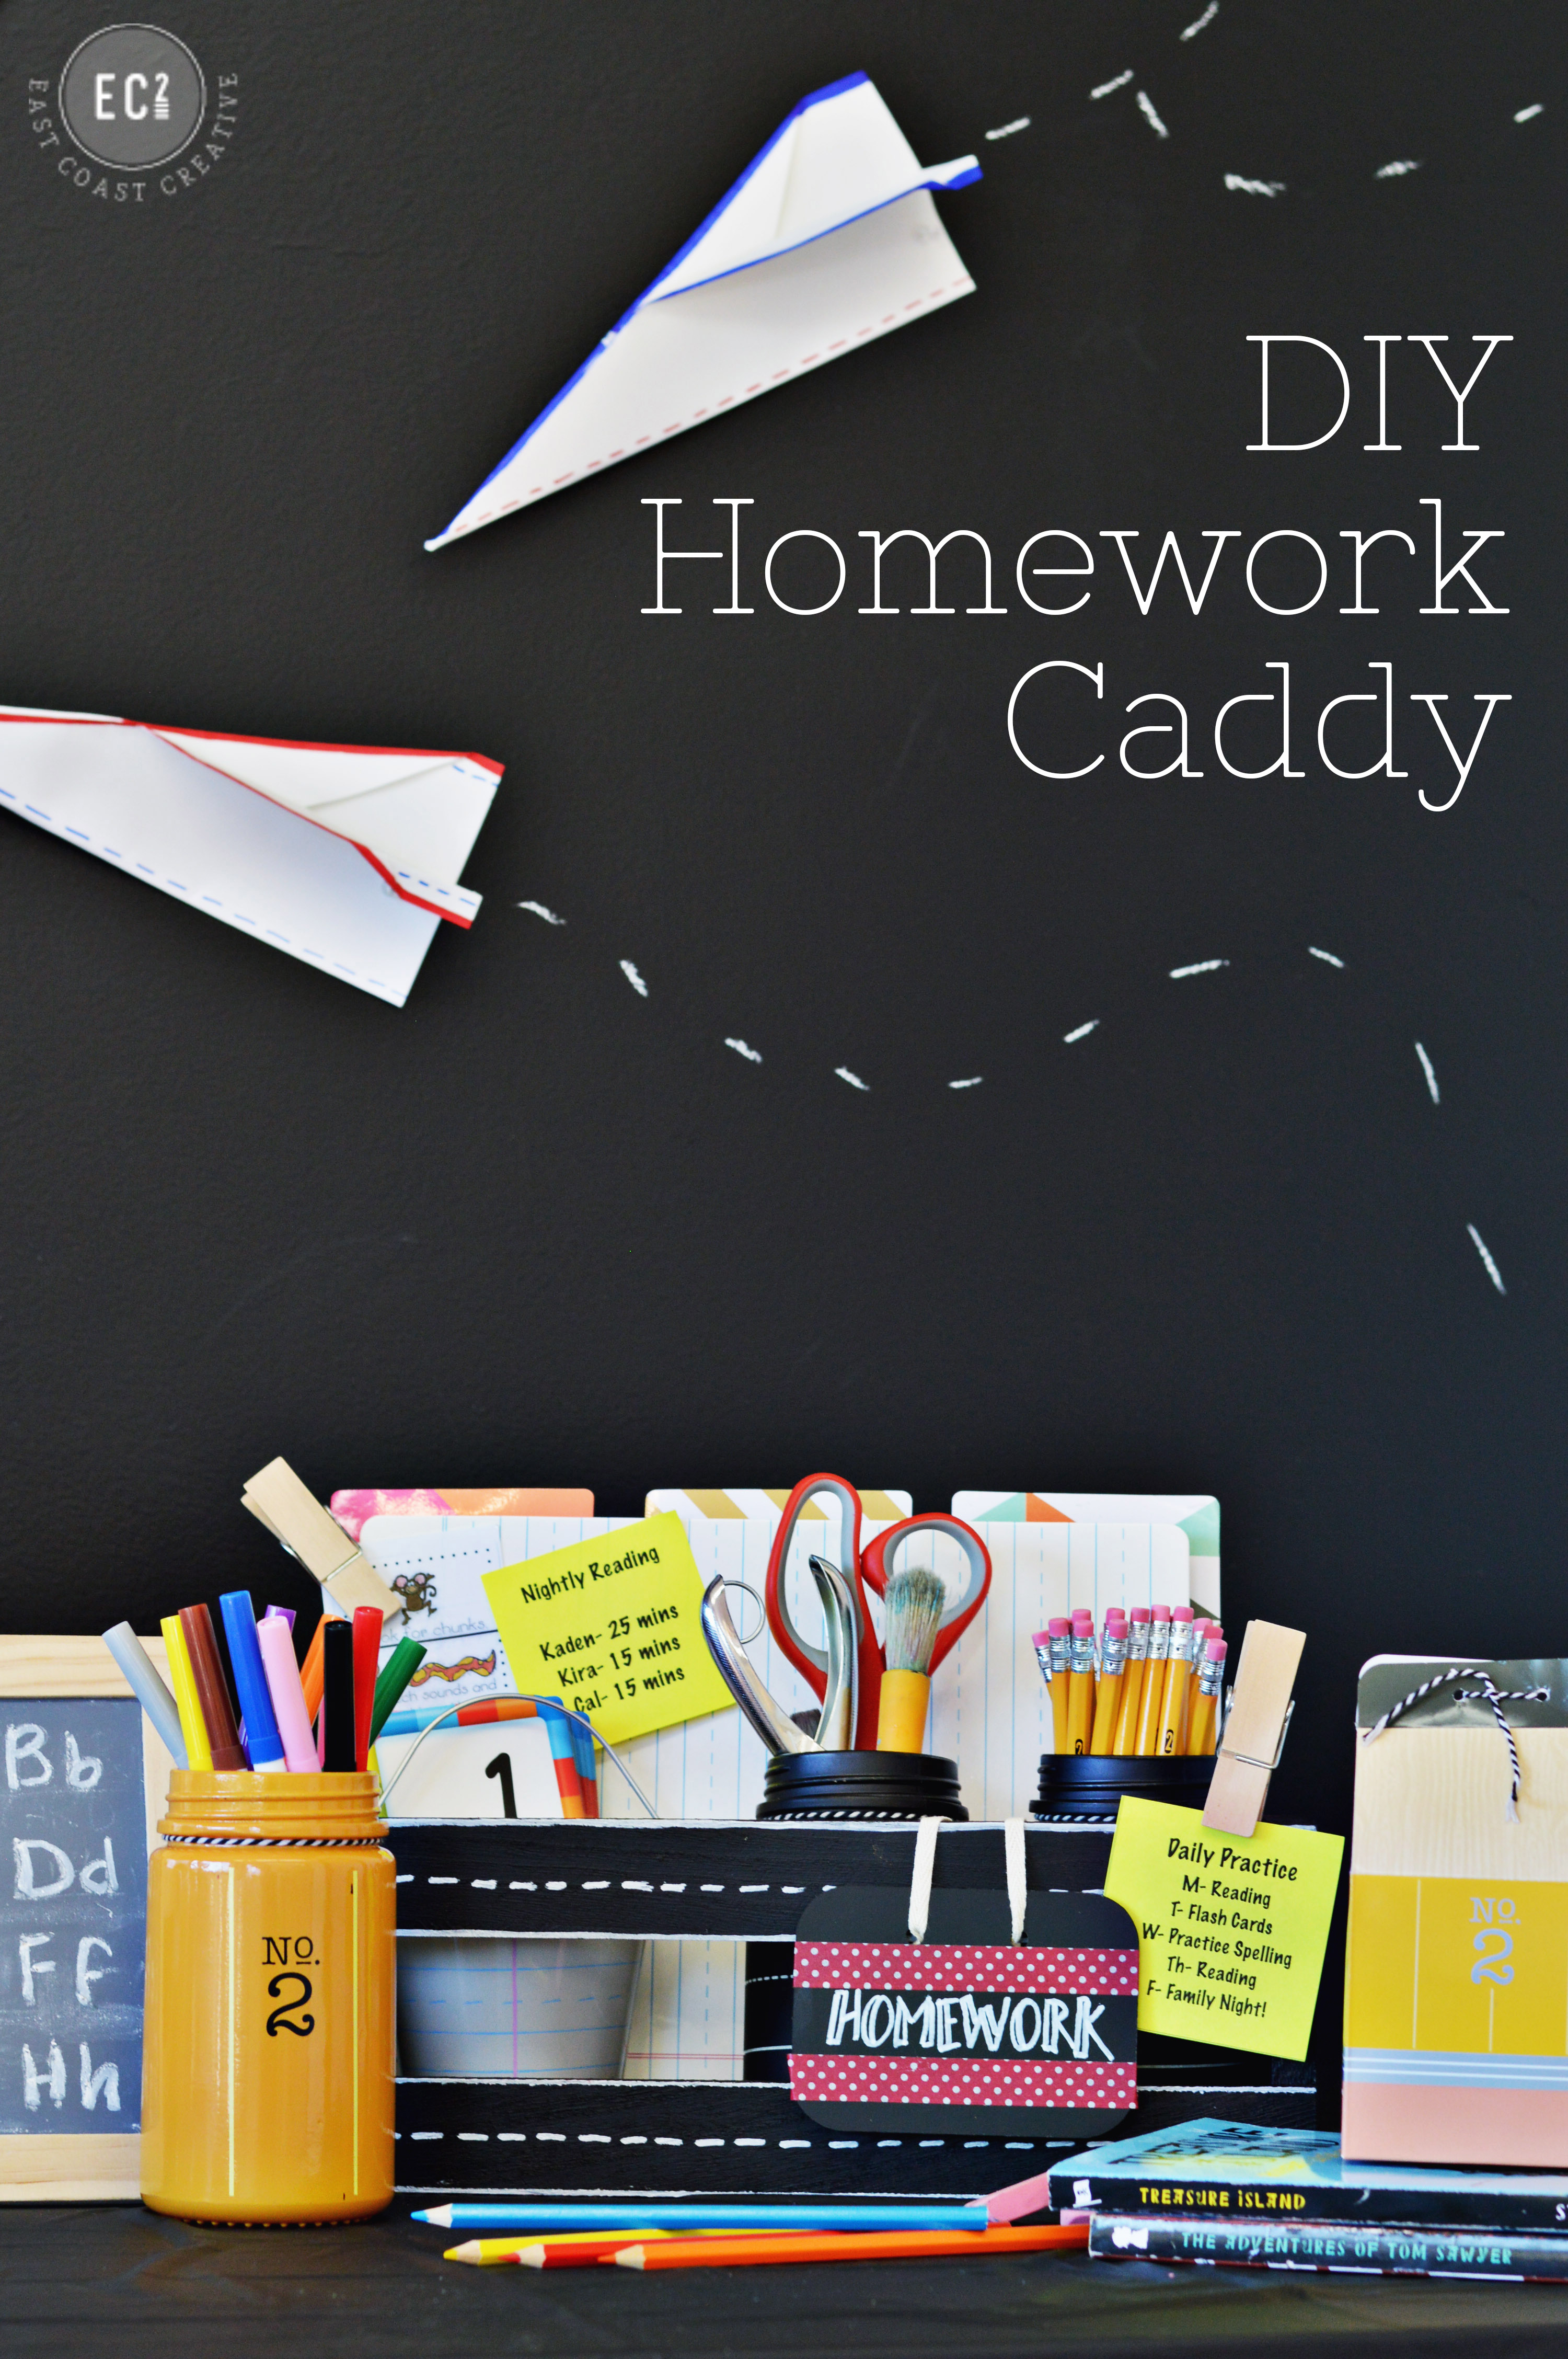
It’s cute, functional, and actually got my kids a tiny bit excited to do some homework (even if they didn’t want to admit it!) Here’s how to make your own:
DIY Homework Caddy
Materials:
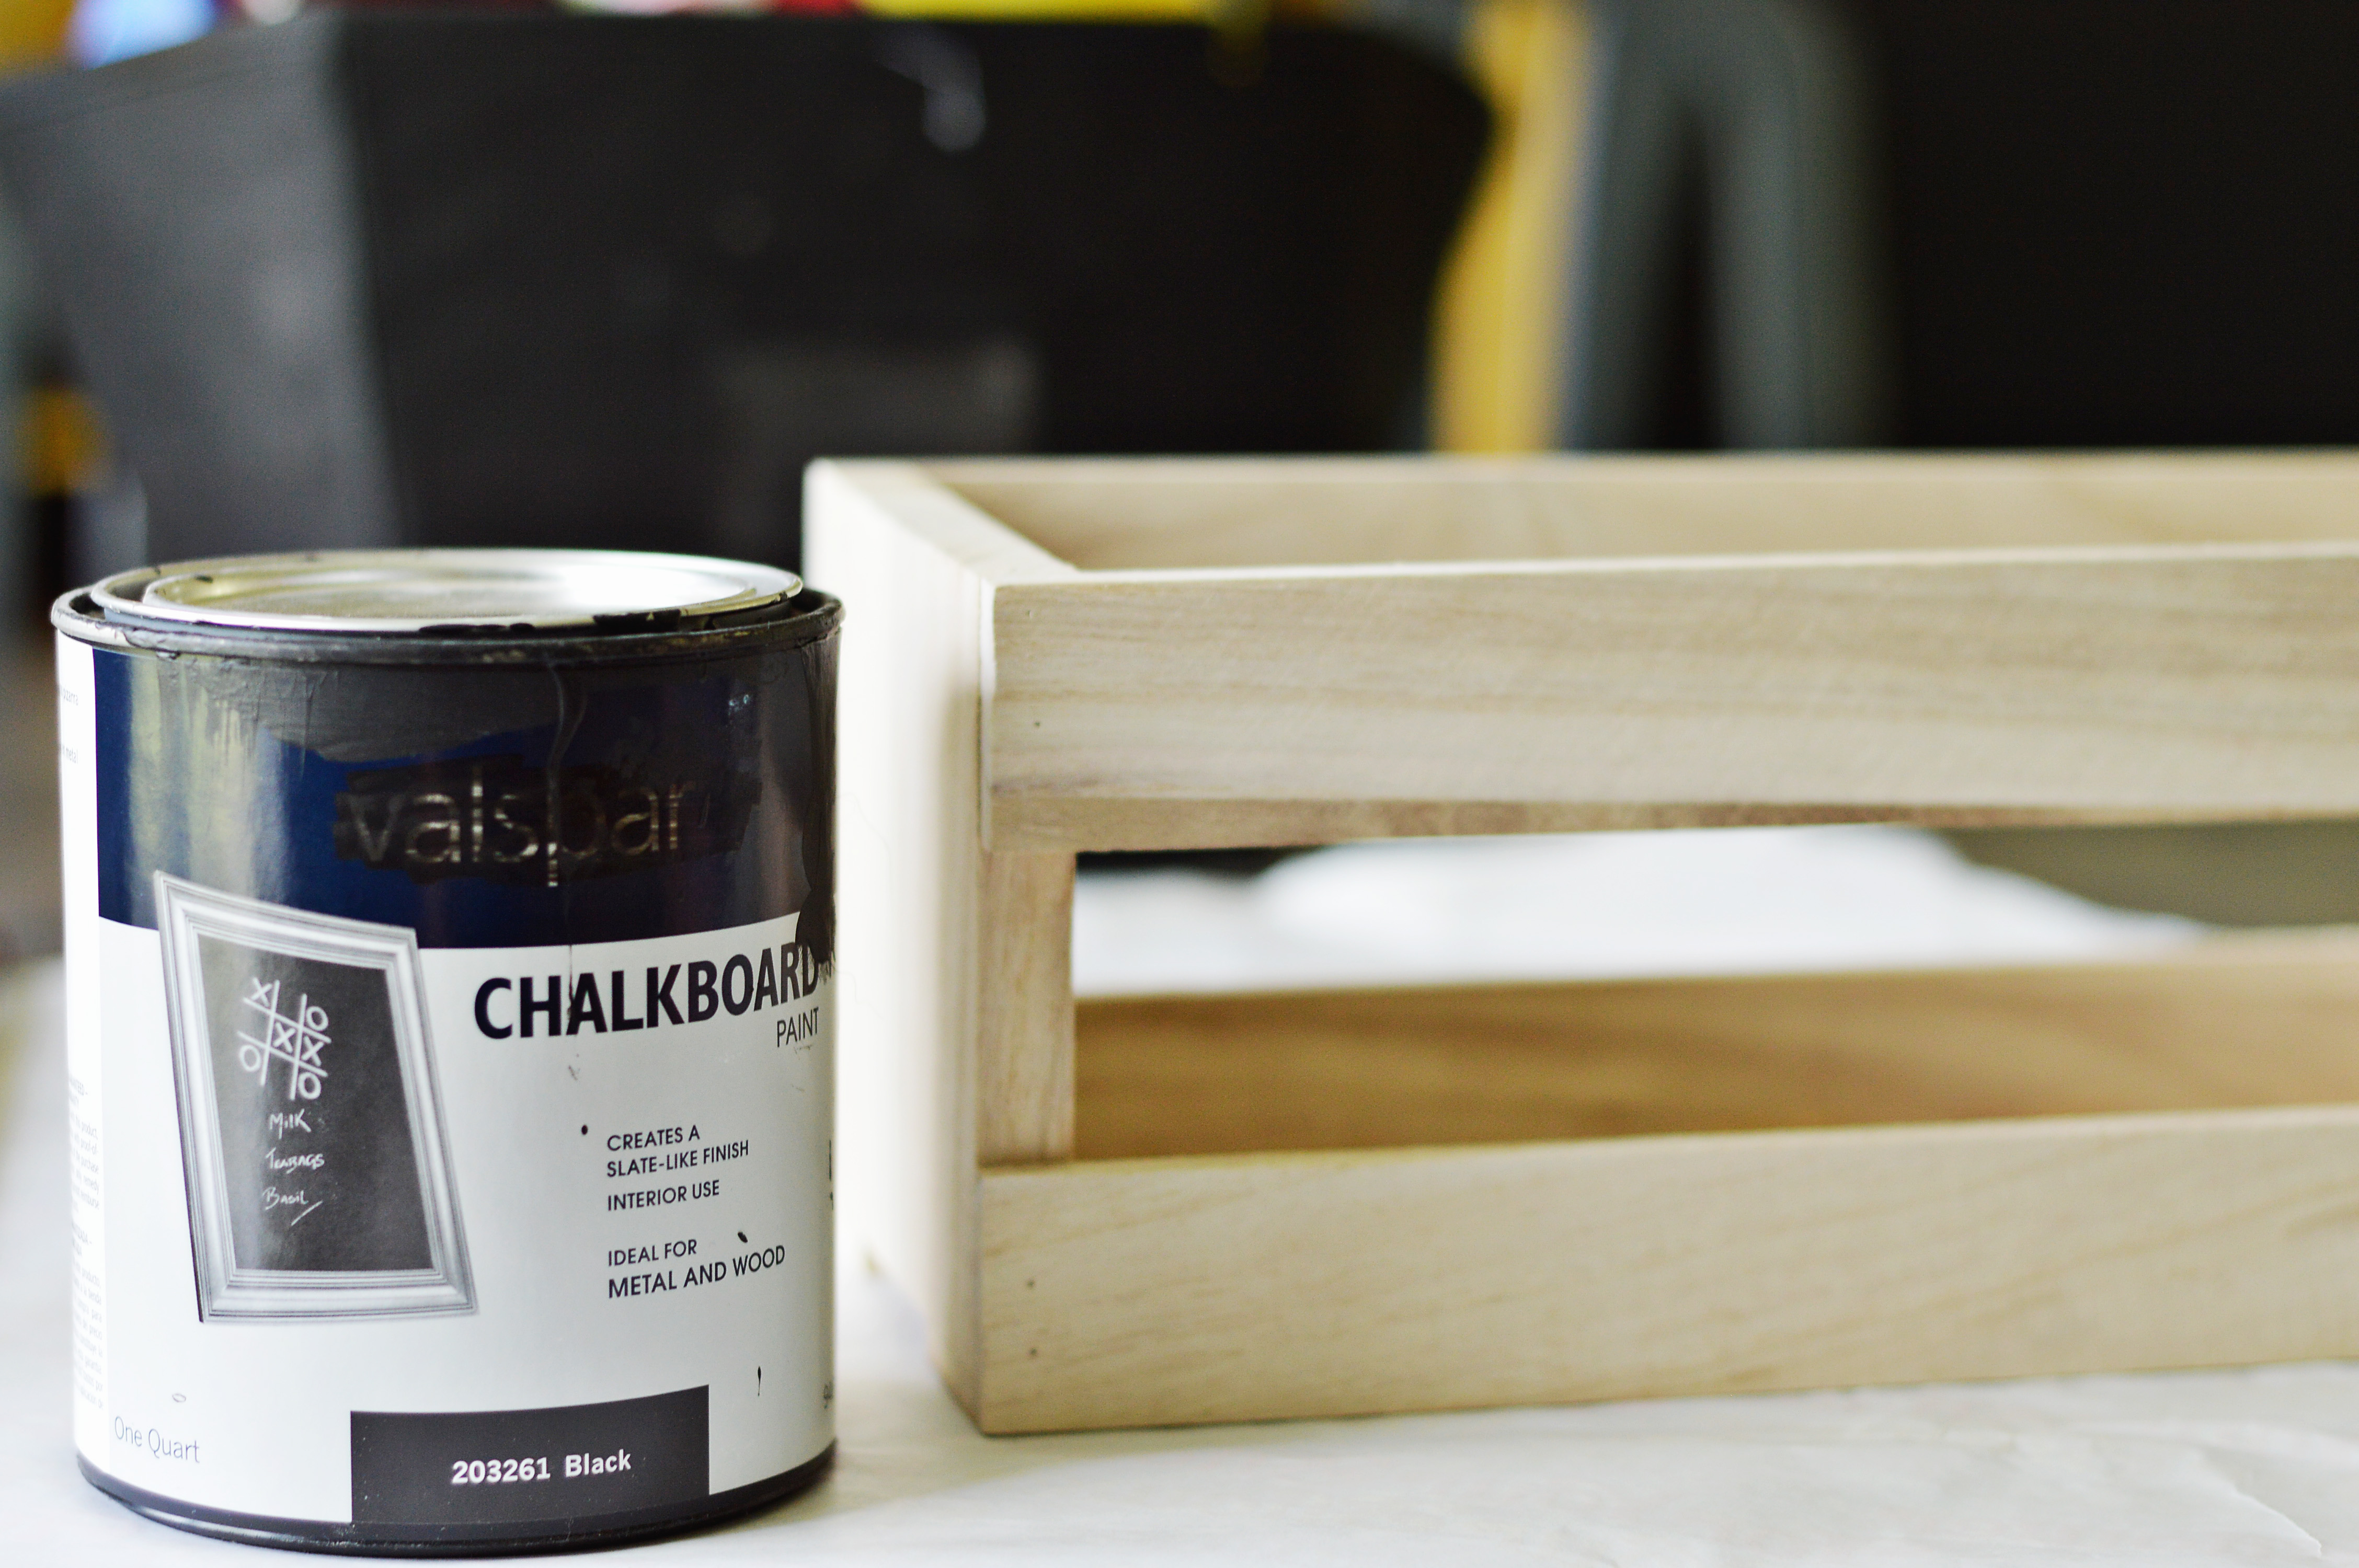
Wooden Crate
Chalkboard Paint
Painter’s Tape
Elmer’s Painters™ Paint Markers
Wooden Tag
1 piece white chalk
pen or pencil
printer (optional)
Tin cans or cute containers
School Supplies
Step 1:
Pick up a wooden crate- I went for this one and used a coupon, so it cost about $3.50
Step 2:
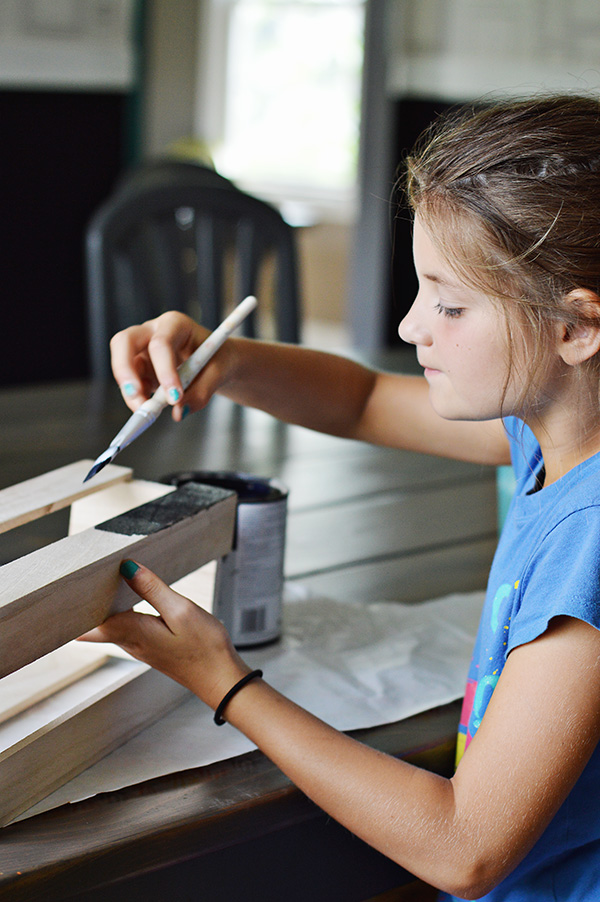
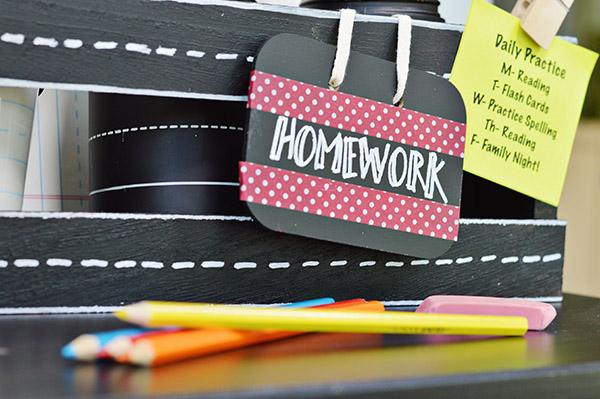
Paint the entire crate with black chalkboard paint- make sure you paint the inside too, because you’ll see it. Kira was happy to help me paint…Gotta love crafty kids! Paint 2 coats and allow for drying time. Also paint your wooden tag at the same time- Paint the front and all sides with chalkboard paint.
Step 3:
Add faux writing paper lines.
Once dry, use 1″ painter’s tape and place the tape across the wooden crate. This will act as a guide, so you can draw on straight lines at the top and bottom of each section. You can free hand, but trust me on this one, the painter’s tape is a great idea (first hand experience!)
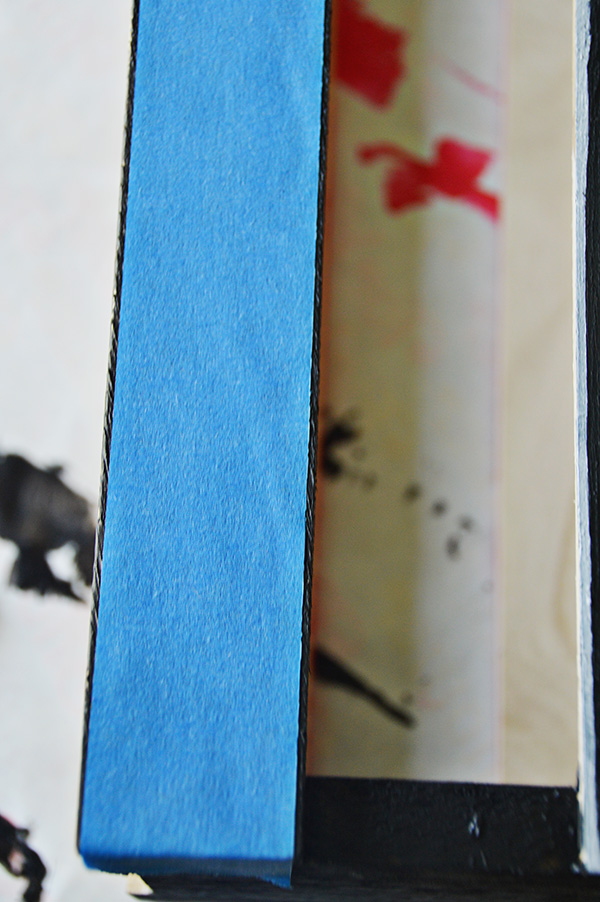
Use a white Elmer’s Painters ™ paint marker and draw a solid line at the top and bottom of the tape, then remove the tape and add a dashed line through the middle. I freehanded this, but a tape guide probably would have been helpful here too.
Step 4:
Use your home printer and print out the word HOMEWORK in whatever font you’d like. You can freehand the wooden tag, but if you’re anything like me, you hate your own handwriting, even if other people love it! I have an easy peasy transfer method that I use all the time!
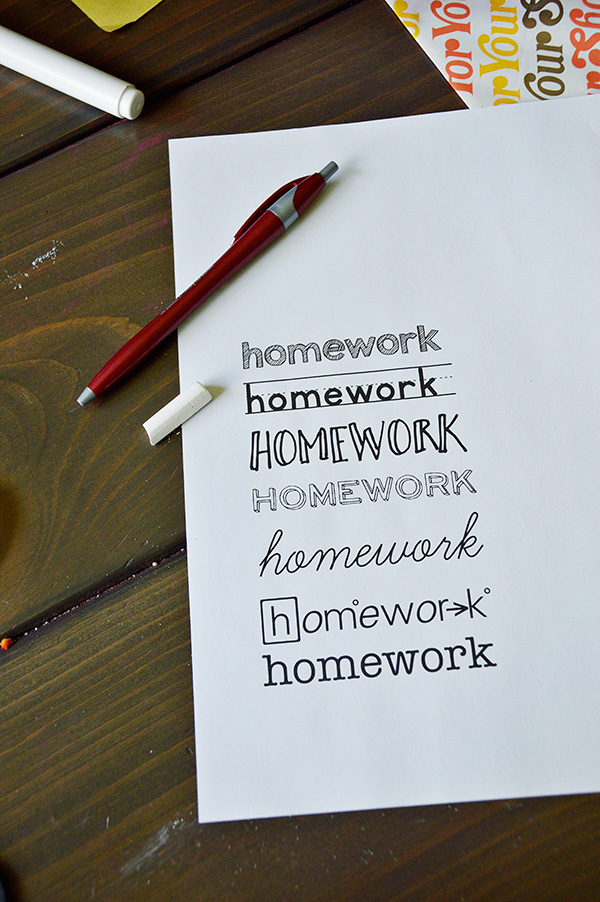
Cut out the font you like and rub the entire backside of the paper with the side of your piece of white chalk. You’re chalking the side without the writing.
Next, tape the paper (chalked side down) onto your wooden tag
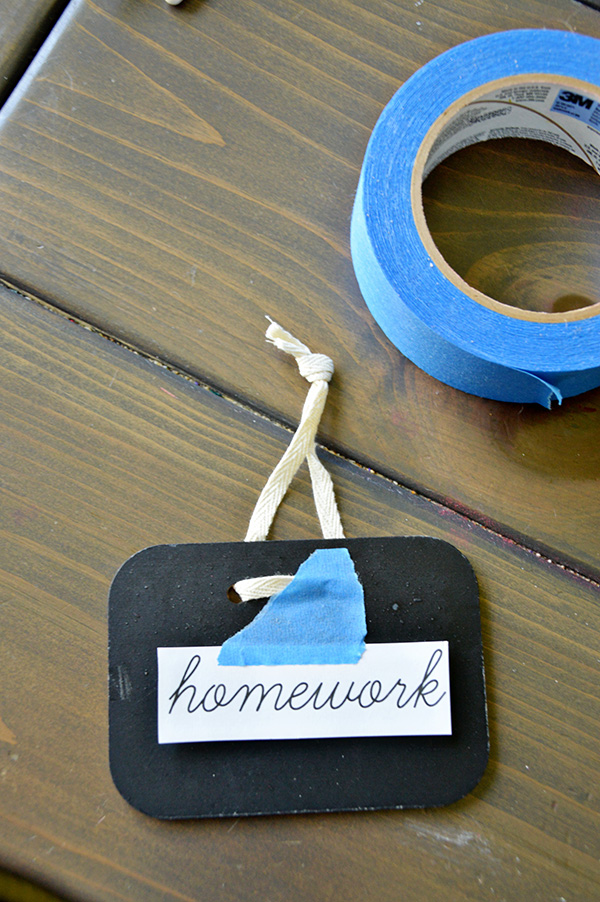
Now, take your pen or pencil and heavily trace over the letters of the word. When you’re done, remove the paper and the chalk will have created a template for you to trace over with the white Elmer’s Painters™ paint marker.
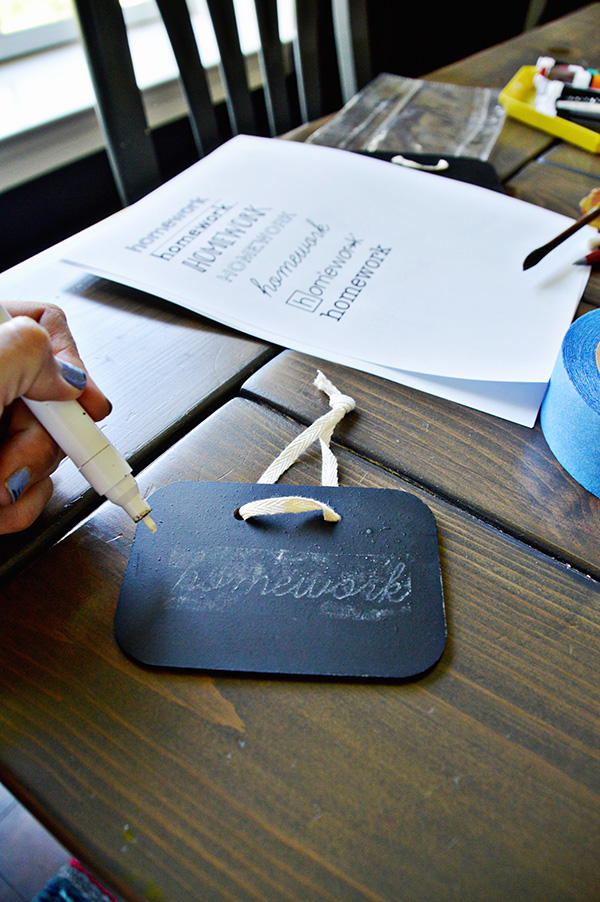
This method is clutch and can be used for all kinds of projects- it’s not just limited to fonts! It’s a great technique to know when you’re working with paint markers and want to get a really perfect design.
I actually switched up the font for my homework caddy because Kira and I didn’t like the school script. I added some washi to the tag and it was done.
Step 5:
Here’s where you’ll personalize this project to fit your needs. You know what supplies your kiddos need and this is where practicality is key! Think through all the “Mom, where’s the ________” questions you might get and plan on including it in your caddy.
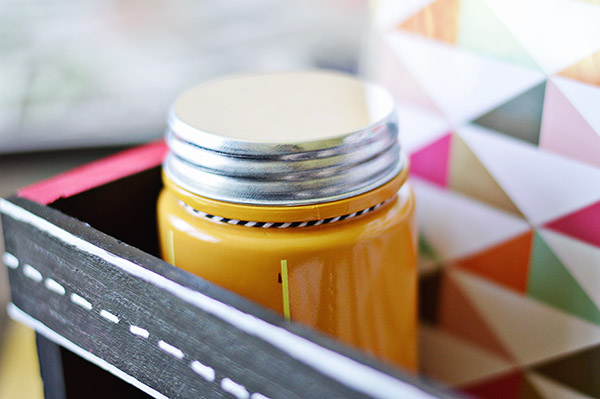
Gather some containers to hold your supplies. I had planned on using some tin cans and plain mason jars, but the Target Dollar Spot was oh-so-good this back to school season and I got this cute No.2 jar and the black faux chalkboard ones as well. If you missed the Dollar Spot deals, you could totally DIY these using plain jars, paint, and Elmer’s Painters™ paint markers!


Here are a few of the items I included in my homework caddy:
Markers| Pencils (sharpened)| Scissors| Hole Punch| Paint Brushes| Flash Cards| Folders (1 for each kid)| Colored Pencils| Crayons| Sticky Notes| Dry Erase Board| Lined Paper| Blank Paper| Mini Chalkboard| Chalk|
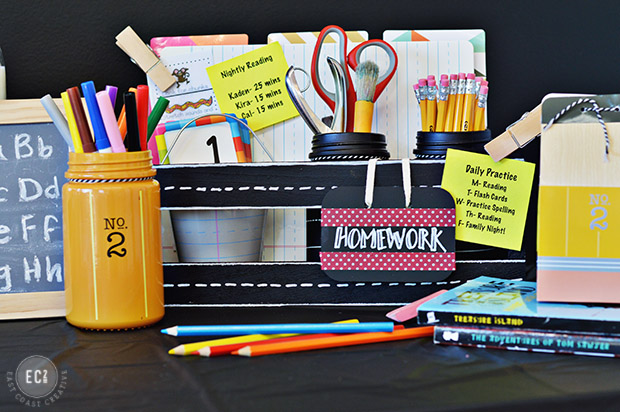
It might only hold the “cool factor” for the first week of school, but honestly, it’s majorly helping out this mom of 4 during the homework witching hour. Under 5 bucks for some organization (and pretty cute style) is a major win in my book!
If you decide to get your craft on and make a DIY Homework Caddy, don’t forget that Elmer’s Painters® is having a monthly contest between now and December where you can make your own creations using Painters® Paint Markers. They’re giving each monthly winner a prize valued at $500! Score!! I’m just full of fab freebies lately!?!
The Style by Aisle with Painters Contest will have five different themes (August-December) which are based on store “aisles.” You and your other DIY lovin’ friends/family can submit your homemade creations to elmers.com/painters. On the website, you can even download a coupon for Painters products and you can take advantage of the coupon even if you don’t enter the contest. Head over to the website to learn more! And use #StyleByAisle and #PaintersStyle to share your projects- I’ll be checking out the hashtag throughout the contest months!

Tomorrow I’ll be sharing some Back 2 School Party Ideas. It’s not too late to start the year off right! I’m hosting my party the second week of school (once the chaos dies down) and I can’t wait!!
-Mon
**This post was sponsored by Elmer’s Painters paint markers, but all opinions, cute kids, and crafty goodness are 100% mine. Thanks for supporting the brands that make East Coast Creative possible! High Fives! **


Hi Monica,
I happened upon your blog this morning and this post made me recall the posterboard ones we did for Kenz and Aiden many moons ago. Good times! 🙂