

From time to time we talk here on the blog about how we try to make sure that we don’t become self-absorbed or too focused on our own homes and stuff etc… It’s a fine line when you’re a home blogger. One way that we try to do this is by using our skills to help others! You might remember our first “Design it Forward Project“
I’ve decided that I’m a DIYer, but I like to DIY-FO too…
Do-It-Yourself-For-Others
And just because I’m a little gangsta, I’ve now coined it…
Wouldn’t it be so cool if we all became more than just DIYers, if we also loved to DIY-FO-SHO!! (If you’re really, really not gangsta it’s a play on words “fo sho”= For Sure) I don’t know about you, but I LOVE doing what I love to make someone else’s day awesome!
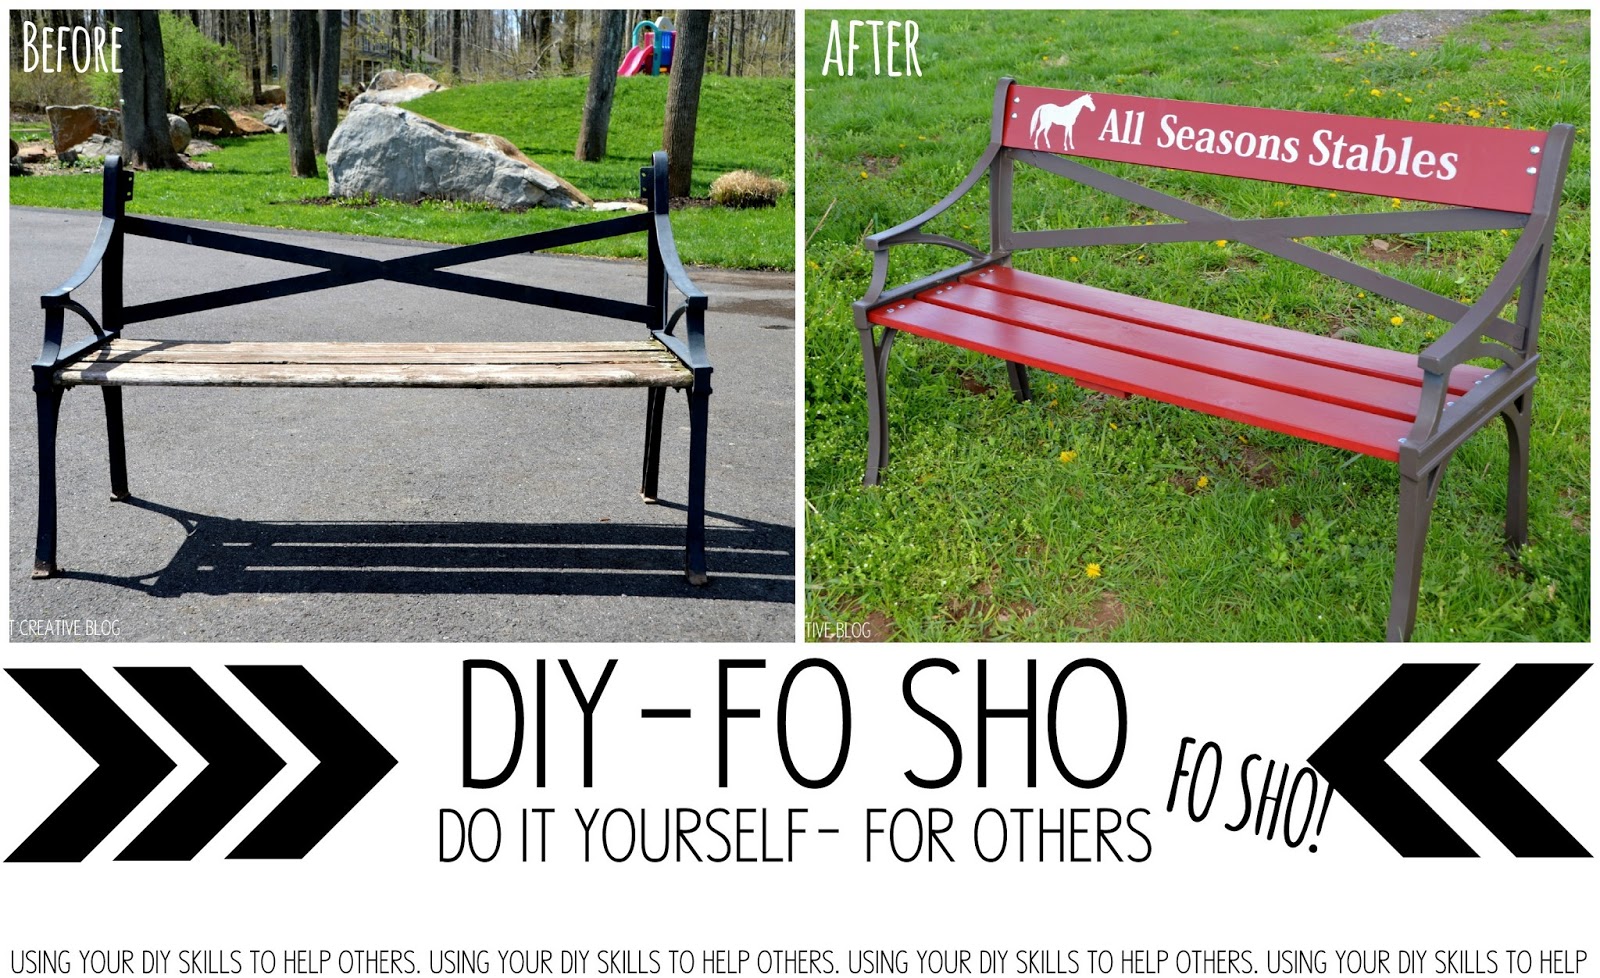
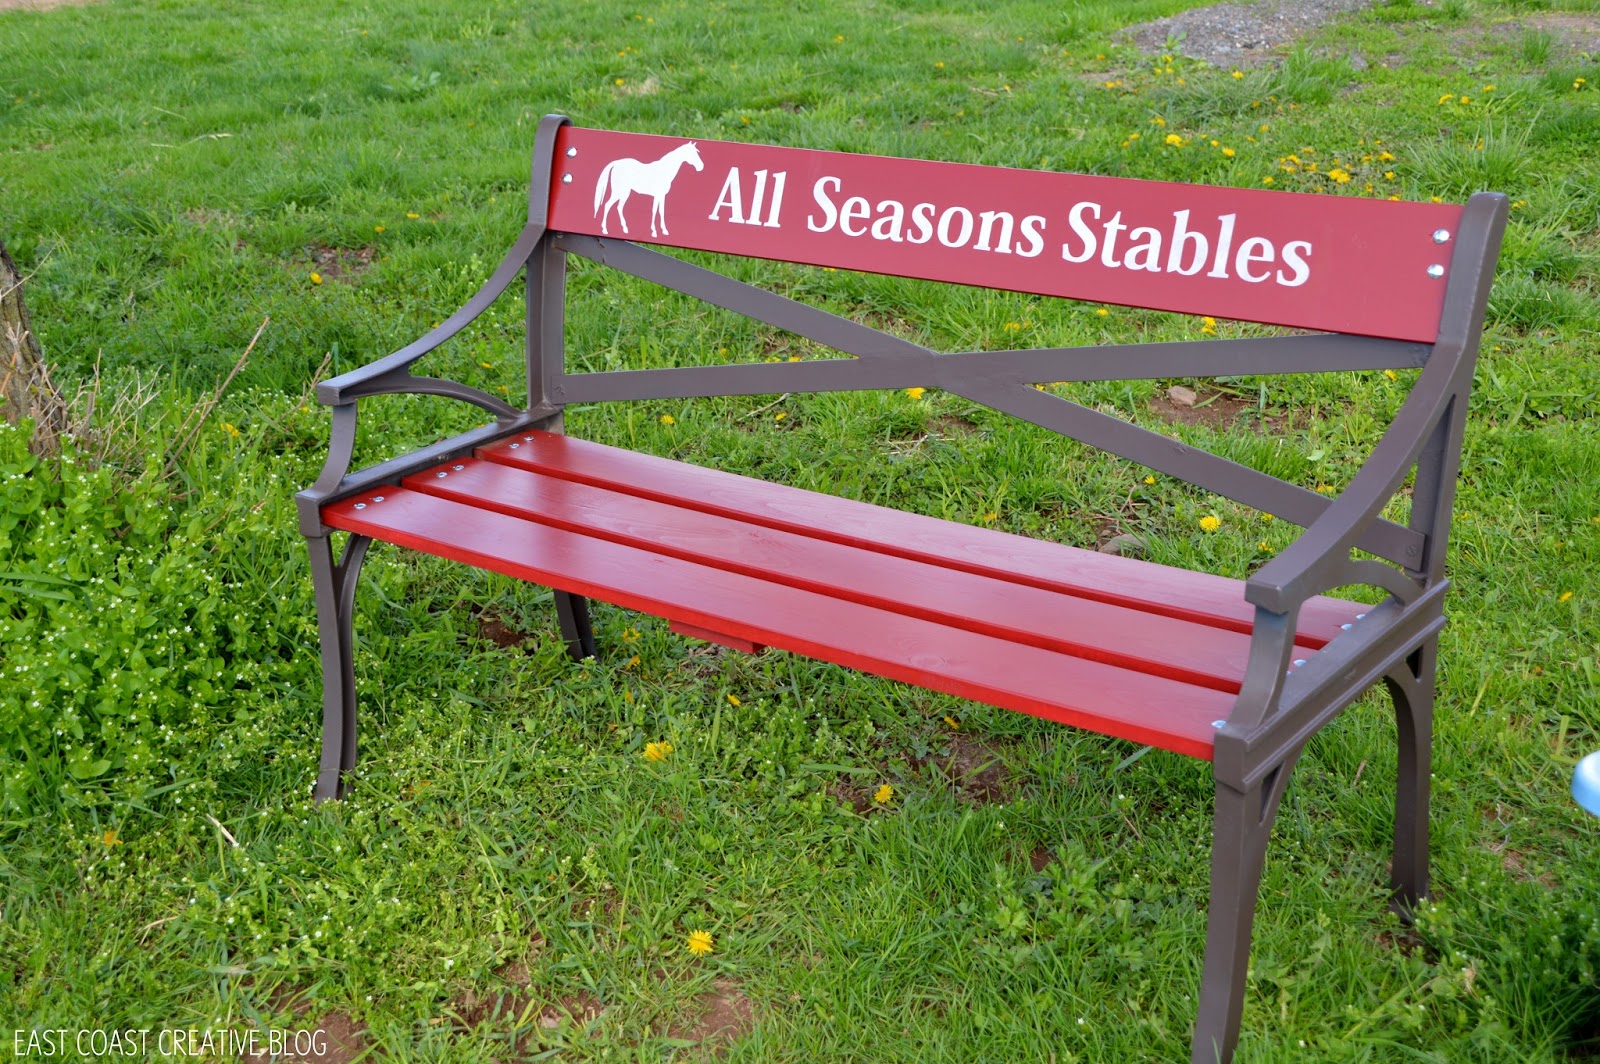
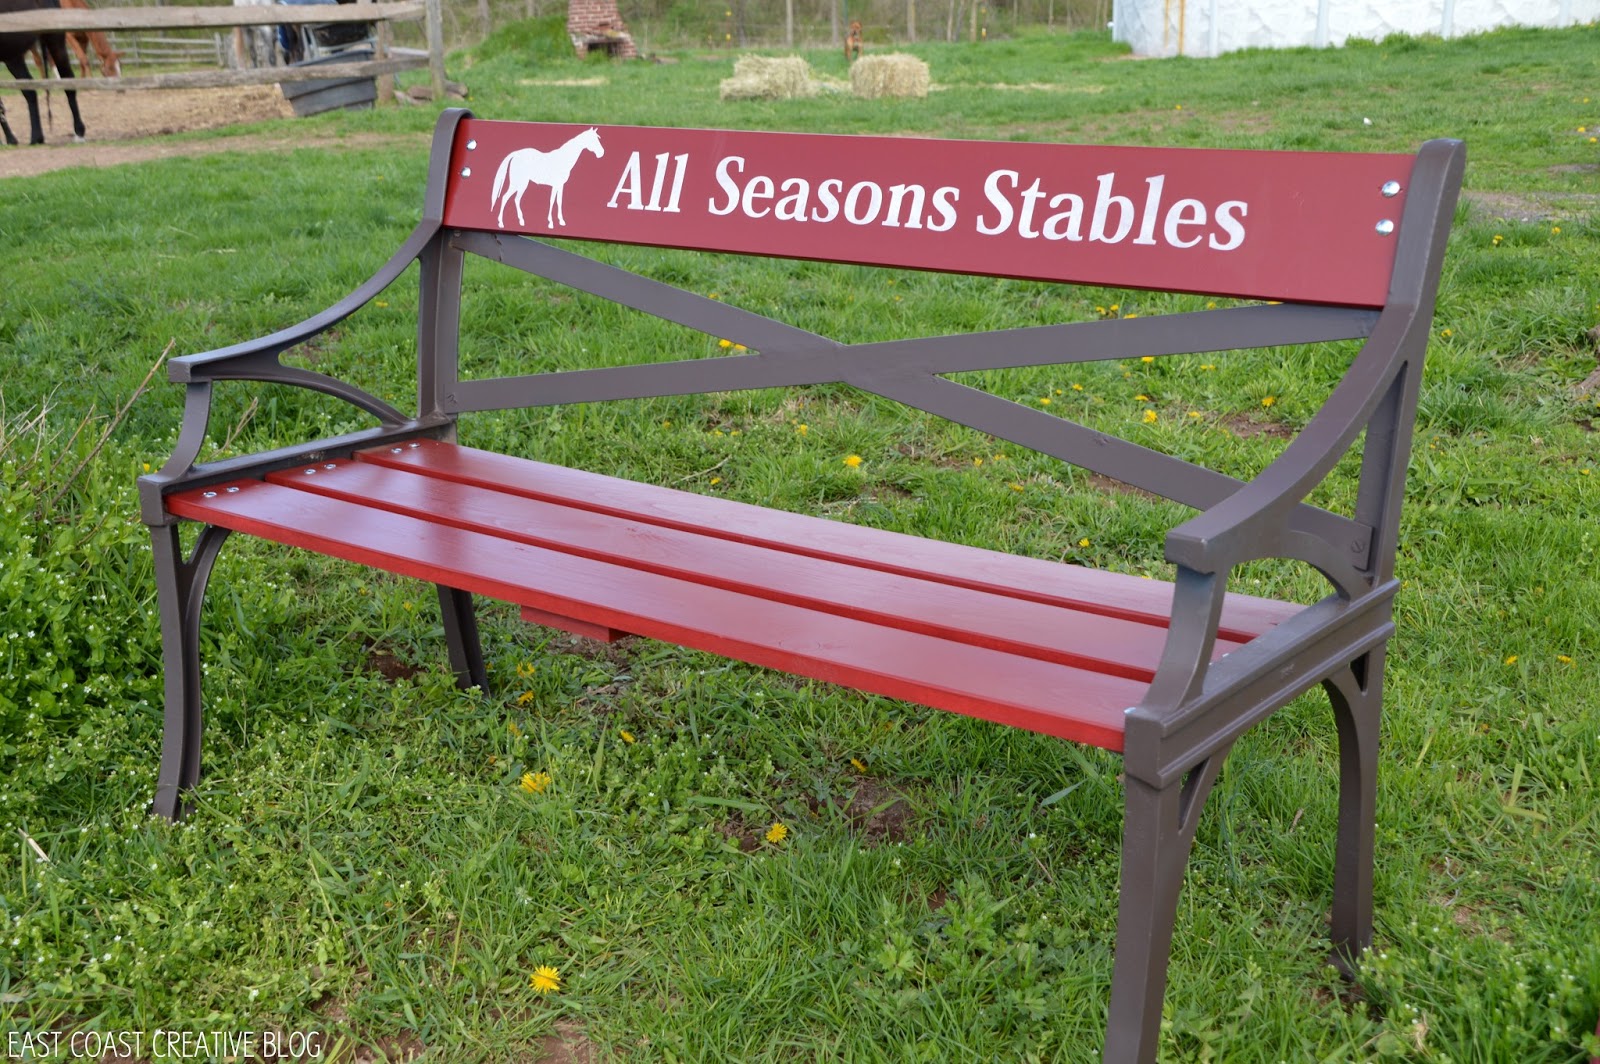
Here’s the story behind the bench pictured above!
So my Kenzie girl is obsessed with animals- I mean she really likes them more than people!

She has been taking horseback riding lessons from an awesome trainer (Katrina) at All Seasons Stables for the last year. If you’re local we totally recommend them for lessons (tell them we sent you!)
Anyhow, near the riding ring, there was this oh-so-sad looking bench that I sat on or near for about 9 months before it occurred to me that I needed to give it a little love (okay maybe a lot of love!)
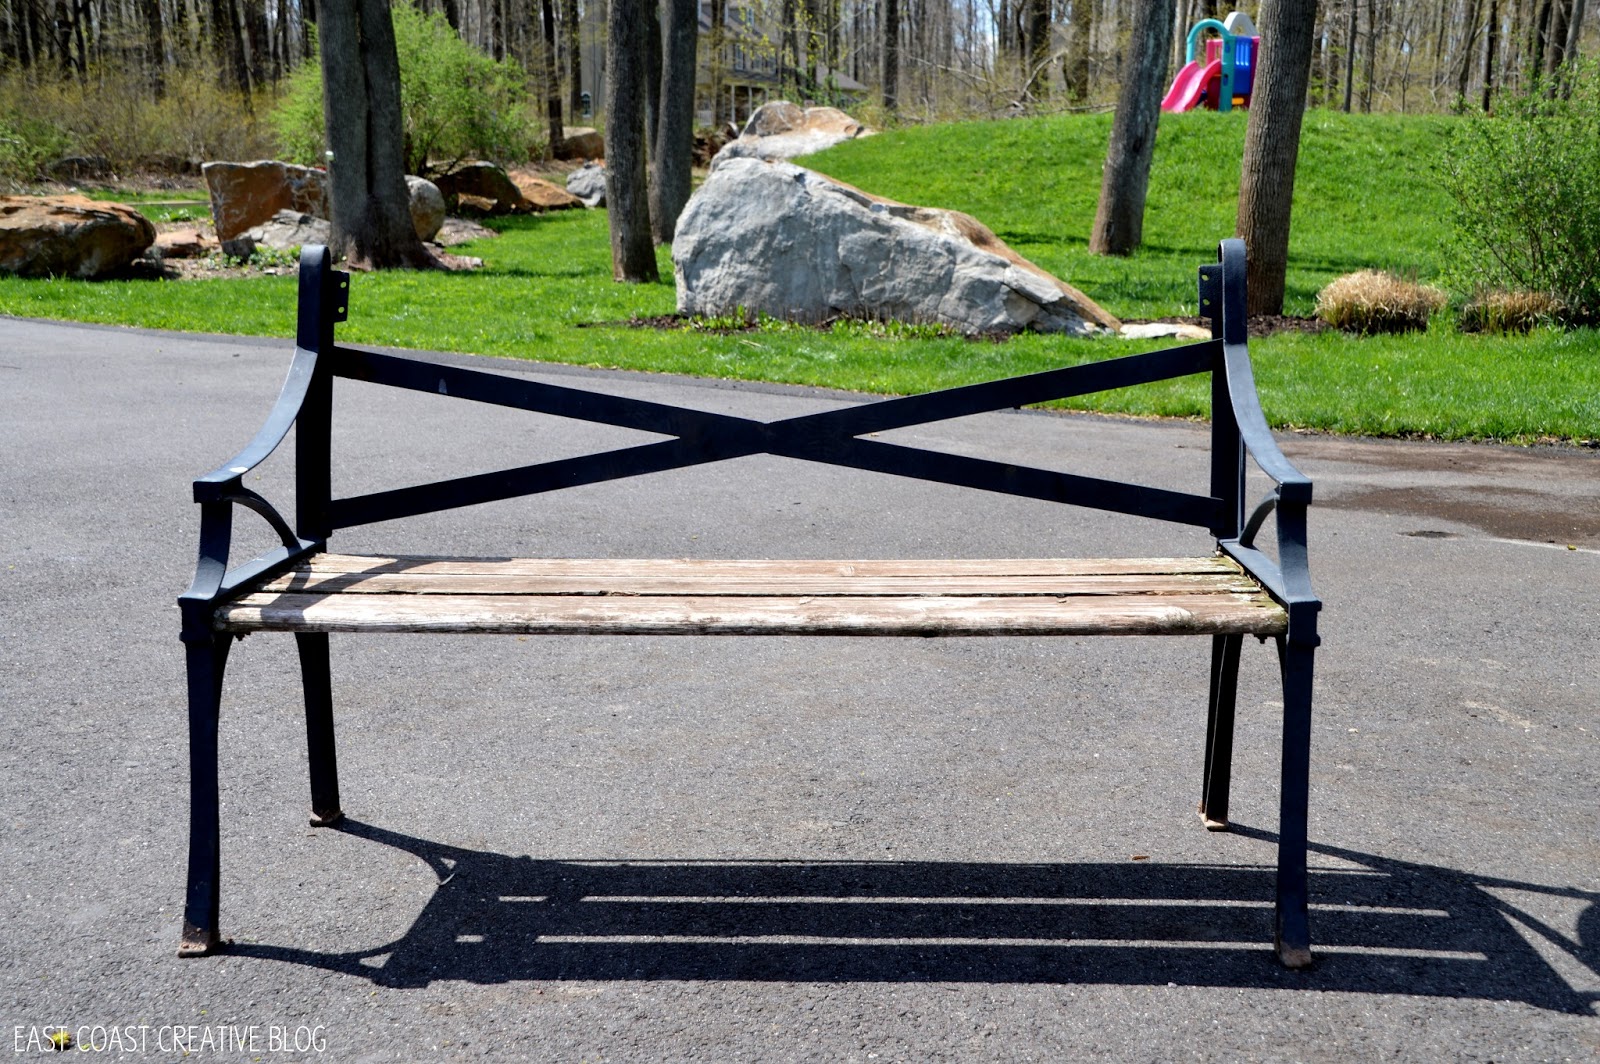
I told Katrina I was going to borrow her bench and I’d have it back the next day… she kind of looked at me like I had 3 heads as I dragged it over to my car and loaded it into the trunk. I promised her it would be worth it!
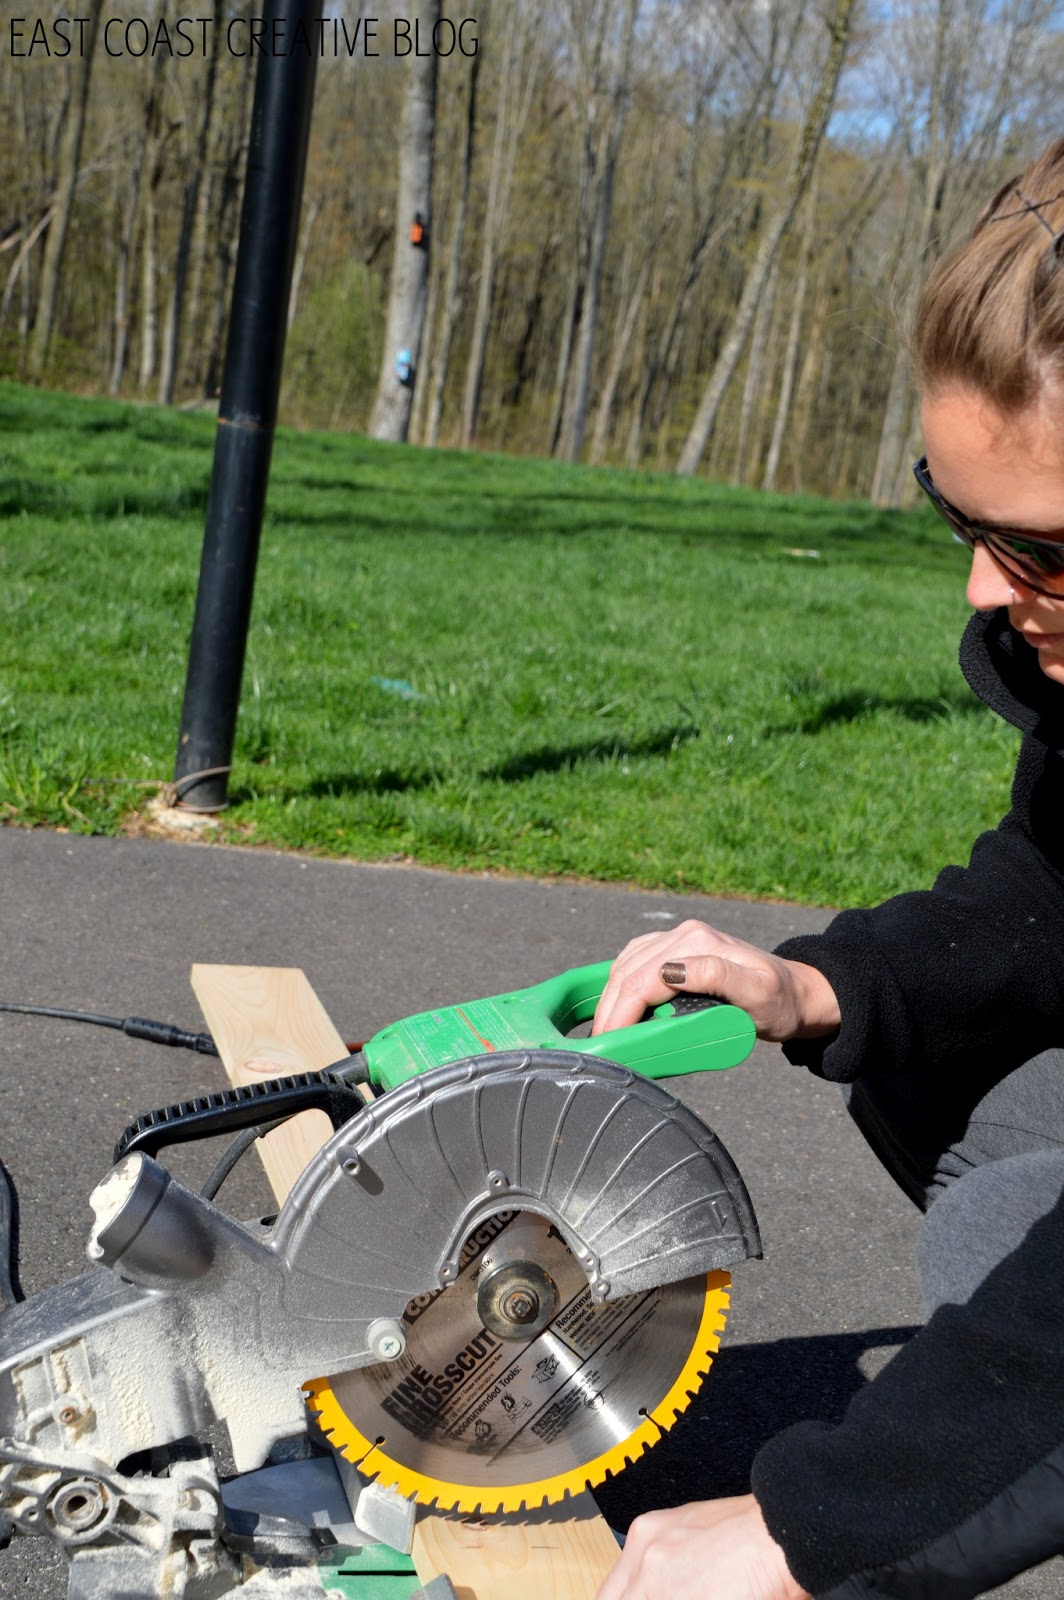
The hubs was 100% on board and we got right to work.
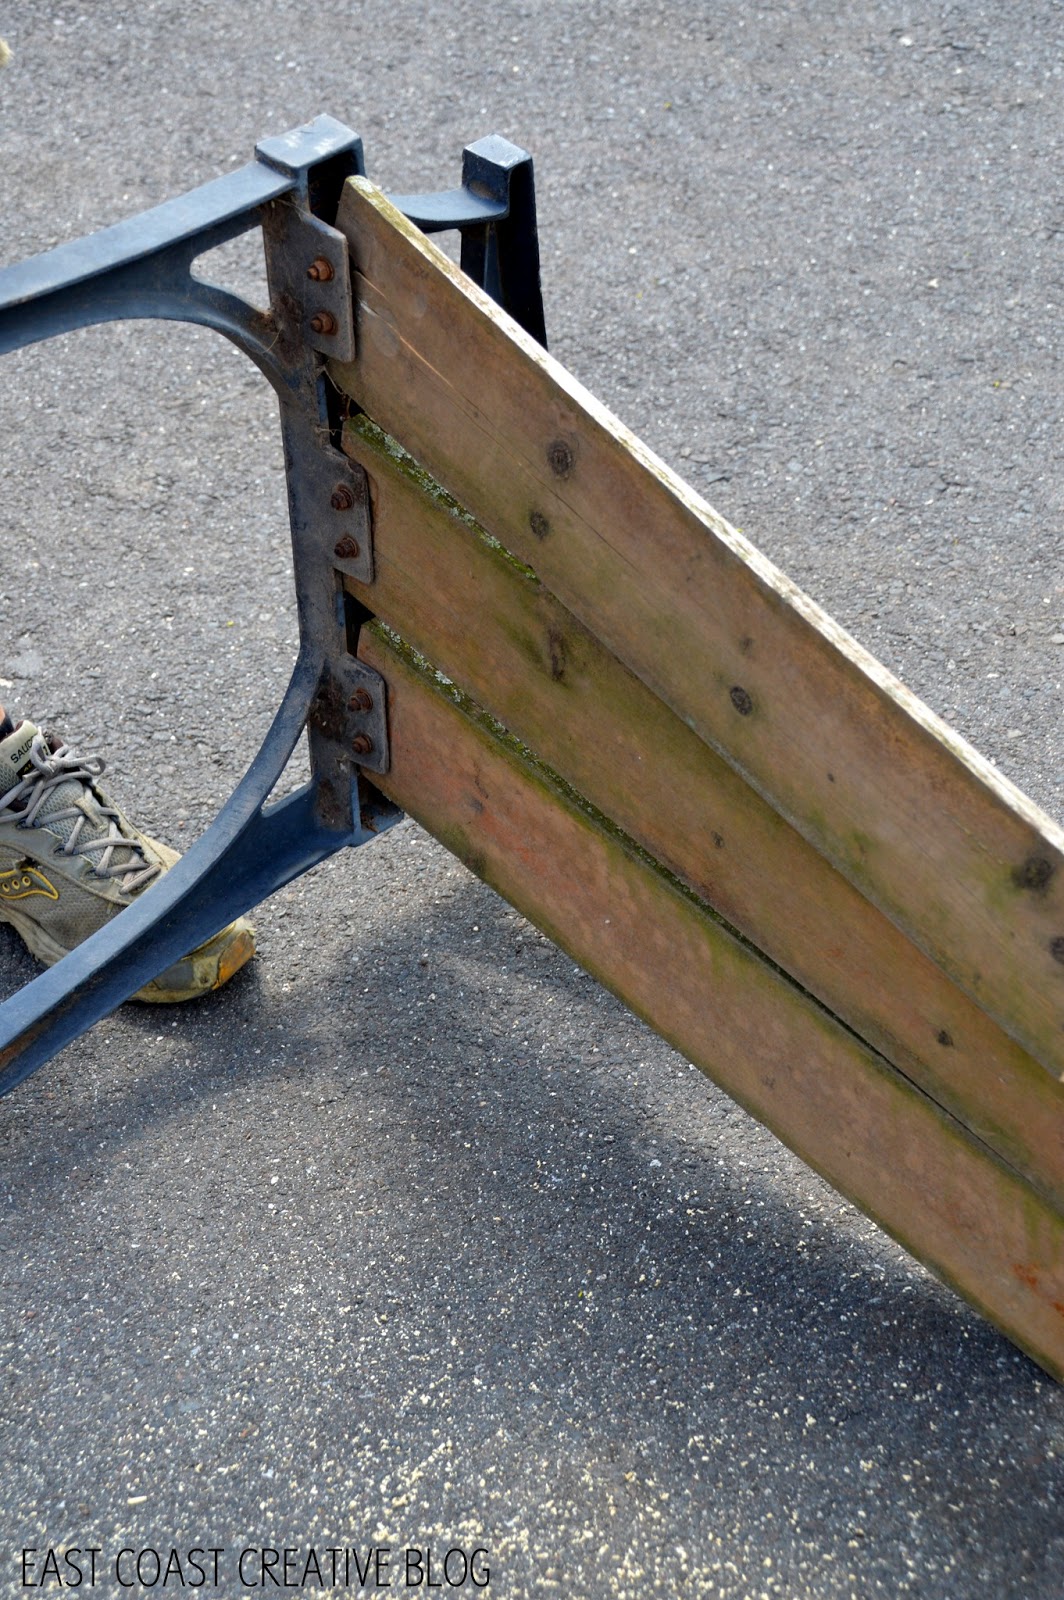
The screws were crazy rusted, so we had to use our jigsaw to cut the boards in half…
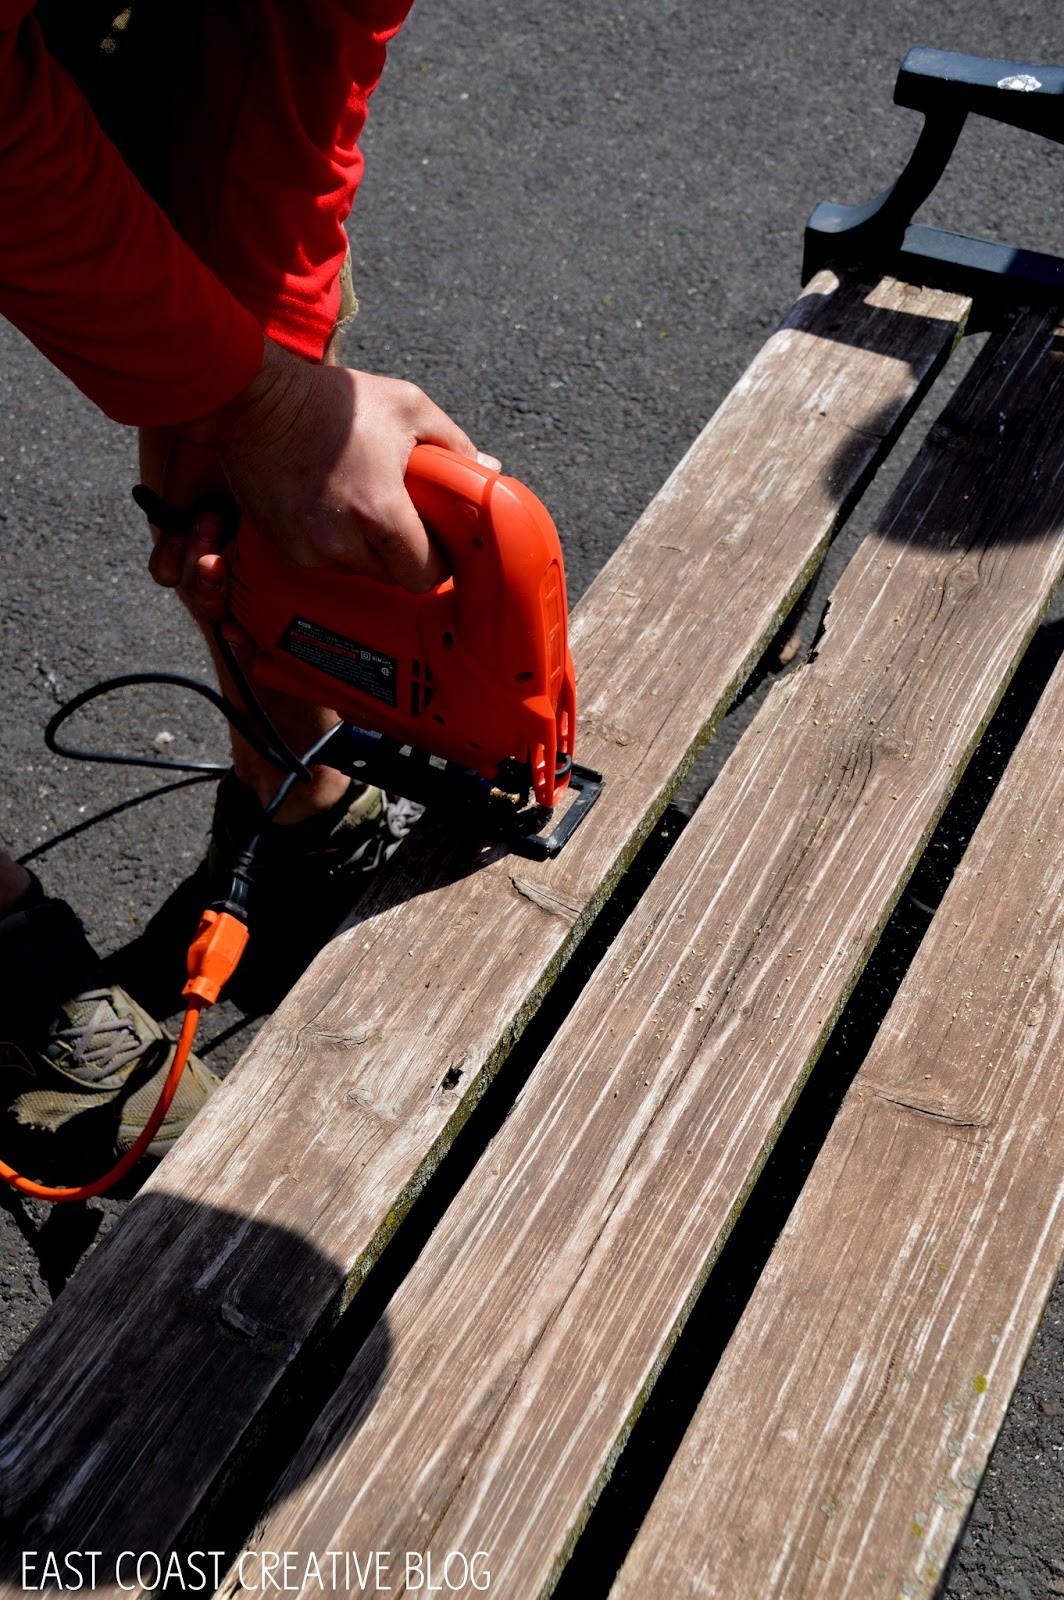
Once they were split down the center, we took a hammer and literally banged them off!
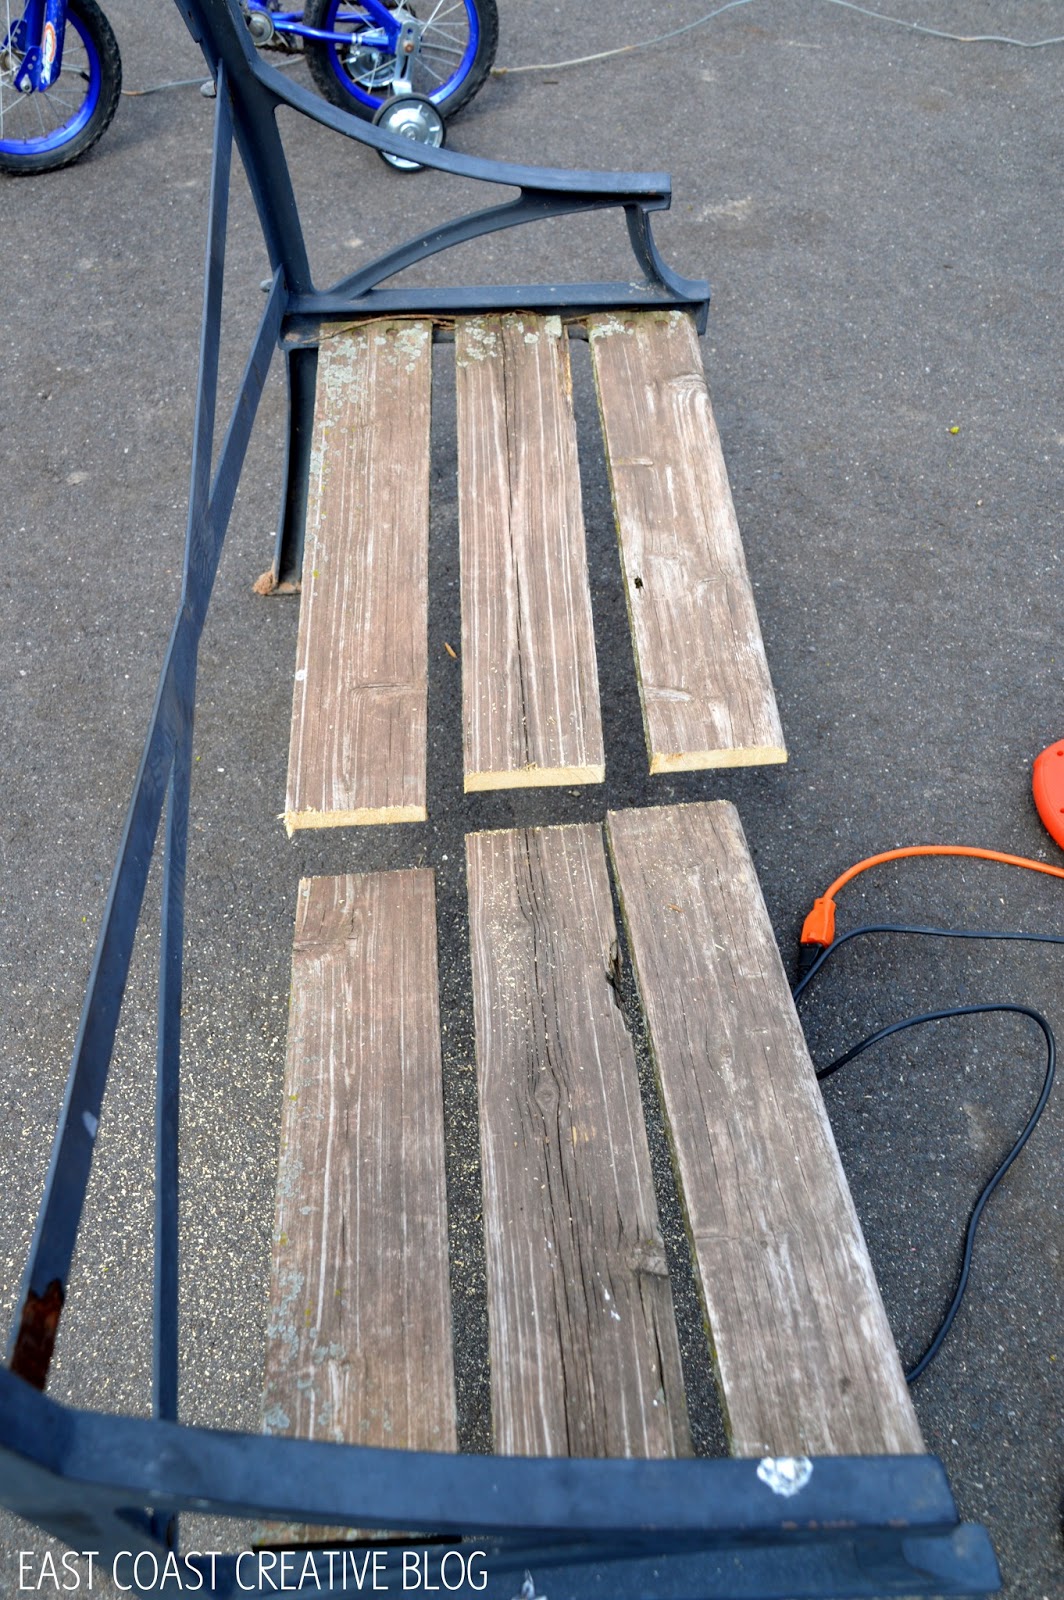
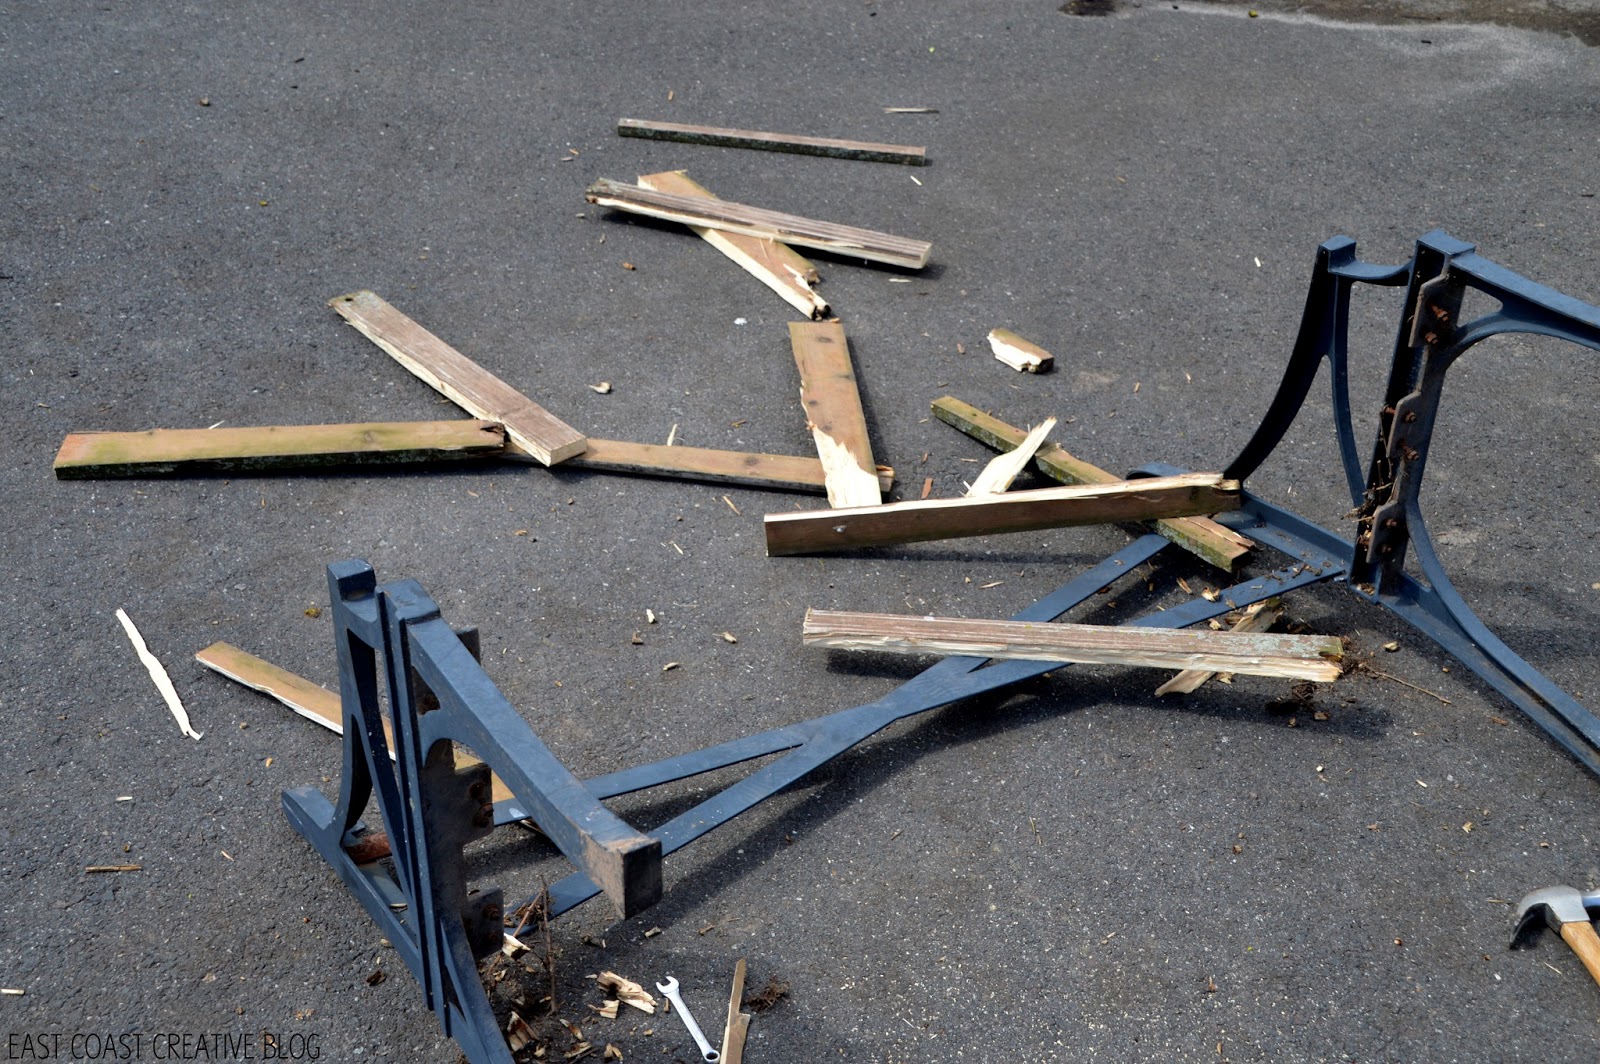
See! I wasn’t kidding.
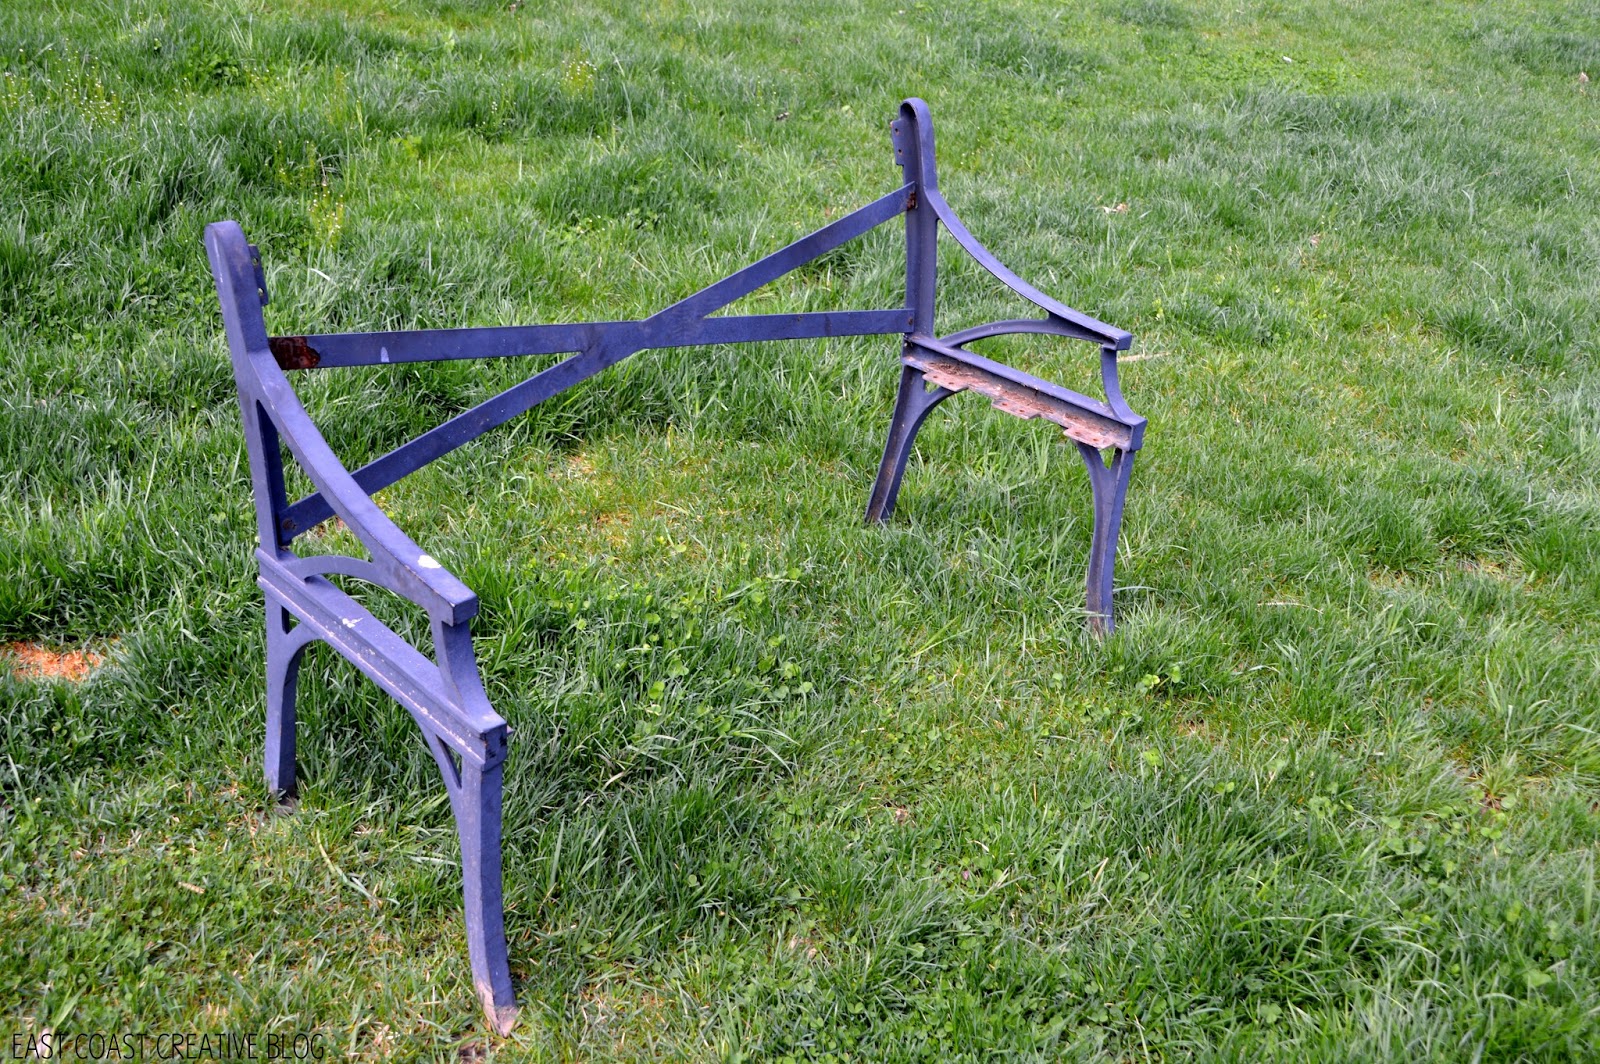
I sent Katrina a picture of the bench like this just to mess with her head a little! lol
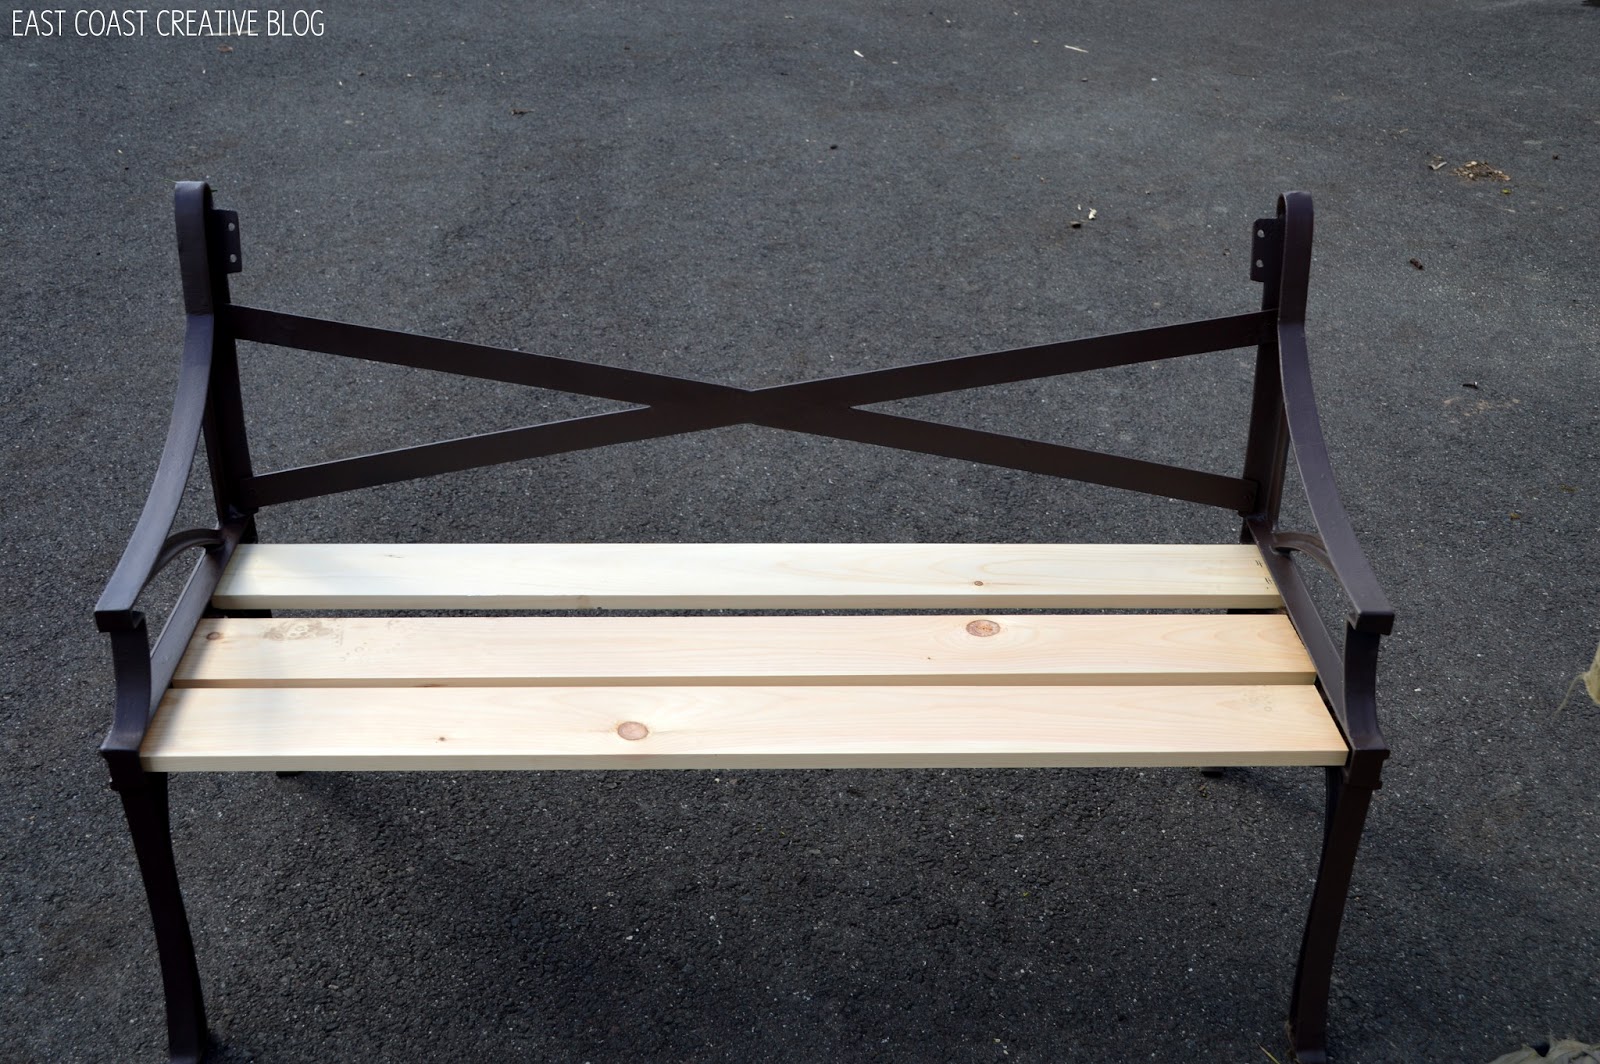
I worked on spray painting the metal frame with outdoor paint, and while it dried, we worked on the new seat and backrest.
We replaced the old, rotten wood with new 1x3s.
Instantly it was looking better!
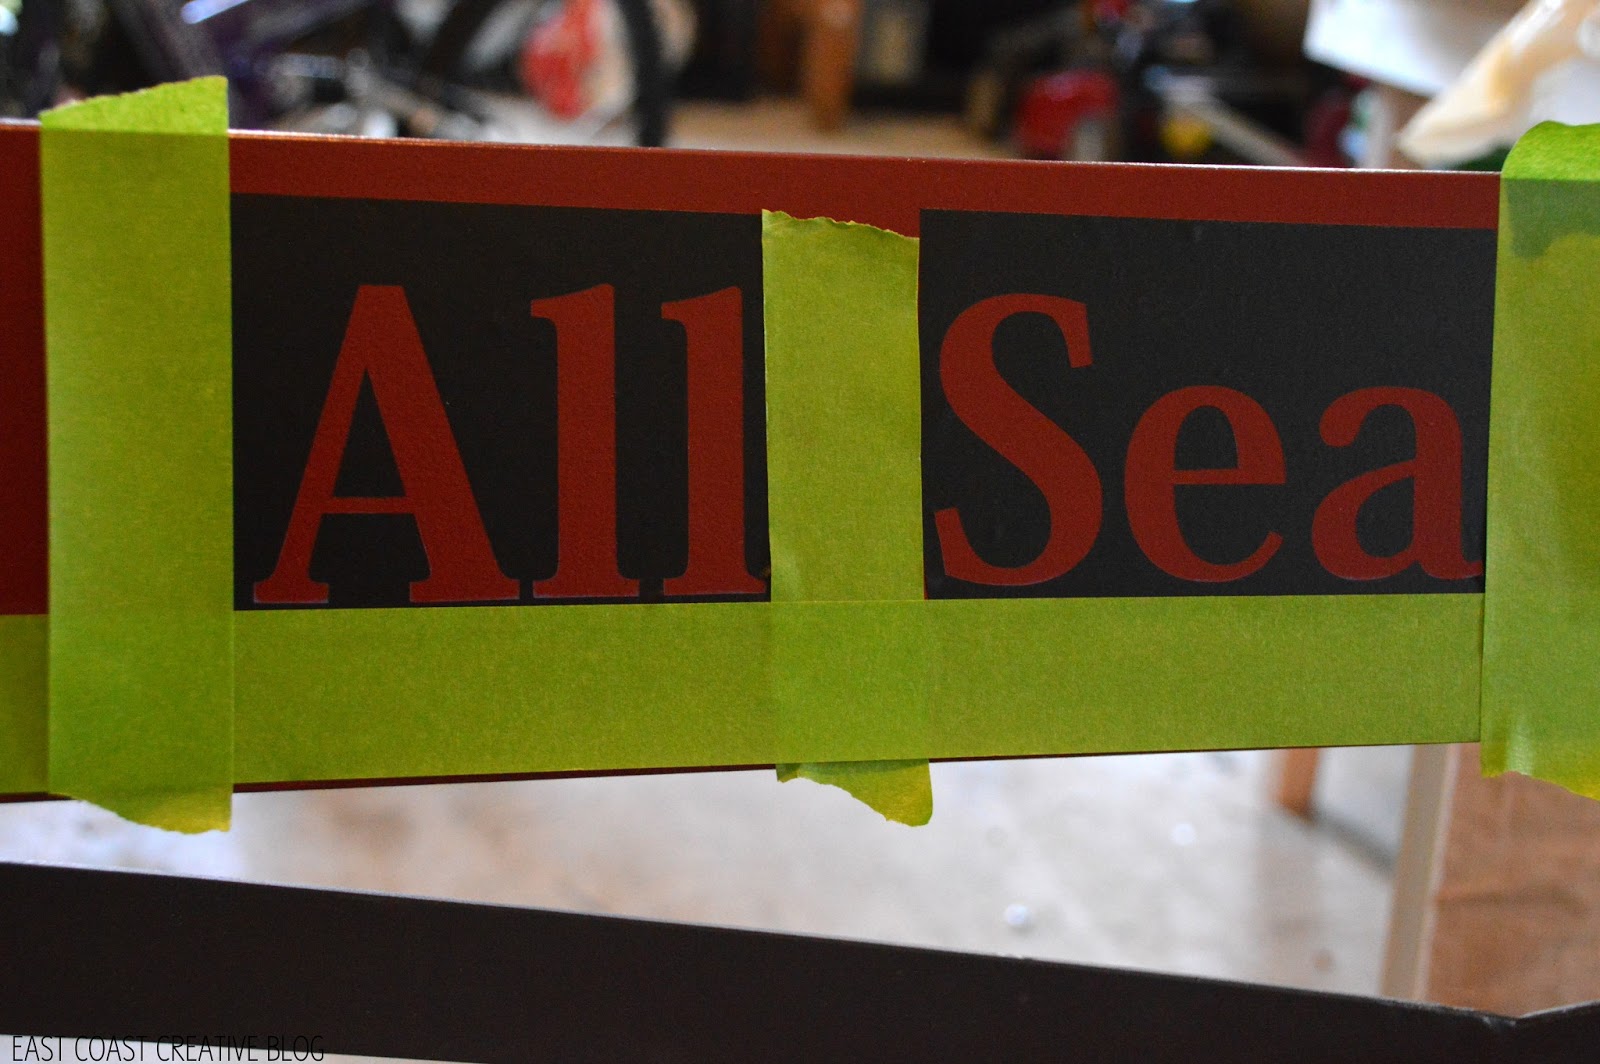
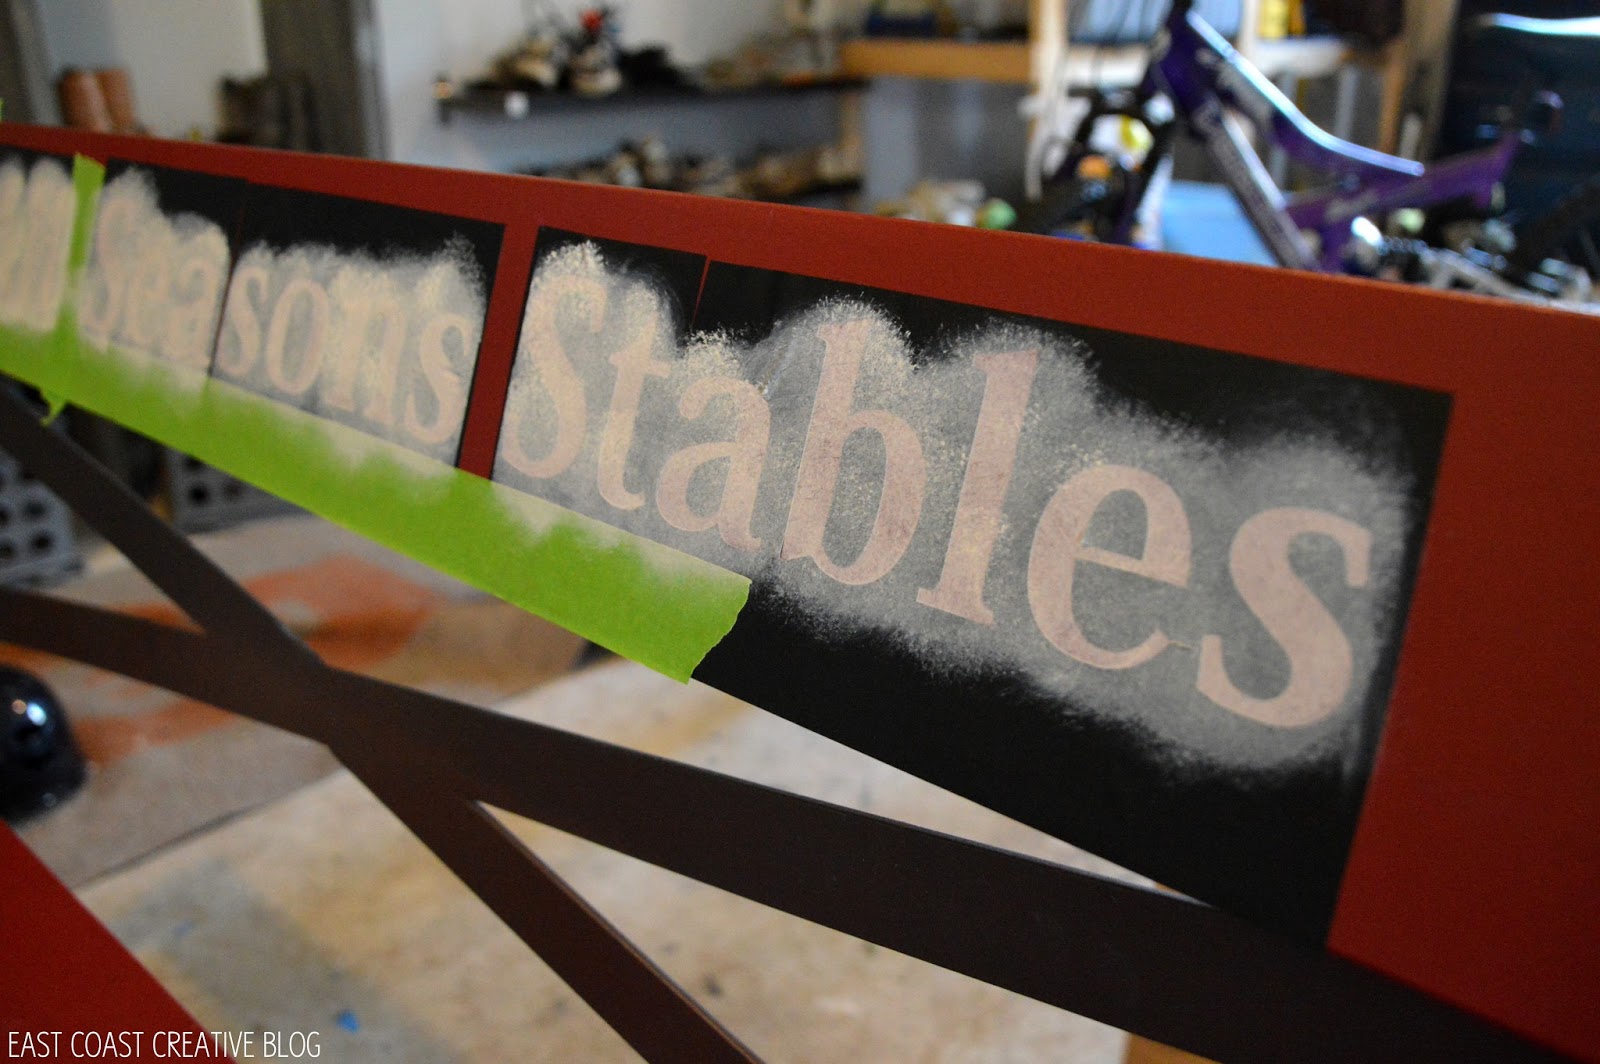
We painted all the wood a classic barn red to match the stables, and I decided it needed a little personalization. Using my Silhouette I added their name.
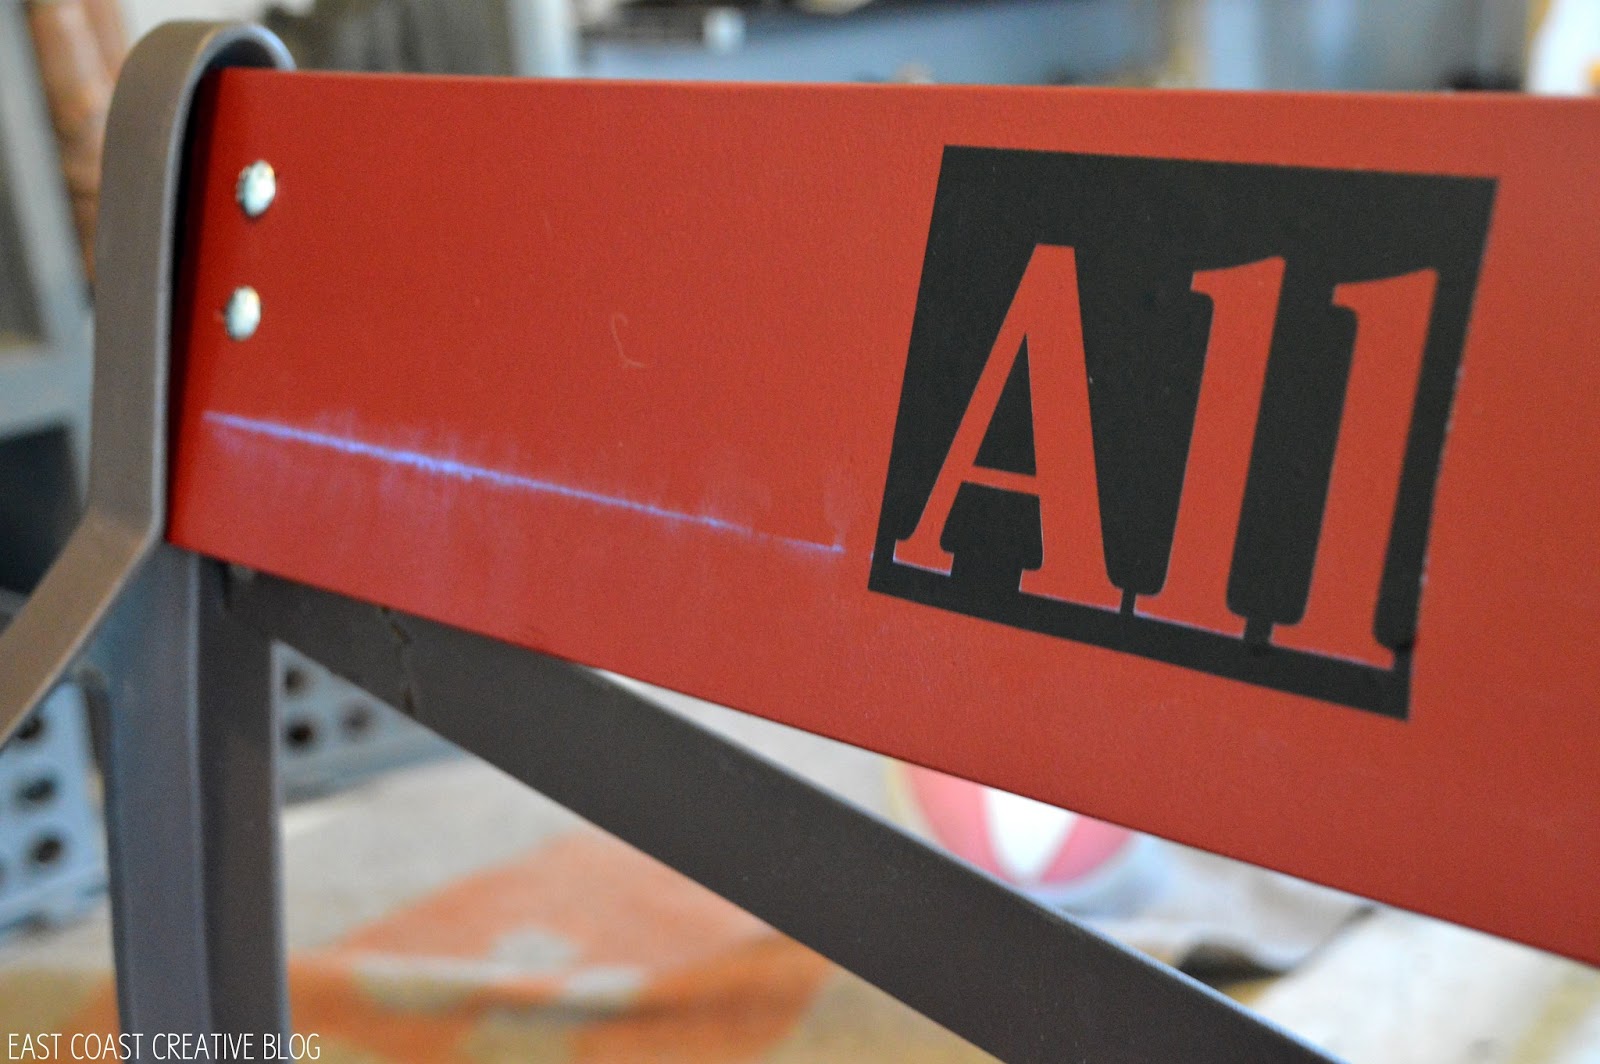
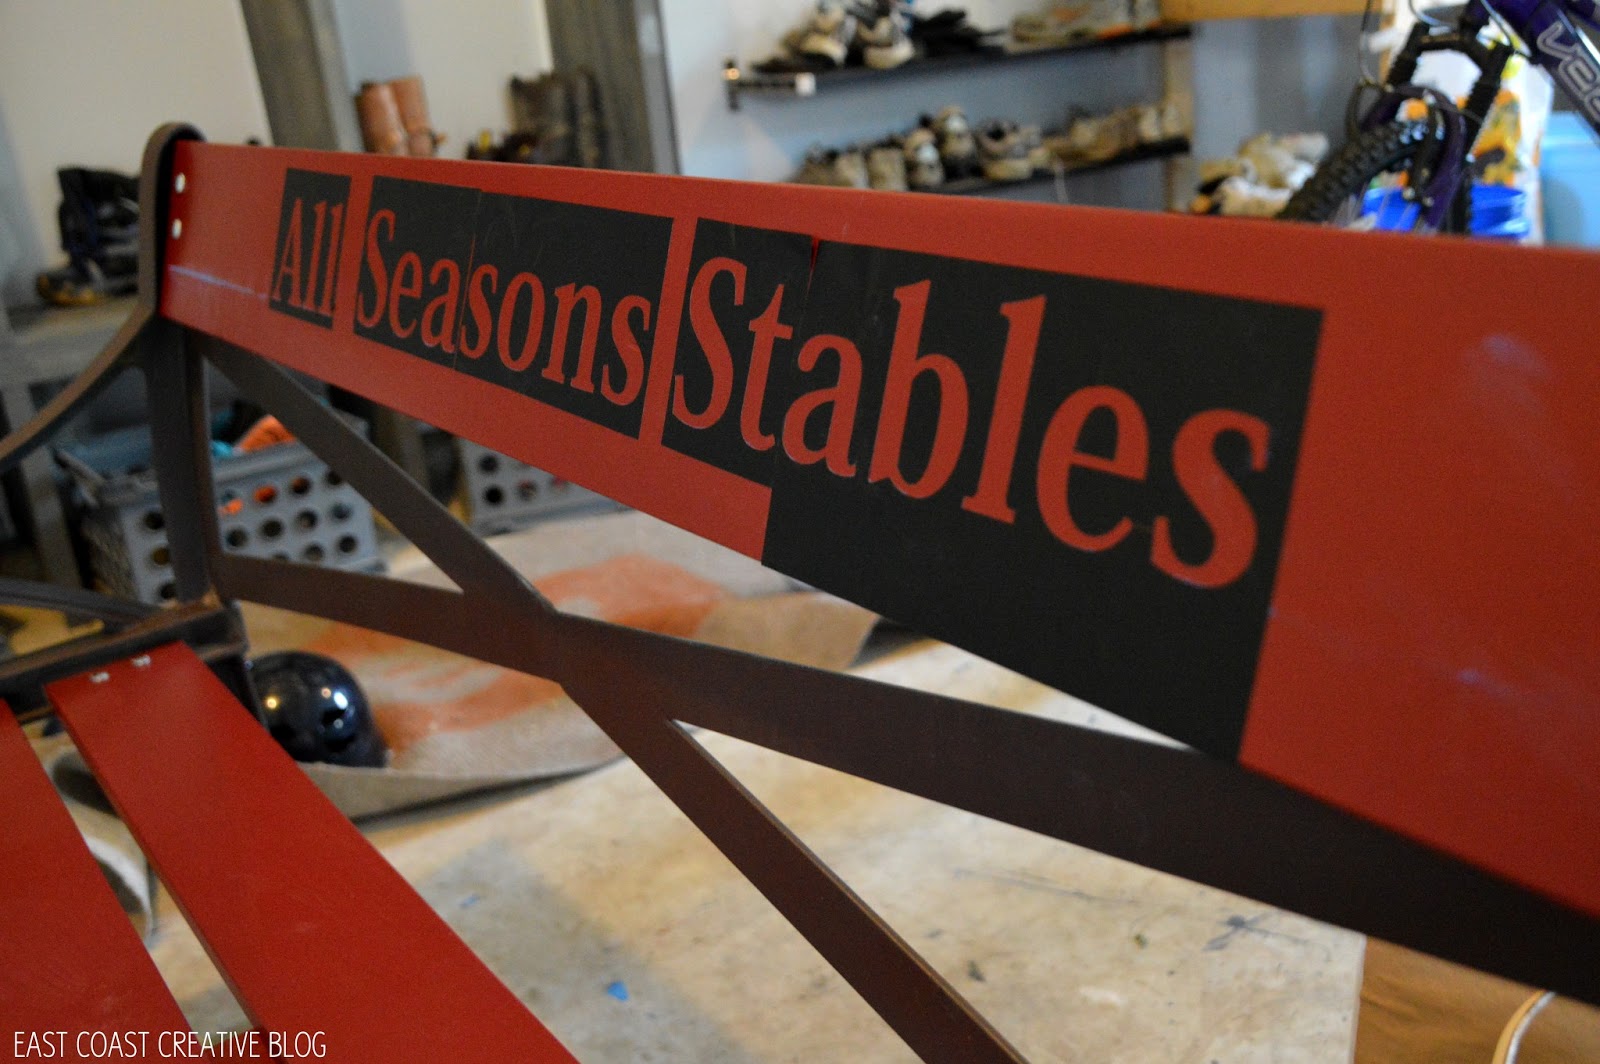
I taped around the edges to avoid bleeding and then got to work with my favorite Royal Design Studio stencil brush (I swear by this thing!)

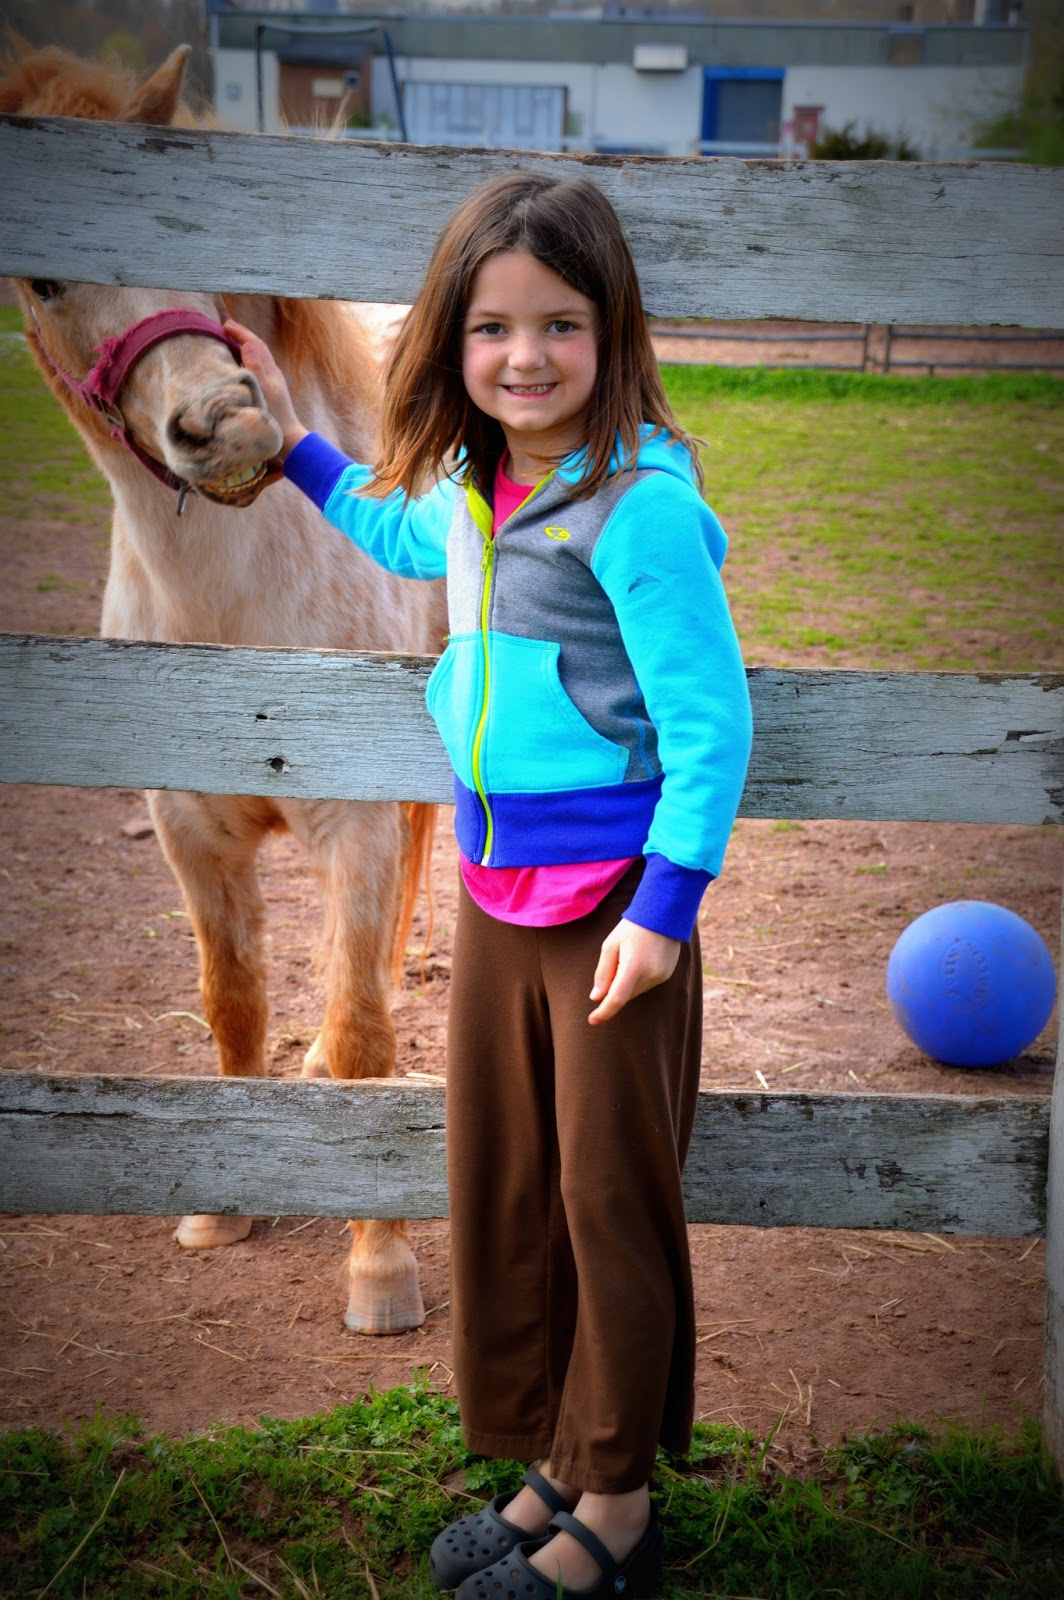
After letting it dry, Kira and I headed back to the farm to make our special delivery. She hung out with a pony named Peaches, while I set up the bench.
I think it looks a WHOLE lot better and Katrina and her family were really surprised and appreciated it so much.
It’s awesome to do a simple, little project that really makes someone else’s day!
It doesn’t have to be a huge project, but it could still make a huge impact on someone else!
So, what do you think of my new phrase?
Are you ready to DIY-FO-SHO???
—————————————————————————–
Psssst. Did you hear our BIG NEWS?


That was super sweet 🙂 Way to go.
I took riding lessons way back in 8th grade and LOVED it! Even though it was just at a very old, sorta run down stable, it was magical to me.
You did a great job Monica! It’s so nice to do things for people just because!
It’s awesome Monica. I love both the DIF aspect AND the result. I have a very similar bench that the weather and squirrels have about destroyed. I see how you removed the wood slats, but how the heck did you get the rusted screws out? Please tell me (and the hub’s aching back) that you have a brilliant solution beyond a hacksaw!
As a life-long equestrian, I can’t tell you how much I love this project! When riders travel to larger horse show venues, many of them create a “stall front” area where friends and family can lounge between classes and catch a little breather. Most of the items are personalized with the farm’s signature colors, name, or logo. A bench like this would be AWESOME for stall front decor!