
We’ve been keeping a secret from you. And it’s a good one. But don’t worry! We’re about to let you in on it…..ready??…..ok, here goes: Six weeks ago we asked several amazing bloggers to join with us in a collaboration group we called Blogging 2 Better. We’re a bunch of like-minded home, DIYand crafting bloggers that want to learn as much as we can about blogging, while also sharing ideas, encouraging one another and sharing each other’s awesome projects as much as we can. We’re so fortunate to be part of a blogging community that encourages sharing! (If you write a blog, we strongly suggest getting a group of girls together to learn from. No one understands all that blogging entails except for other bloggers! You can find more about that in our Part-Time Blogger series here.)Anyway, these girls are really, truly talented and it was a lot of fun getting to know them better. For our final week, we had Beckie from Infarrantly Creative give us a list of materials that we all needed to incorporate into an awesome project. It’s like our version of a Nate’s Crate Challenge! Woohoo! And today is the day we get to see what everyone’s been up to!! Once you finish taking a look at what we created, make sure you hop over to the other gal’s blogs to see what they made.

Here’s the list of the supplies from Beckie:
And here’s what we came up with:

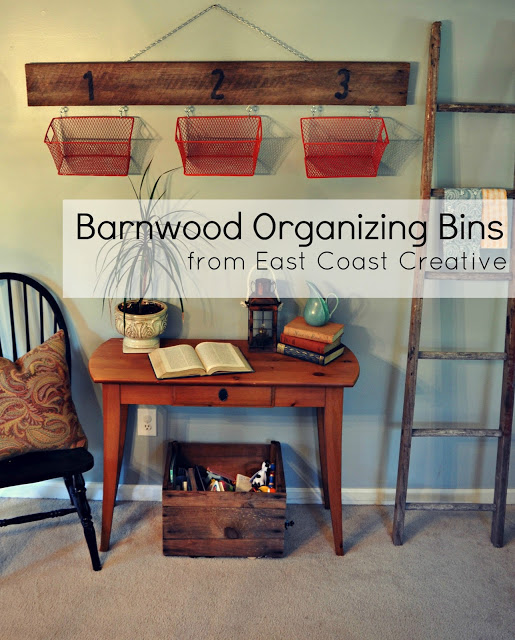
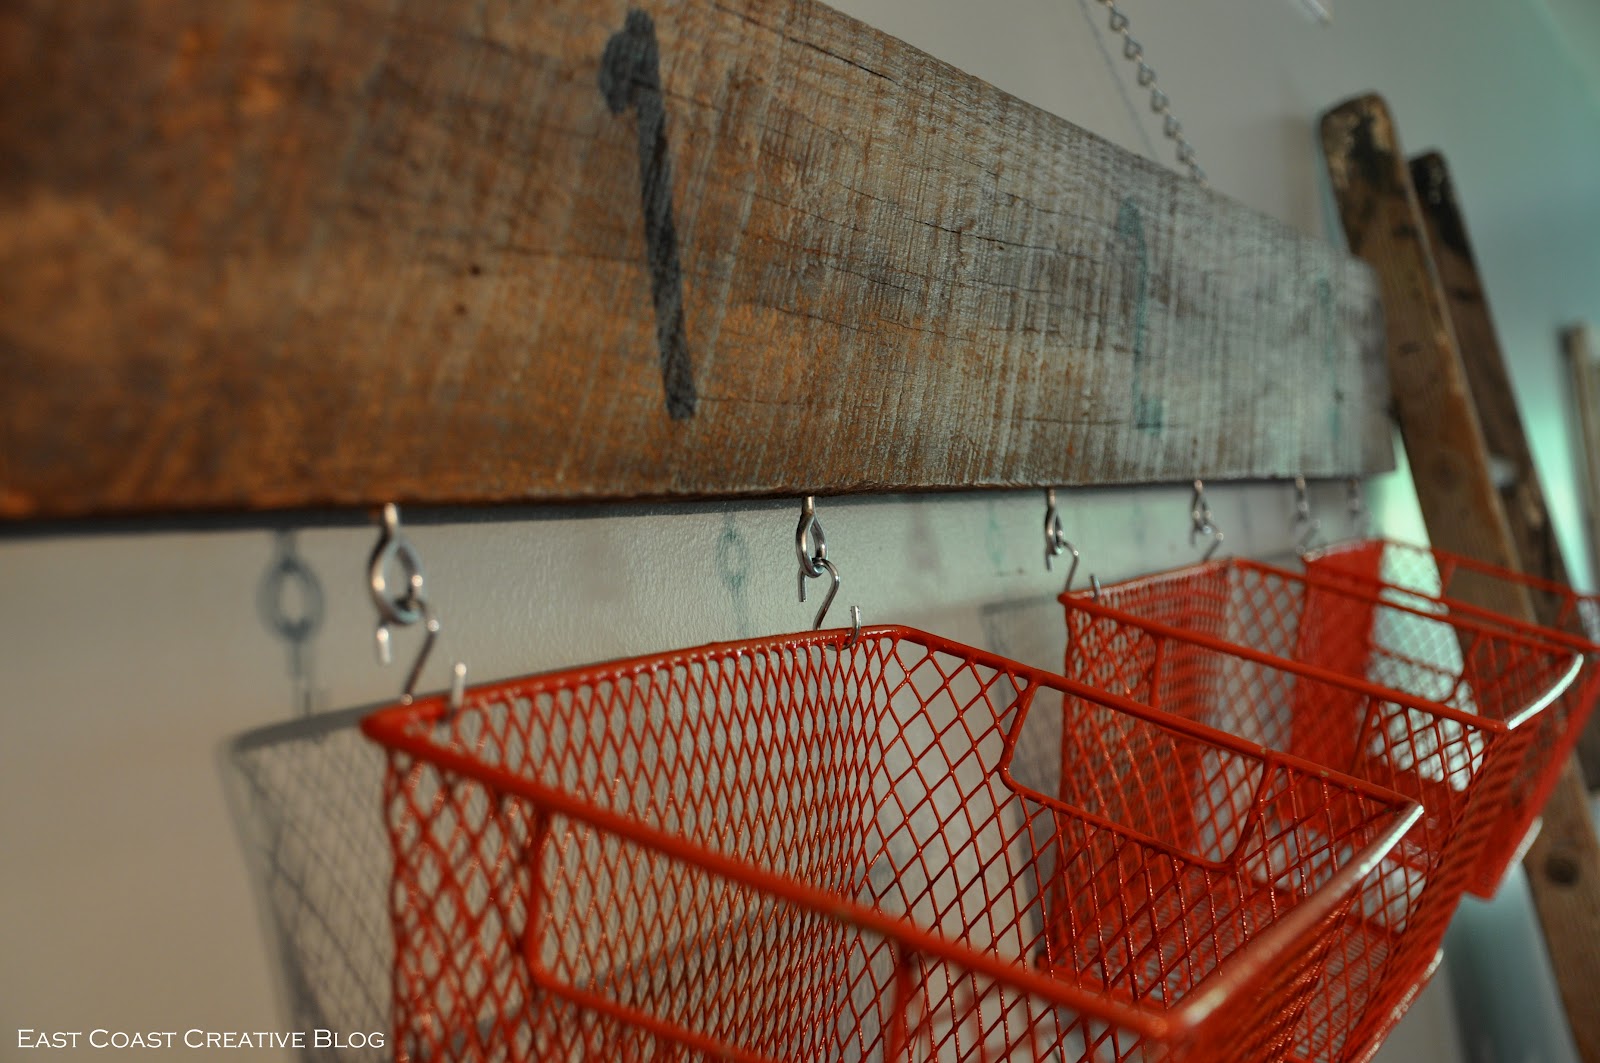
We struggled to come up with a clever name for it, but basically it’s a rustic/industrial storage bin. A very easy project that turned out adorable, if we do say so ourselves. You know we love a good pallet project (we’ve done several here and here), but we also keep loads of barnwood on hand, too. We picked one that was already the perfect length (yay! no extra cutting required!)

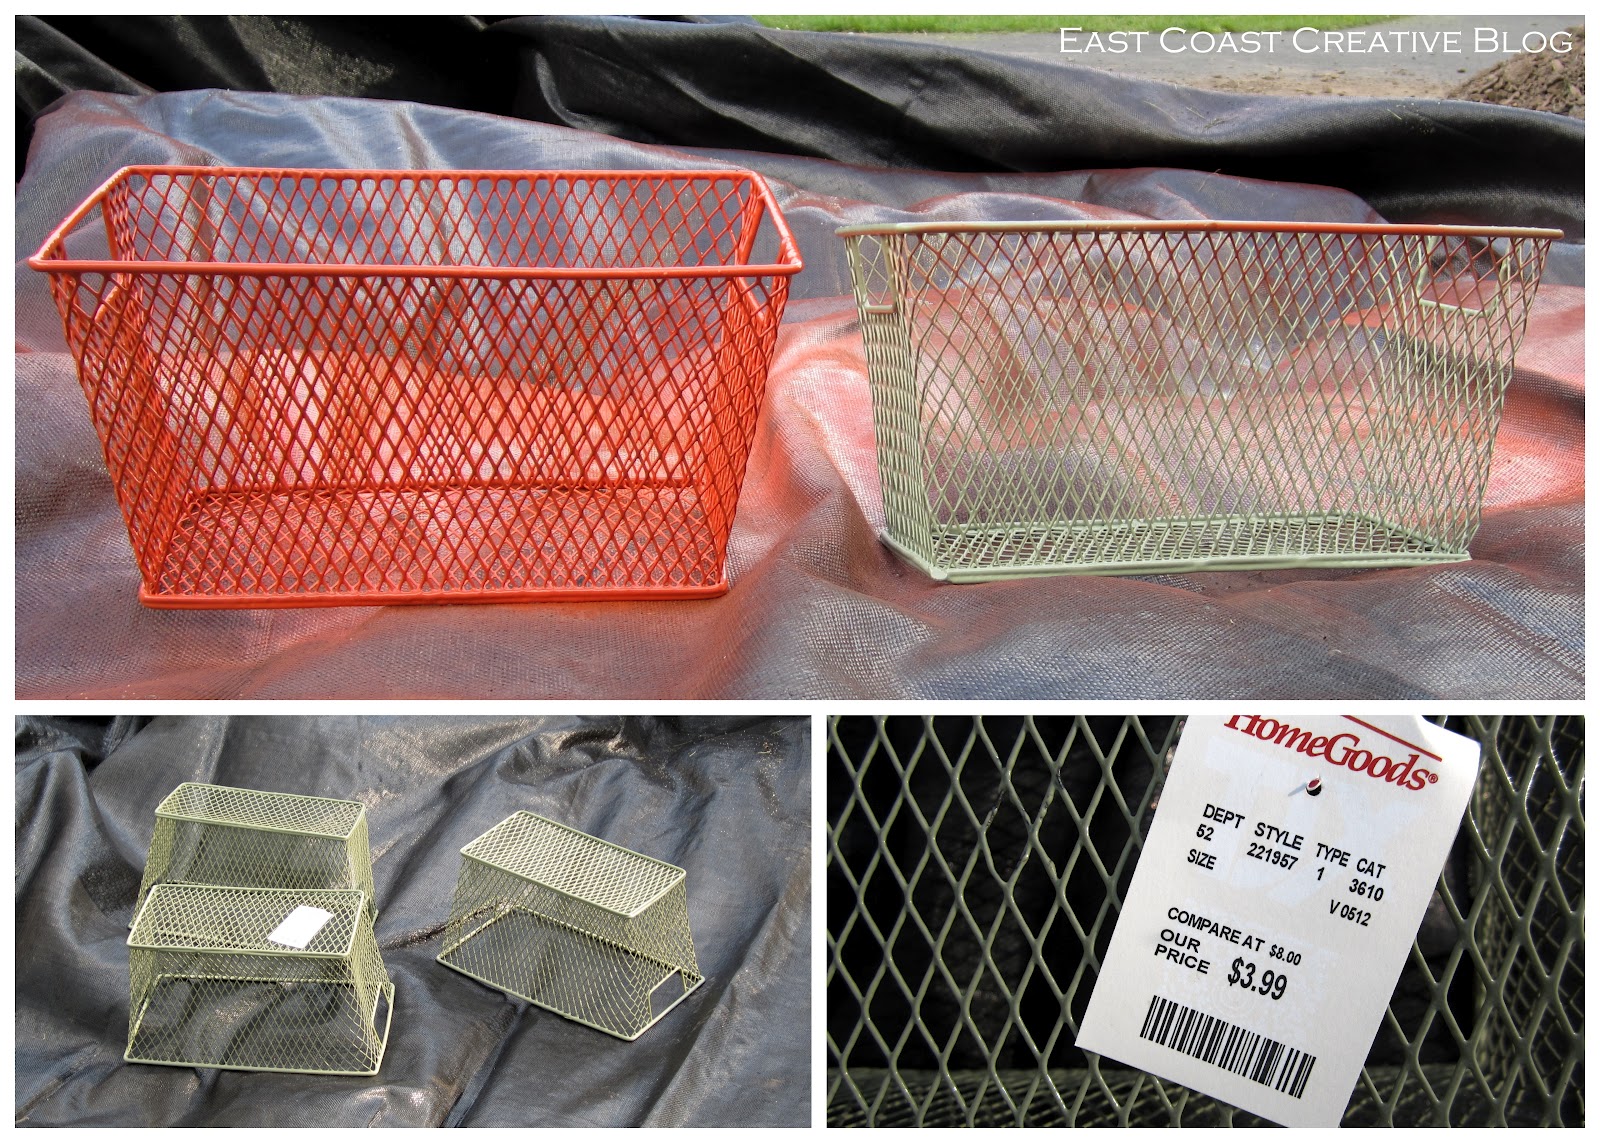
We also scored these three wire bins at HomeGoods for four bucks a pop! We didn’t love the color, but knew immediately that this is where we could use coral! We spraypainted them with Valspar’s Hacienda Tile- the perfect coral.
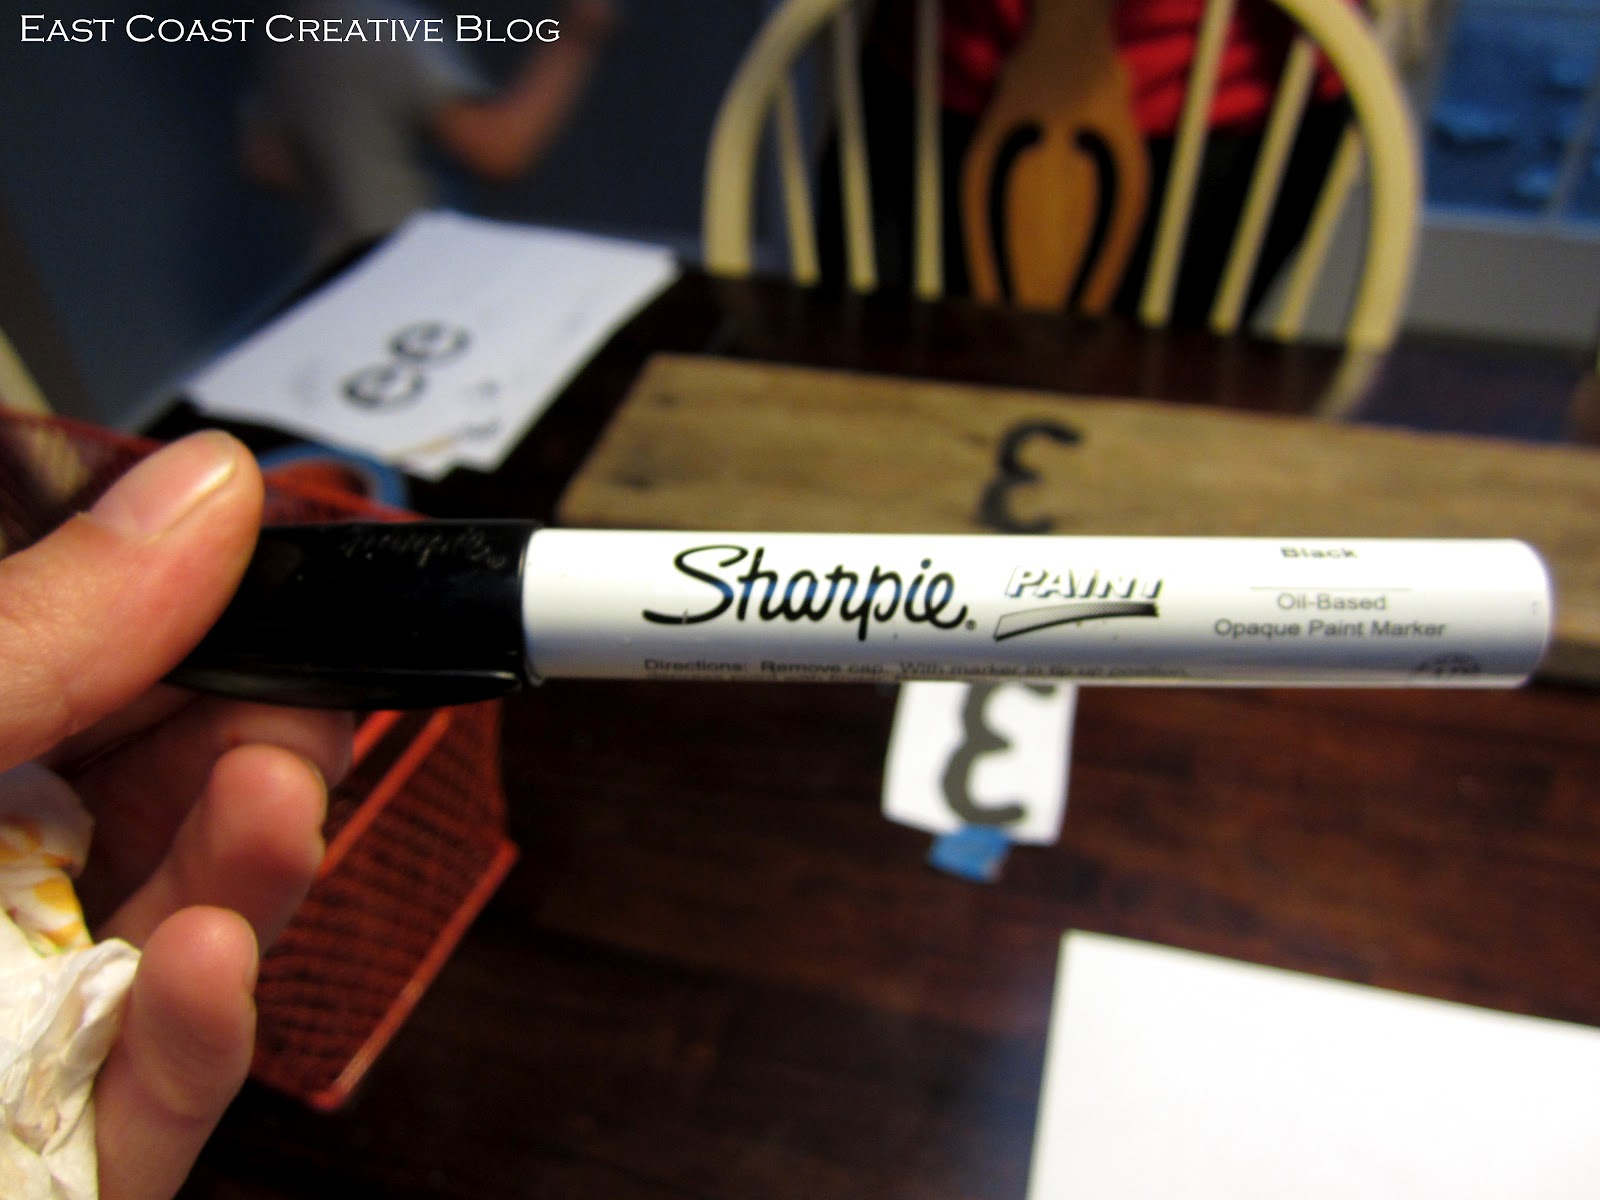
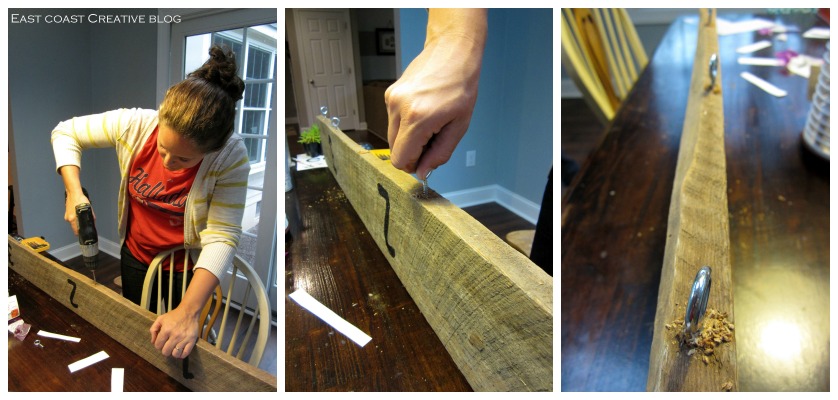
Next we found a font that we liked and printed number 1 through 3 large on regular, old paper. With a pen, we traced the number while pressing down to leave the outline on the barn wood.
![]()
Have you tried paint pens yet? They’re so easy to use, but they still looks like paint. We carefully filled in the stencilled numbers with a black Sharpie paint pen.
Once the paint on the bins had dried, we brought them in and laid them down in front of the wood to determind the placement. We measured the board, divided it into thirds and then marked where the hooks would go.

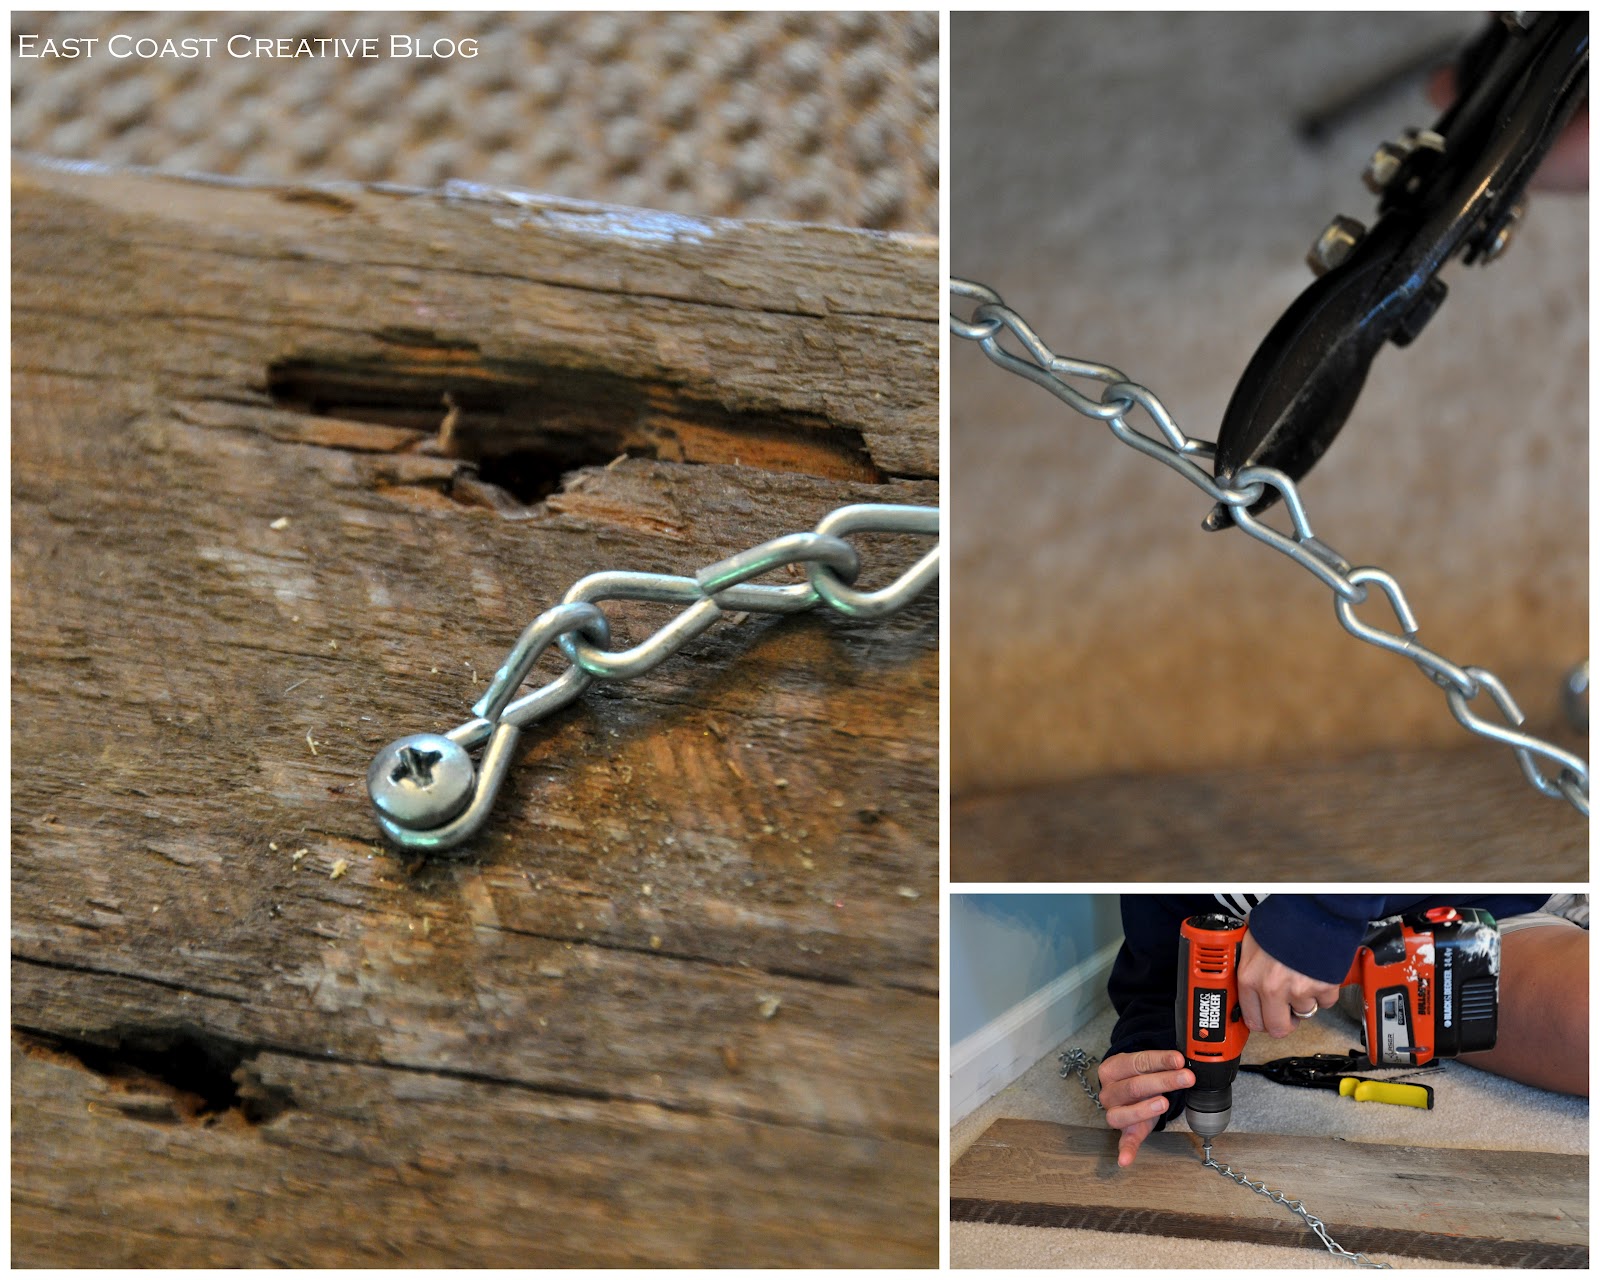
Monica drilled pilot holes where we had previously marked and then we screwed in the eye hooks …..Six hooks for three baskets.
Then I gently sanded down the numbers to distress them a bit.
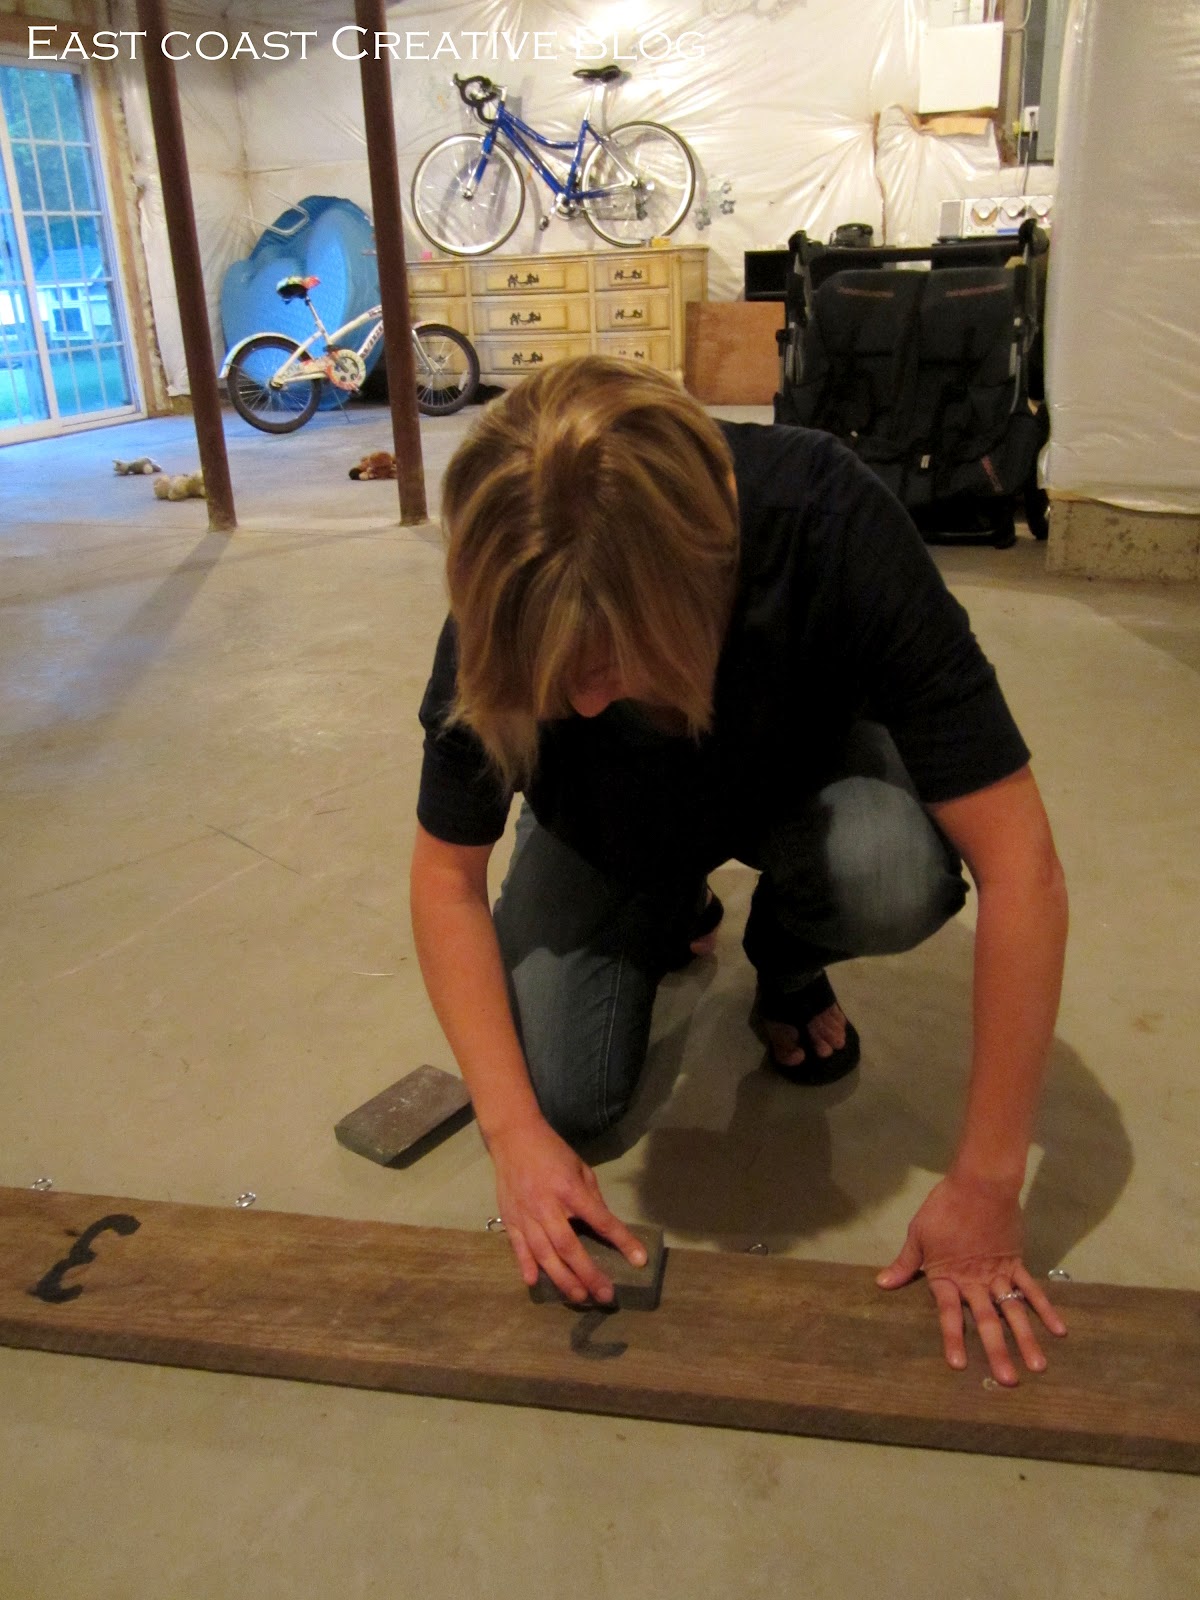
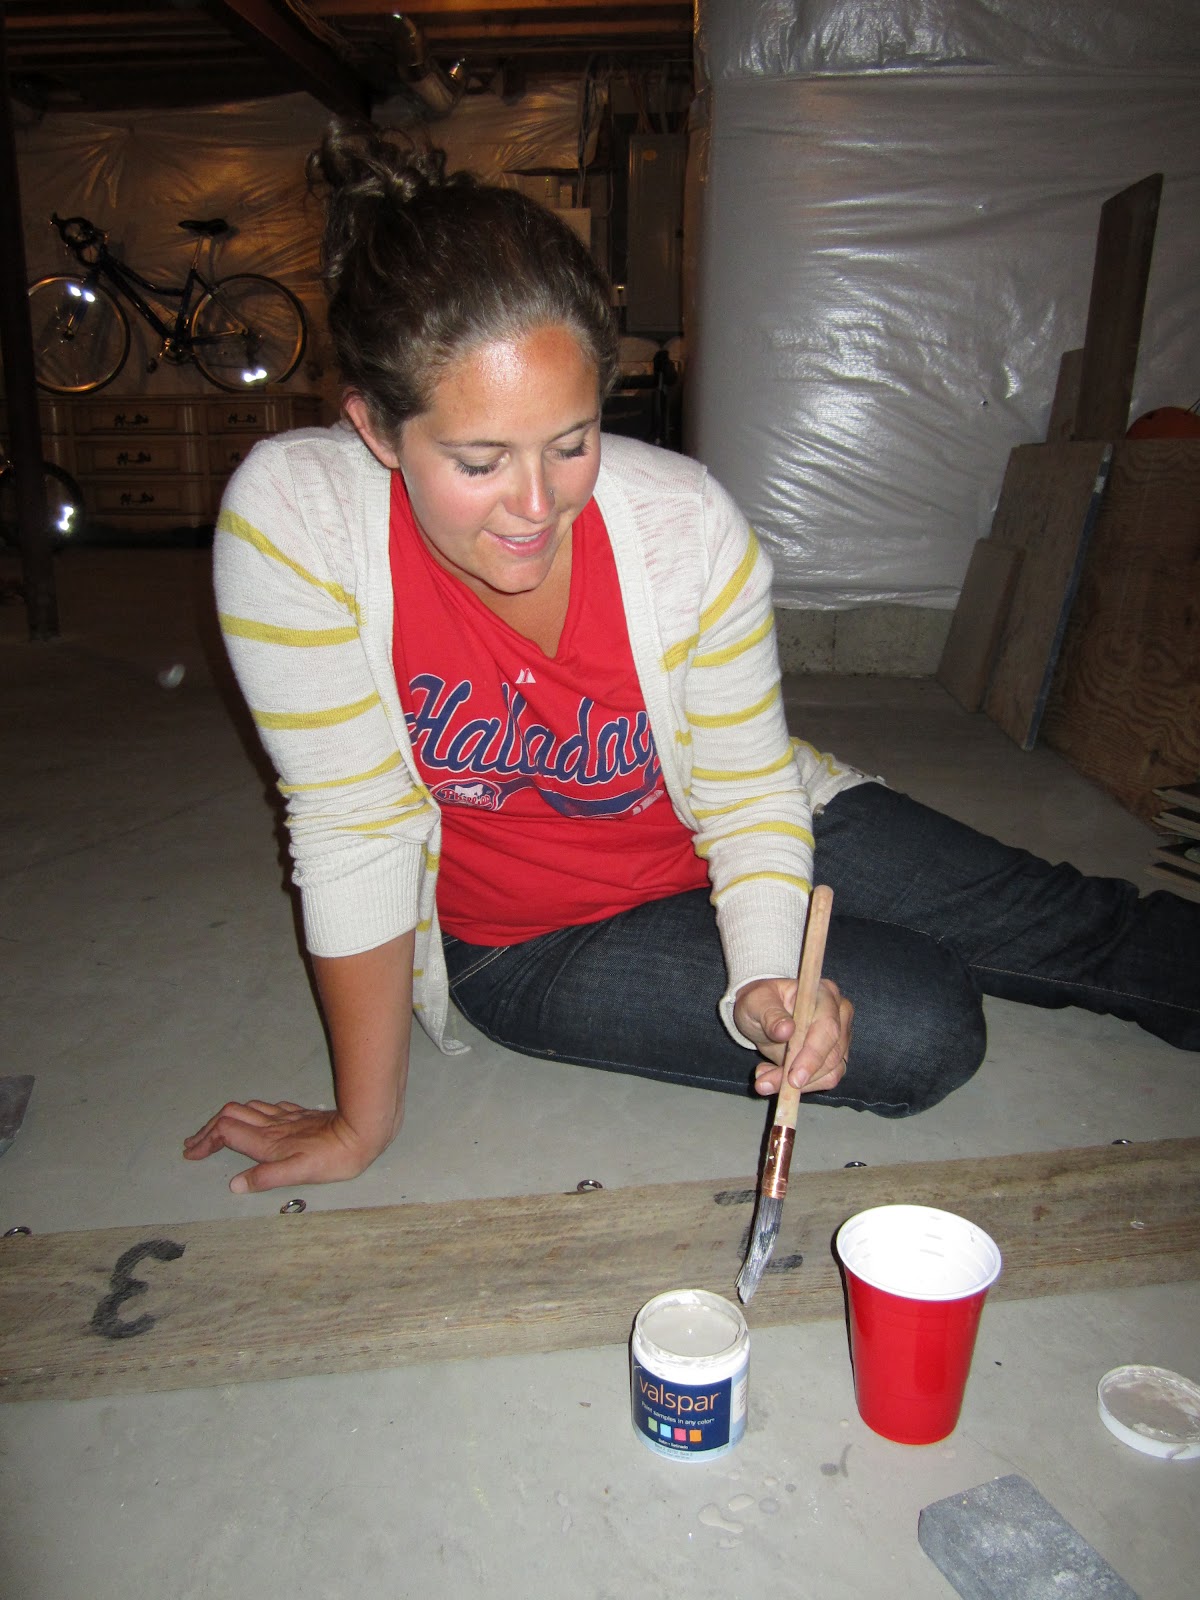
Monica whitewashed the entire board with a mixture of paint and water to give the piece a little more depth. (Side note: working as a team makes the project go faster! We’re so fortunate to have each other. 🙂 (I totally Agree! -Monica)
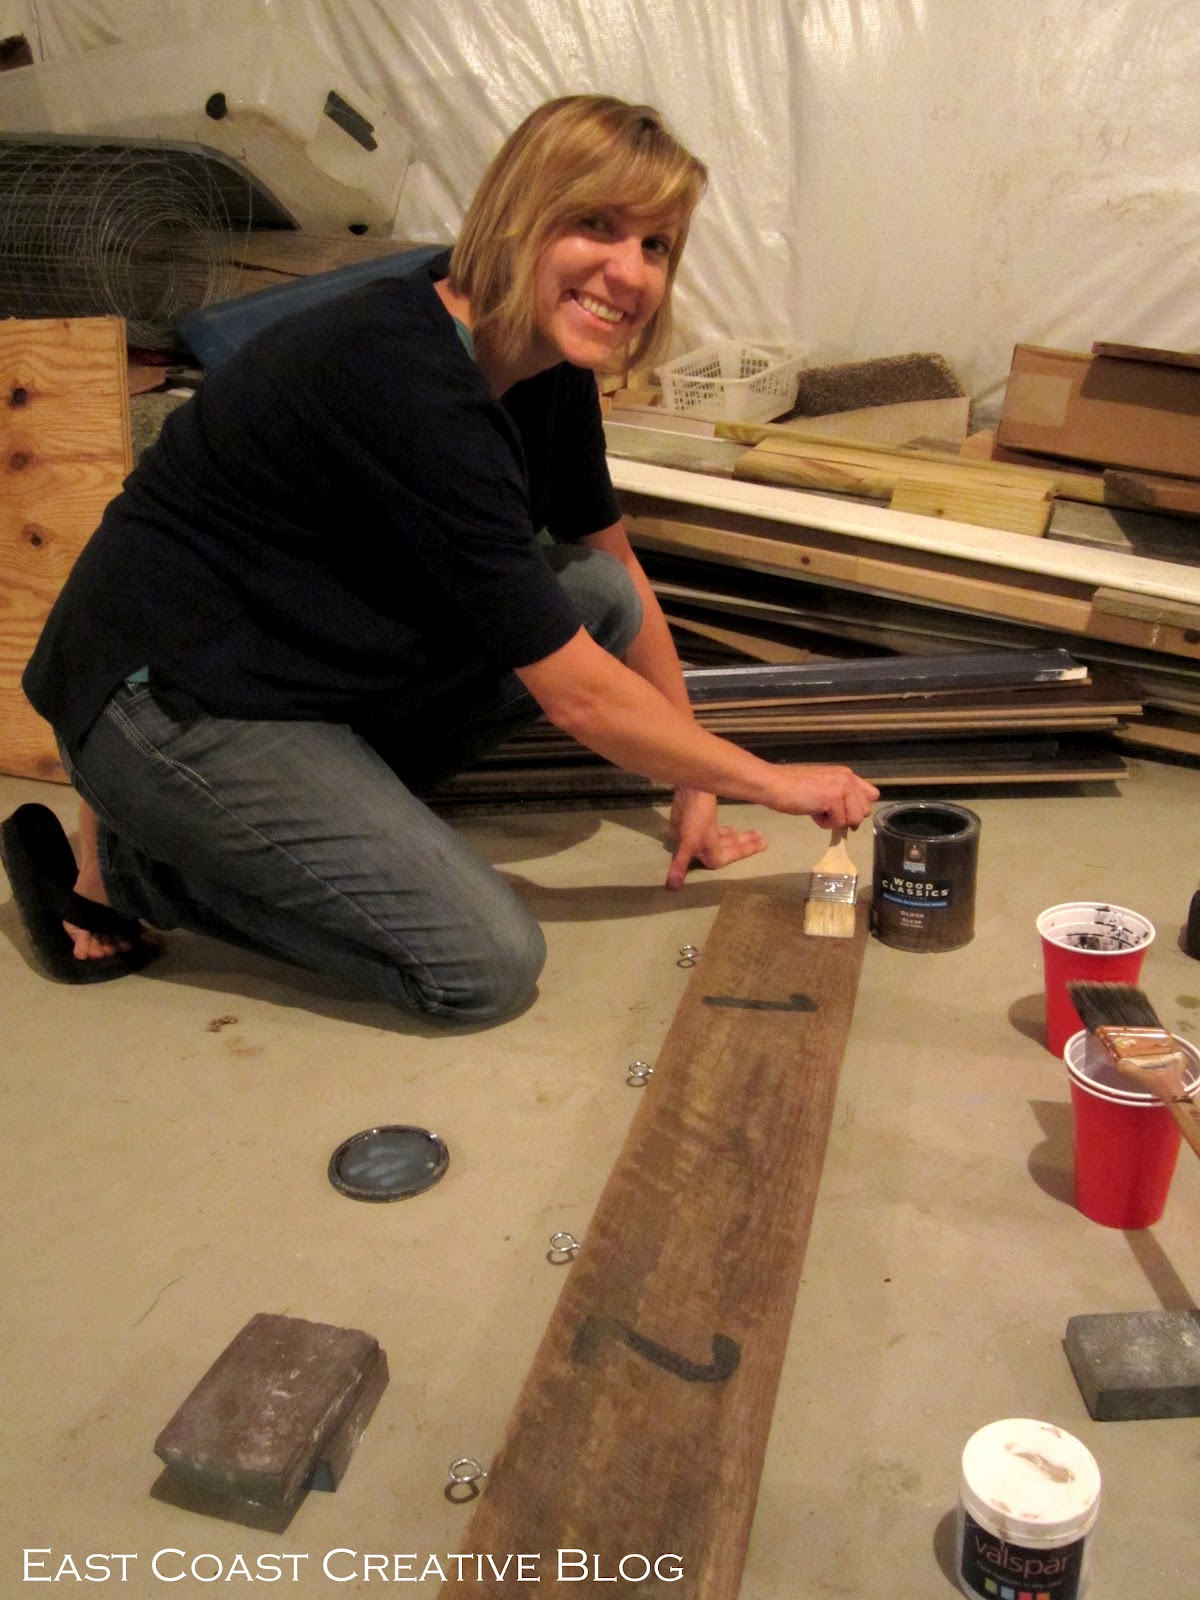
The last step for the wood piece is to add a coat of water-based polyurethane (water-based won’t change the color of the wood!).
To hang it, we took chain, cut it to the length we wanted with wire cutters and screwed threw one of the links directly into the wood. Make sure your screw isn’t so long that it goes right through to the other side!
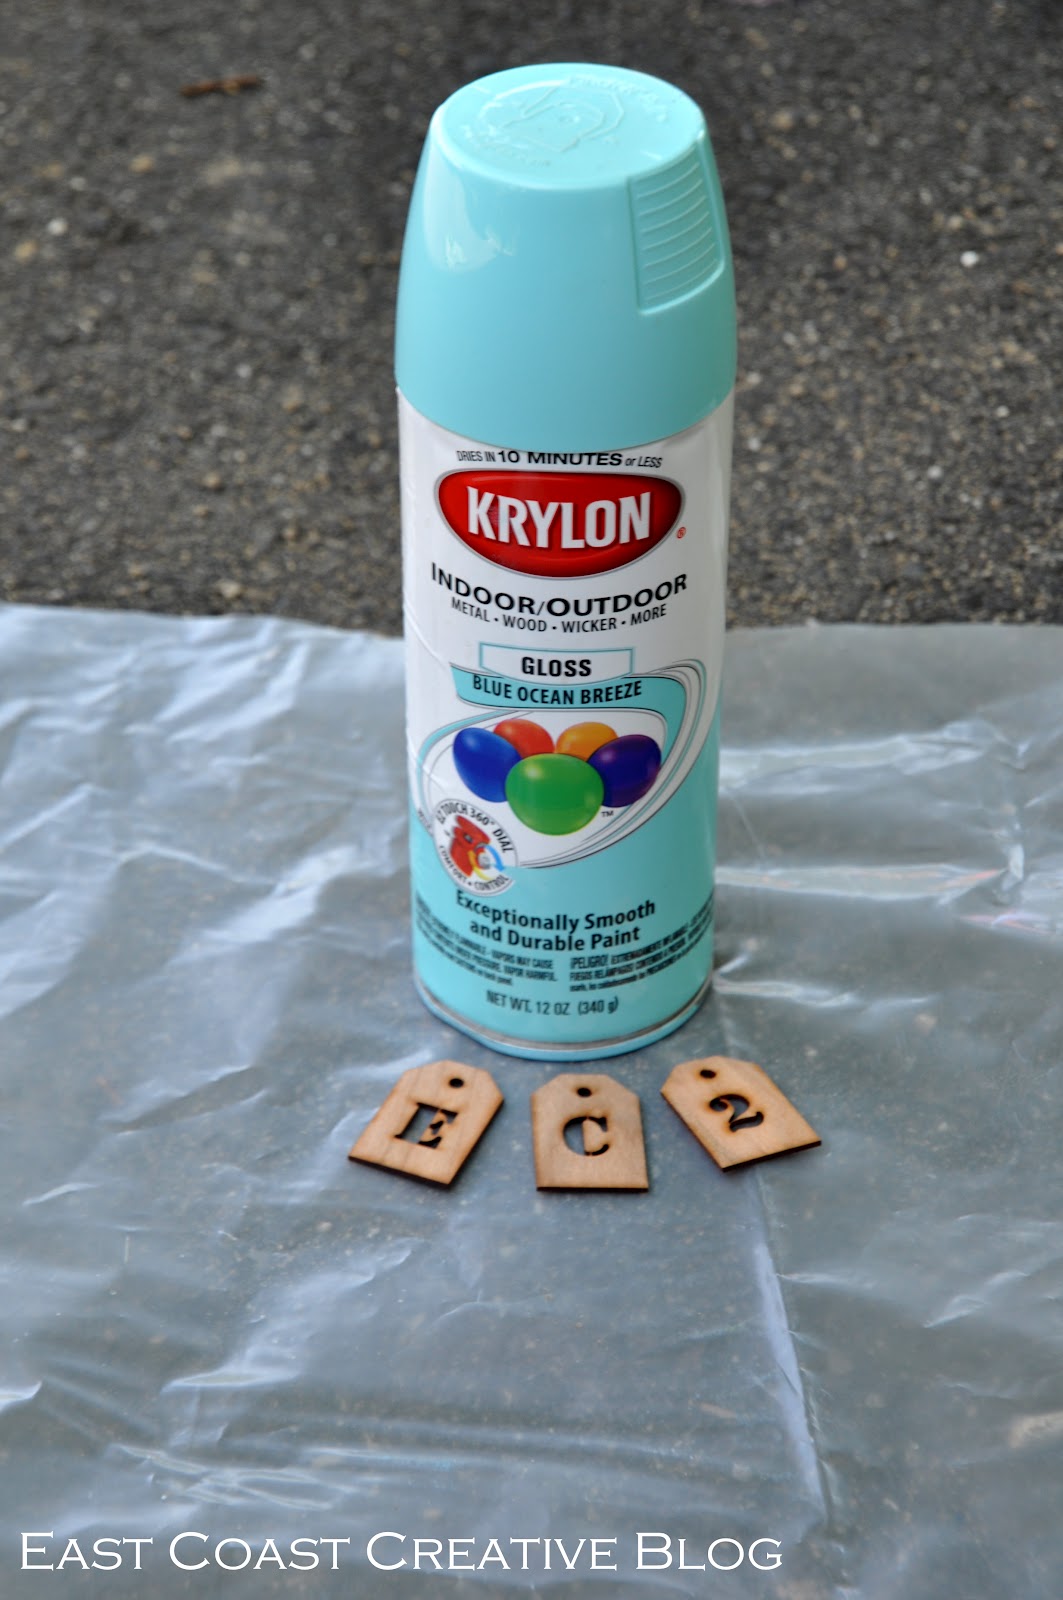
Then we hit a creativity wall. Booo. We could not for the life of us figure out how to incorporate fabric into this project. We toyed with lots of different ideas, but finally decided on a cute hanging pendant banner for one of the baskets. Recently we came across a shop called The Finest Kind and we couldn’t get over how cute their stuff is! We decided to purchase three of their typographical tags to use on our pendant. You’ll probably catch the significance: EC2. 🙂 First, we spraypainted the little cuties blue.
Next, we took apart three 2×3 frames so that we could use the cardboard backing. Wierd, I know, but there’s always an untraditional use for everything!
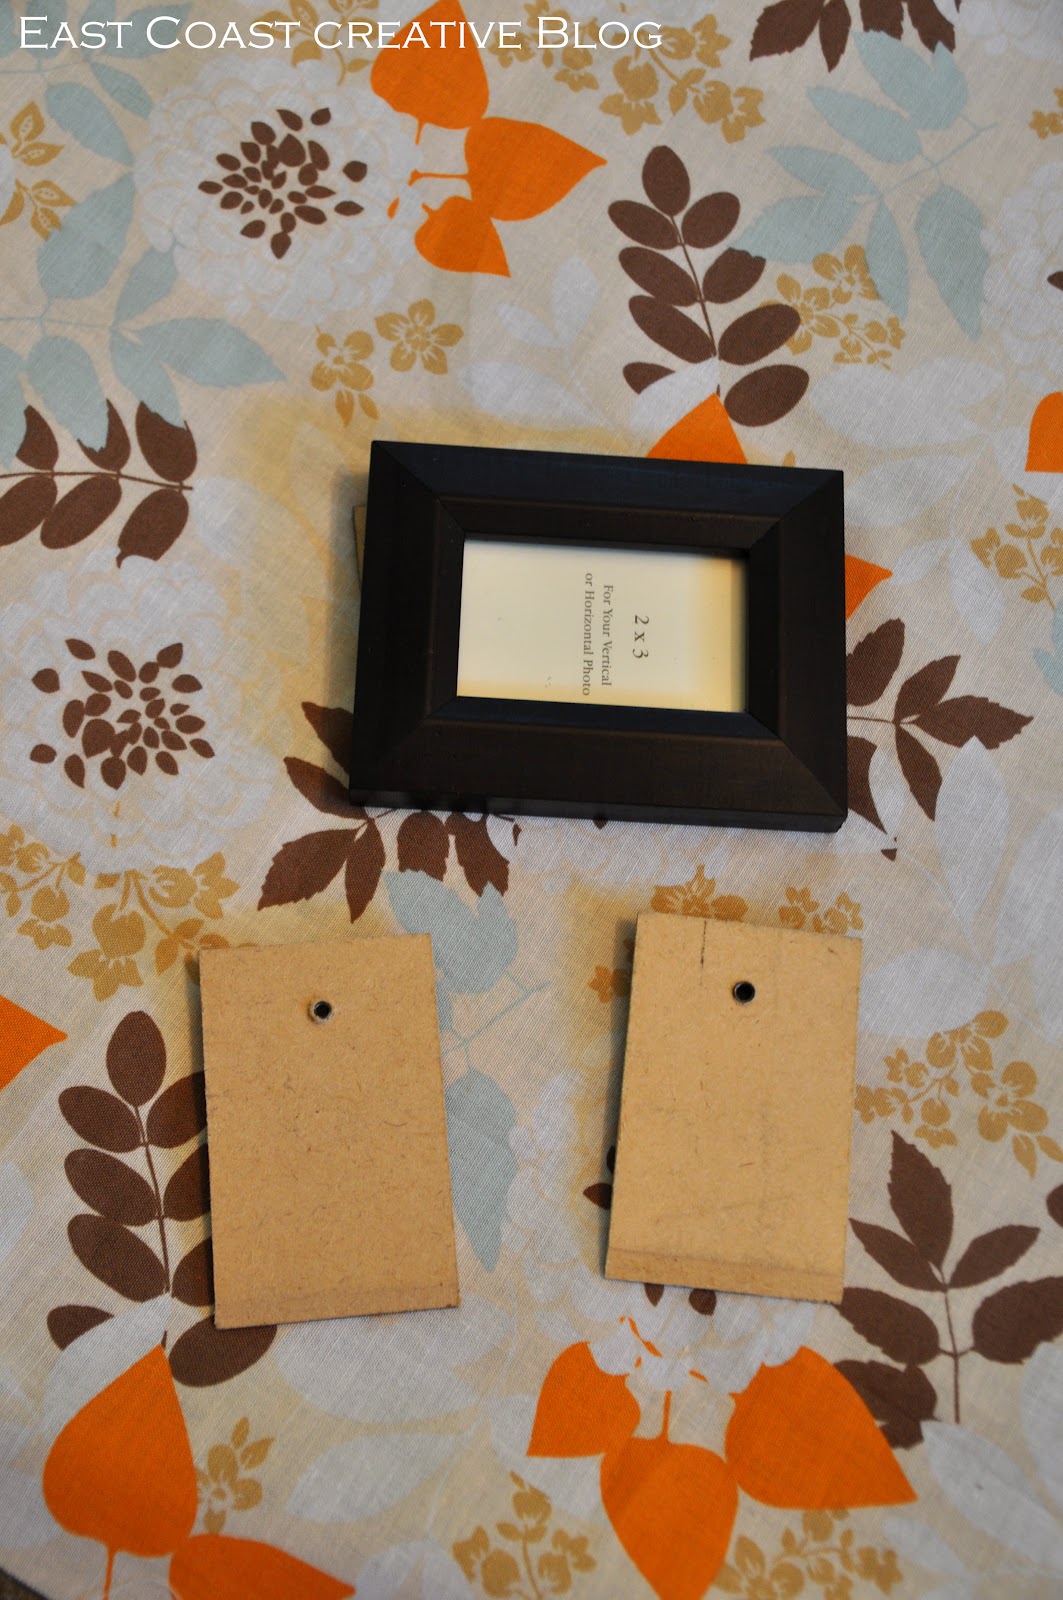
We wrapped the fabric around the cardboard and mod podged it right on.

Before the Mod Podge had dried, we stuck our tags on, and voila! An adorable pendant honoring our blog for the basket!
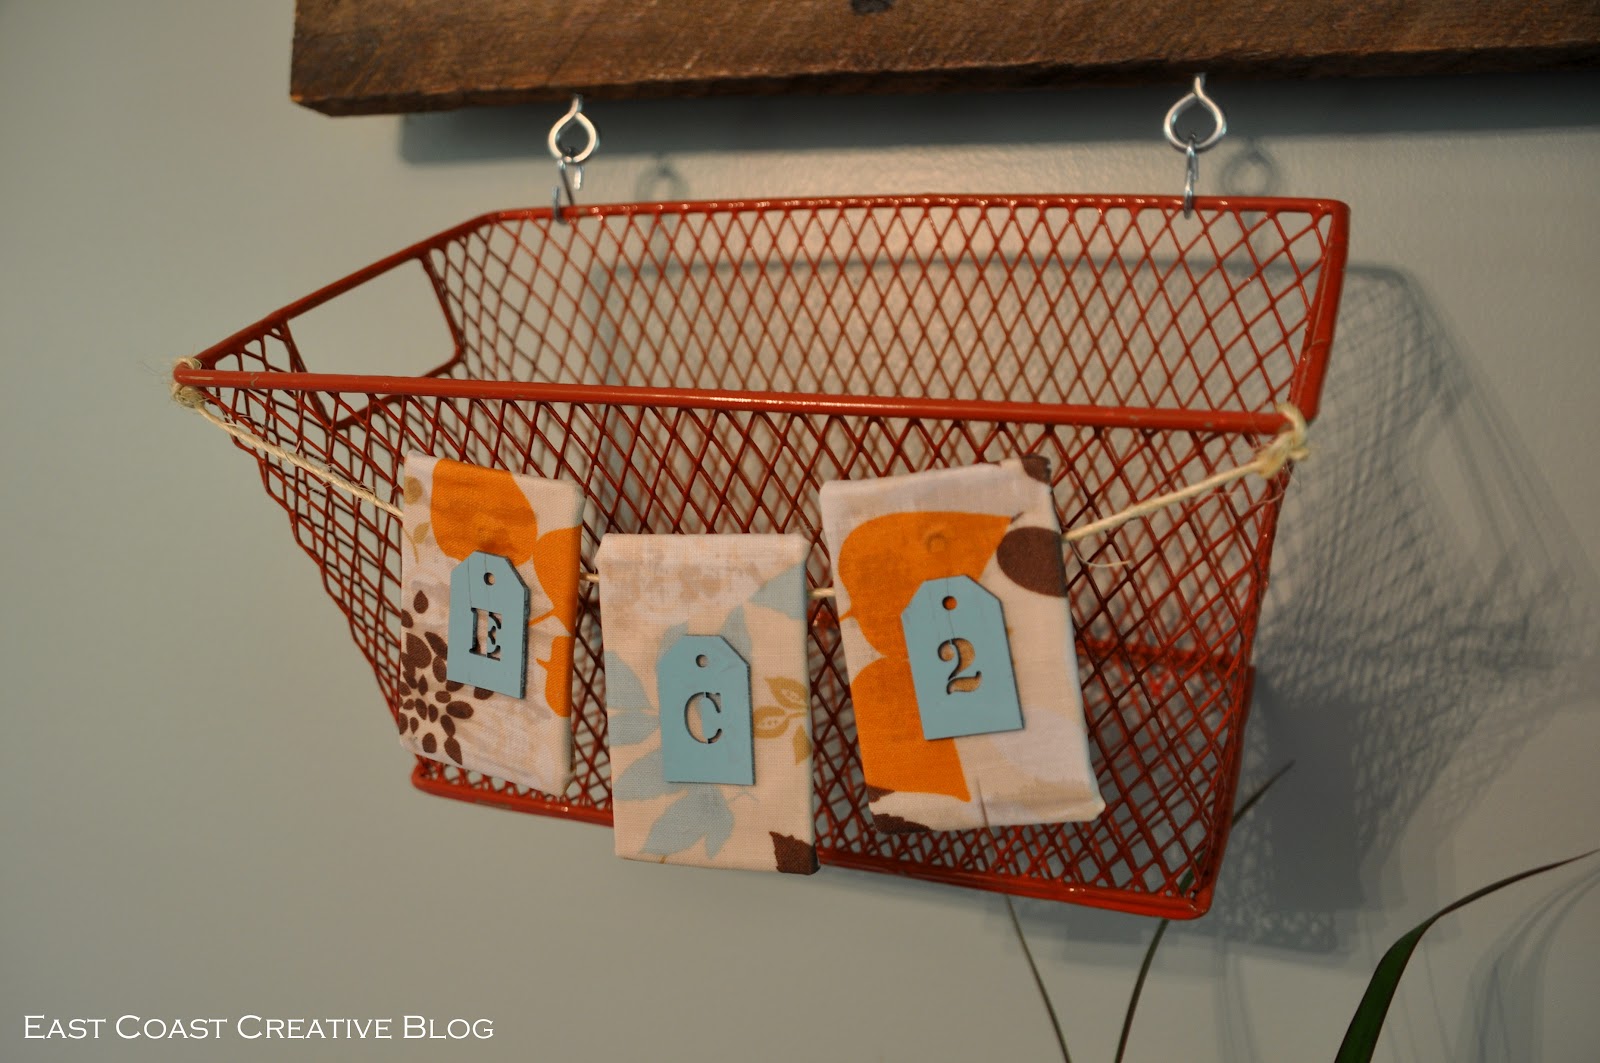
We were thrilled with the finished product, and it has now made it’s home in my dining room. And just so you know, it totally inspired me to rearrange my living room and gave me the motivation I needed to start our dining room makeover!
To be completely honest, we liked this project better without the fabric banner, but do think it makes a super cute accessory!

And now for the REALLY fun part! We were so excited to see what our blogging buddies came up with using the same materials, and they did not disappoint!


Please stop over at these amazing ladies blogs to see what their projects. Share the EC2 love with them and tell them we sent you!
Clockwise from top right:
Kim from Sand & Sisal: Surfboard Pallet Art
Brook from Being Brook: Fabric Wall Map
Allison from House of Hepworths: Dangle Earring Frame
Jenna from SAS Interiors: Monogrammed Chevron Pallet Tray
We had SO much fun putting this project together and consider ourselves lucky to be in the company of these awesome bloggers. If you don’t already follow them, shame on you! But it’s not too late, go ahead and do it now. 🙂
We want to know: What would YOU do with those materials?


Great project, what will you put in your pretty organizer?
Thanks Donna!
We were actually stumped on that! Since it’s in Jess’ dining room it couldn’t be like office papers etc.. She’s going to play around with it this week and figure something out!
Thanks so much for reading and commenting!
Monica (and Jess)
I love it! The whole space is just adorable.
Thanks so much Taryn. We were thrilled with how it turned out and that the whole thing was under $15 made it that much better!
Thanks for your encouragement!
Monica (and Jess)
I LOVE the fabric Map! That is so cool!
Isn’t Brook’s project AWESOME!! I am so going to try that!
Thanks Candice!
M & J
oh my WORD! Boy’s room storage idea! I LOVE LOVE it! And all these projects are amazing!
YAY for using the tags! Awesomesauce! 🙂 Y’all are the greatest.
I have a name for it “Barntastic Bins”! Since it’s in a dining room, I think they should each be caddies to bring onto the table. One with linen napkins, one with mason jars filled with utensils and one for salt, pepper, spices, candles, etc. Then you can just grab and go!
This looks super fun! How long does the challenge last?
[…] Being Brooke, East Coast Creative, House of Hepworths, & SAS […]