
We’re secretly hoping that we are introducing you to Beckie for the first time, but chances are, you’re already addicted to her sites, like us. Beckie must be one of the hardest-working women in the blogosphere because she writes THREE blogs! I know, crazy, right? But she is just that awesome. Plus, we are super-excited to be monthly contributors on Infarrantly Creative beginning this month, so you’ll be hearing a whole lot more about Beckie here on our blog. Lucky you!!
Take it away, Beckie!
————————————————————————————————————
Hi, my is Beckie and I am the mommy to three babies…
Take it away, Beckie!
————————————————————————————————————
Hi, my is Beckie and I am the mommy to three babies…


Yes I am a tri-blogger. But these are actually my real babies!

Yes I am a mom to two, wife of one, spray paint addict and Roadkill Rescue hero! What is that, you ask? No I don’t scoop dead animal carcass off the side of the road, but rather rescue discarded furniture and turn it into usable and beautiful décor for my home.
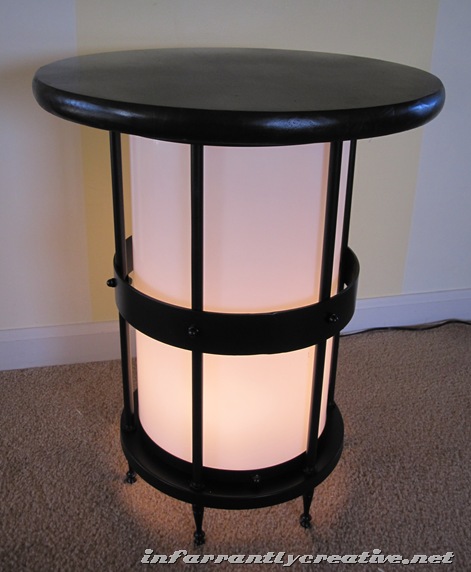
Here is the lighted end table I made for my husband’s office. You will never guess what this originated from…

Our church was remodeled last year to accommodate more people. Along with tearing out pews and adding new theatre seats they upgraded their lighting, which meant tearing down the dated chandeliers. The chandeliers are HUUUGE! They took them down and before they hauled them off to the dump I snagged a bunch of the arms.
Here is what one of them looked like.

On the inside was 8 sockets for lights.

So after tugging, twisting, turning, clamping, and unscrewing I had everything taken apart.

I decided it would be fun to make one of the arms of the chandies a lighted end tables for my husband’s office. See my husband is a pastor at the church. It is kind of symbolic for him in a sense, since he is such an integral part of the growth and change happening right now.
I lightly sanded all the brassiness with my 3M Sandblaster Pad and then wiped it down. I sprayed it with Clean Metal Primer by Rustoleum. After it was dry I sprayed it with some Oil Rubbed Bronze Metallic spray paint by Krylon.

I purchased a pine tabletop at Menards for $9.44.

In order to accommodate the threaded pipes I needed the tabletop to be drilled a bit so it would fit in place.

So I flipped it upside down and had my husband press it down so that it made an indention into the wood top. Since pine is a soft wood it worked pretty well.

Then I marked the spots and used a drill press to drill down into the table top. Then I placed the tabletop on top. Perfect fit!

I primed and painted the tabletop (Krylon’s Oil Rubbed Bronze) as well.
I wanted there to be a light still inside the table. So I asked my licensed electrician friend to show me how to use the parts I had to created a light fixture inside with an attached cord. After cutting some of the wire and removing the extra sockets. It went from this…

to this…

I measured the bottom harness and cut a circle out of a piece of scrap wood to fit perfectly inside.

Then I drilled a hole in the middle of the wood circle and added the light fixture securing it at the bottom with a nut.

Then I set my light into the harness and added 3 fifteen watt bulbs.

Then I put the white plexiglass in place and the top of the fixture.

Then I dabbed some Gorilla Glue onto the thread pipes and then pressed the wood tabletop in place. I weighted it down and let it dry.


And there it is…from church chandie to hub’s new end table.

And here it is plugged in…
Roadkill Rescue…success!
Do you love trash to treasure projects? Well come check out all my Roadkill Rescues here.
Guess what?! I had another chandelier arm that I turned into something fabulous as well. Come check it out!
Thanks, girls, for having me and Happy 30th Birthday my friends!
————————————————————————————————————
Aren’t some people just so creative??!!! Thank you so much, Beckie, for stopping by our blog! We’re hoping you leave a little more inspired today.


Love her eye for style, I mean road kill…