
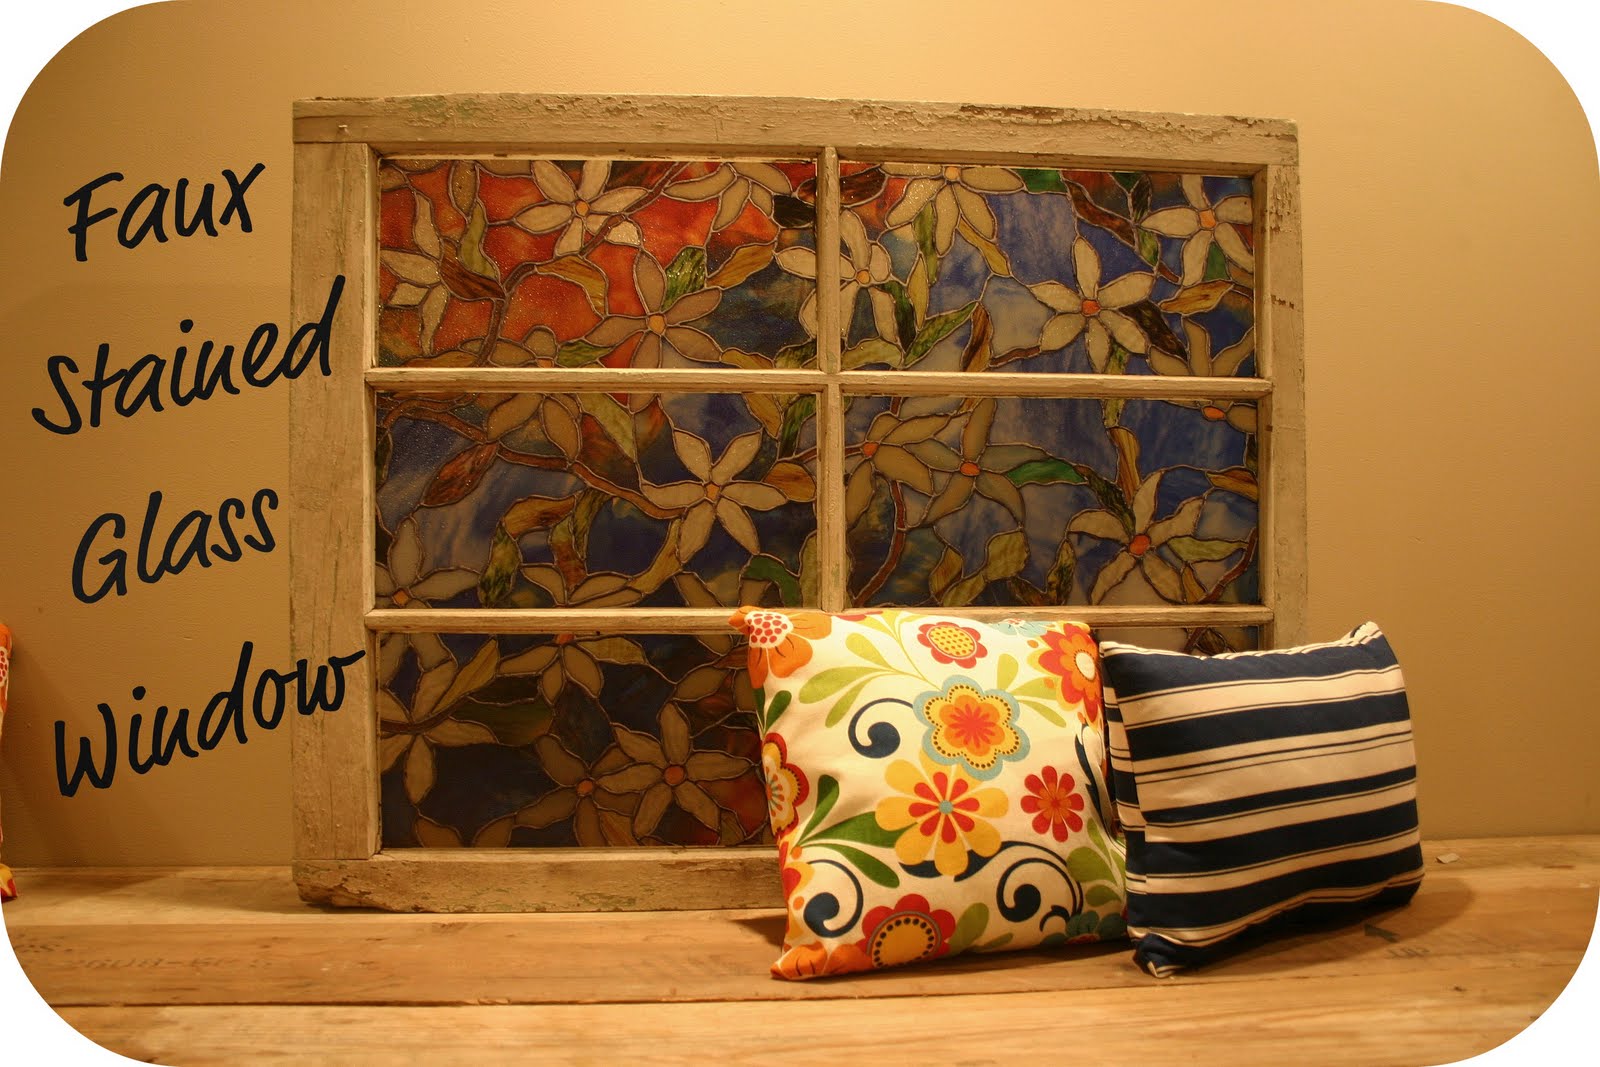
This is one thing that we made that I LOVE LOVE LOVE. Really, it couldn’t be much easier to make, and it’s a really unique attention-grabbing piece of art. I’ve mentioned before that I am so fortunate because my father-in-law has a barn FULL of great old planks of barnwood, doors and old windows that he generously allows me to use. Wait, let me back up and start at the beginning. Stay with me here. My hairdresser, Kate, (who, by the way, is awesome at doing hair and is equally awesome at decorating. Oh, the colors in her house! I’m thinking of house crashing her just to show you her fabulous decorating style! Note to self: stop rambling.) has a small bathroom window that she put a faux stained glass decal on. I immediately loved it, and when I saw this old window from my dad-in-law, I knew exactly what I wanted to do.
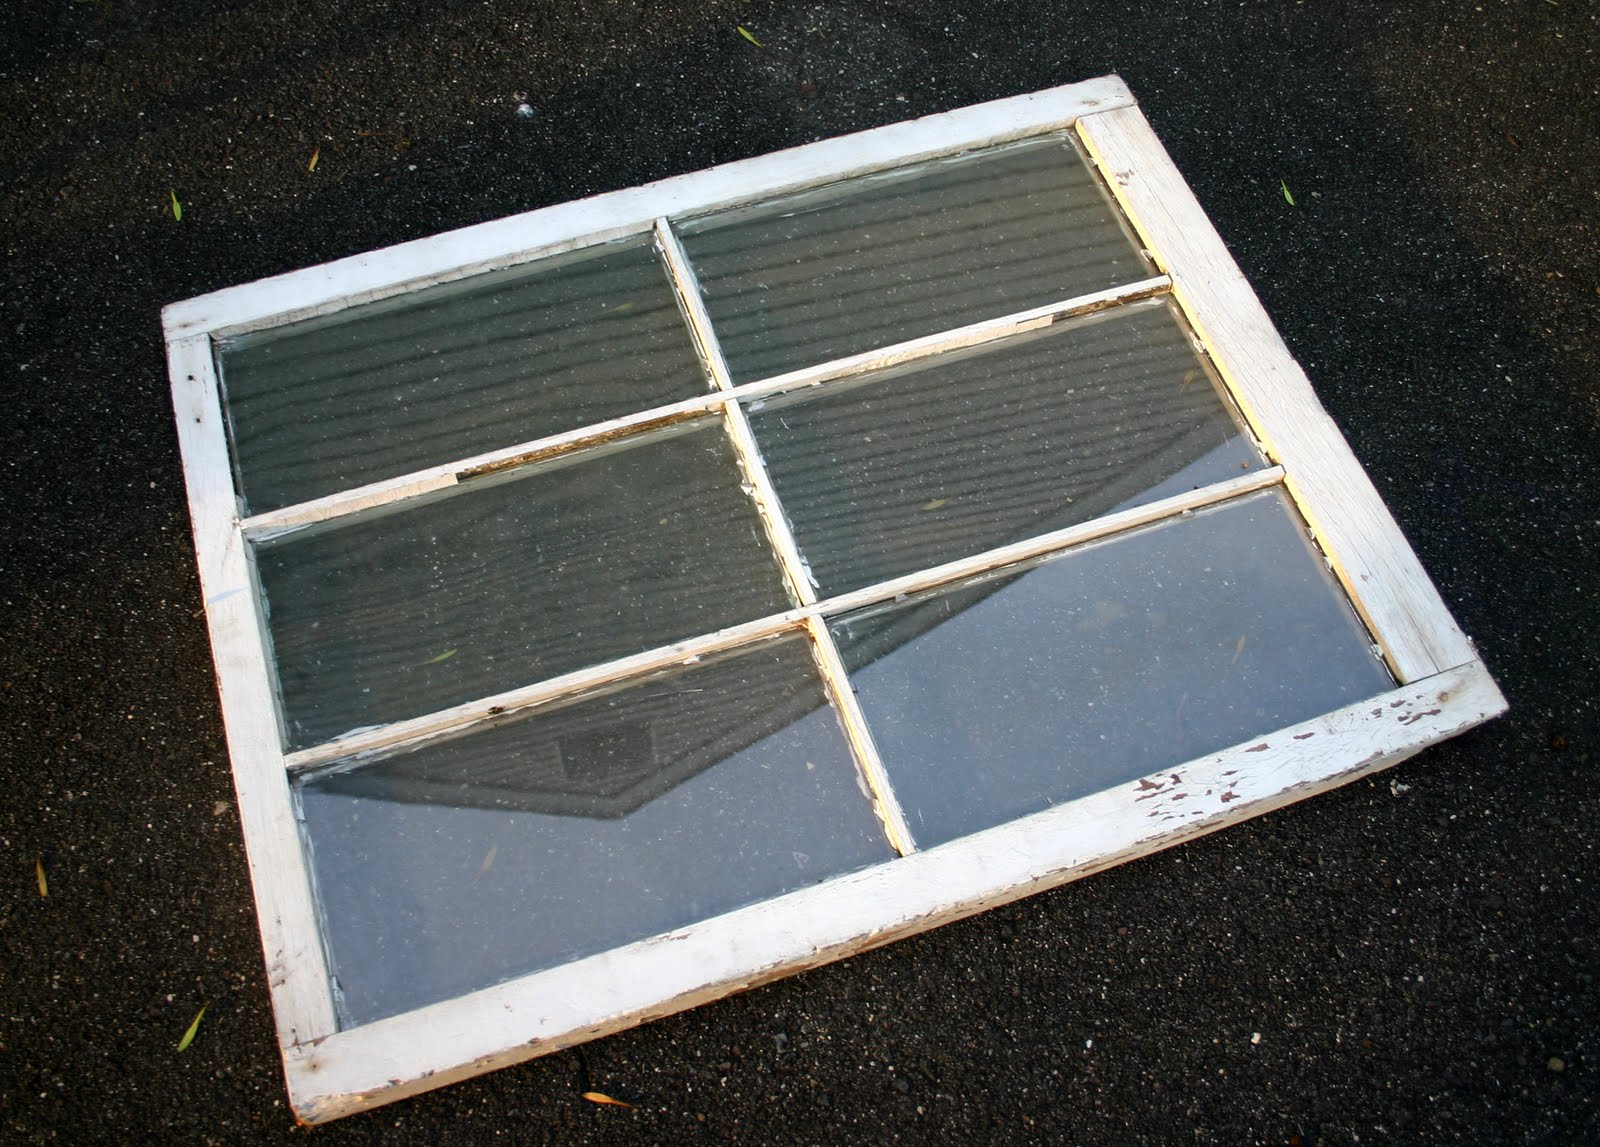
Old, beat up and……PERFECT!
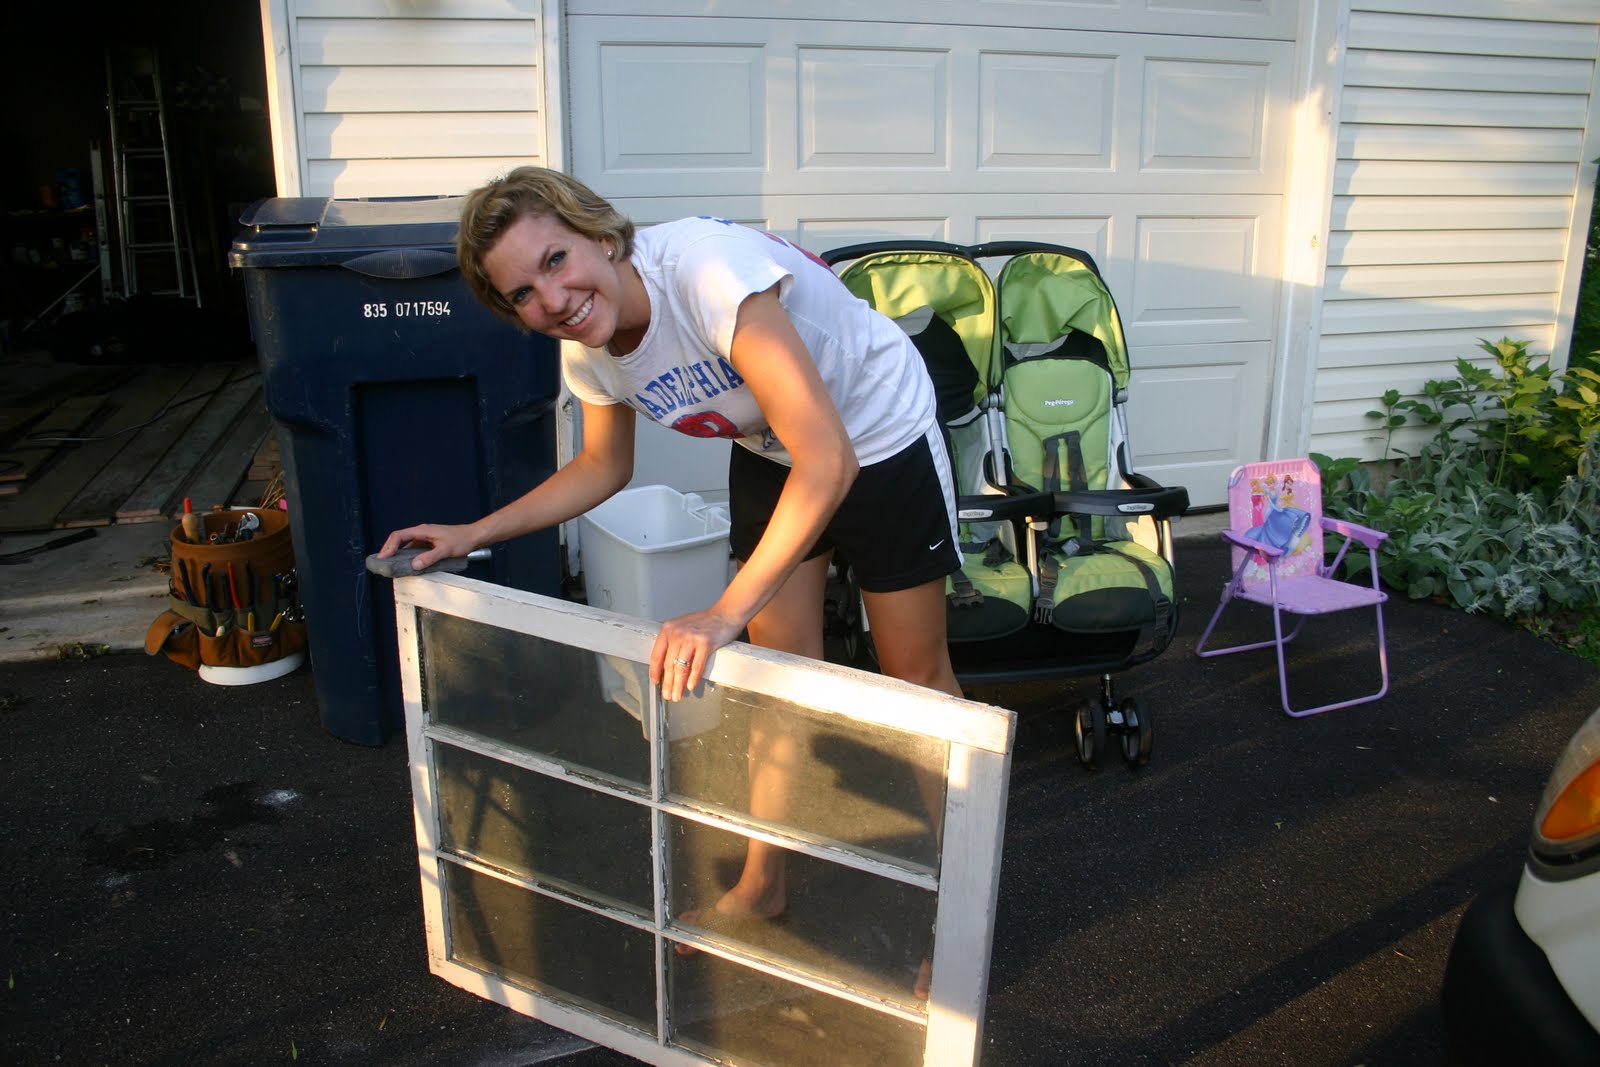
Step 1. Sand down any rough edges or peeling paint. The trick here is to sand enough to make it safe, but not enough to lose the character. I love the aged look, but also didn’t want paint peeling off that my 1 year old son would, without a doubt, pick up and eat.
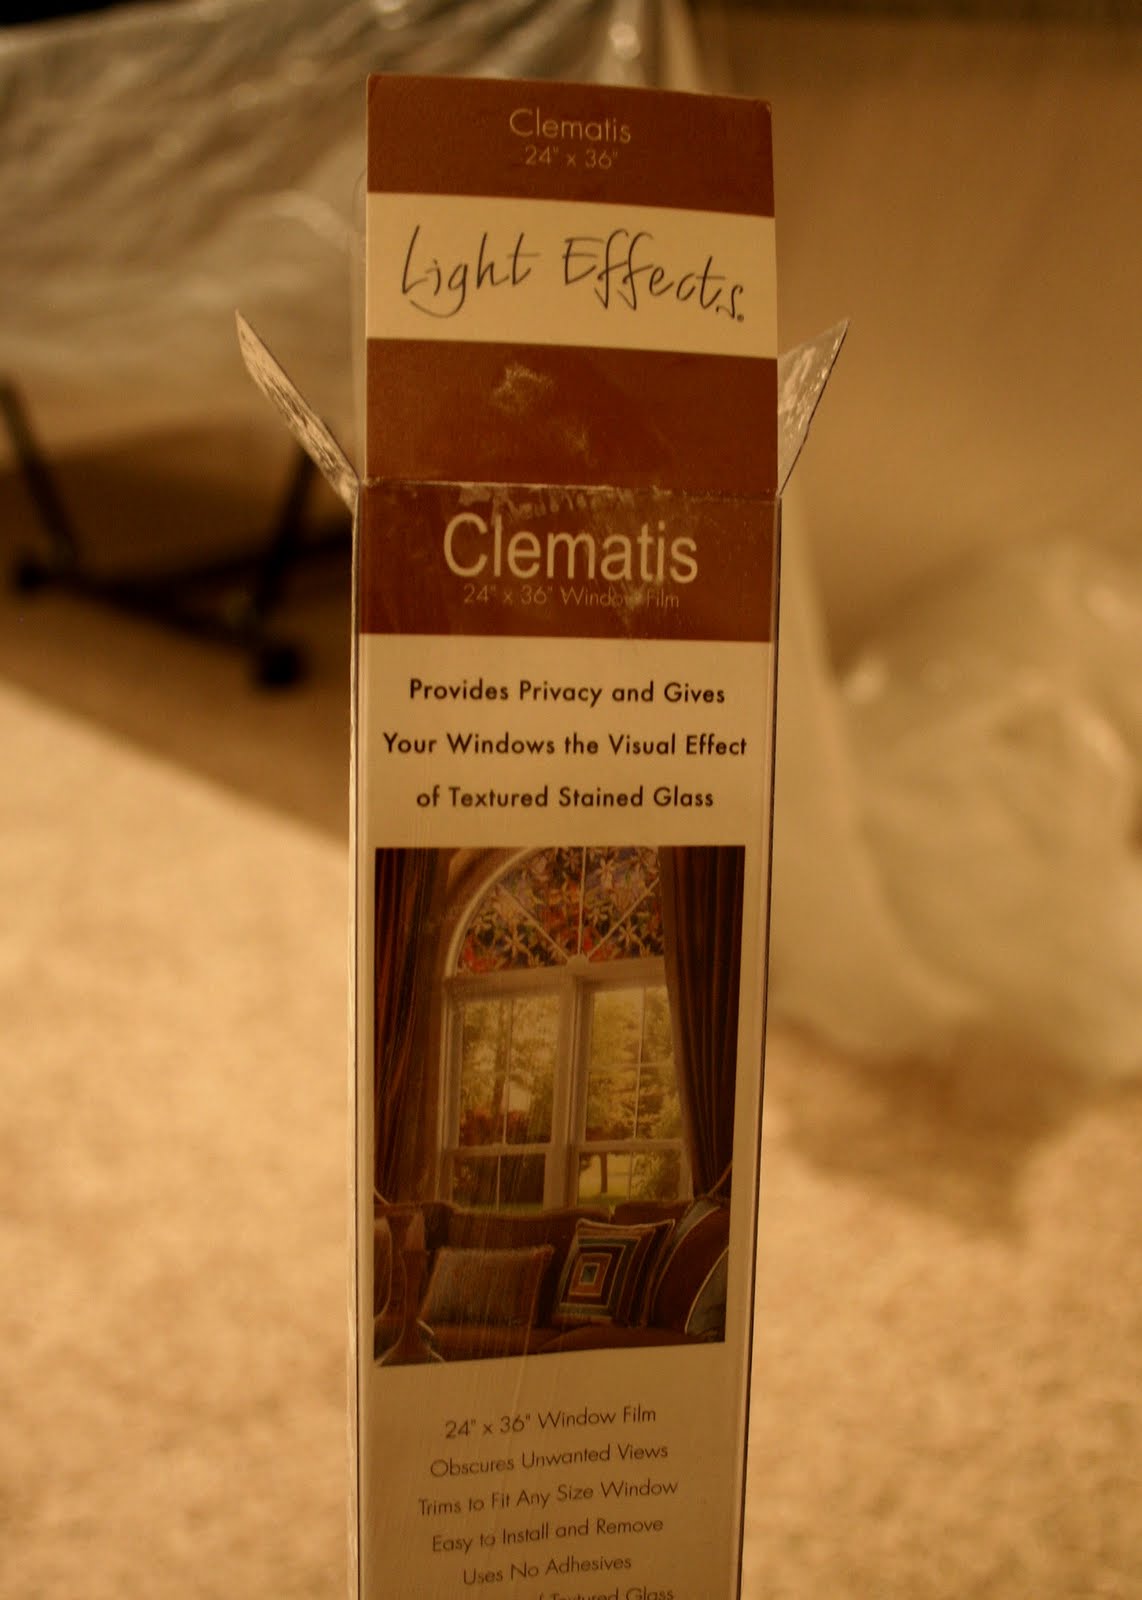
Step 2: Pick out your Light Effects stained glass film. I found mine at Home Depot and they had a pretty large selection. I chose the clematis pattern because I loved the colors and the not in-your-face-flowery look. One 24×36 in window film was around twenty bucks.
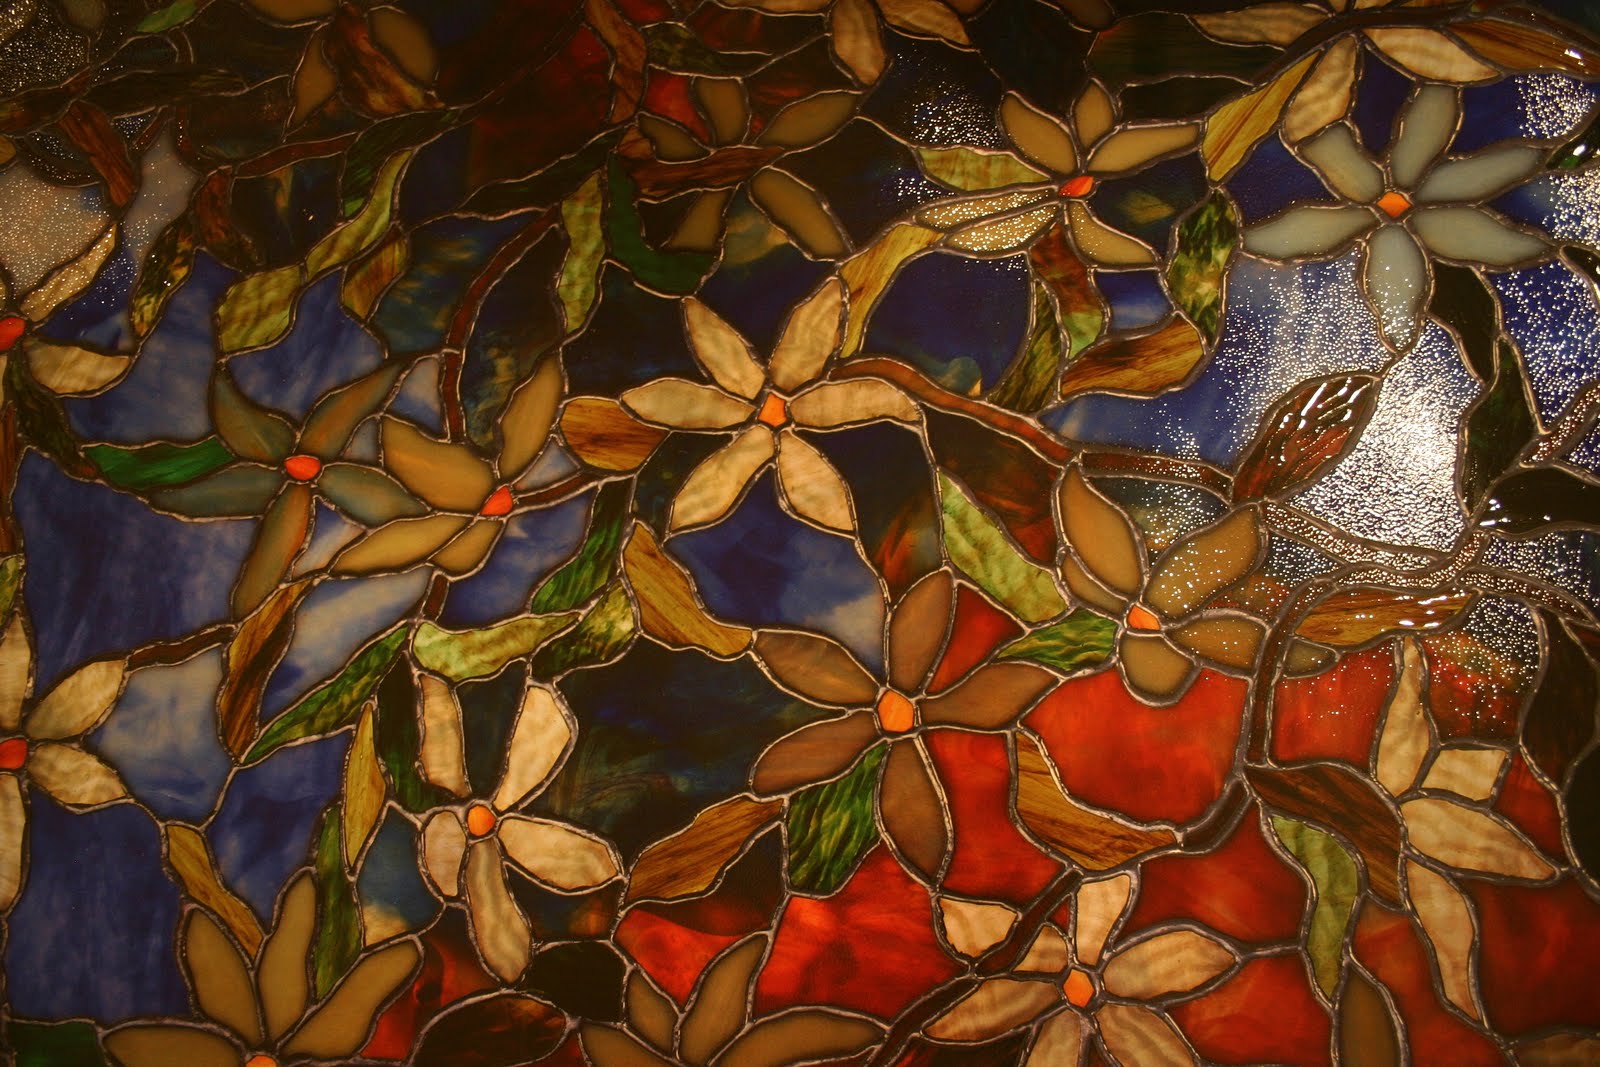
Here it is, close up. Gorgeous! This stuff is amazing. It’s actually texturized so it totally looks like REAL stained glass. No lying.

The window I chose was actually a pretty close fit, size-wise. (Is size-wise even a word? Well, now it is.)
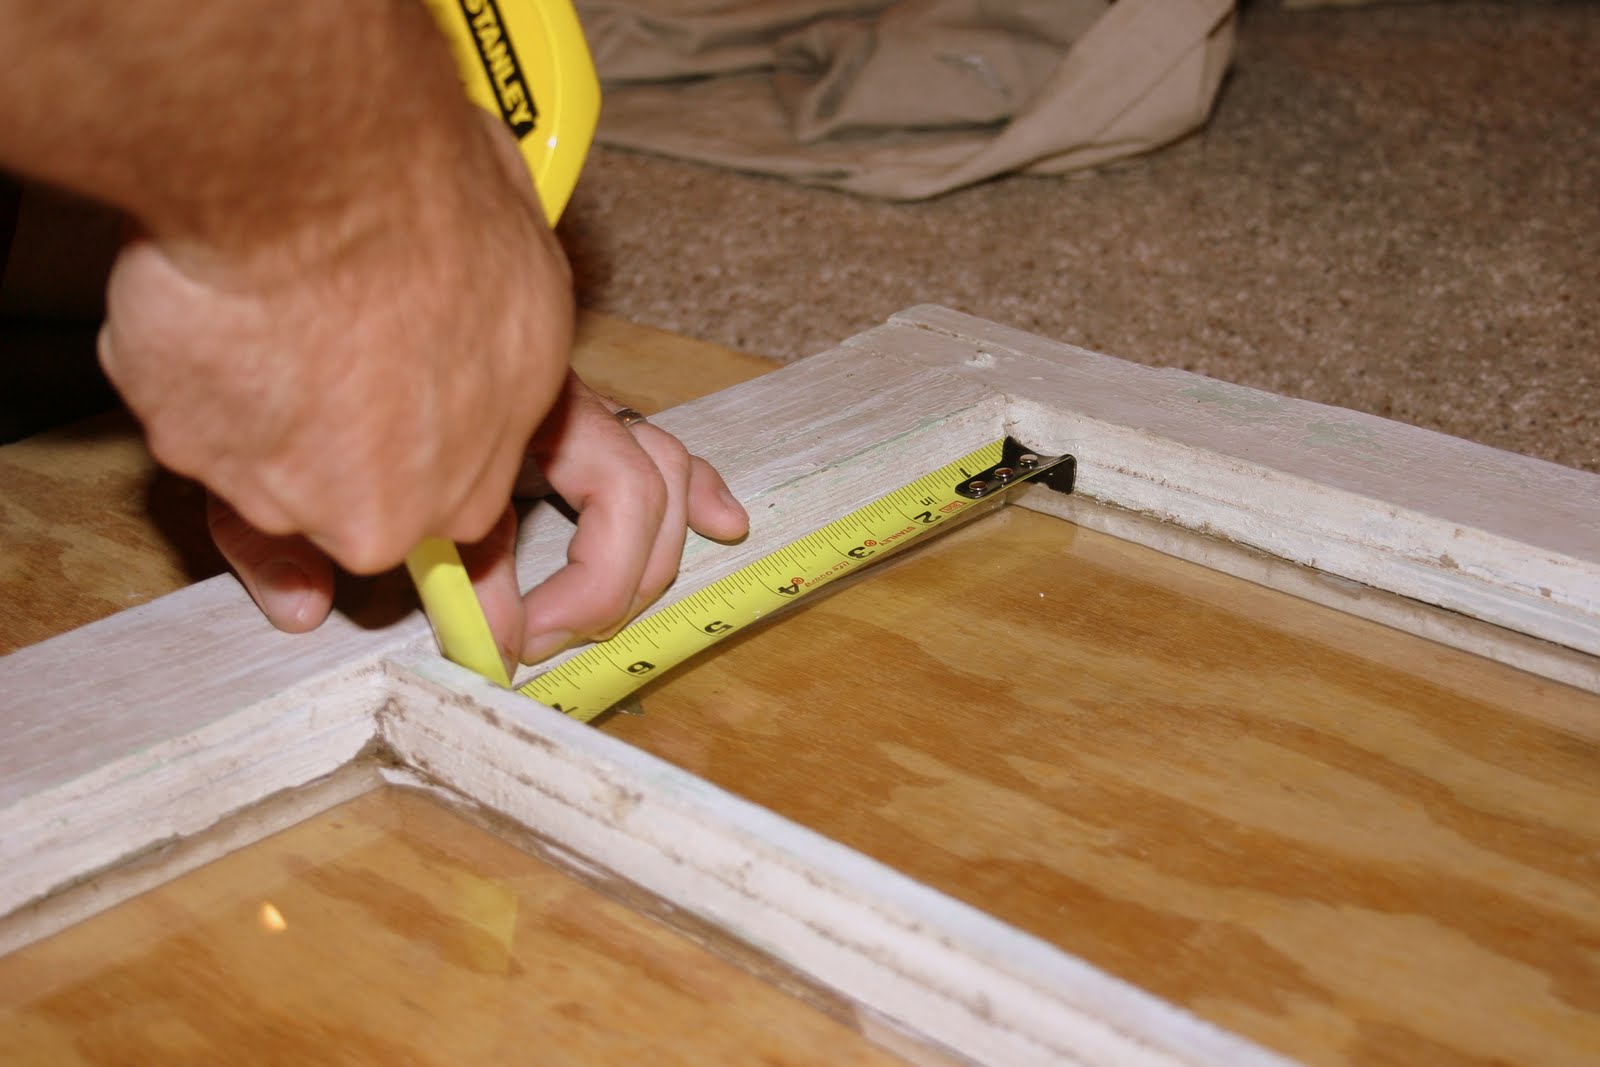
Step 3: Measure, measure, measure! As with anything, measuring here was really important. The film was a little bit bigger than the window, so we had some wiggle room, but not much. We wanted to make sure we were making the right cuts, the first time. We measured the length and width and, as per the instructions, left about an 1/16th of an inch between the window frame and the film.
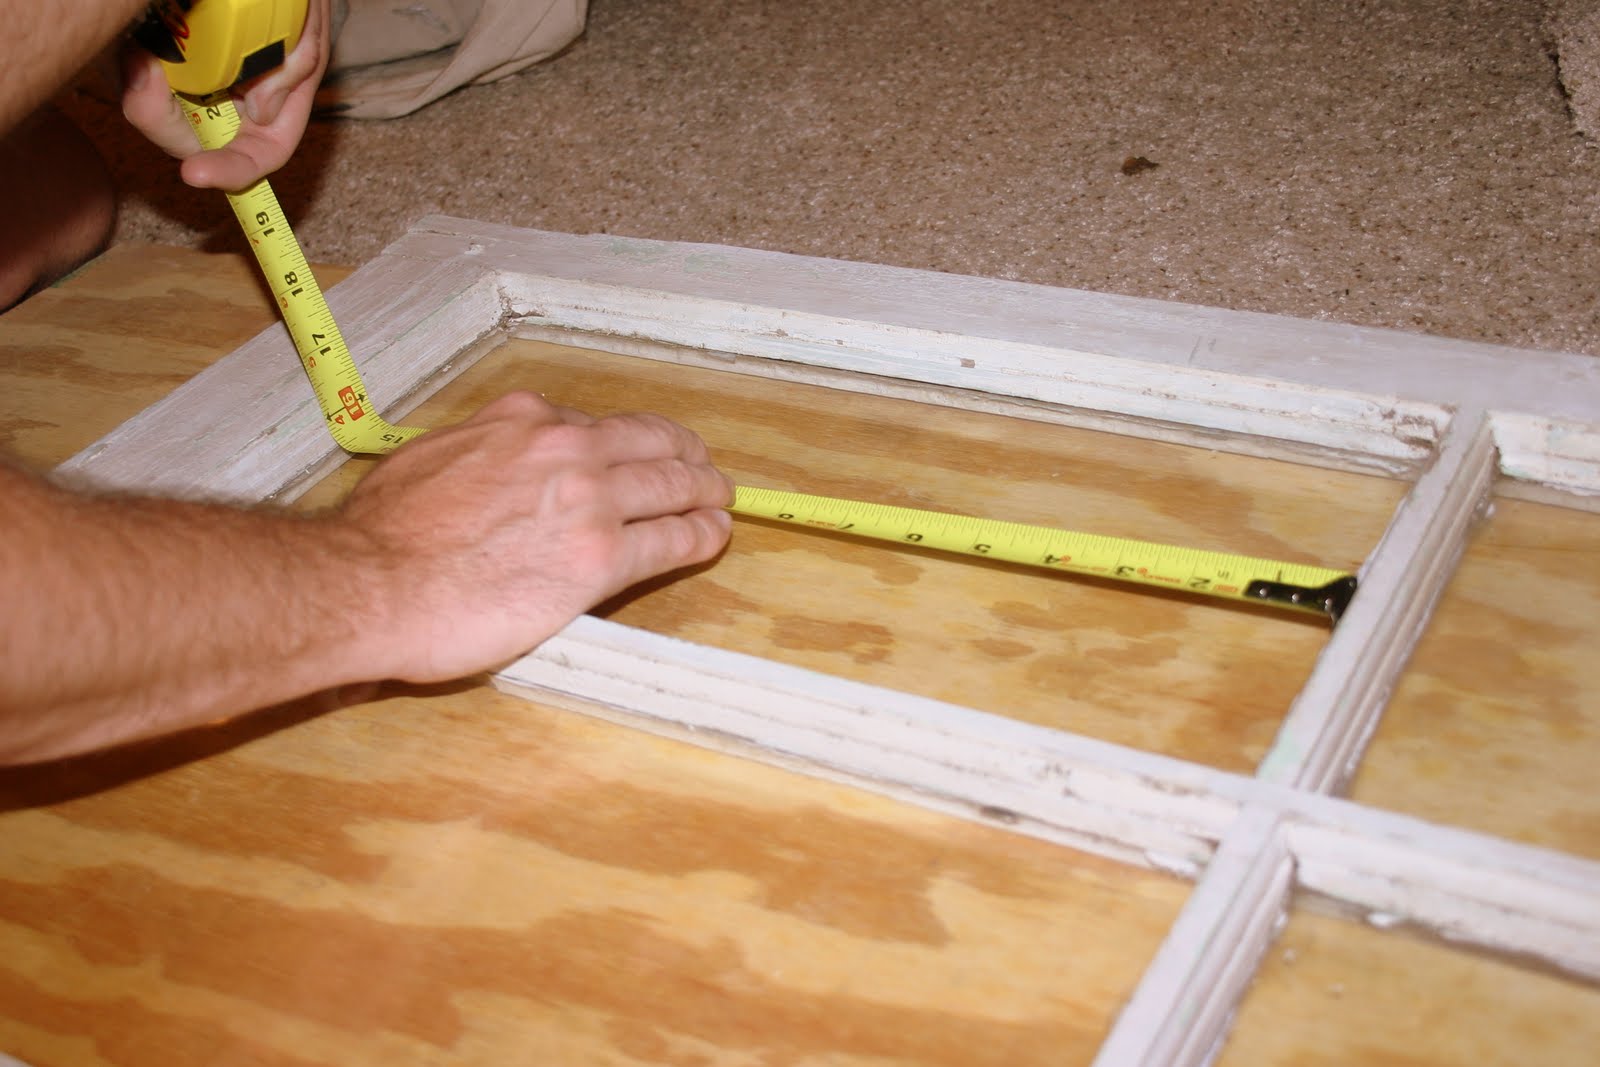
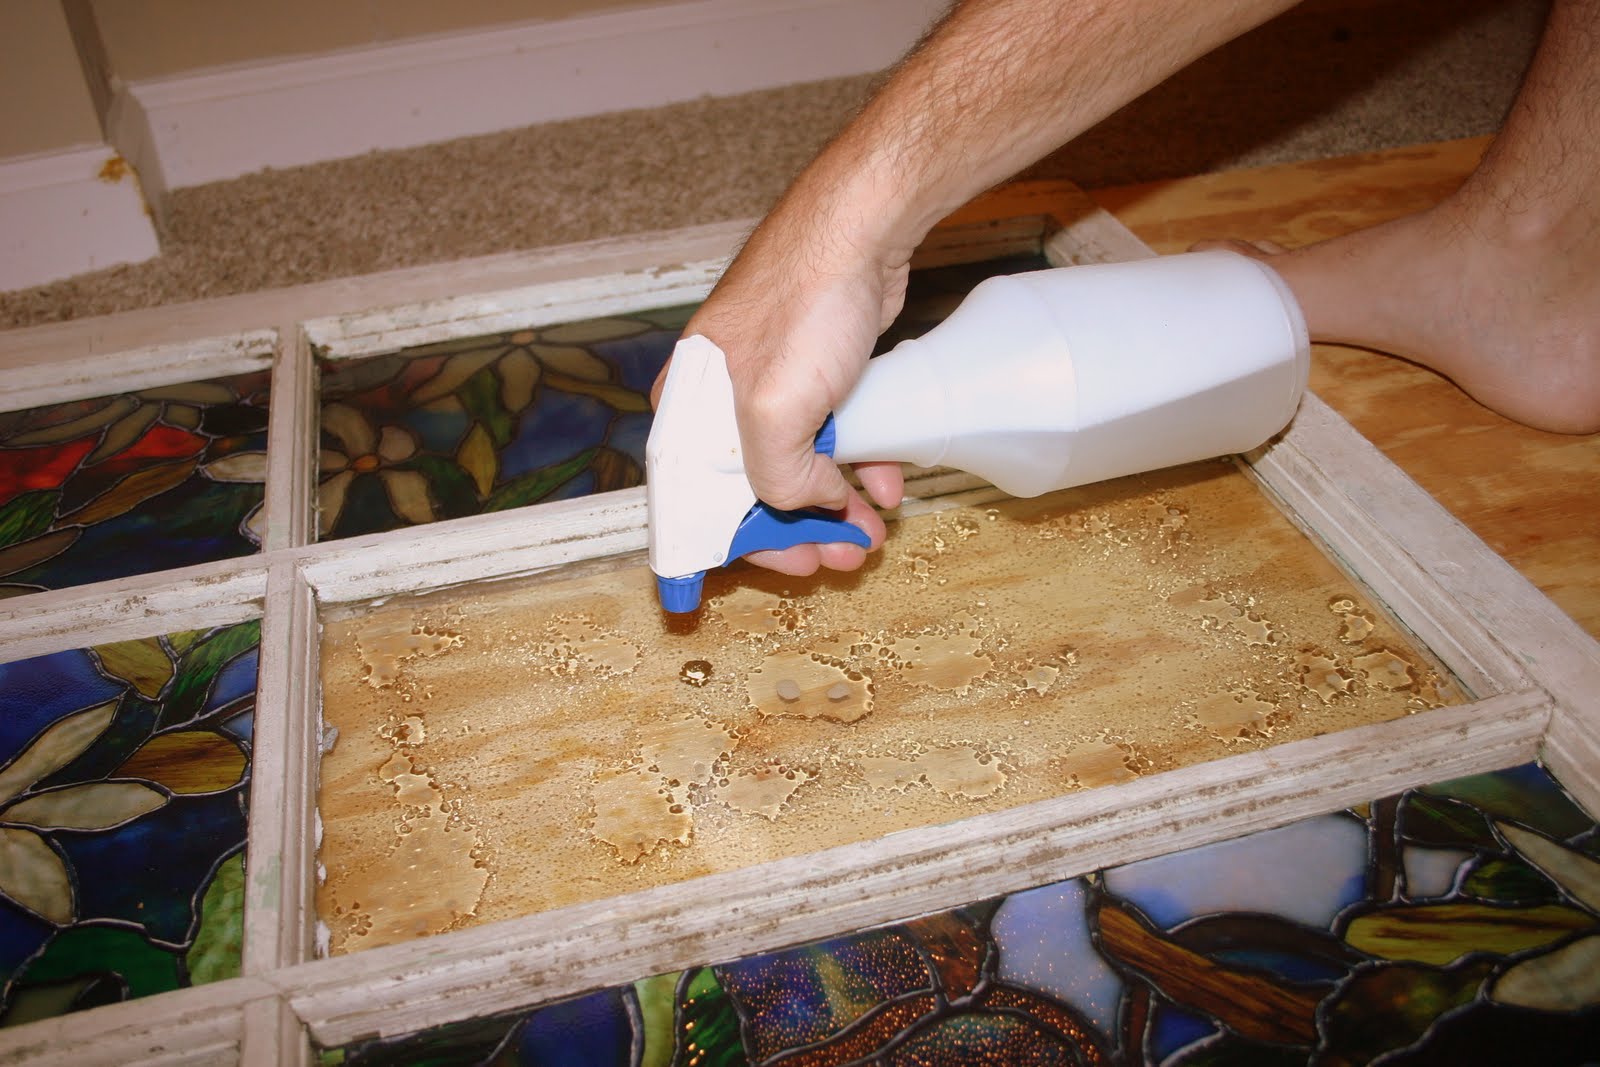
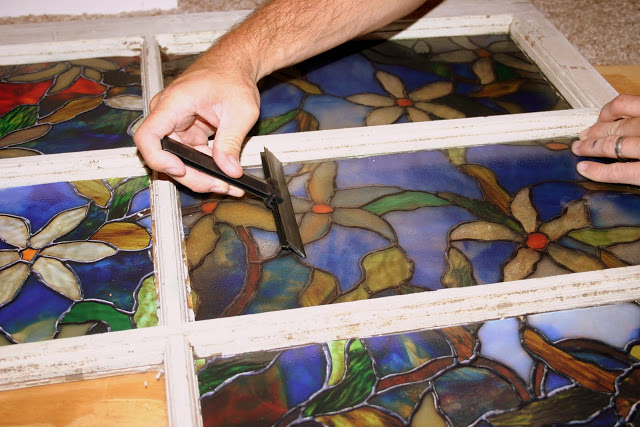
First of all, stop thinking those are my arms and legs. Eew, I’m not that hairy. (Love you hubs!)
Ok, Step 4: All you have to do here is follow the very simple instructions, but basically, the film has an adhesive on the back that is activated by water, so we sprayed the glass generously with water.

Step 5: Squeegee the excess water out from the center to the edges to prevent bubbles. The kit comes with a squeegee, so don’t worry about that! My hubs owns a window-cleaning business on the side, so I let the man work his magic with the squeegee, and didn’t interupt. 🙂
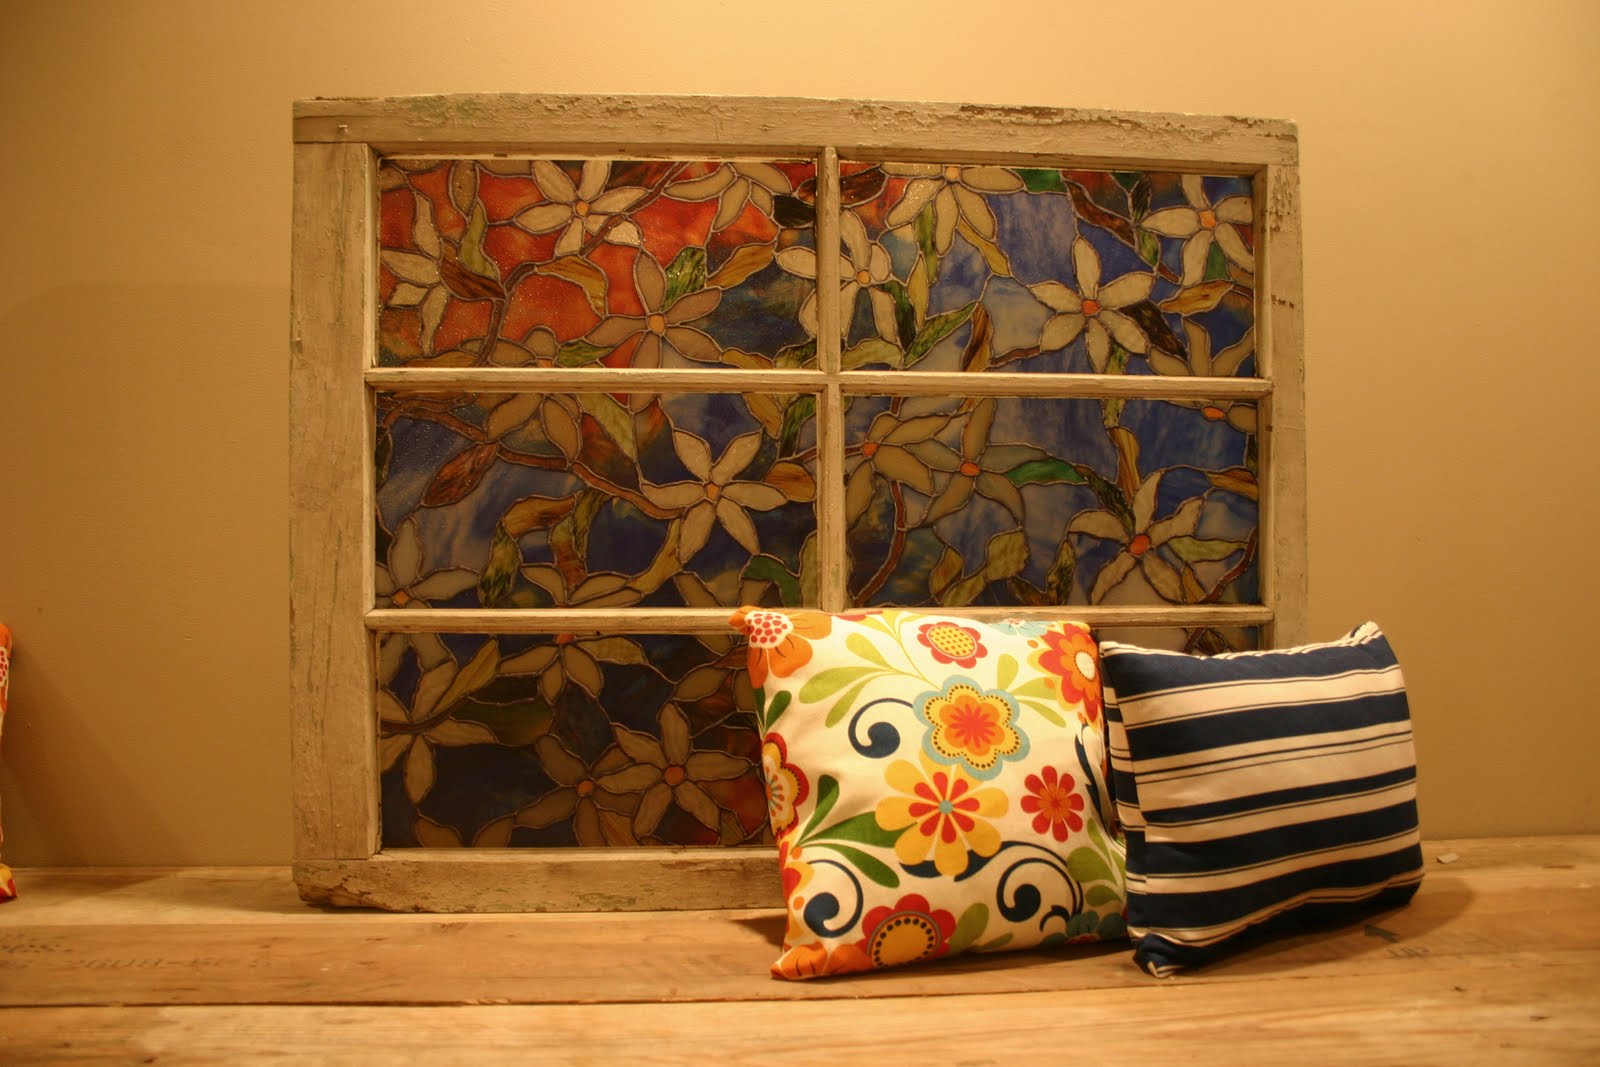
And that’s it! It really is beautiful and I’m so excited to show you how Monica incorporated it into our new basement space. Trust me, it’s worth the wait for the big Nate reveal. Ahhh! So exciting.
Ok, people, show me some love. What would you do with an old window?
Linking up to: Tutorials & Tips Tuesdays, Tip Me Tuesday


very cool!
Oh I like! I’ll have to keep this in mind! Come see where I put my old windows!
sooooooo…..did Monica have to decorate your basement and did you do her dining room?
Such a cool idea! And I’m thinking we must have the same hair dresser – does her last name begin with an S – in Sellersville? I’m thinking it’s small world!
I love this! Thank you so much for showing us. I have an old window that I can’t wait to do this with.
I wanted to put a fake window in a room that has none. What an excellent idea. Thank you.
beautiful! I will make one like that for my office.
replacement windows Boston
If you choose panel curtains to cover your sliding glass door, it’s a good idea to keep them an inch or so above the floor. If the door is in a high-traffic area, there’s likely to be some dirt from outside that gets in, and you don’t want the curtains to slide through it each time they’re pulled back or across.