I pride myself on making amazing style and design accessible for everyone, regardless of location, budget, or ability! My design philosophy is rooted in authenticity + attainability - If I can do it, you can too! My work has been featured in countless publications, but I take the most pride in homeowners that have been personally inspired by my DIY ideas and have tried something in their own homes!
You guys know I love a big, old room renovation, but I’ll be the first to admit that it’s the smaller, detailed projects that really bring a space together. I’ve teamed up with Joann Fabric and Craft Stores to teach you how to make an organization project that’s just as cute as it is functional and can work for about a million different uses! Check out the video below!
HD video looks best! Click the Gear to watch in HD
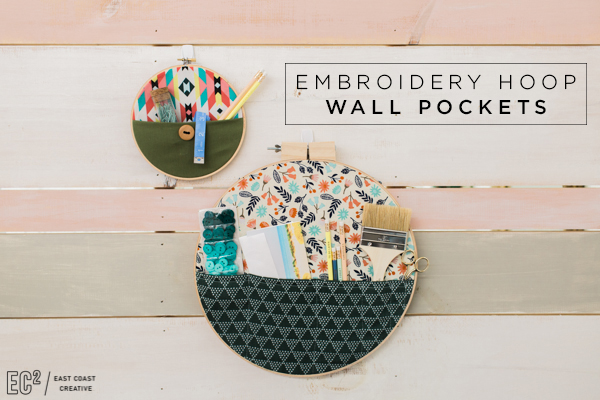
Aren’t they super fun?!? A few things I love the most… A- there are a million different fabric combos and ways you could embellish them B- They can store all kinds of crap (I have a lot of crap to store! My mail pile issues are out of control!) C- They take just a few minutes to whip together!
Here’s How To Make Your Own Embroidery Hoop Wall Pockets
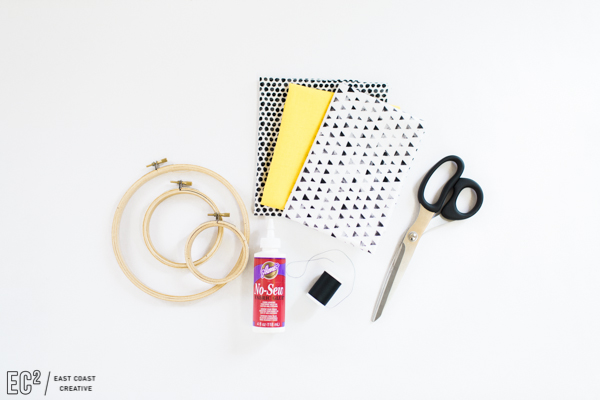
Step 1. Once you gather your materials and decide what size embroidery hoop will work best for your space, start laying out your fabric combinations. MIXING AND MATCHING FABRICS IS ENCOURAGED! Have some fun with it!
Step 2. Separate the inner and outer rings of your embroidery hoop by loosening the screw at the top, then place a piece of your backing fabric under the inner hoop. The fabric piece should be a bit larger than the hoop.
Step 3. Trim the fabric, leaving about an inch around the entire hoop –then tuck and trim the excess on the backside.
Step 4. To make the storage pockets, take a coordinating piece of fabric, or two fold in half & press with an iron. The crease line will create the top of the pocket.
Step 5. Next, apply no sew glue around the back, outside and bottom edges of the pocket, make sure you don’t glue the top! Press the pocket onto the backing fabric about halfway down. You could also sew the pocket into place if you have a sewing machine.
Either way will work!
Step 6. Lastly, put your outer hoop over the top. Be sure to pull the fabrics nice and taut and tighten the screw to secure.
Pick a wall spot within reach for your pocket – somewhere where you can easily access whatever you’re storing and where you can show it off because I’m sure it looks awesome!
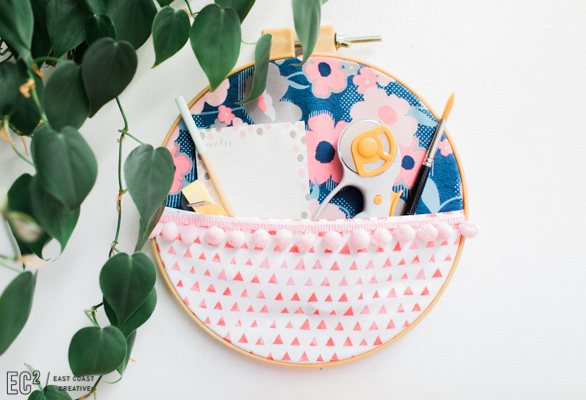
This project is easily customizable with a few extra materials!
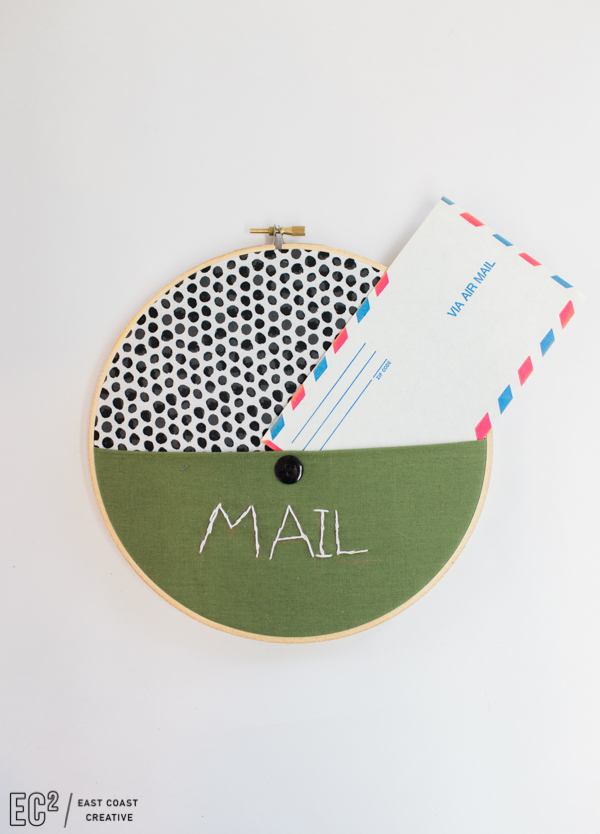
For a mail pocket, sketch out a phrase and take some embroidery floss and a needle and stitch that onto your pocket (make sure only to stitch through the top fabric). We added a little button too, because well, it’s cute!
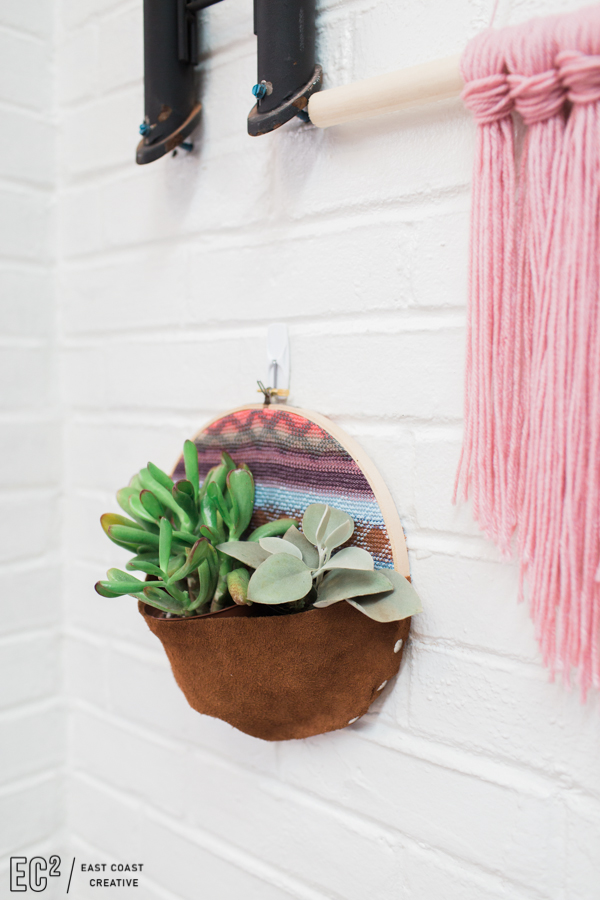
For a plant pocket, you’ll want to use some leather or sturdy material for your pocket and some brass furniture tacks to secure the pocket to the hoop. Then, just add some cool plants!
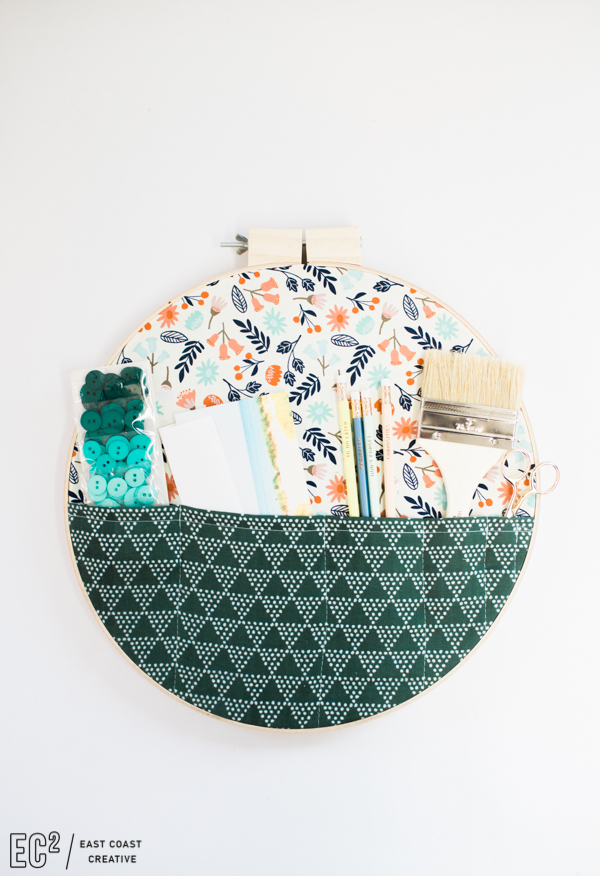
If you have a sewing machine, it’s simple to create little sections to keep your storage even more organized! I like how this works for some of my crafting supplies.
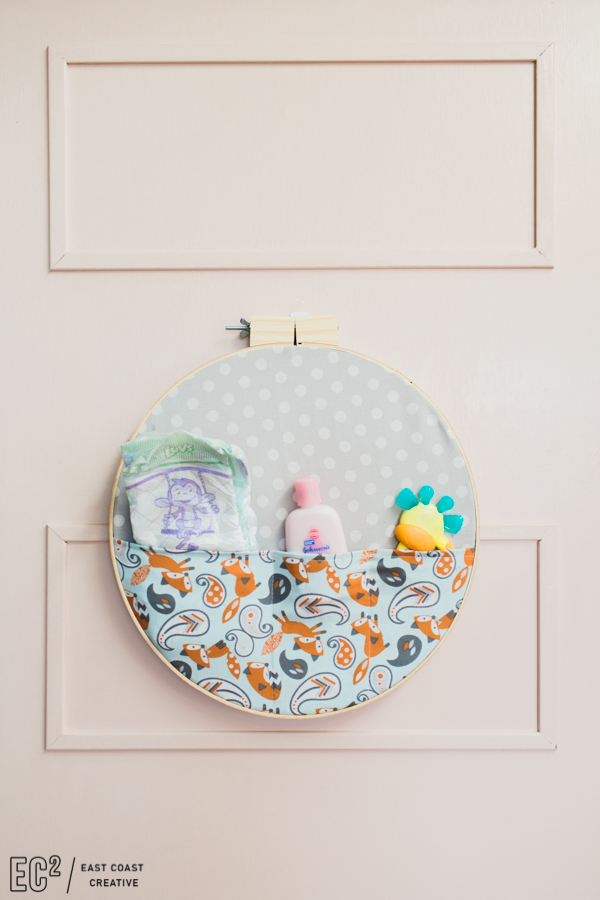
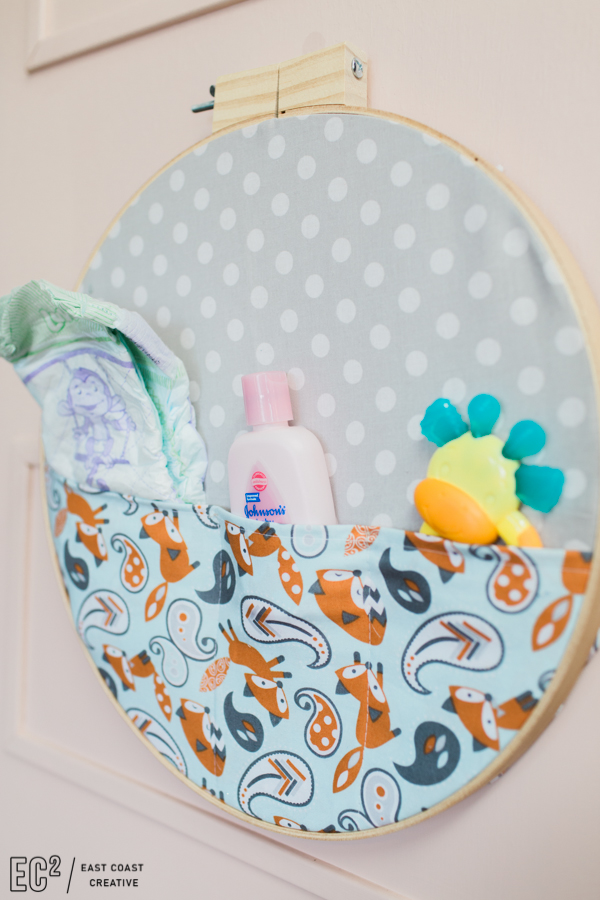
Going to a baby shower or in the baby phase yourself? How cute would this be in a nursery?
So you pretty much have no excuse for ugly storage or mail piles now… Confession, I still have some minor organization issues (spelled MAJOR), but being 100% honest… when my organizational systems are cute I’m more likely to use them!
I’d love to know what you thought of my first crafty video (there’s lots more where that came from!) and if you make your own wall pockets tag me on Insta : EastCoastCreative and use #HandmadewithJoann !
-Mon
**This is a sponsored collaboration between East Coast Creative and JoAnn Fabric and Craft Stores. All opinions are mine. Thanks for supporting the companies that help make EC2 Possible! **


The comments +