
This is a Sponsored post written by me on behalf of Elmer’s ProBond Advanced. All opinions are 100% mine.
I’ve had a busy summer- the kind of busy that a person can’t and shouldn’t keep up for too long. It’s a whole long big story for another time, but one element of my busyness has been building and designing a full apartment (If you’re on Instagram follow me @EastCoastCreative for lots of sneak peeks). My brother moved back to PA in early spring and is going to be finishing his final year of law school here, so he’s moving in with us (actually he’s already here! Yay!) Law school is so.dang.expensive so Eric and I decided we’d build an apartment where my brother can live for free for as long as he wants it. I’ll be sharing a full series on the EC2 Apartment, because it’s literally DIY Central, but for now I want to give you one sneak peek and share my favorite project I’ve done, perhaps ever. That’s right-EVER!
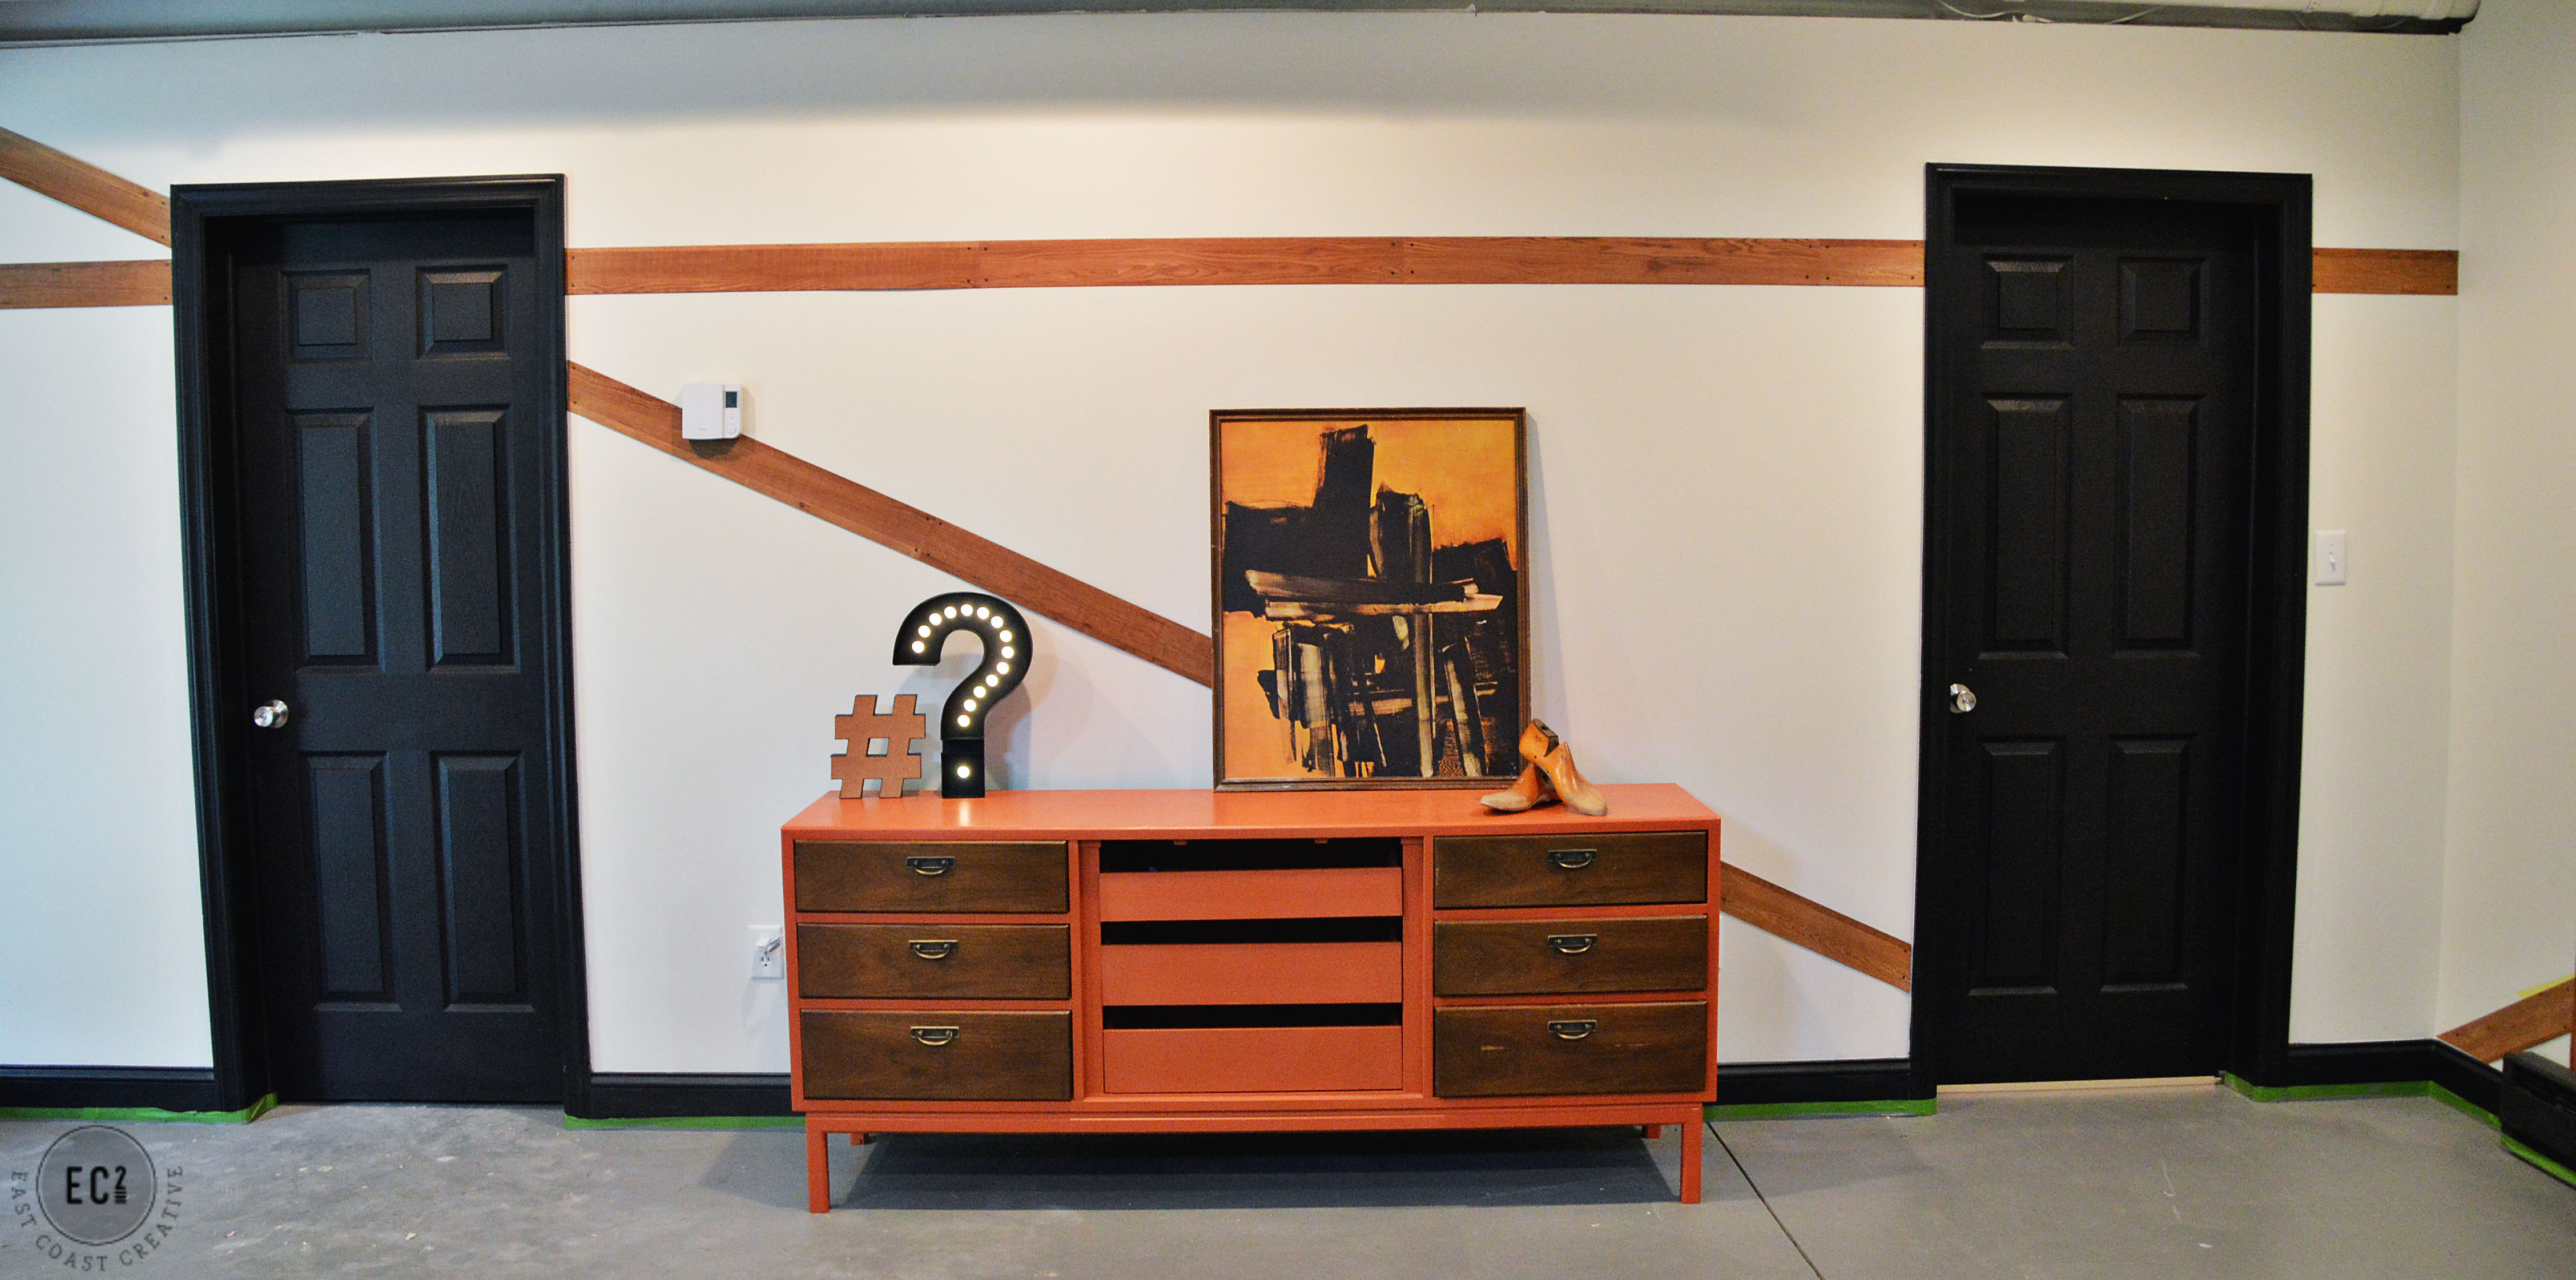
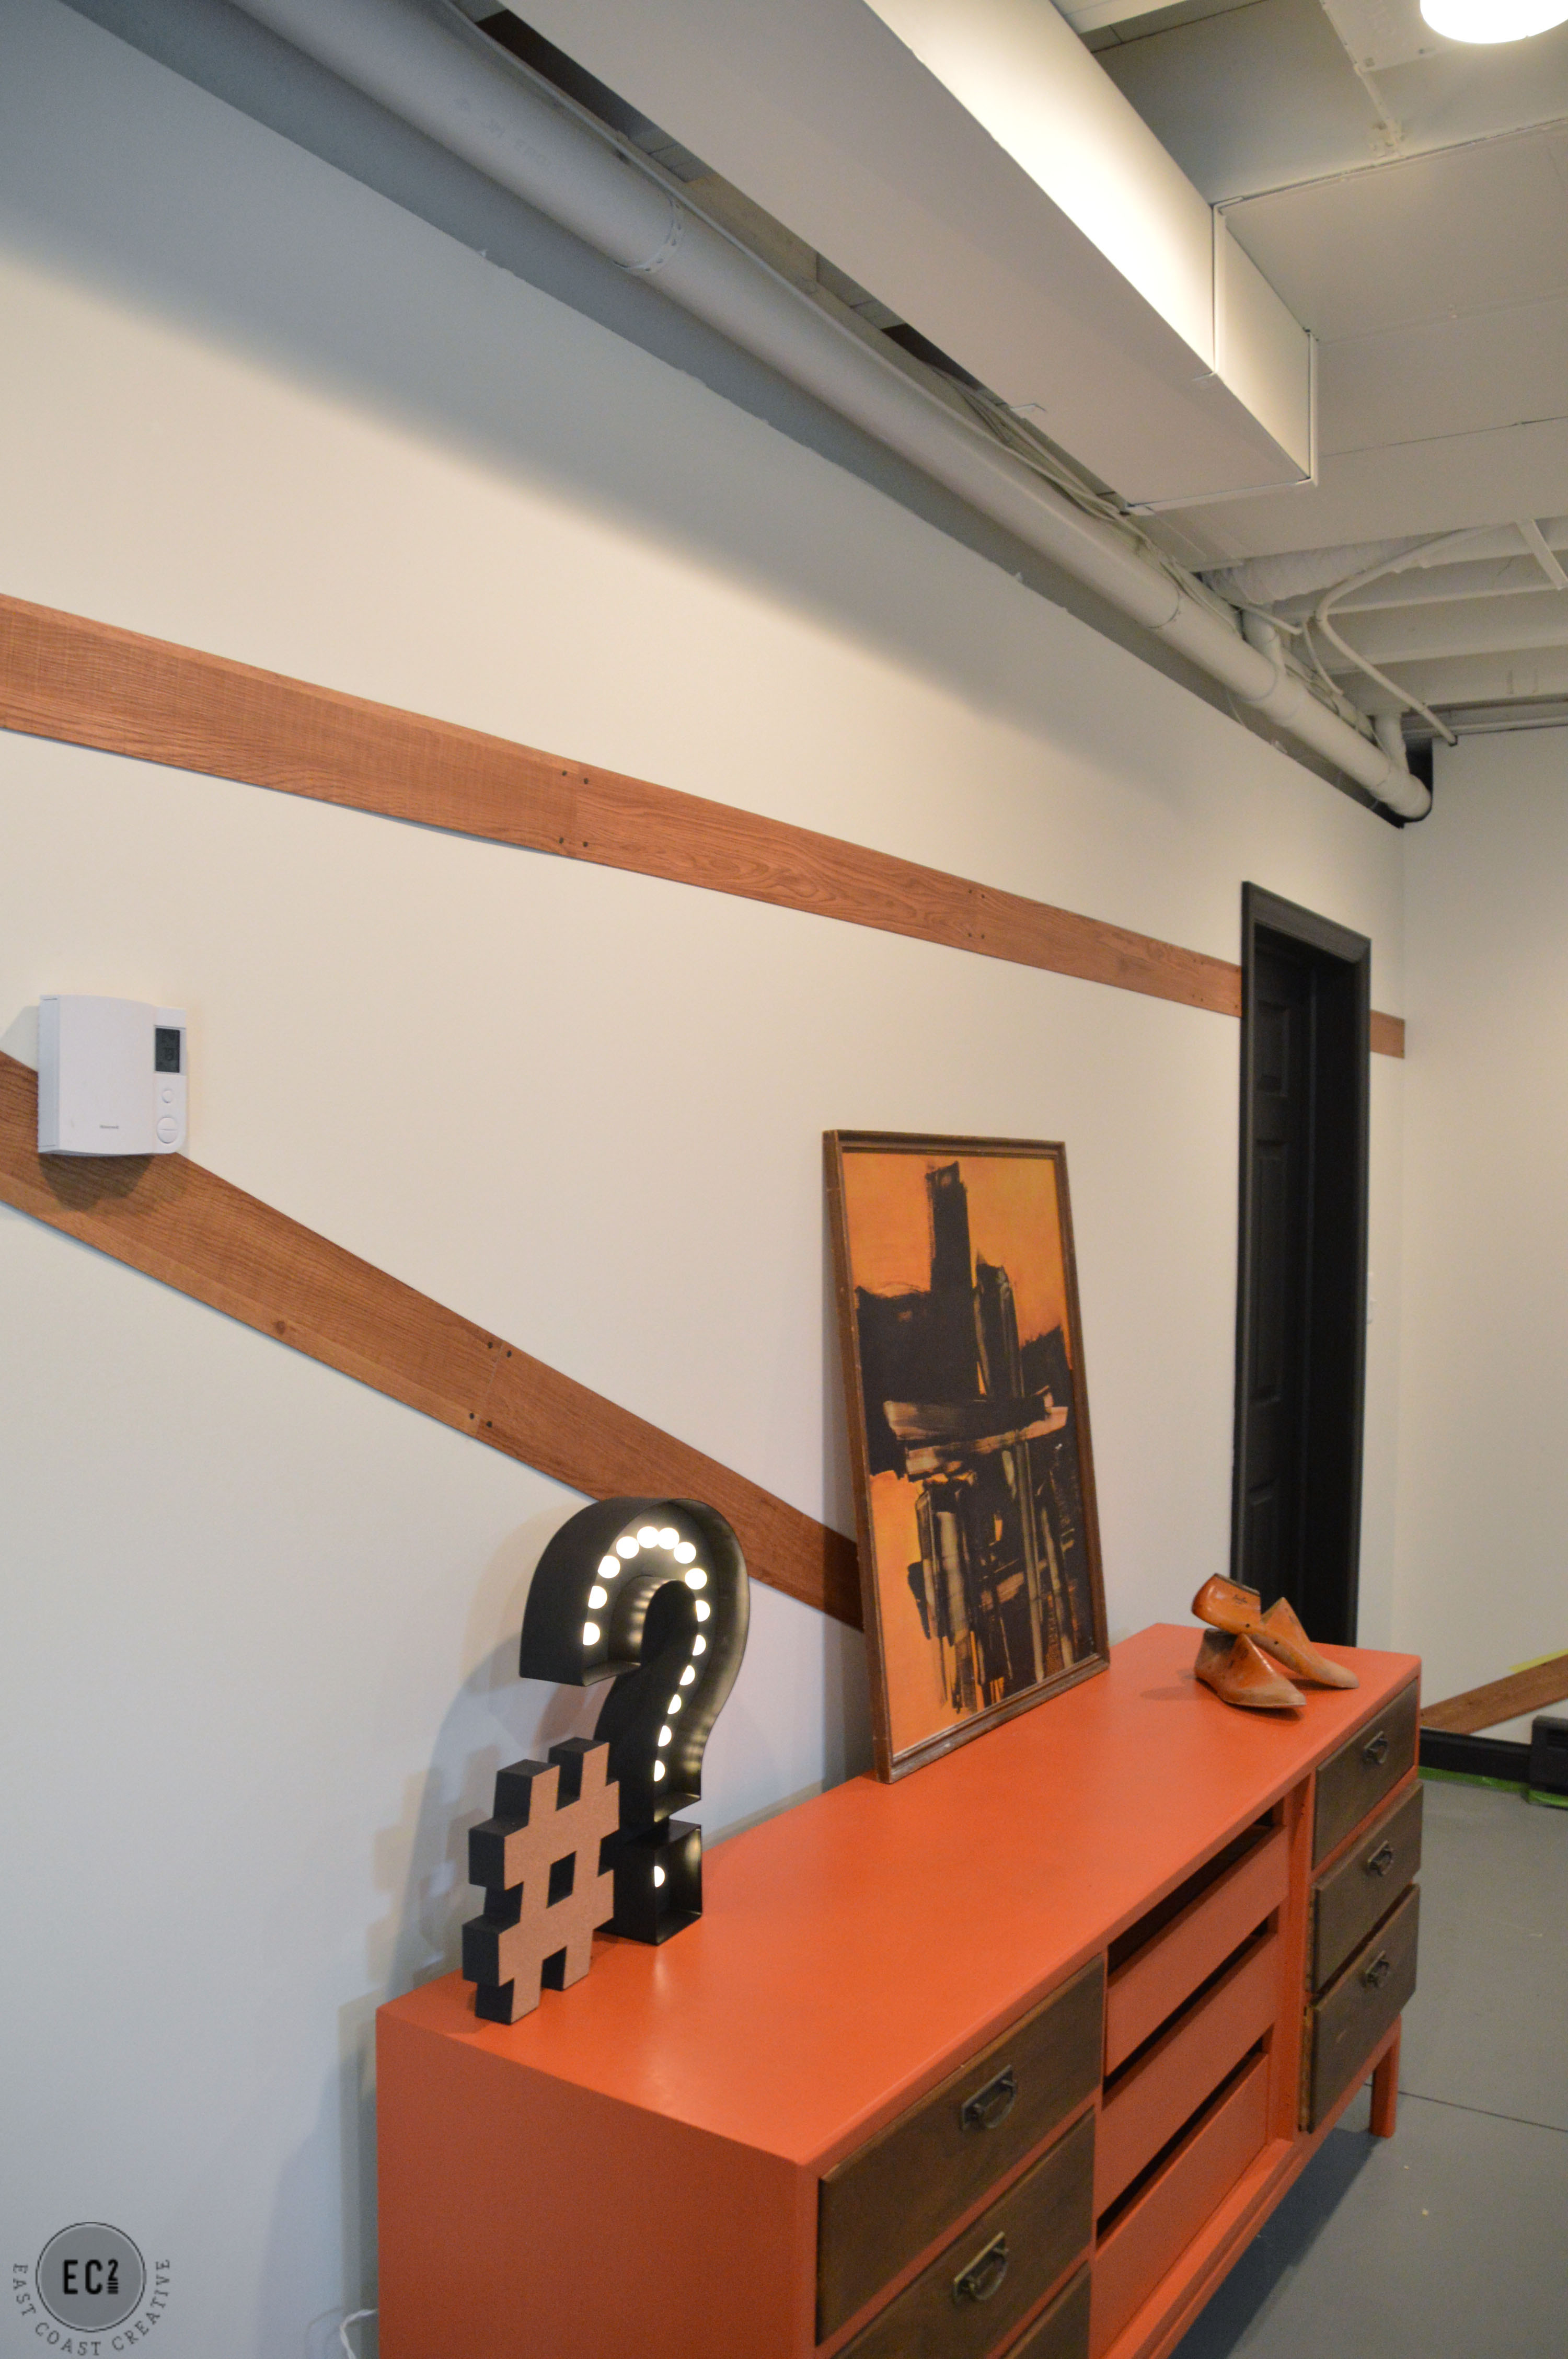
You know I like funky styles that usually lean towards modern, but my house isn’t really all that classically modern. I have 4 kids, so white walls just ‘aint happenin’! I’m using the apartment as my modern, non-kid-friendly design playground!! I can do whatever I want!! Mwhahaha! I don’t want to give too much away, so I’ve actually staged these pictures with completely random furniture that won’t even be in the room, but I couldn’t keep this project to myself any longer!
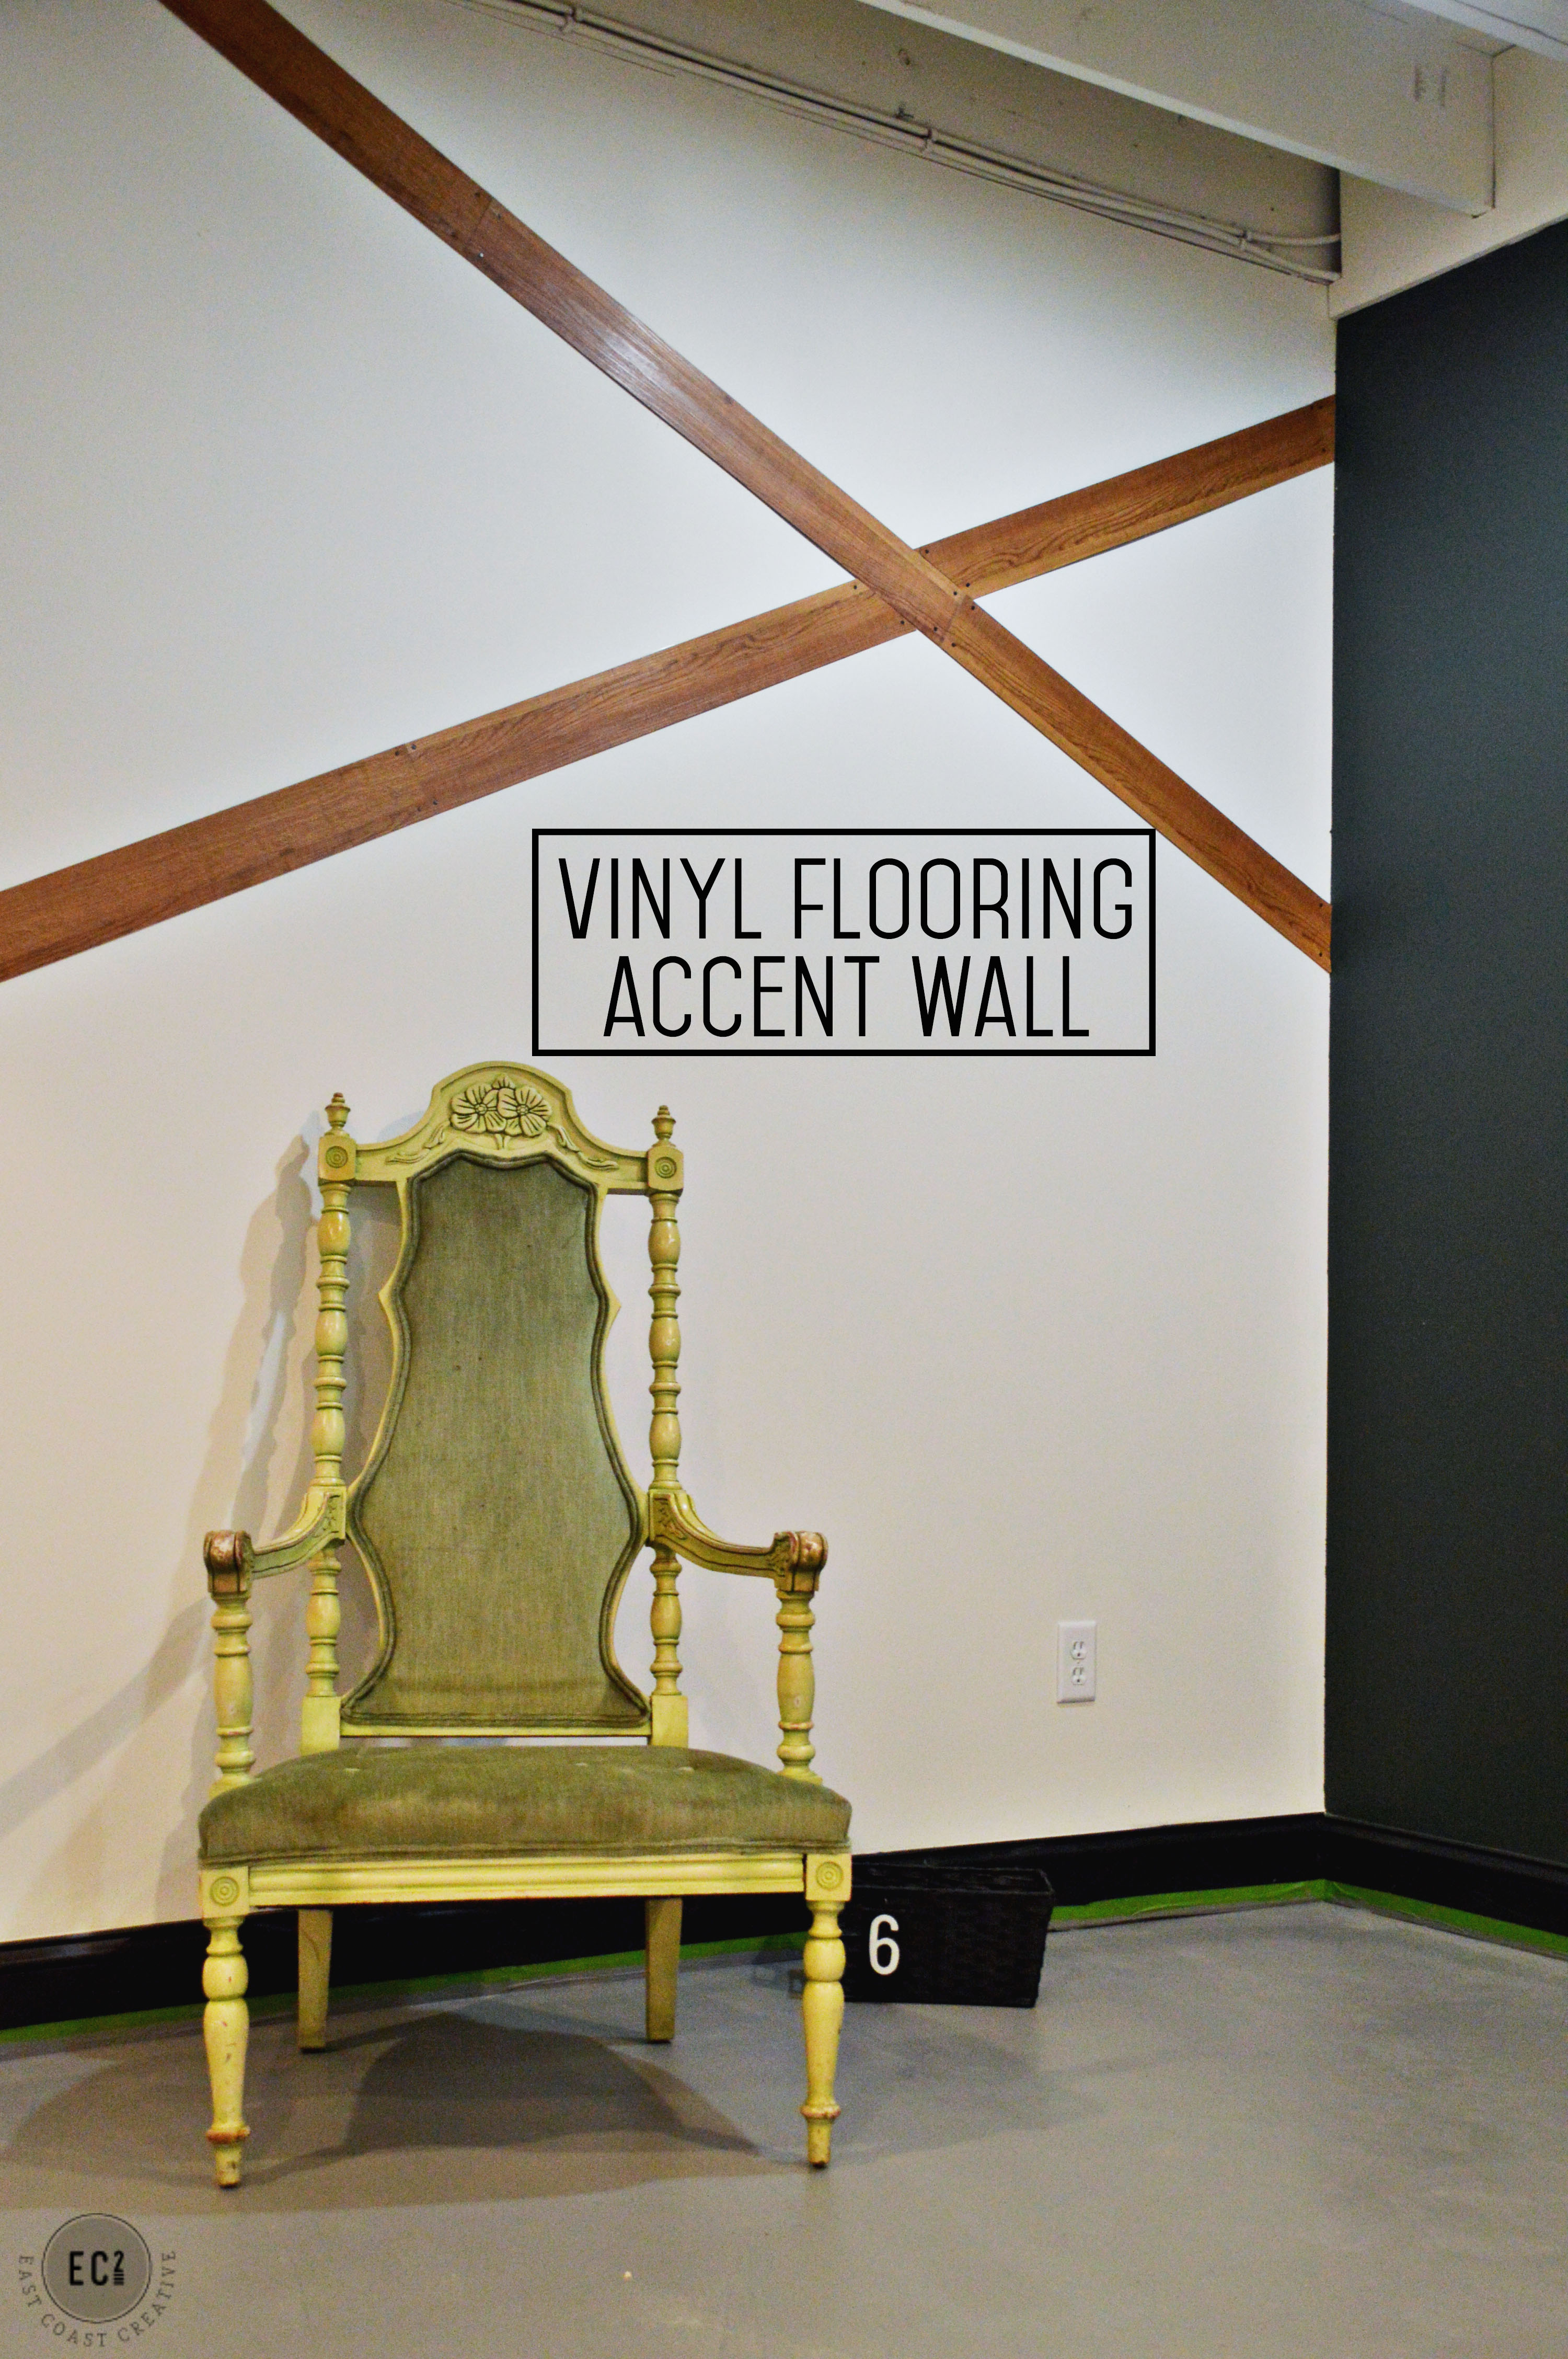
Let me introduce you to my Favorite Modern Accent Wall (ever in the history of time)
Since we’re such good internet pals, I’ll share with you the exact same iPhone video that I texted to Jess the night I did the project. Please forgive the high pitched woo-hoo….
Now, I know it might be hard for you to fully grasp the awesomeness of this project without umm, say… furniture, accessories, art, etc… but I promise you- it’s the perfect backdrop for what I have in store for this space!
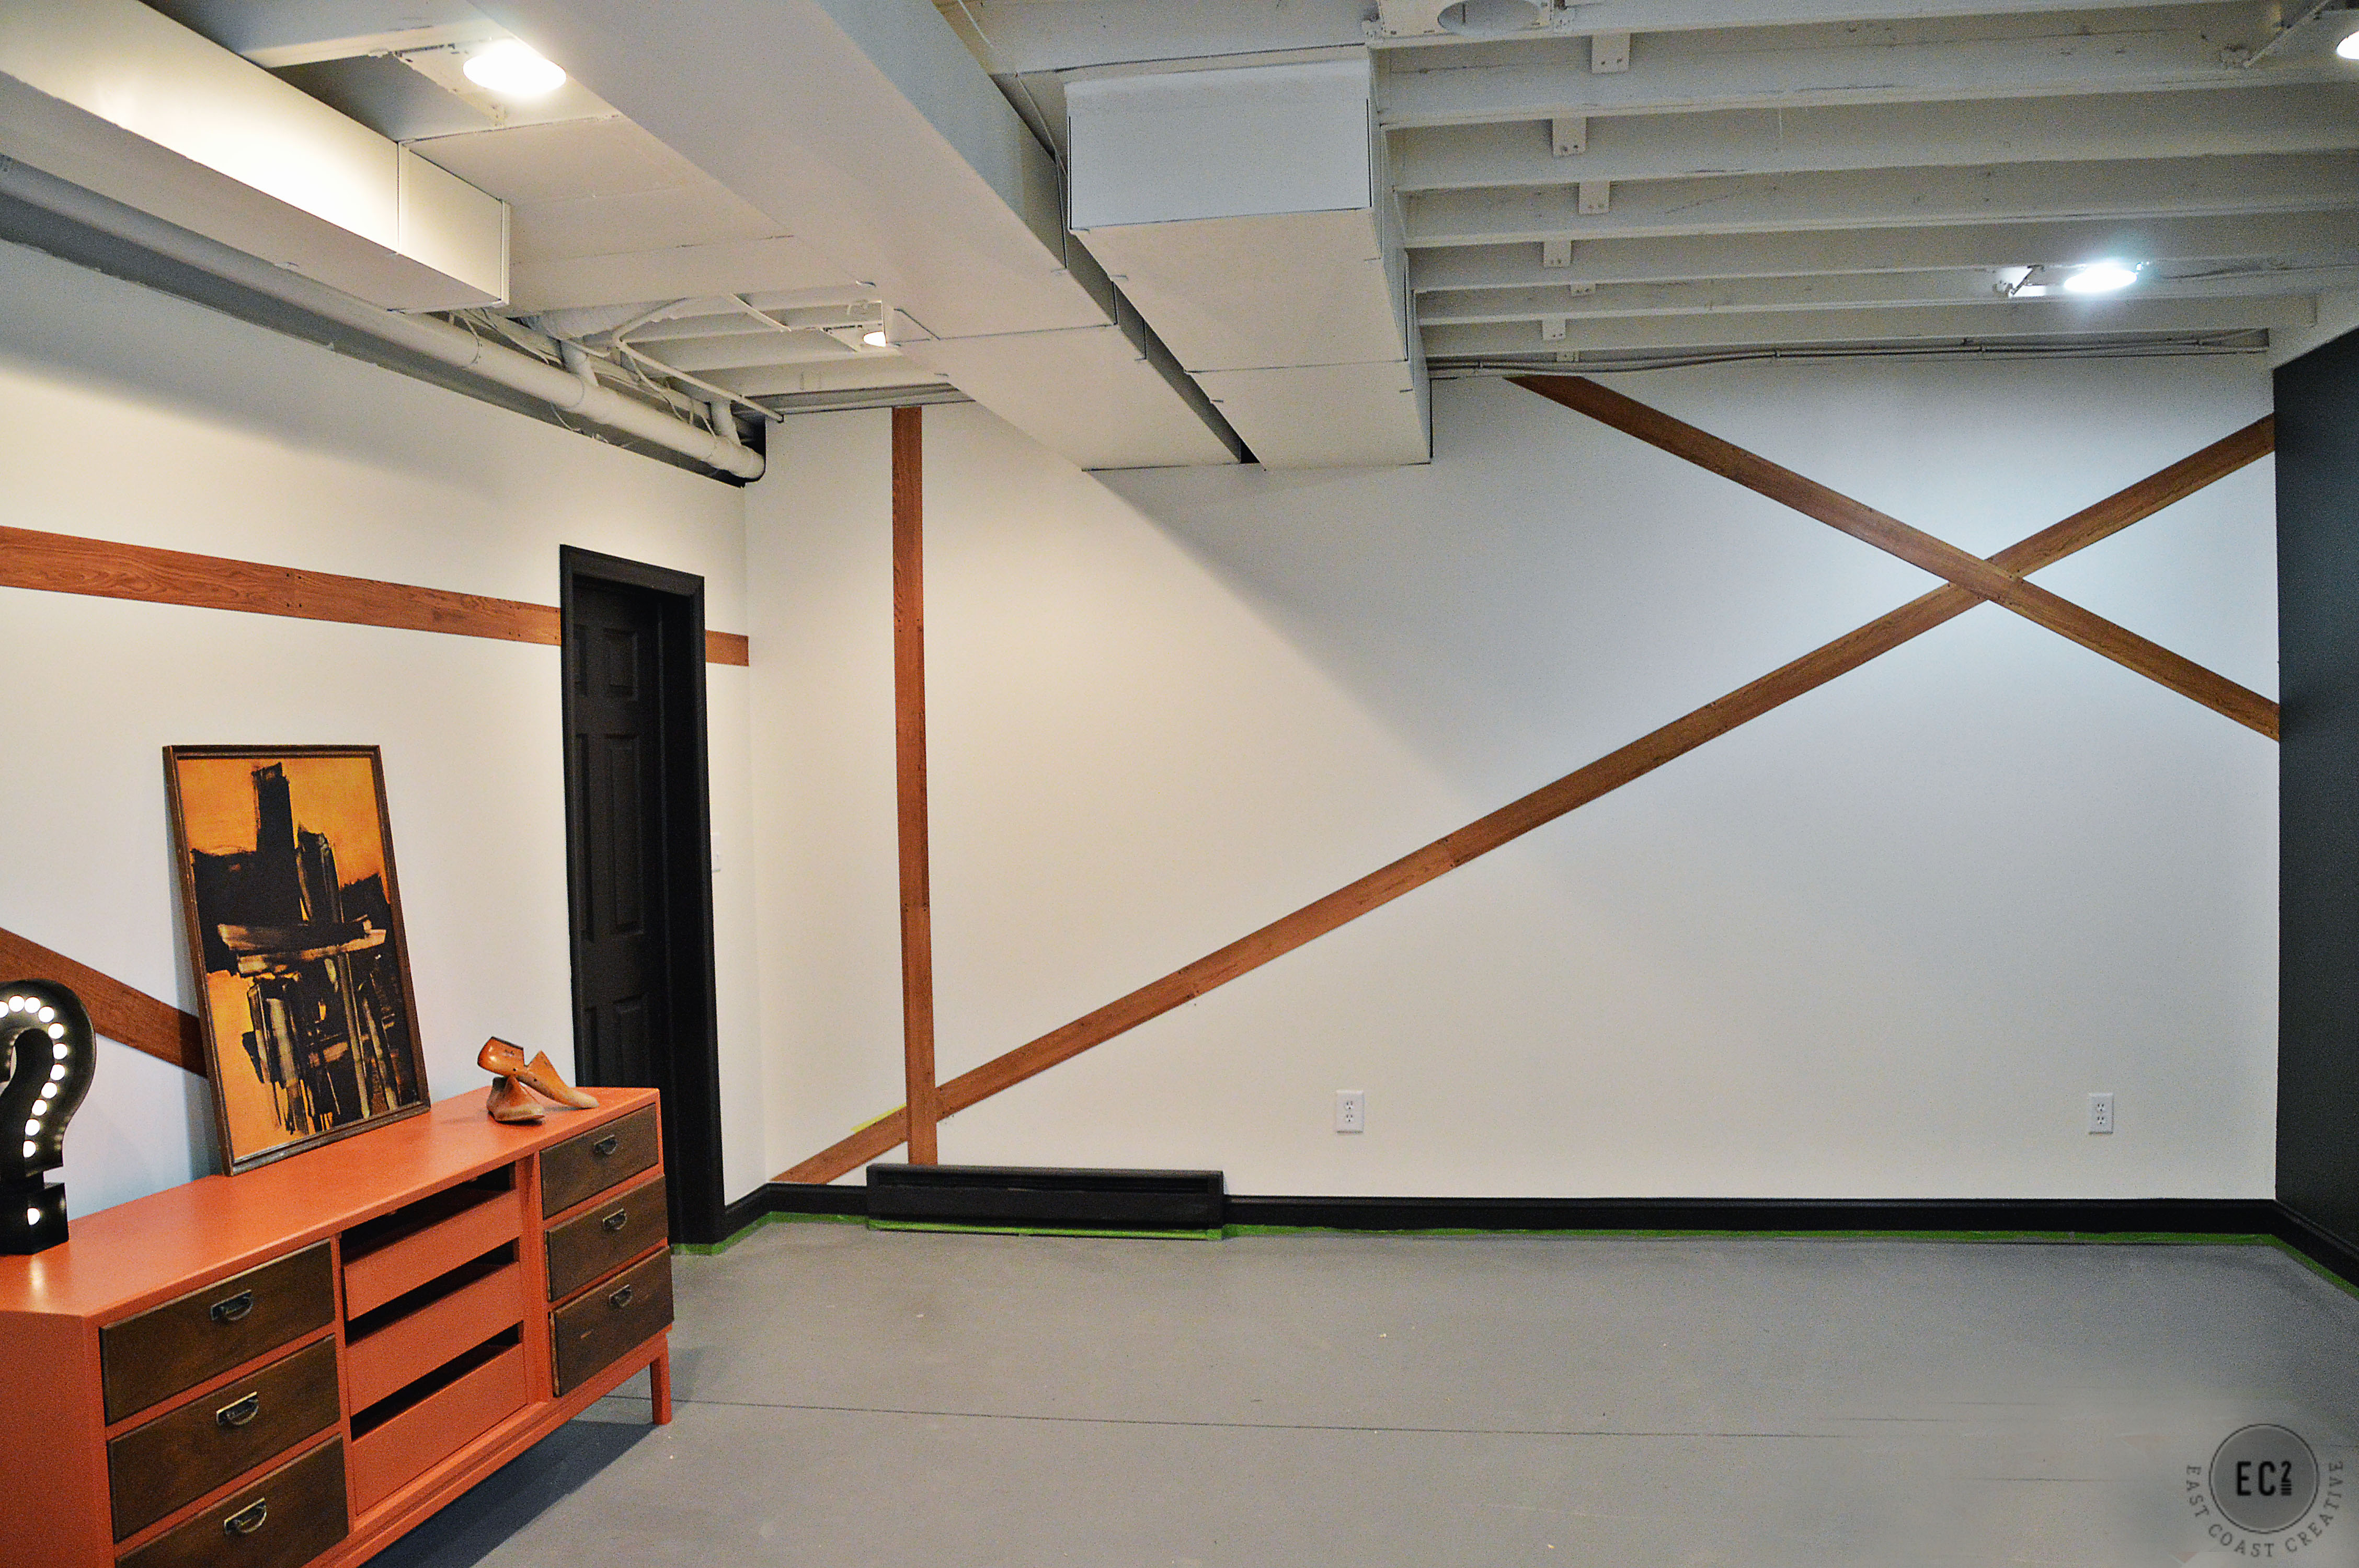
This was most definitely a live and learn DIY project… Here’s how it all went down. I determined where I wanted my accent lines and simply peeled each piece of flooring and stuck it on the wall. I cut any angles with a utility knife. The whole process was so simple and I was on cloud 9, knowing how much I was going to love this project!
Flash forward 24 hours…
I walked into the family room to work on another project and all my perfectly placed vinyl strips were now ON THE FLOOR! Apparently the vinyl adhesive wasn’t strong enough. I was bummed. I rehung all the strips, having to replace a bunch because they got ruined from falling, and this time, I used my nail gun to pop two nails into each plank to keep them on the wall. I used small finishing nails so that you wouldn’t even see them.
Flash forward 24 hours… yep, you know what’s coming….
It all fell off the freaking wall again!!! Apparently the finishing nails would have needed a much larger head to hold the vinyl on. At this point I was pretty fired up and not a happy DIYer… I mean, vinyl planks weigh about an ounce, how could they possibly be falling off! It was time to do some DIY research…
My solution… Elmer’s ProBond Advanced!
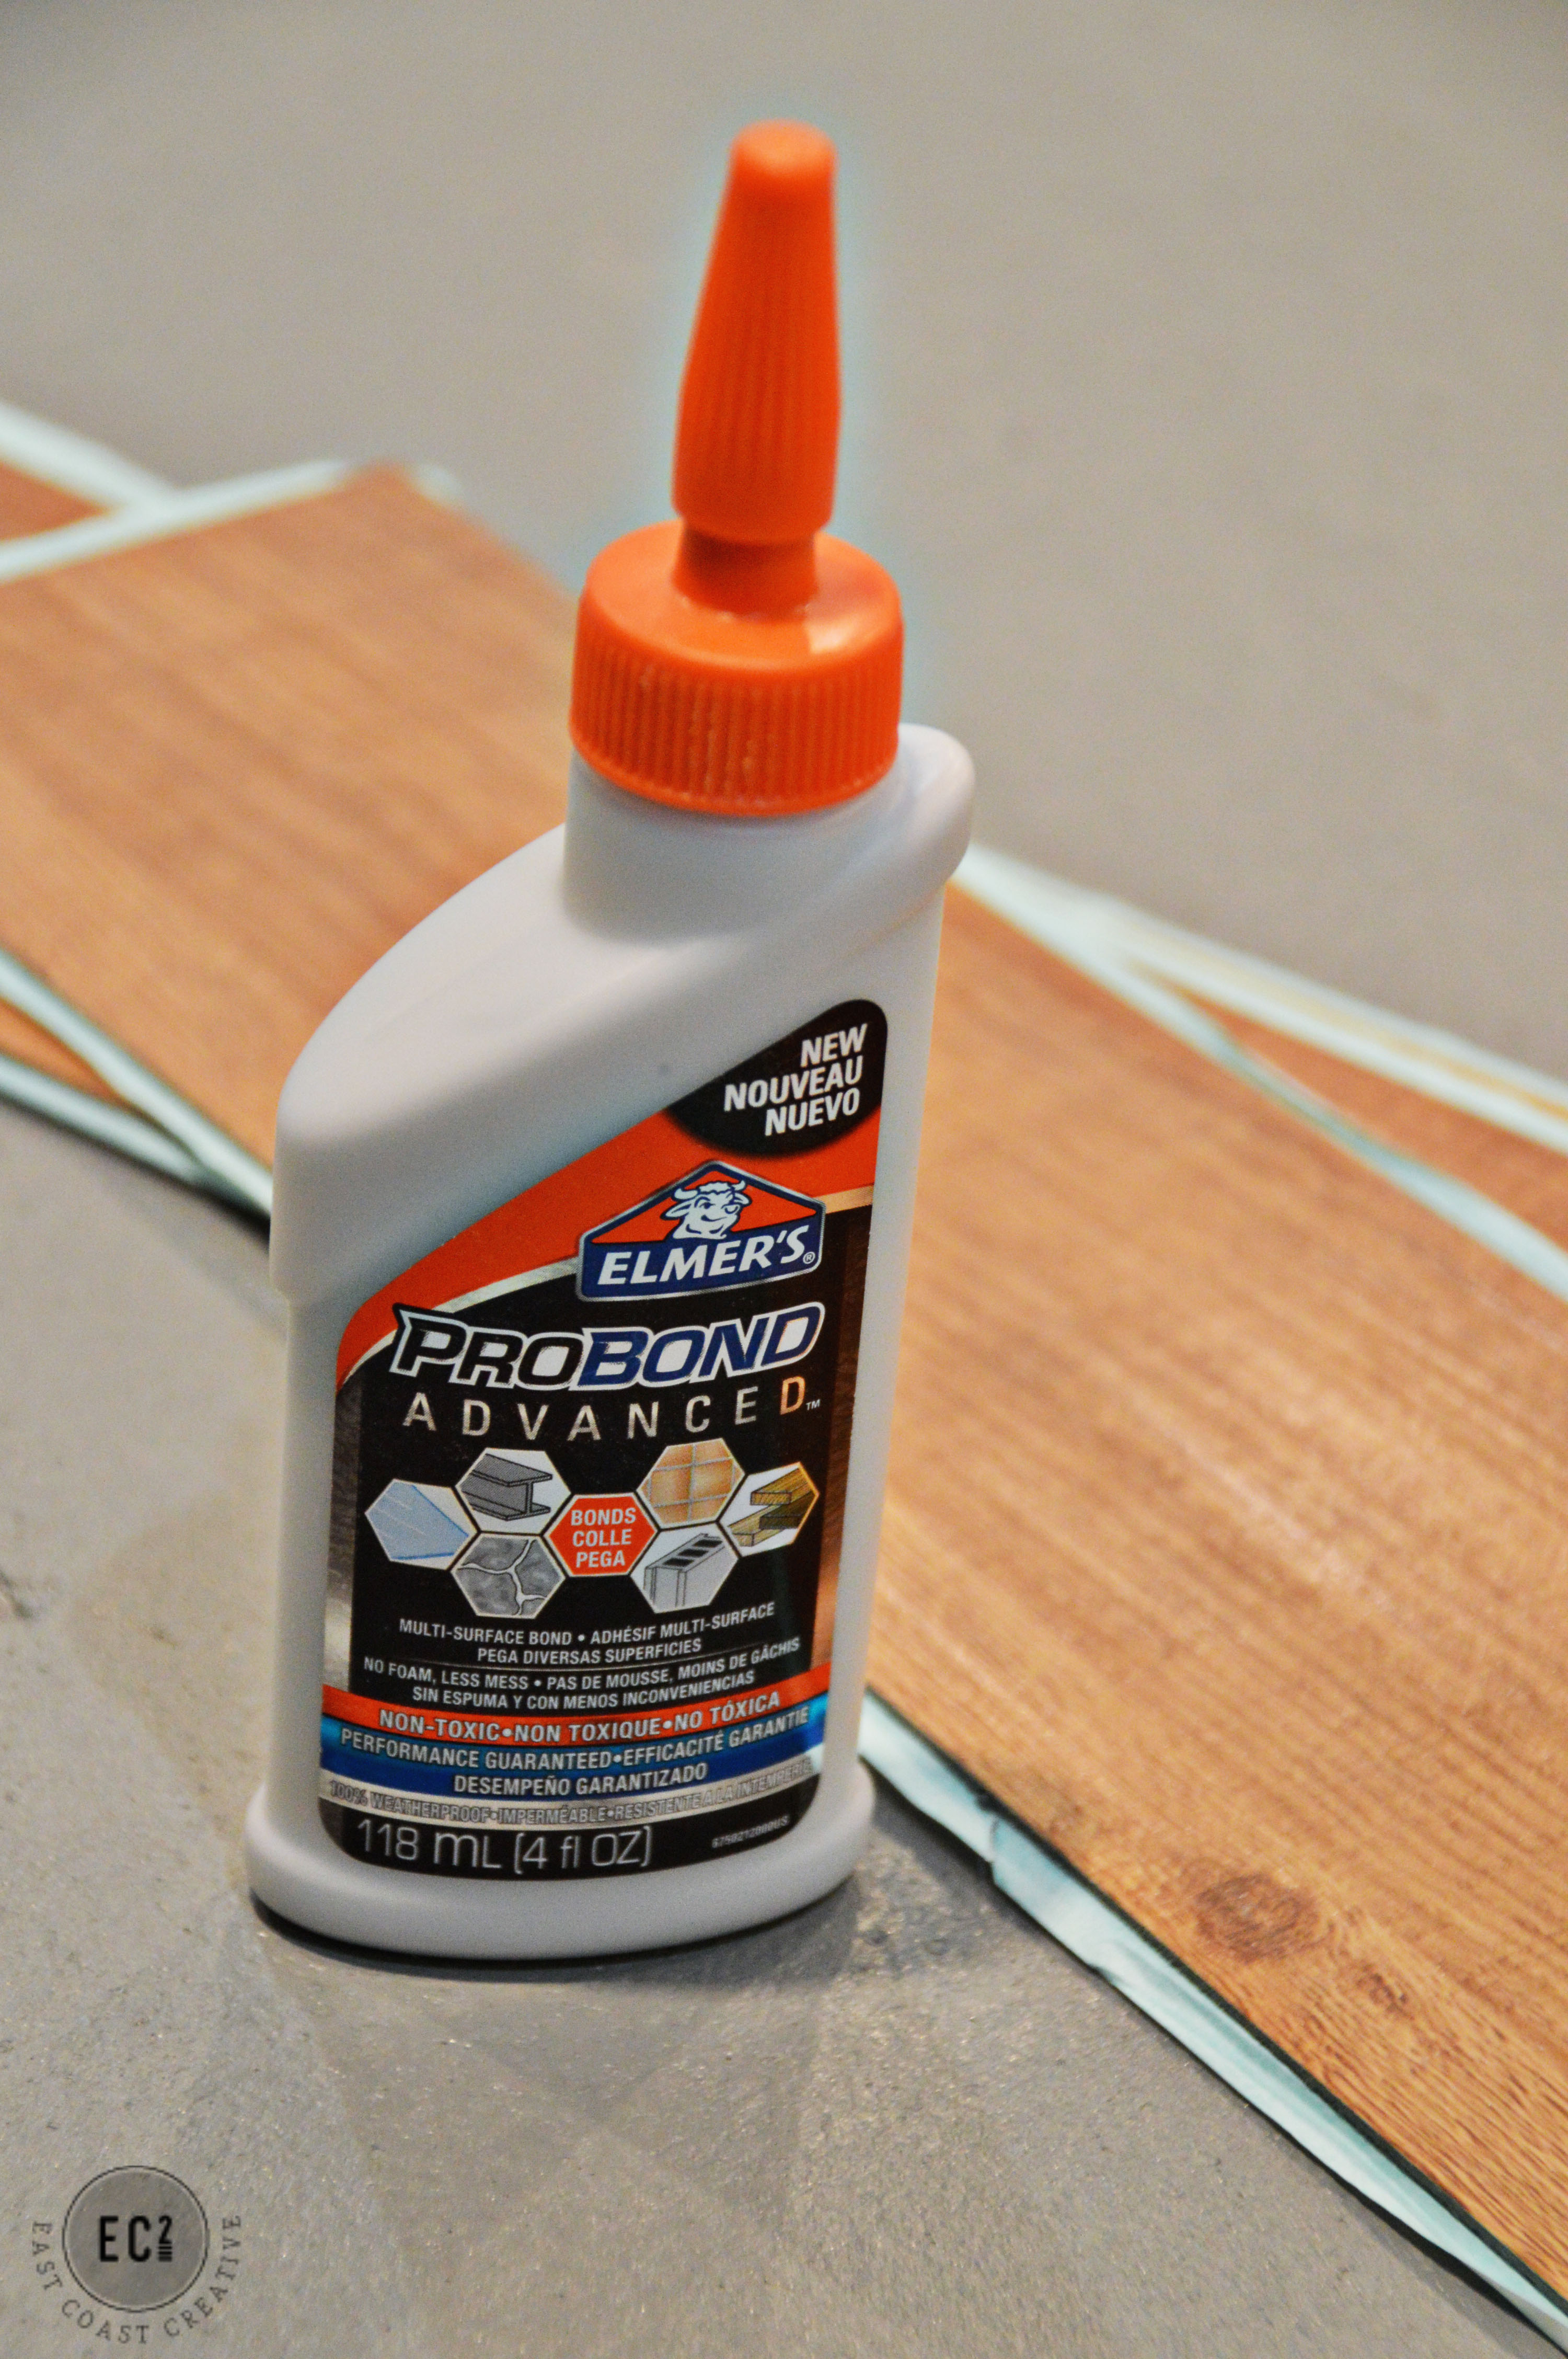
Here’s the deal-ProBond Advanced is a multi-surface adhesive intended for bonding mixed material, like wood to metal, or in my case vinyl to drywall and won’t leave any of the foam residue of other adhesives. I had considered a construction grade contractor adhesive, but I know from experience that it would destroy the drywall and if I dripped any, it could ruin the wall. I found out that ProBond Advanced also dries with a completely translucent, paintable finish. I had found my winner!!
As soon as I knew this was going to work (and NOT fall off the wall- because if that happened again I might have really lost it!) I got right down to business.
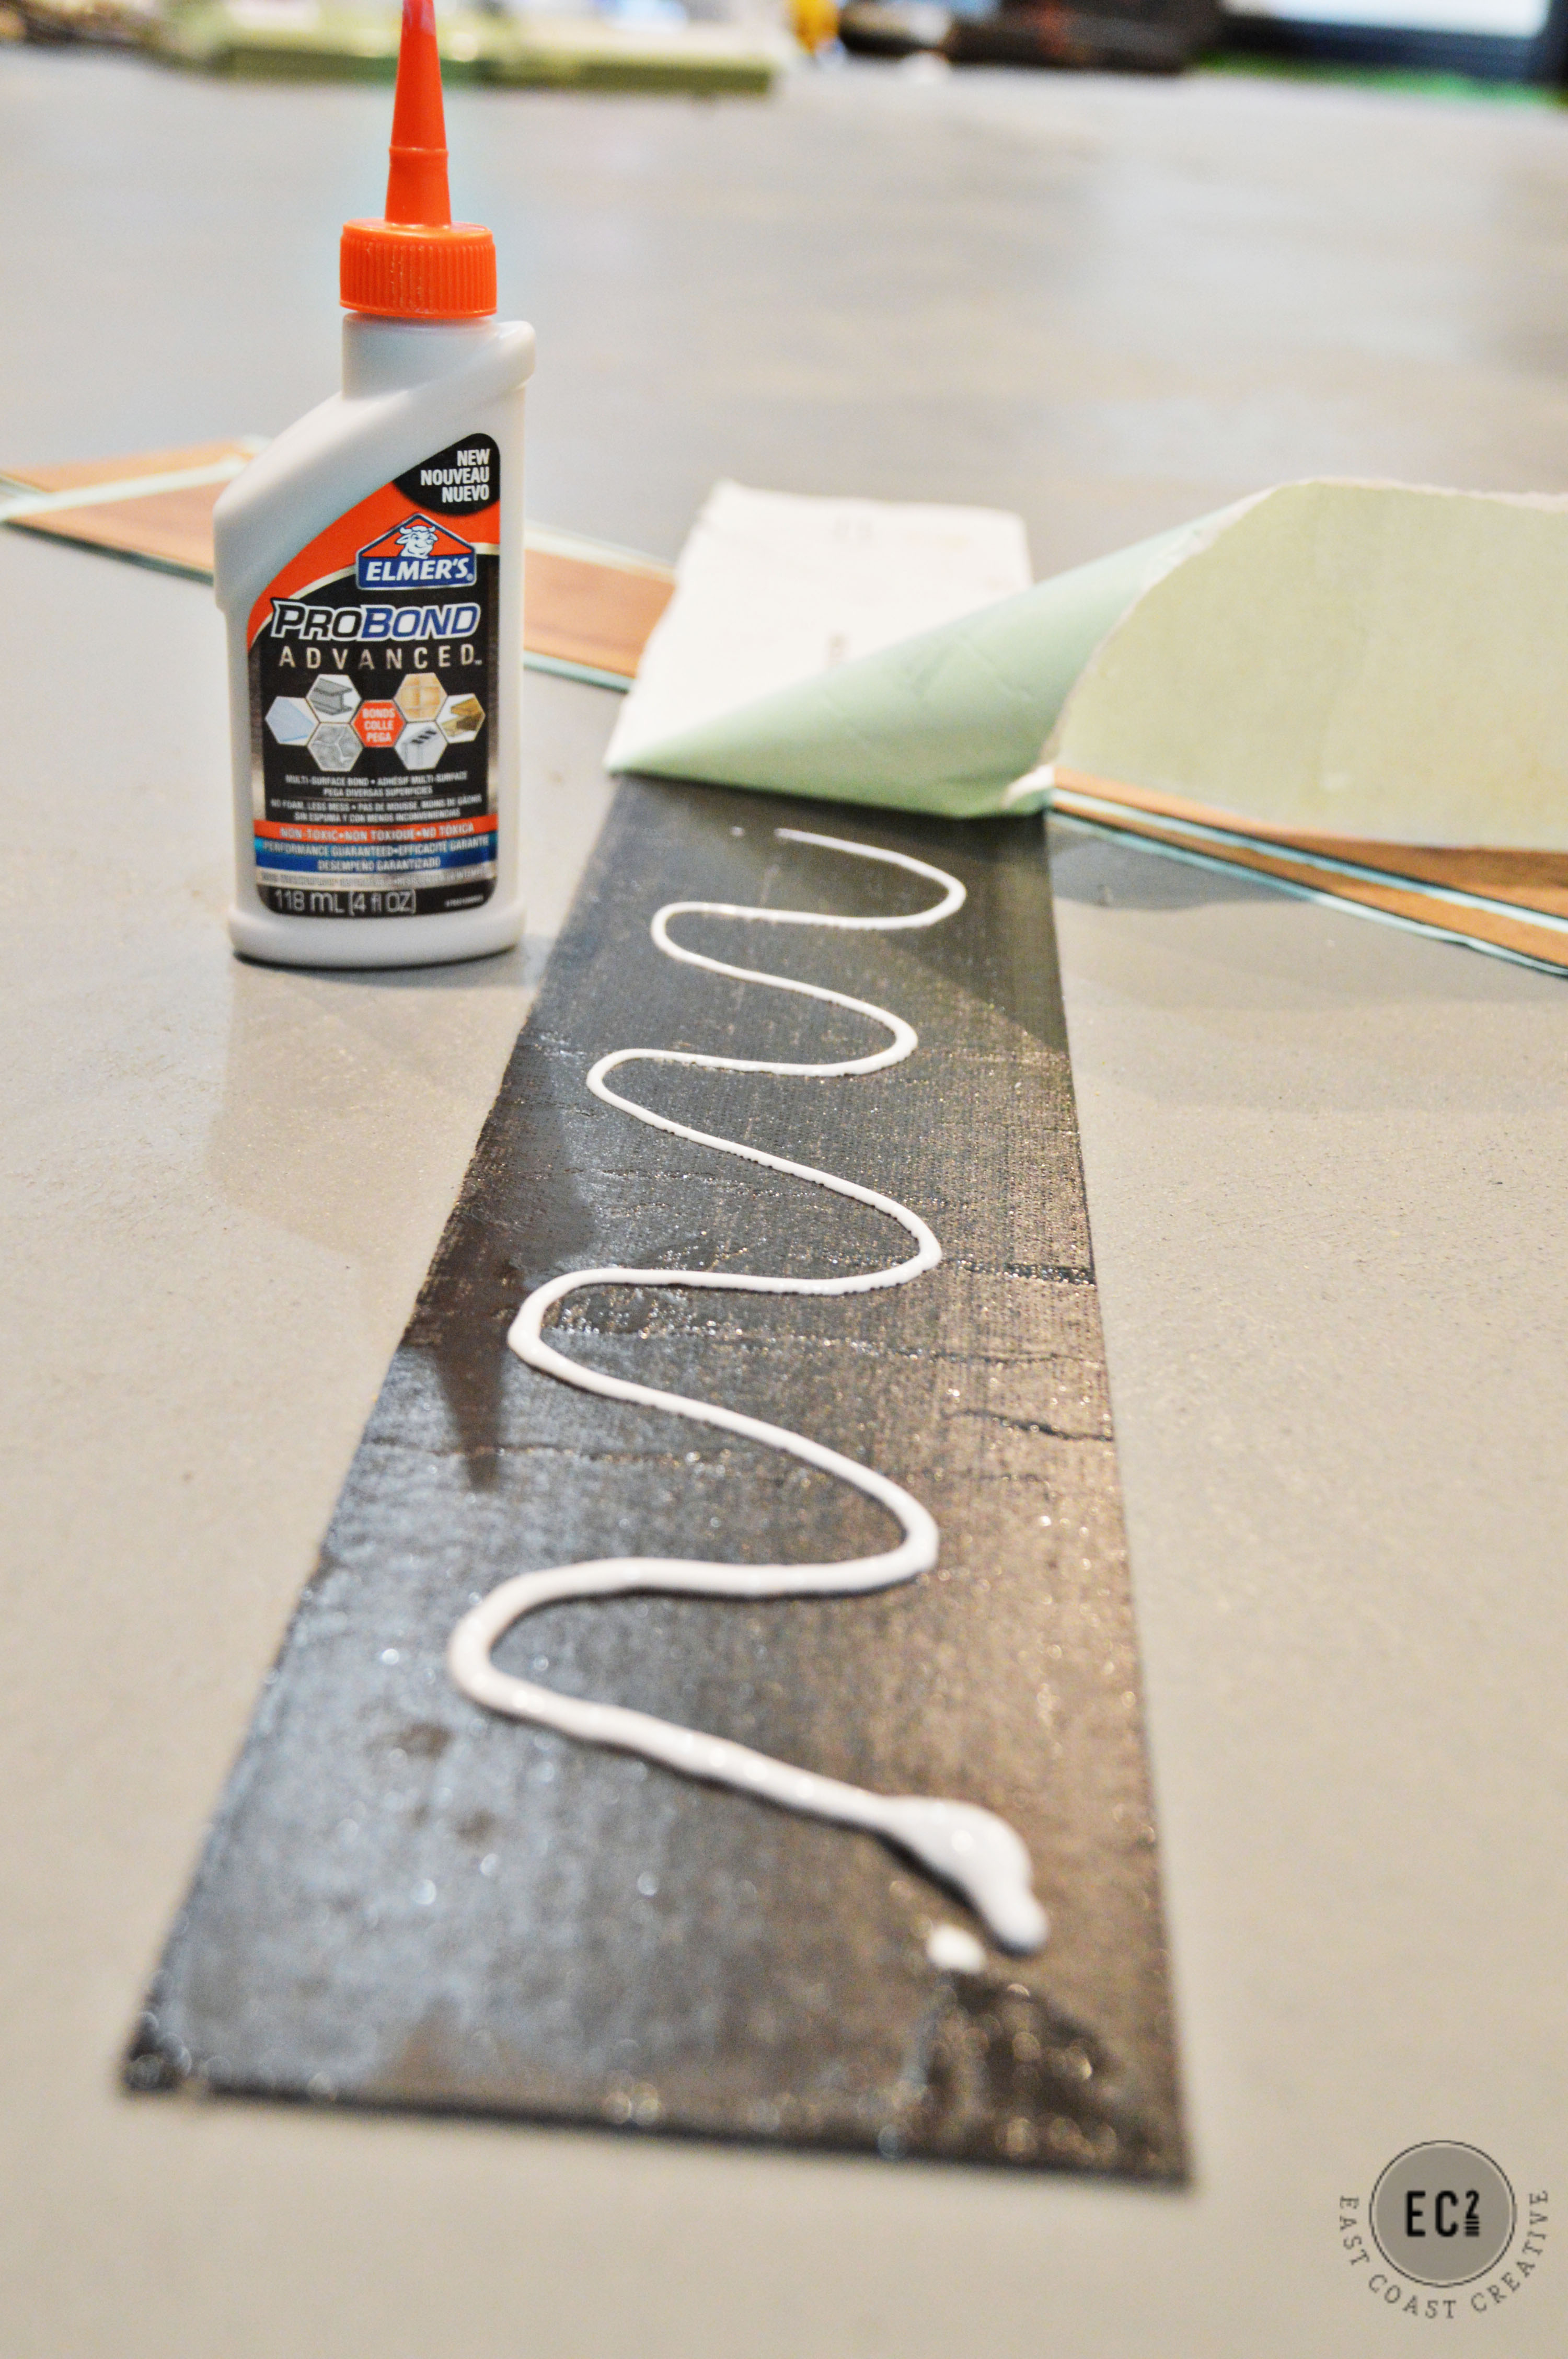
I put a squiggle of glue on each vinyl plank before putting it on the wall. I’m not sure a squiggle is a technical term, but let’s just pretend that it is okay? I loved that using the ProBond Advanced was simple and I didn’t have to mix or combine ingredients like some products. It was like I was just using craft glue, but with superhuman strength!
Flash forward 24 hours….
And it was still on the wall!!! It hadn’t moved an inch- I did a serious celebration dance!! (sorry, no video of that for ya!)
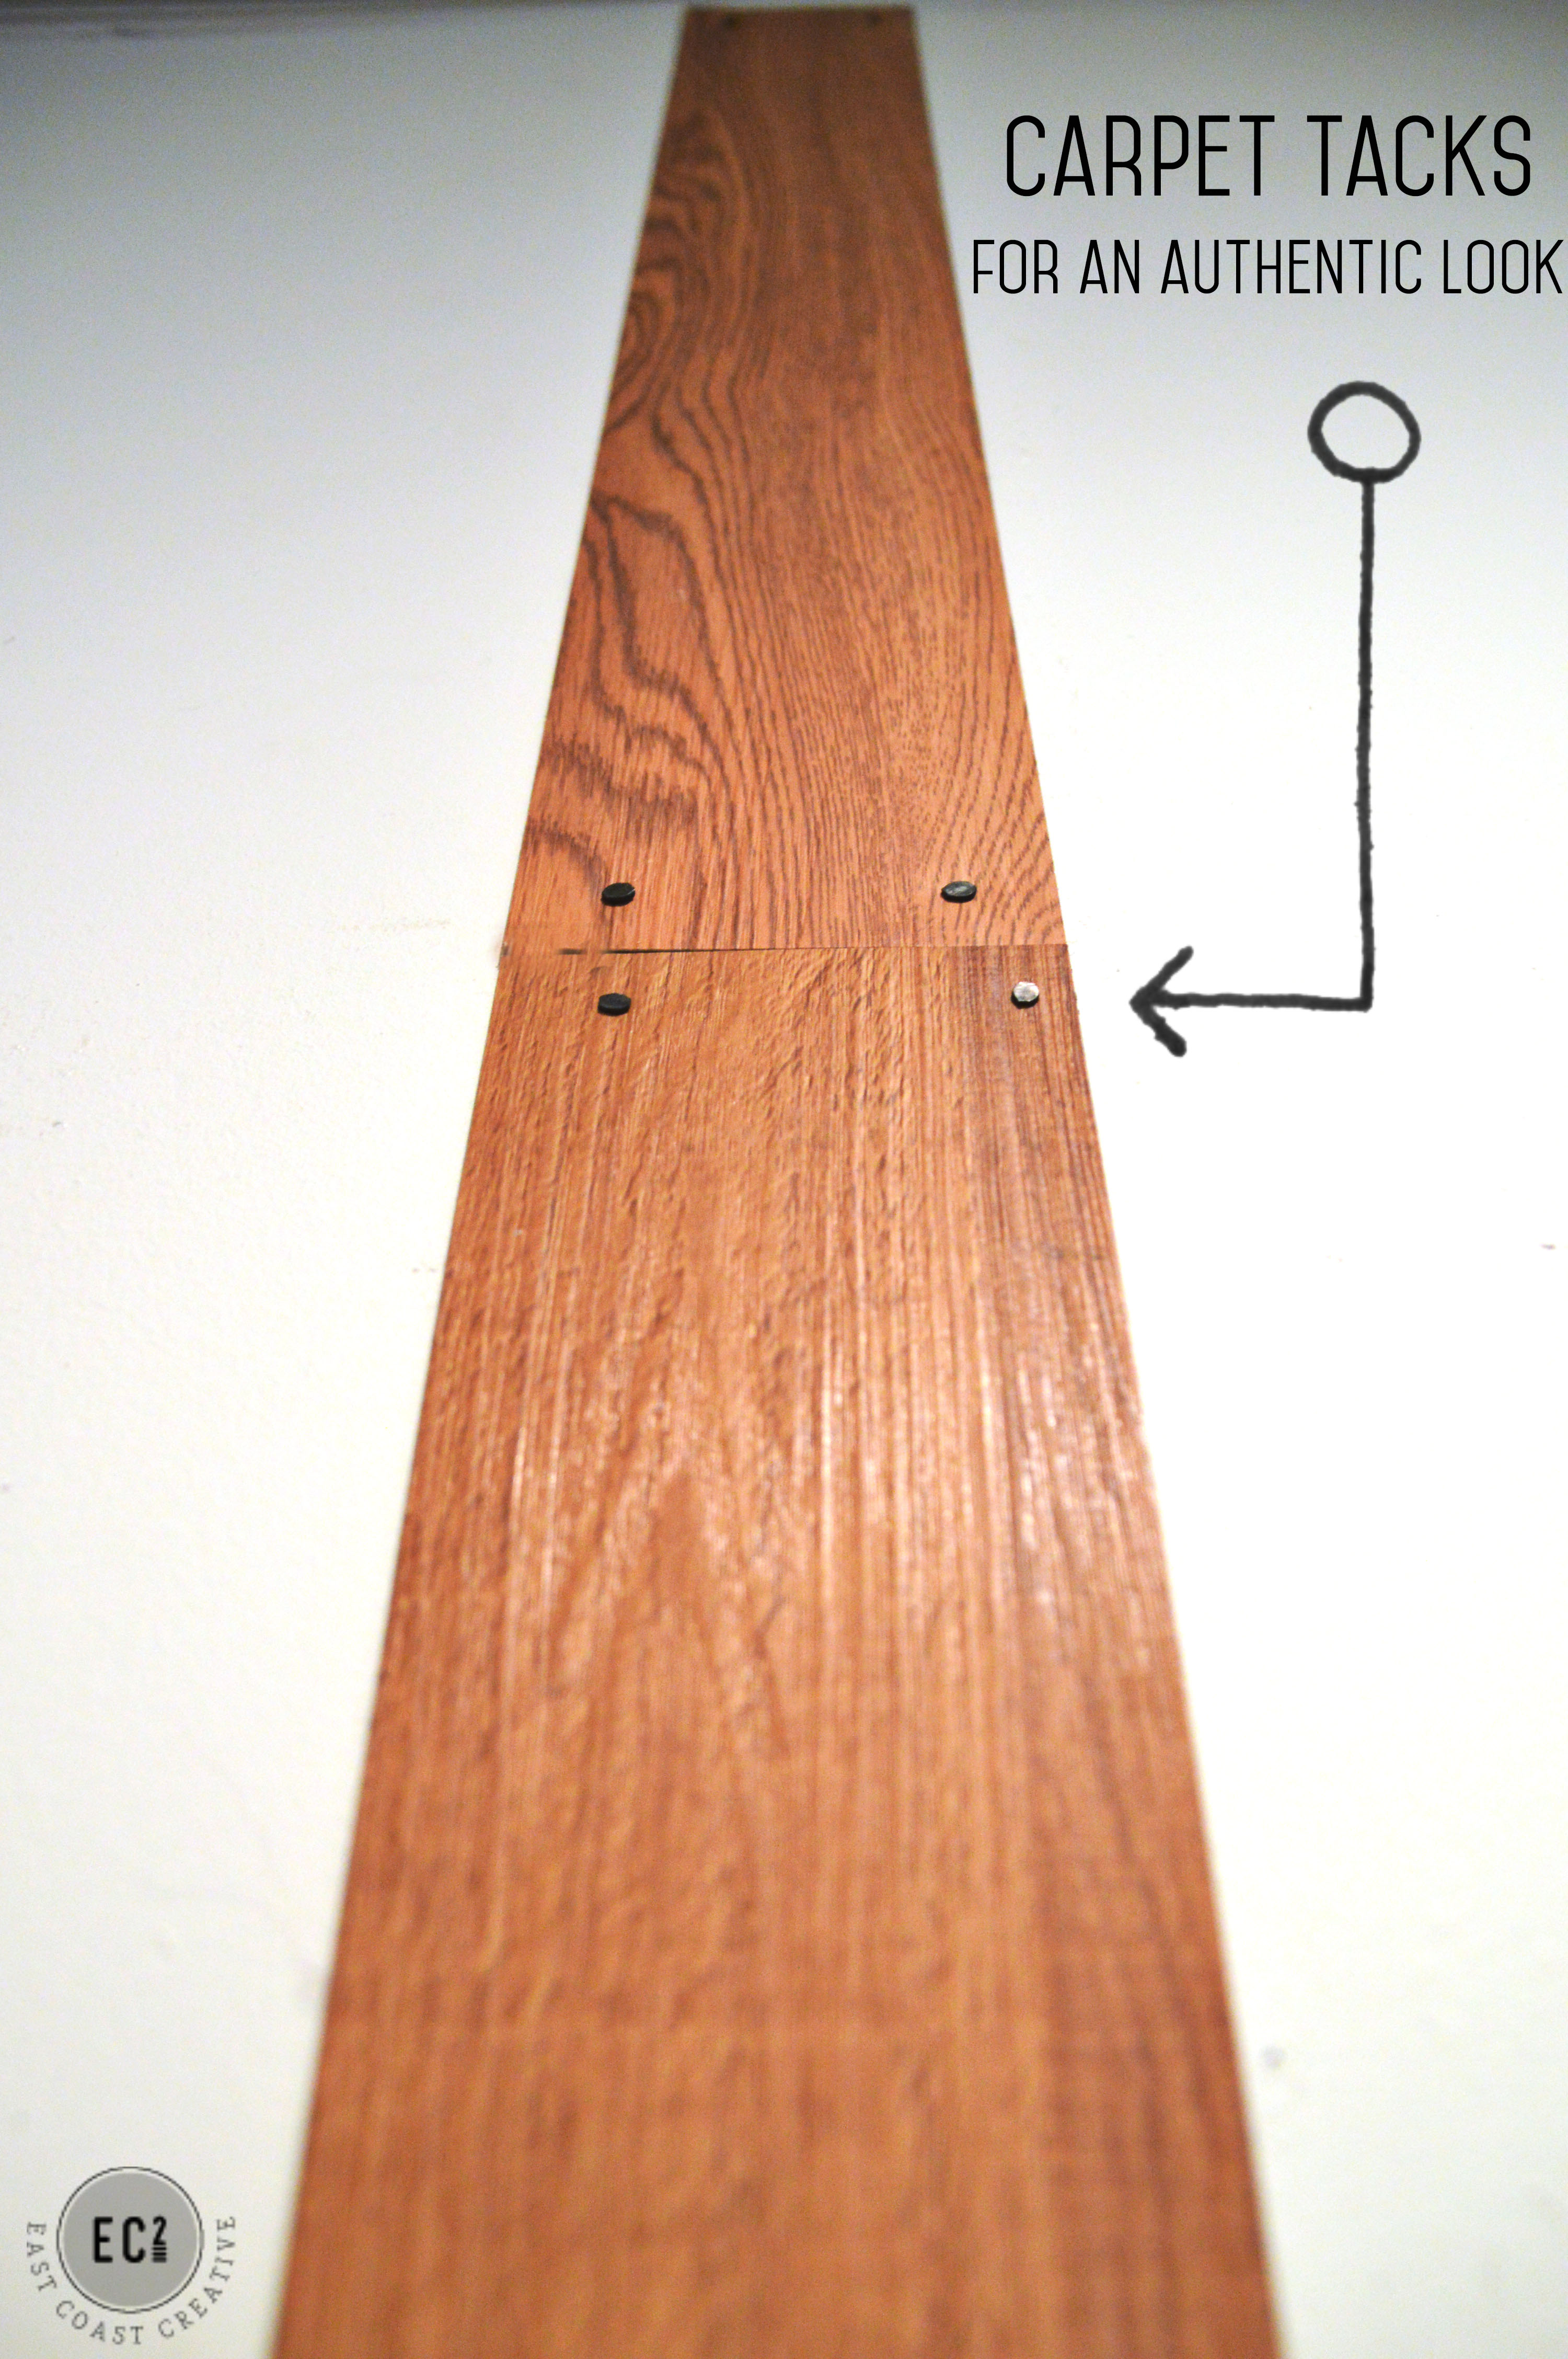
Even though the ProBond Advanced had saved my project and held the vinyl on the wall, I decided to add some carpet tacks to each plank to give it an even more authentic wooden plank feel. I love the look of carpet tacks and I think they’re highly underutilized in the DIY world! They look great on the vinyl.
I love the contrast between the stark white walls and the warm oak tones of the wood. I’m dying to get to work decorating this space as soon as I’m back from vacation next week!!
What do you think of this modern accent wall? I feel like it’s the kind of wall items from the most recent West Elm catalog would REALLY like to live in… I can’t wait to finish the apartment and be able to share everything with you- fingers crossed I don’t have any more challenging DIY projects like this one started out! Now that I know all about Elmer’s ProBond Advanced, I at least have a secret weapon for my next projects!
Have you tried ProBond Advanced yet? Got any upcoming projects that it would help you out on? Plus, for more ideas on what to use it on check out the Elmer’s Mixed Materials Pinterest Board!


love it, Monica! Can’t wait to see the finished space … and I really love the “woo hoo” (probably my favorite part of this whole post – hahah!!)
Okay, so did I read this right? Is this something that can be used in a rental situation? Because I love it!
[…] to NYC, helped finish up a few big DIY projects at The Well with Worthwhile Wear, is working on the EC2 Apartment, and planned a Fall Nights Party all the while taking care of a household of four kids, two dogs, […]
Has the EC2 apartment been finished? Would love to see it.