
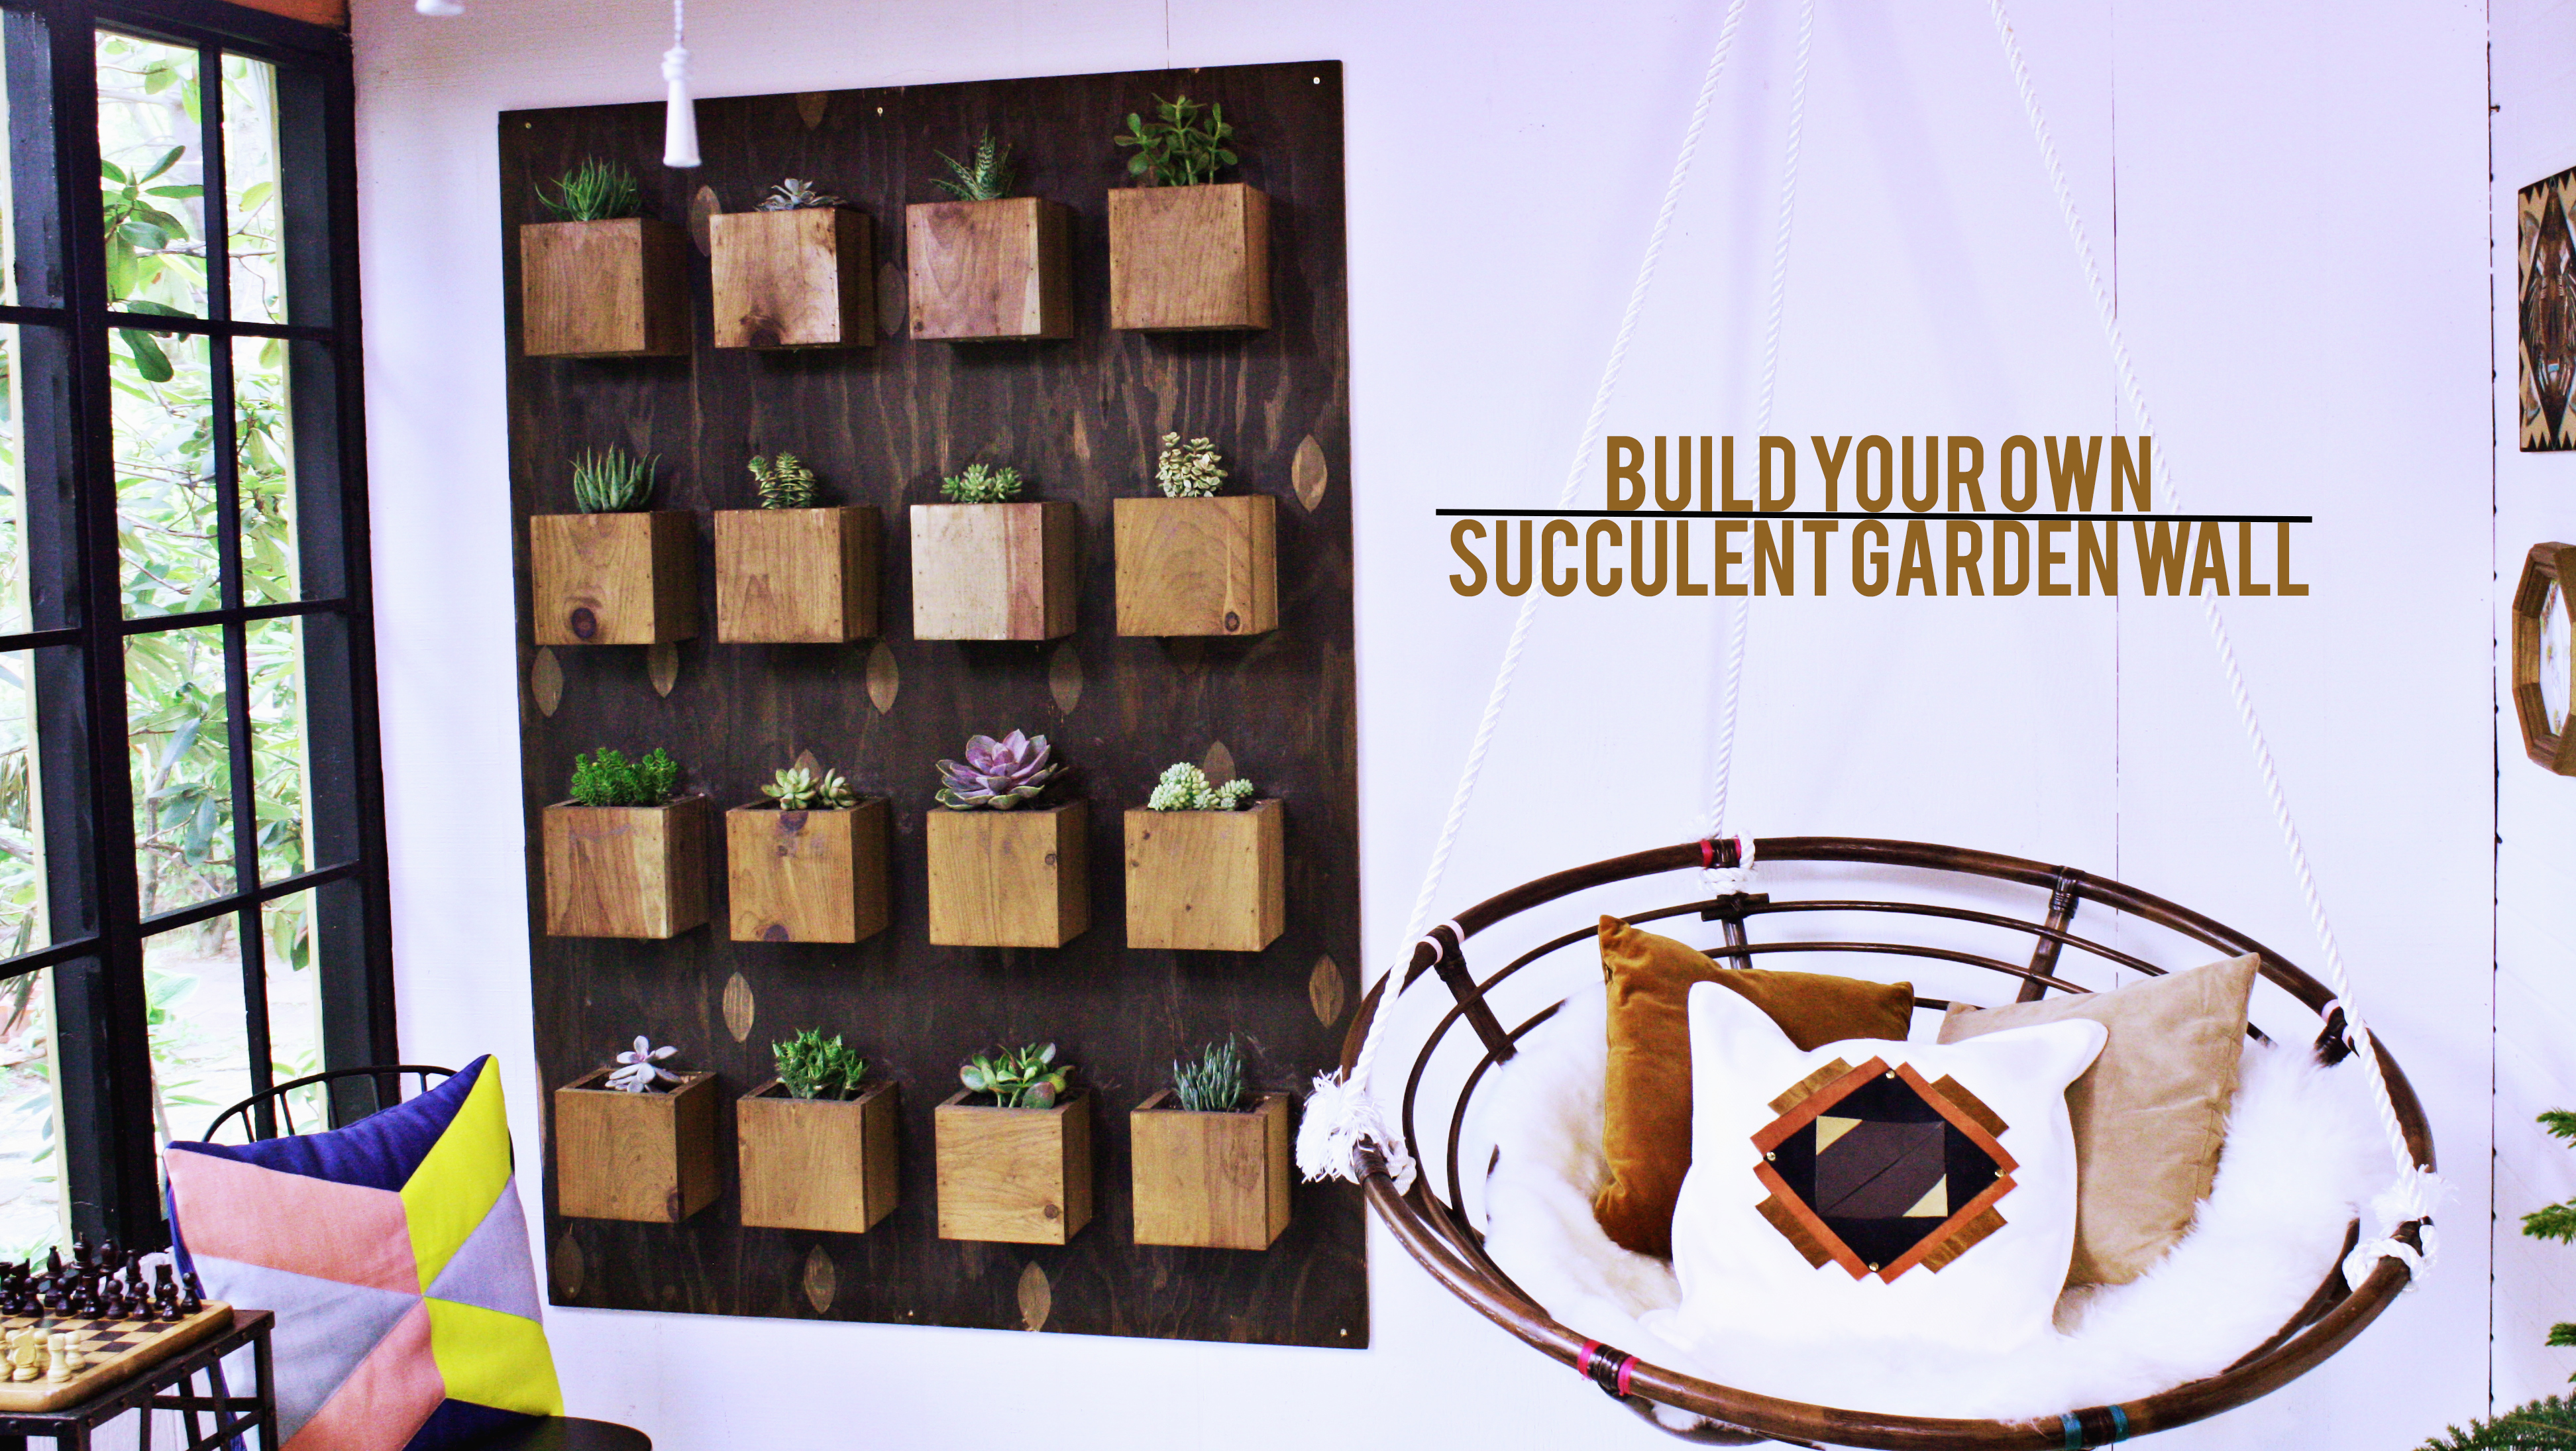
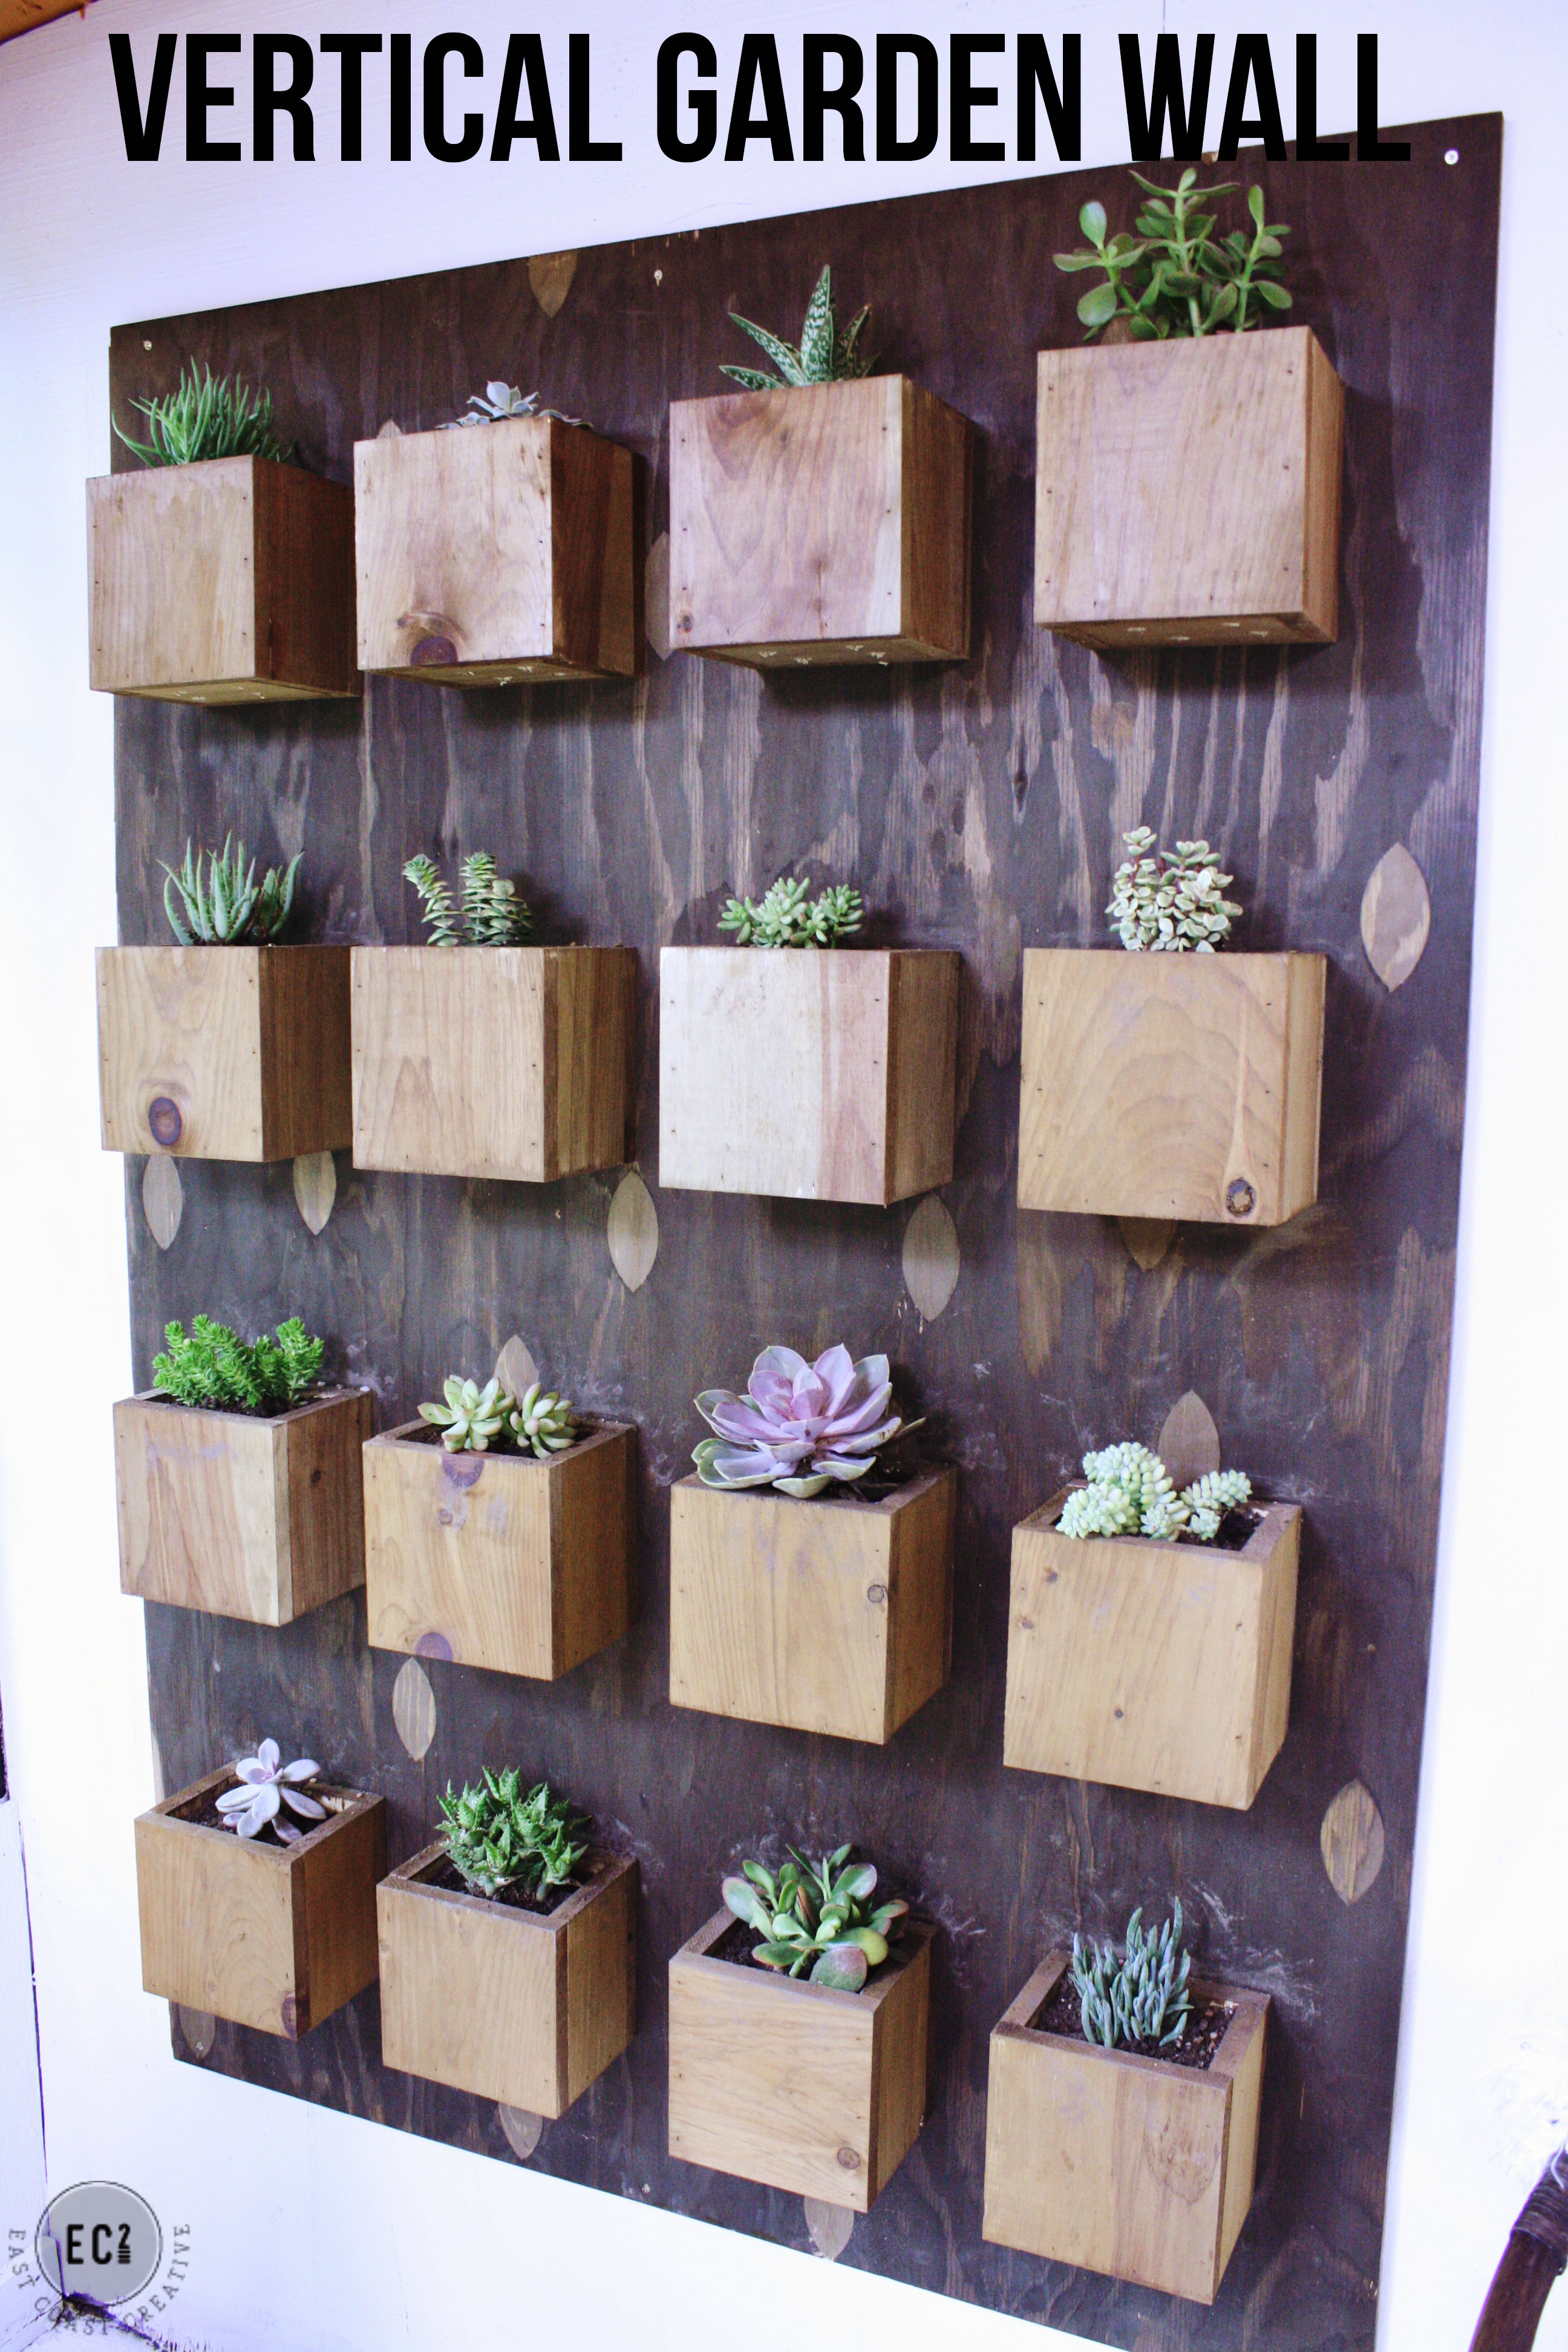
Do you ever have those times where you envision a project in your head and then it actually turns out just as cool as you pictured, maybe even a bit more epic? It doesn’t happen all the time for me, but this DIY Garden Wall project from our Urban Sunroom Makeover was one of those times. I knew it had awesomeness potential, and I knew that the room was going to be one of my favorite makeovers of all-time, but I was still kinda shocked at how it all worked out!
If you missed this episode of “Knock It Off!” you totally need to check it out online. It’s my fav!
You can watch full episodes HERE.
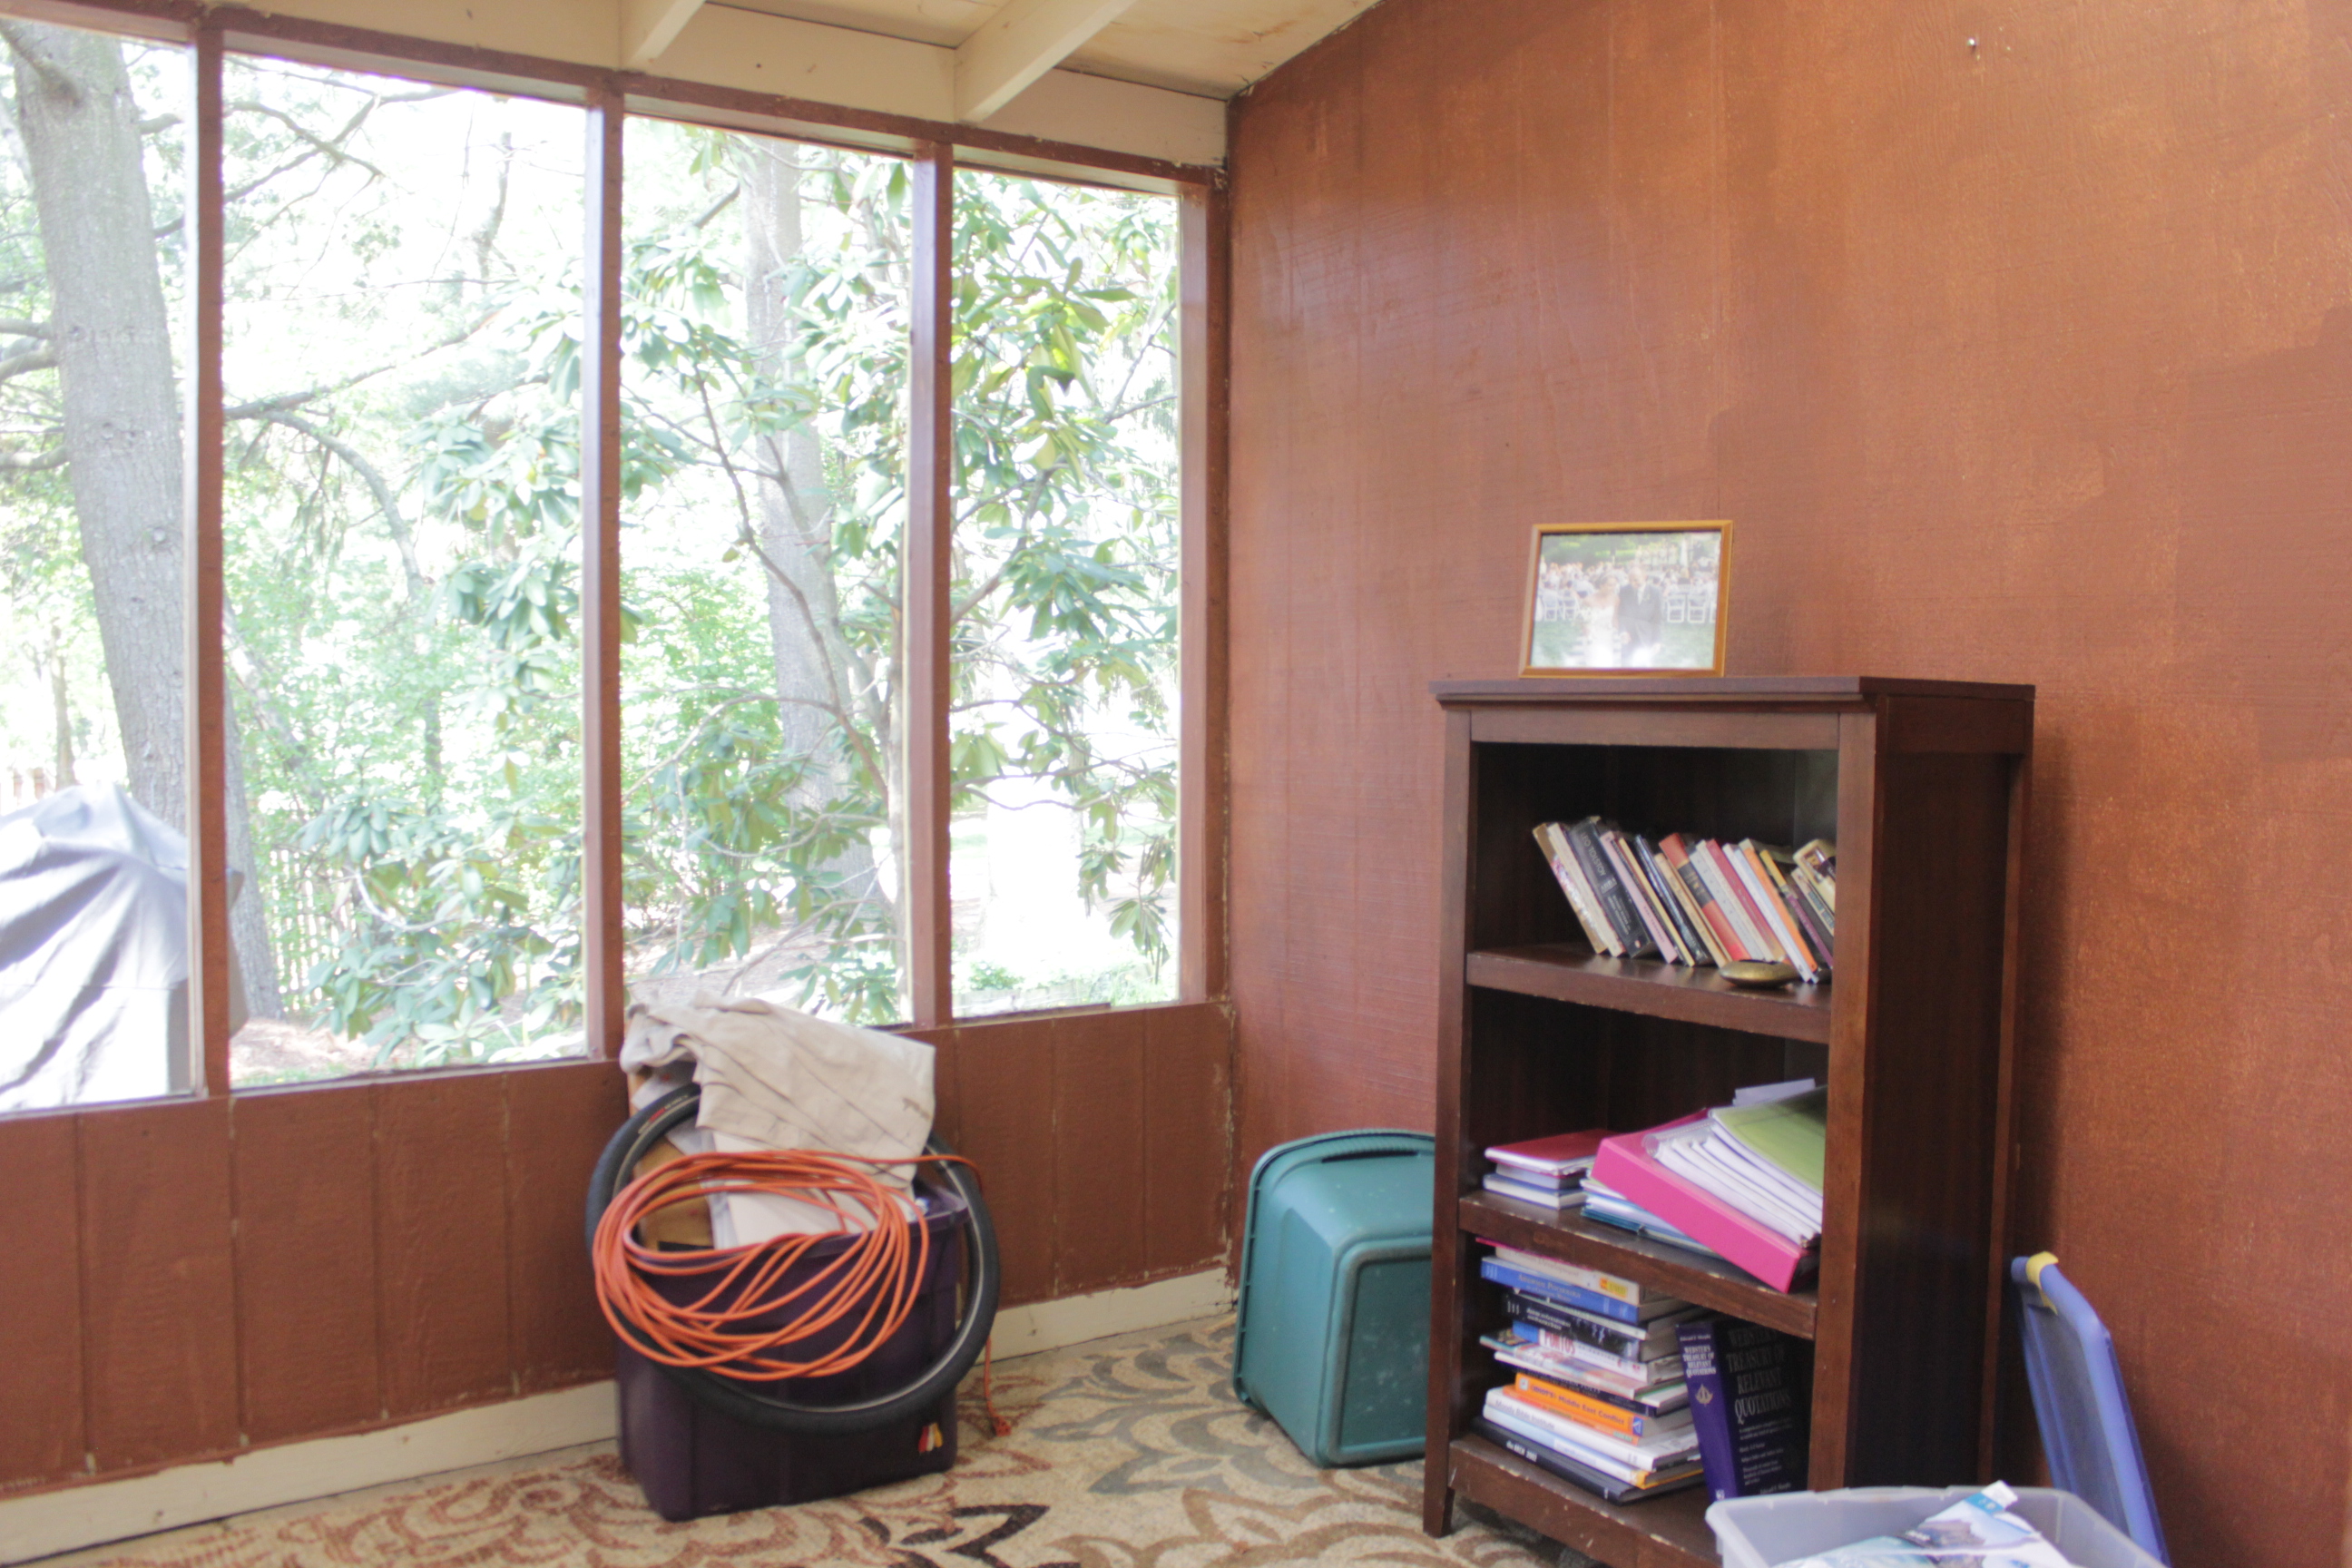
And before we get to the planter, here’s a peek of where is space started out before our makeover… Like I said you’ve gotta check it out online!
Okay, now let’s chat about how you can build your own DIY Garden Wall shall we?
Here’s what you’ll need:
Plywood Sheet
1×6 planks of pine
(amount depends on how large you want your garden wall)
Chop Saw
Nail Gun (not needed, but recommended)
Nails & screws
Drill
Stain
Dirt & Plants
1- Determine how large you want your garden wall and cut your plywood down to size if needed. You can use a table saw or just a circular saw or even a jigsaw would do.
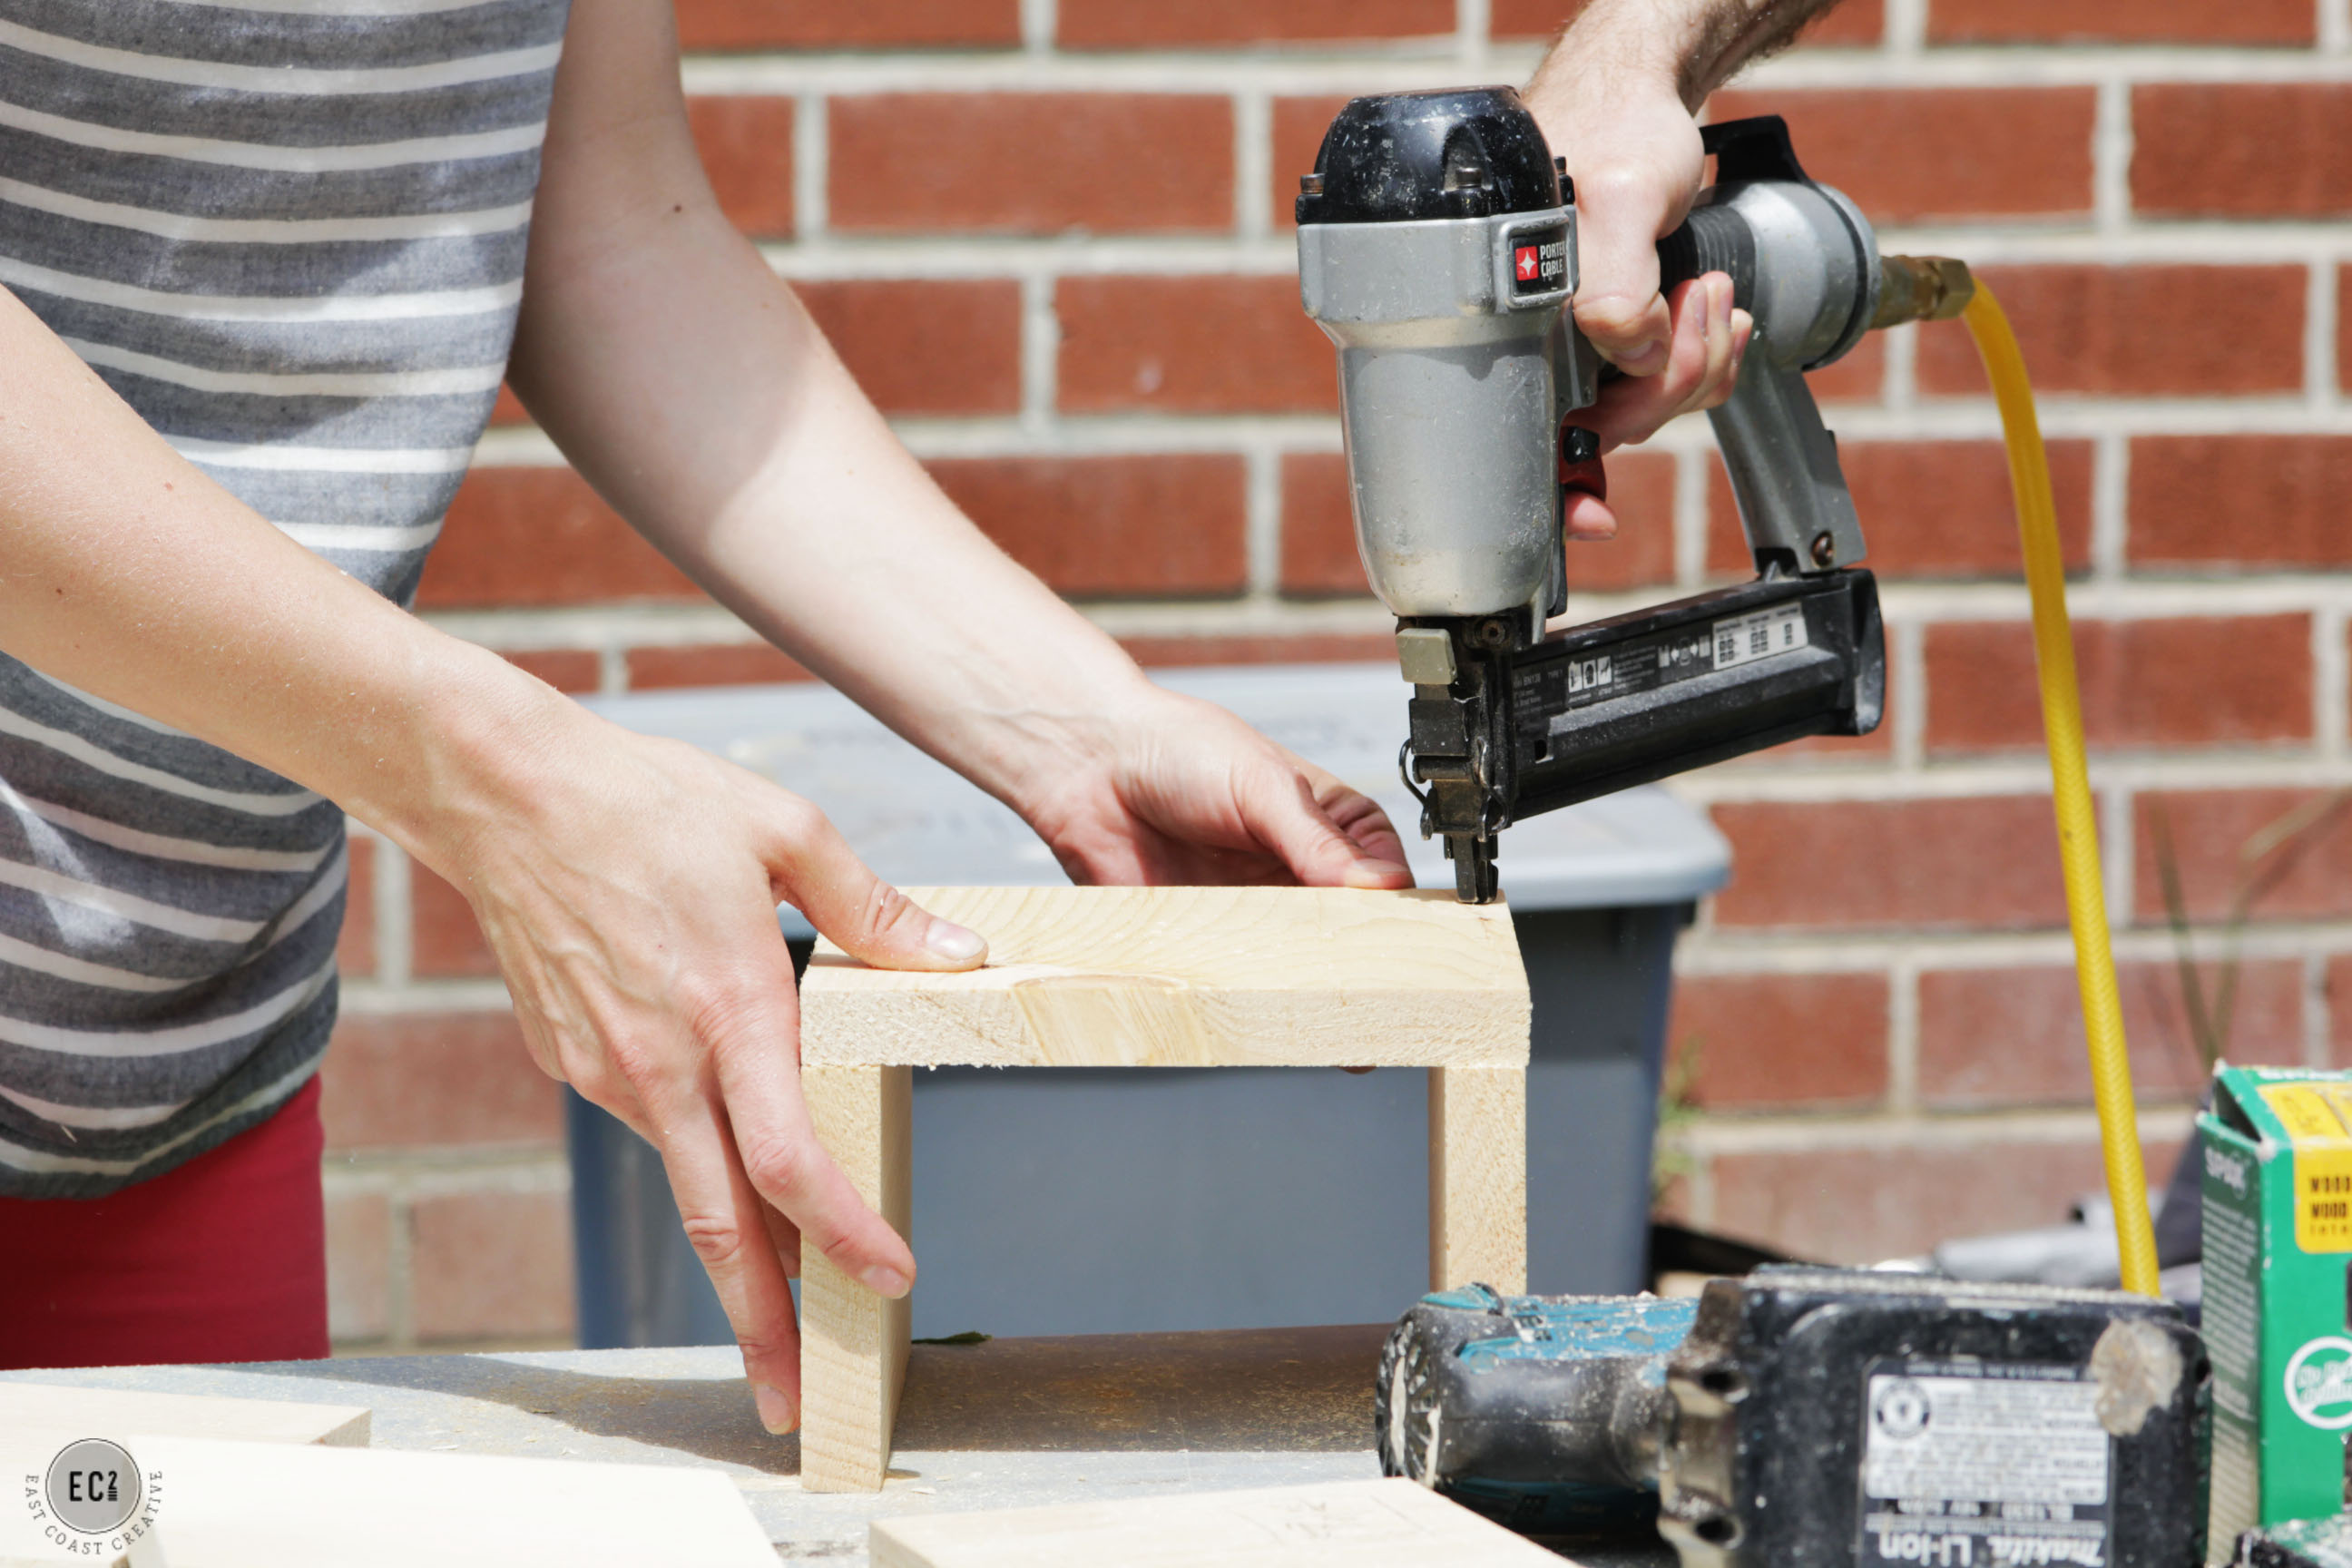
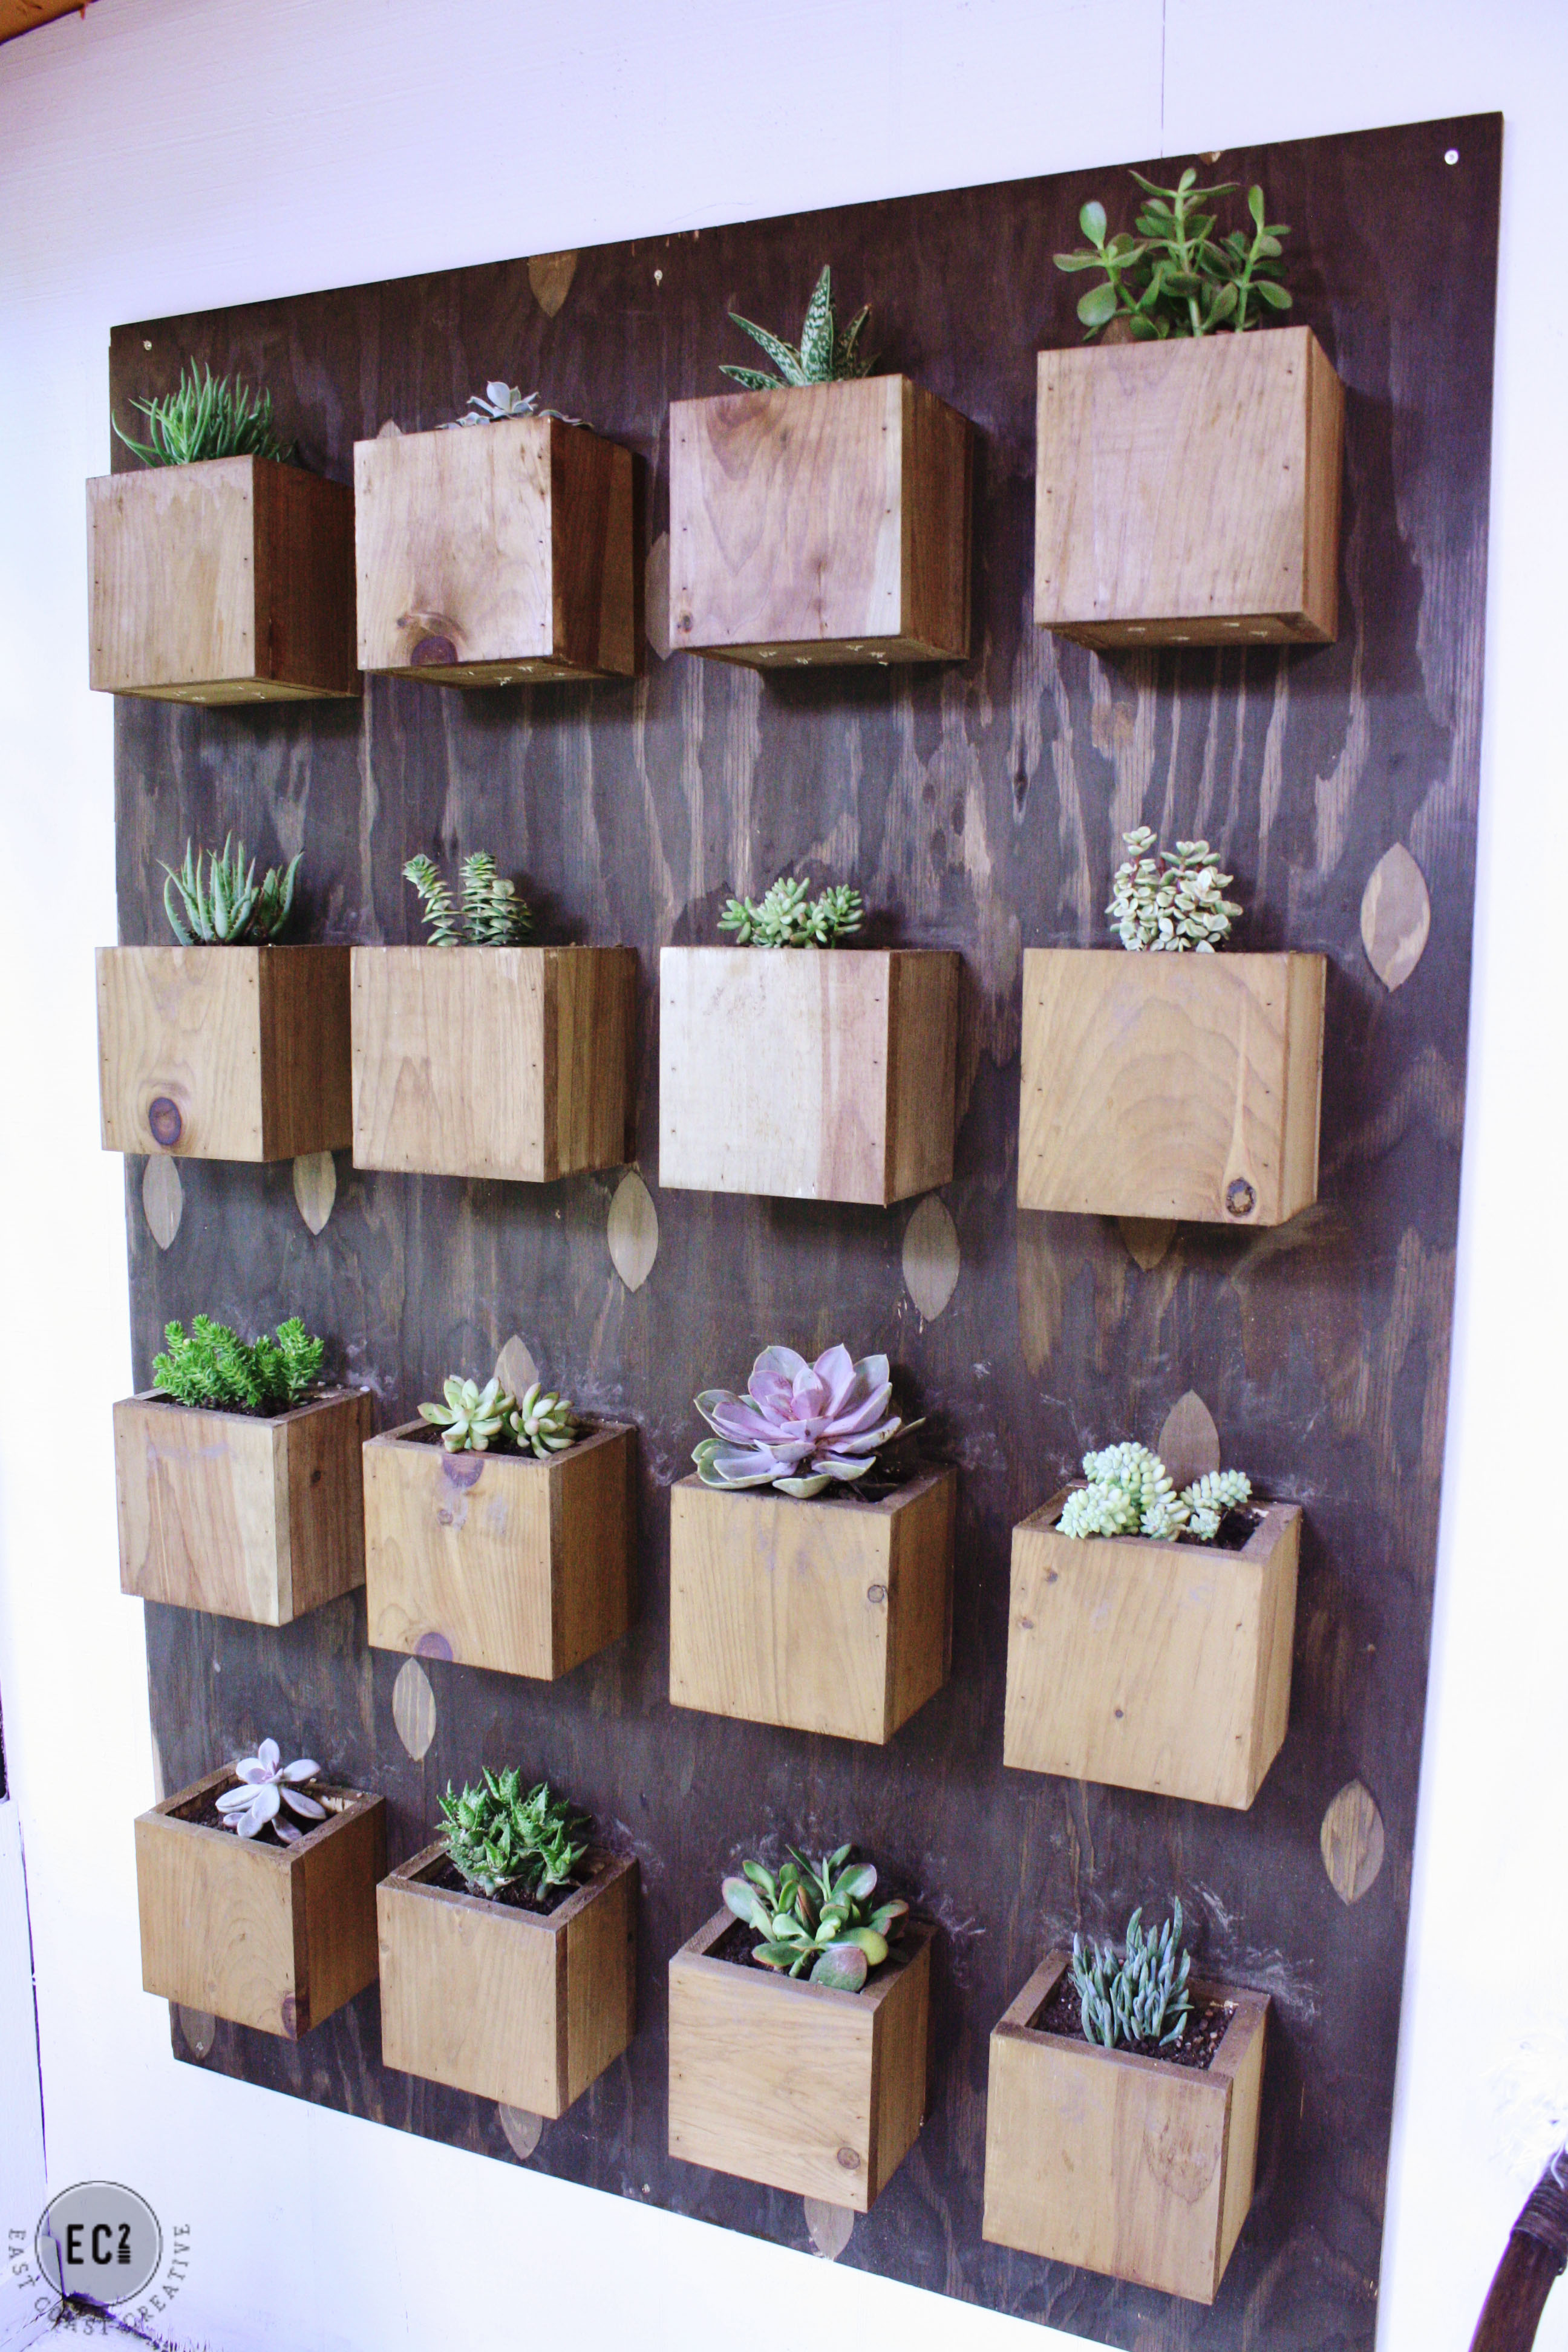
2- Begin cutting your 1x6s down to size. We wanted square planter boxes, so we made 6″ cuts. Actually a smidge under since they’re not really 6″. Each box will require four 6″ pieces and then a smaller bottom piece. So cut, cut, cut for a while.
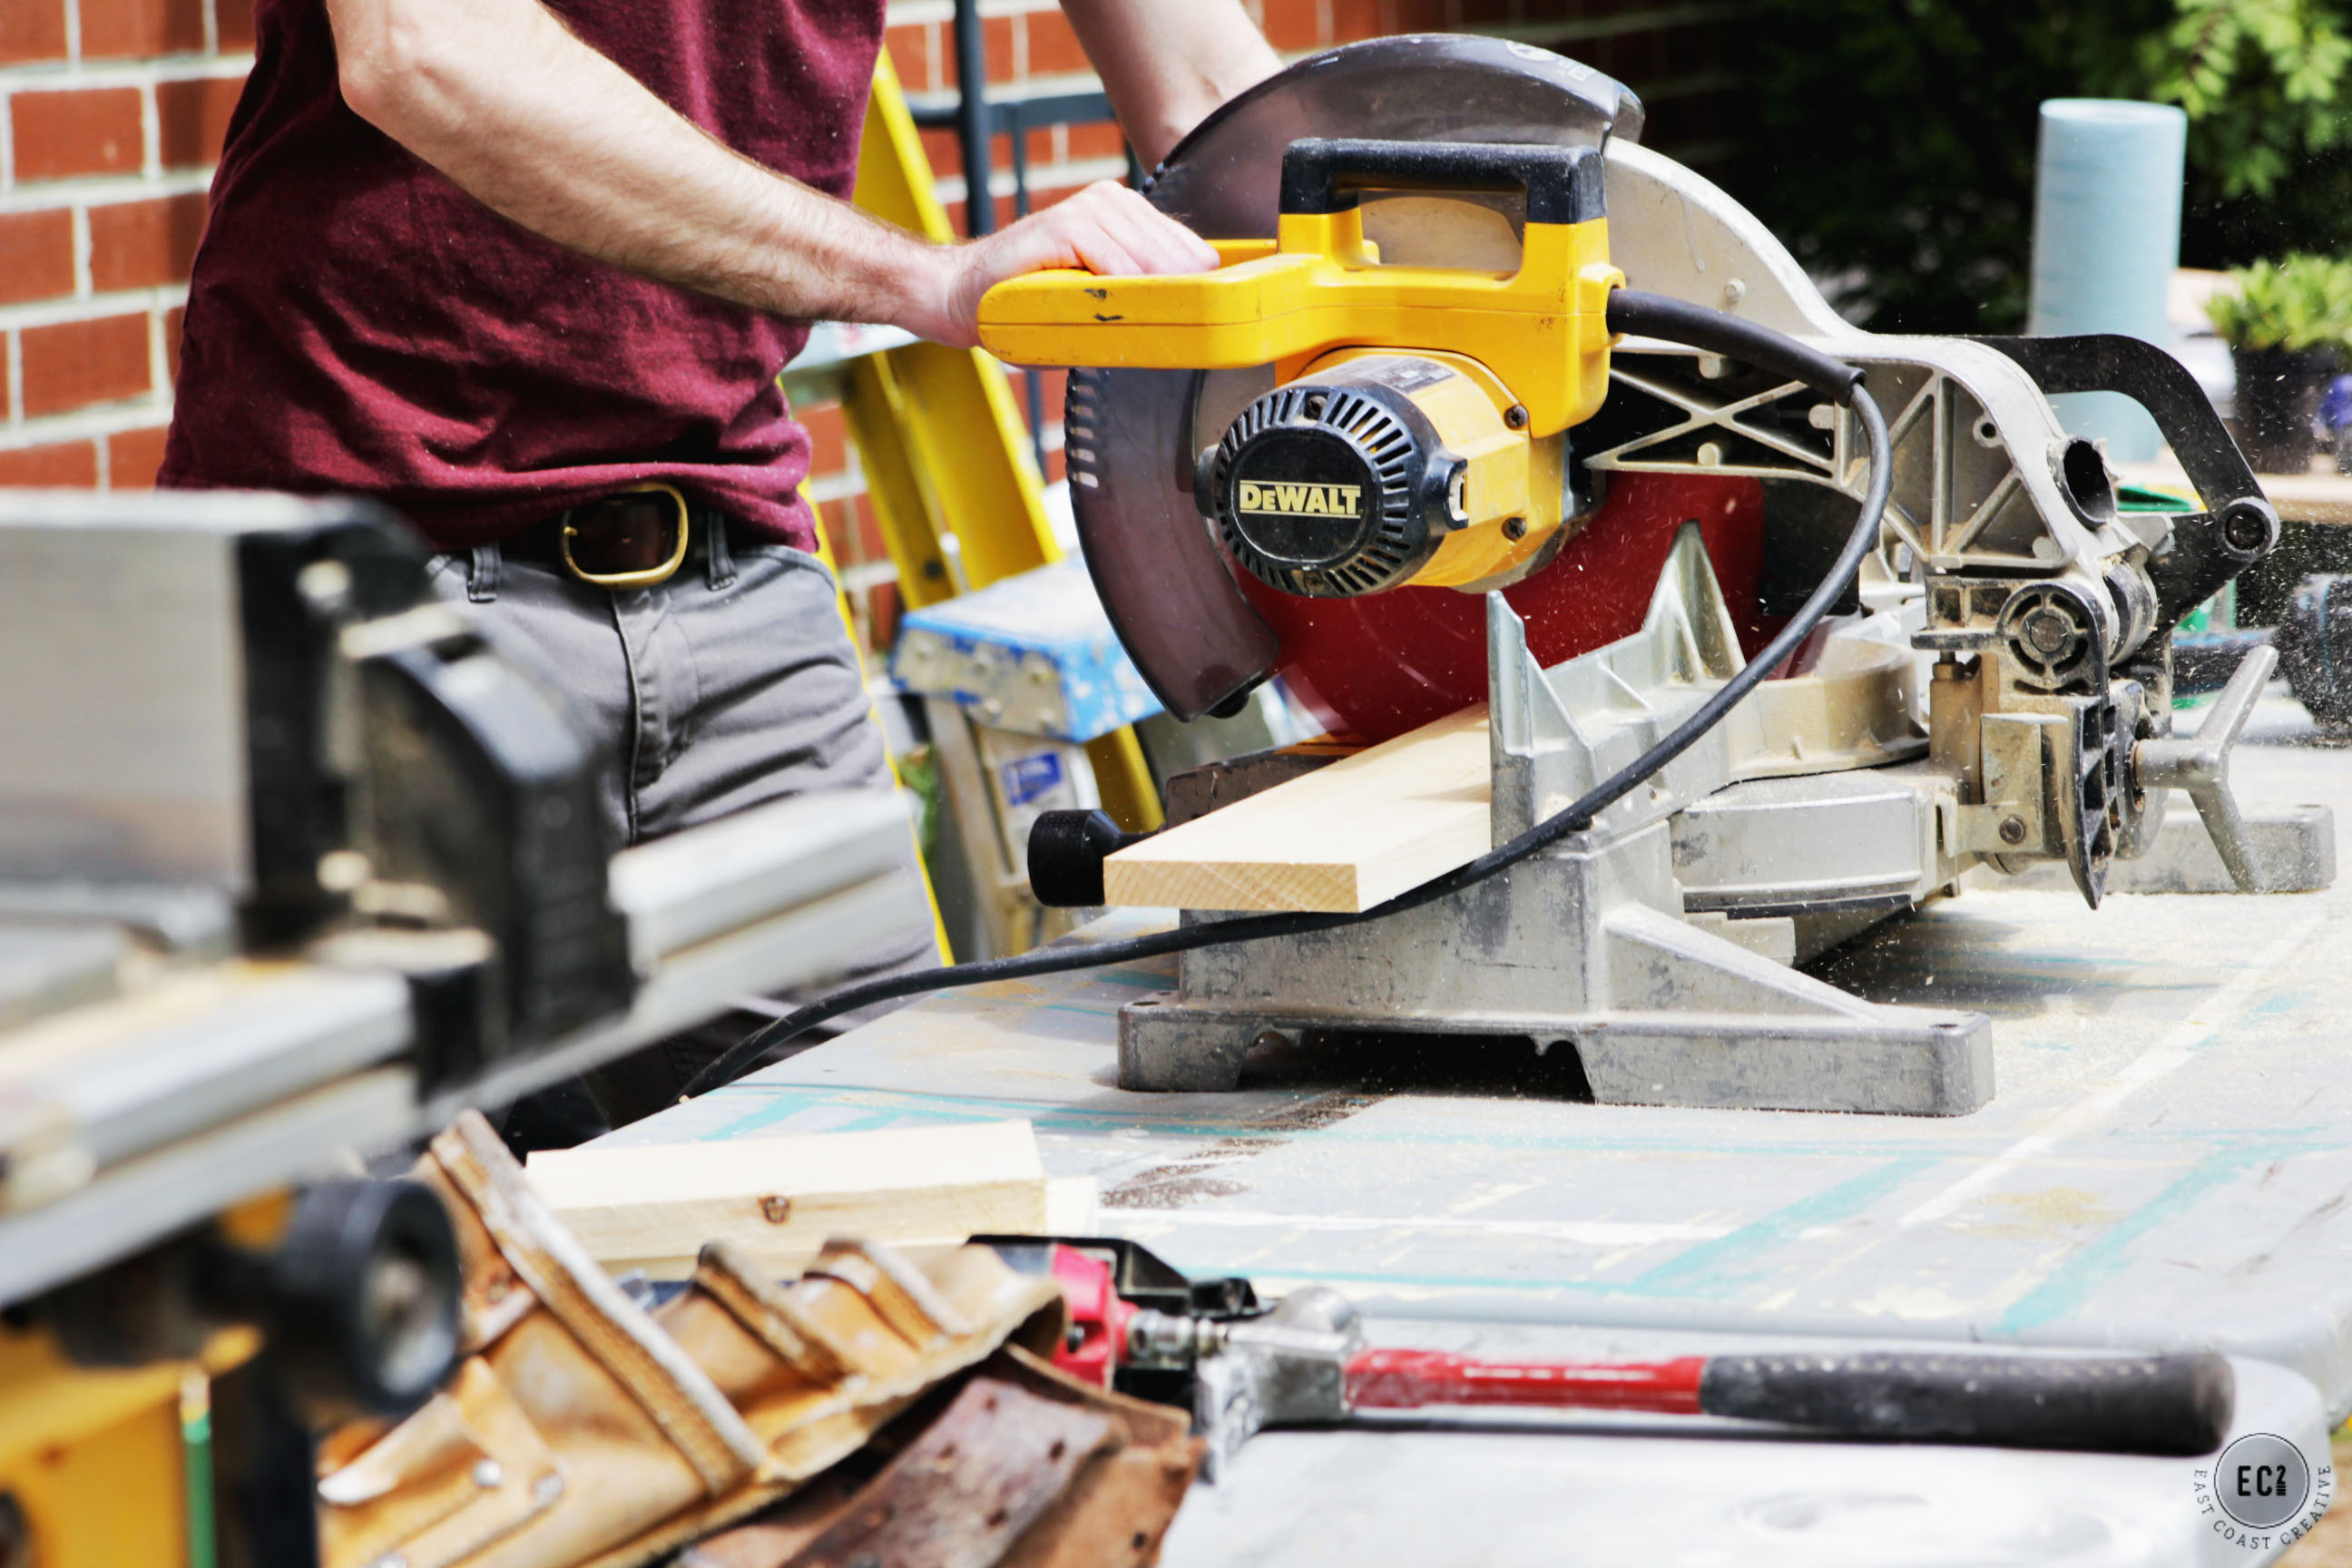
We made a BIG planter wall, so all our cuts and wood were no joke!

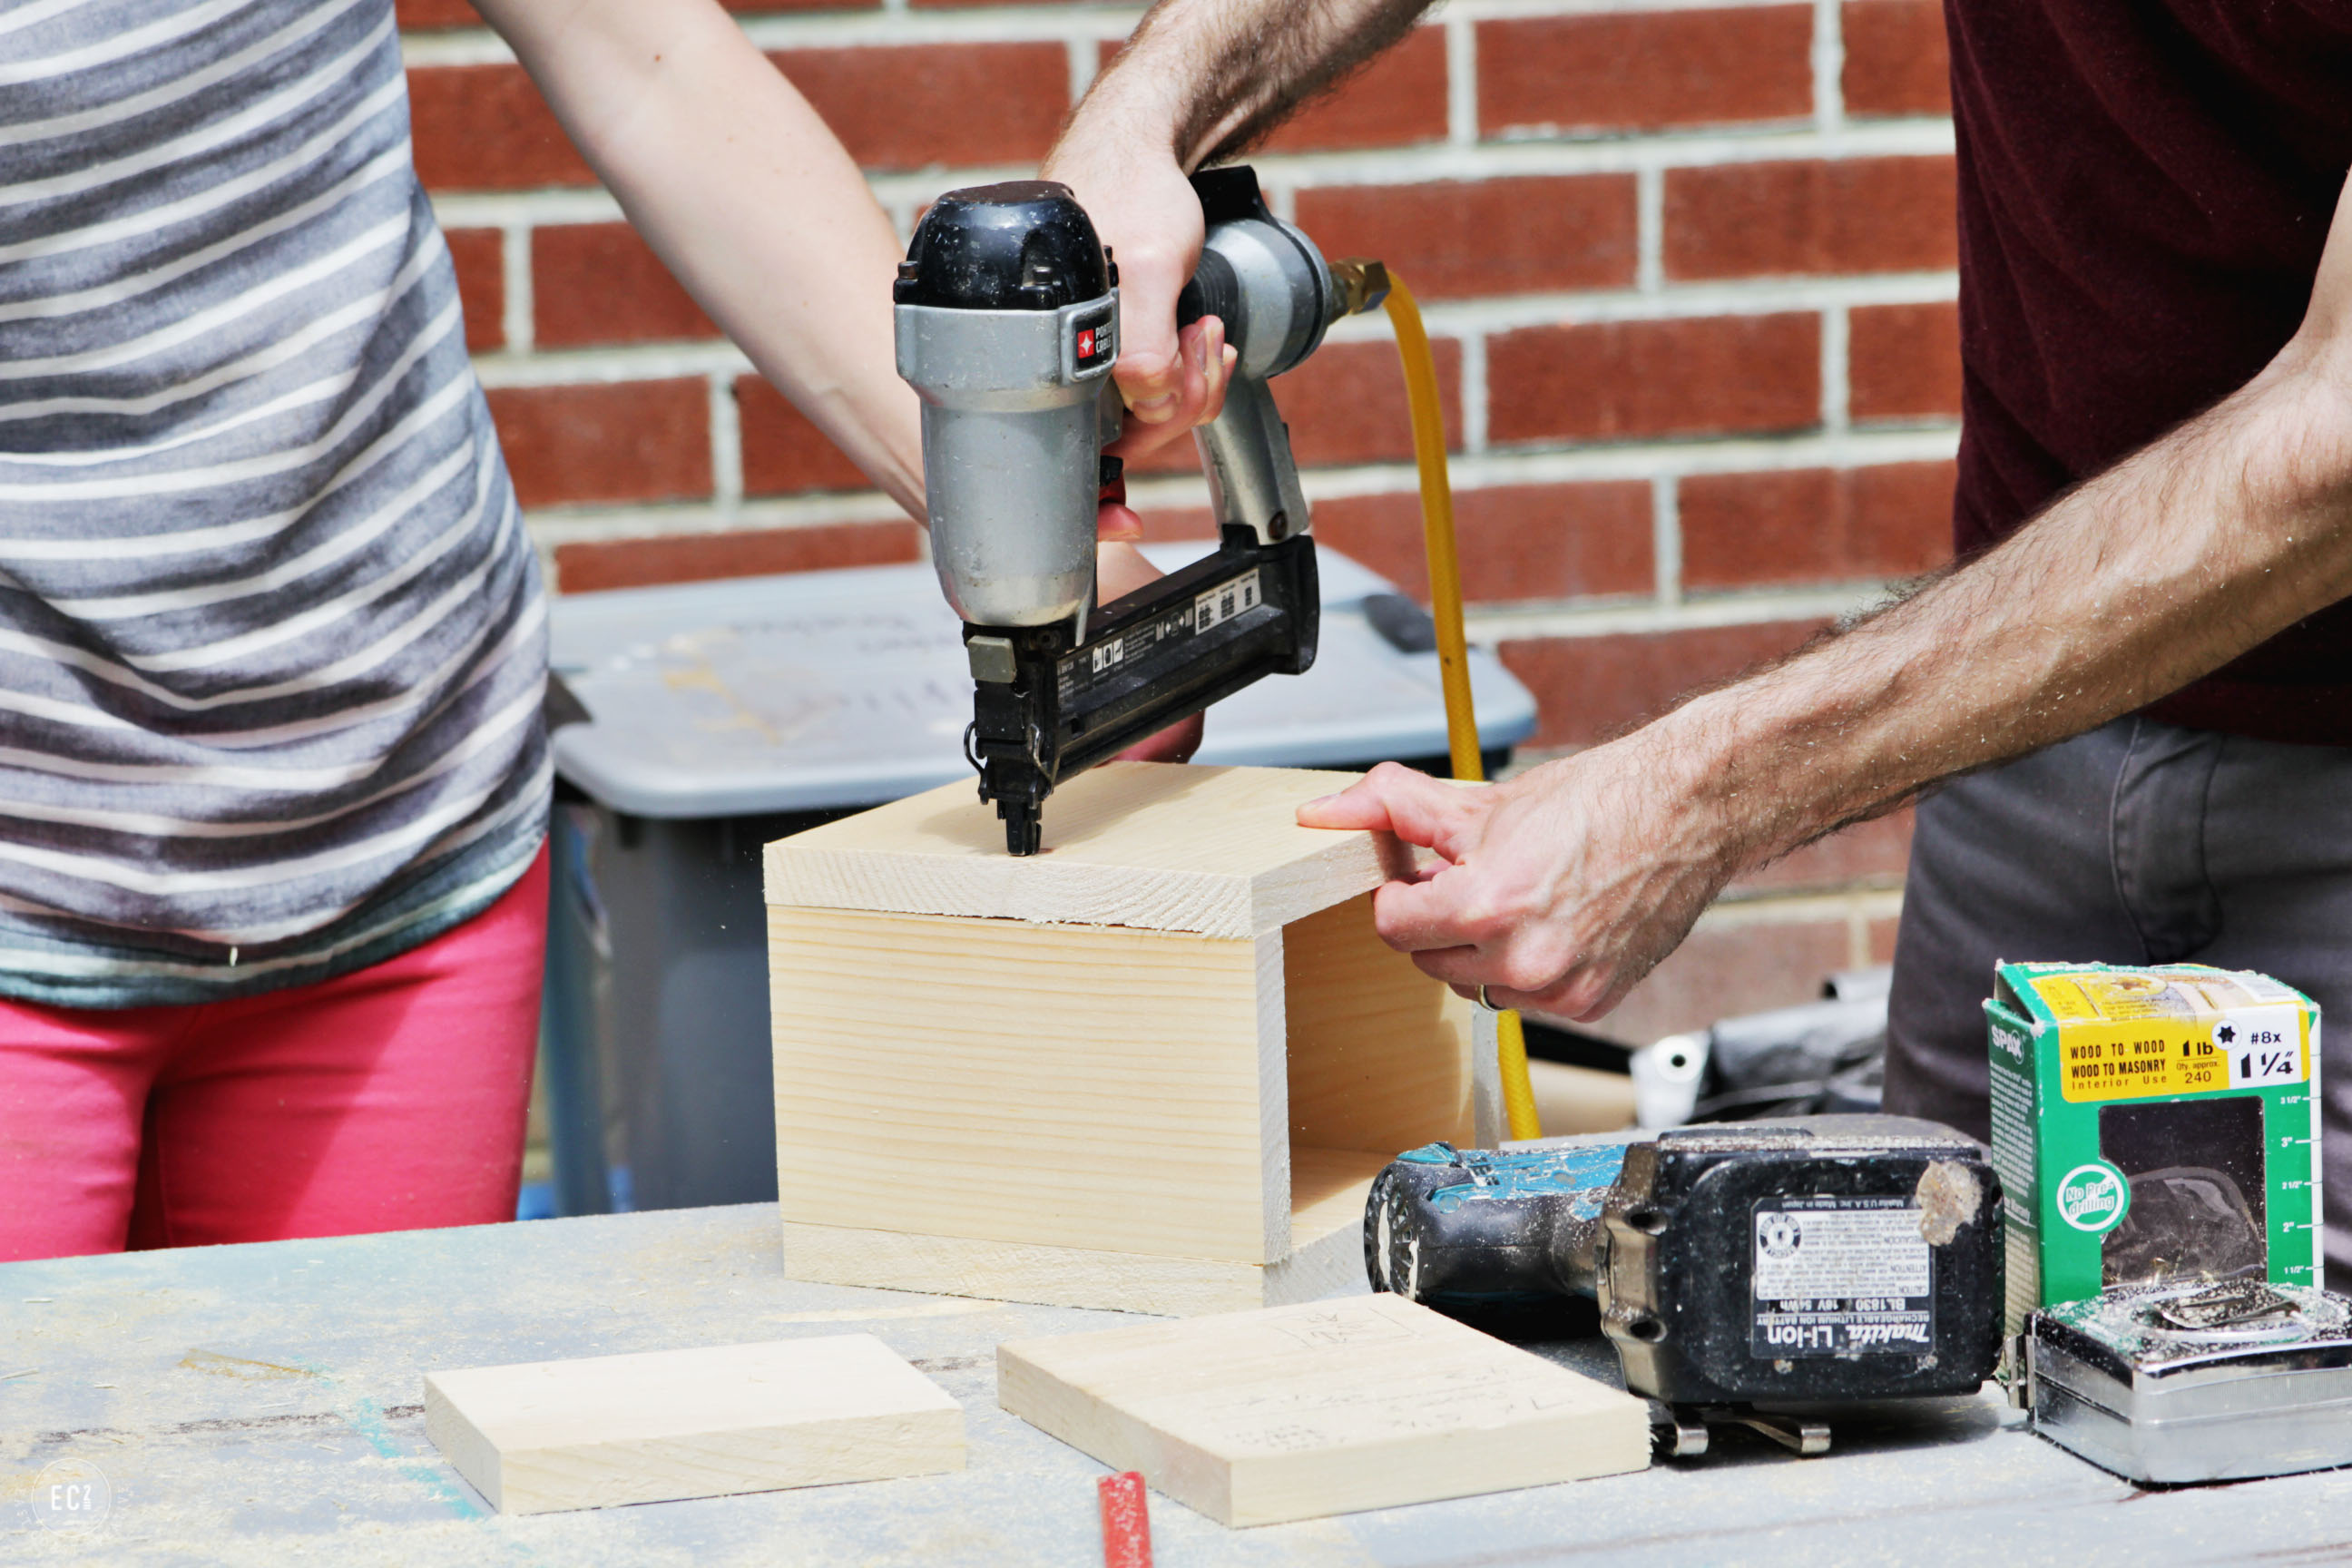
3- Once all your pieces are cut, it’s time to make individual planter boxes. I went into deeper detail on this process on my previous post about my mini wall planter, so you can get more info here, but basically you’re attaching each side with your nail gun, and then fitting in a bottom piece.
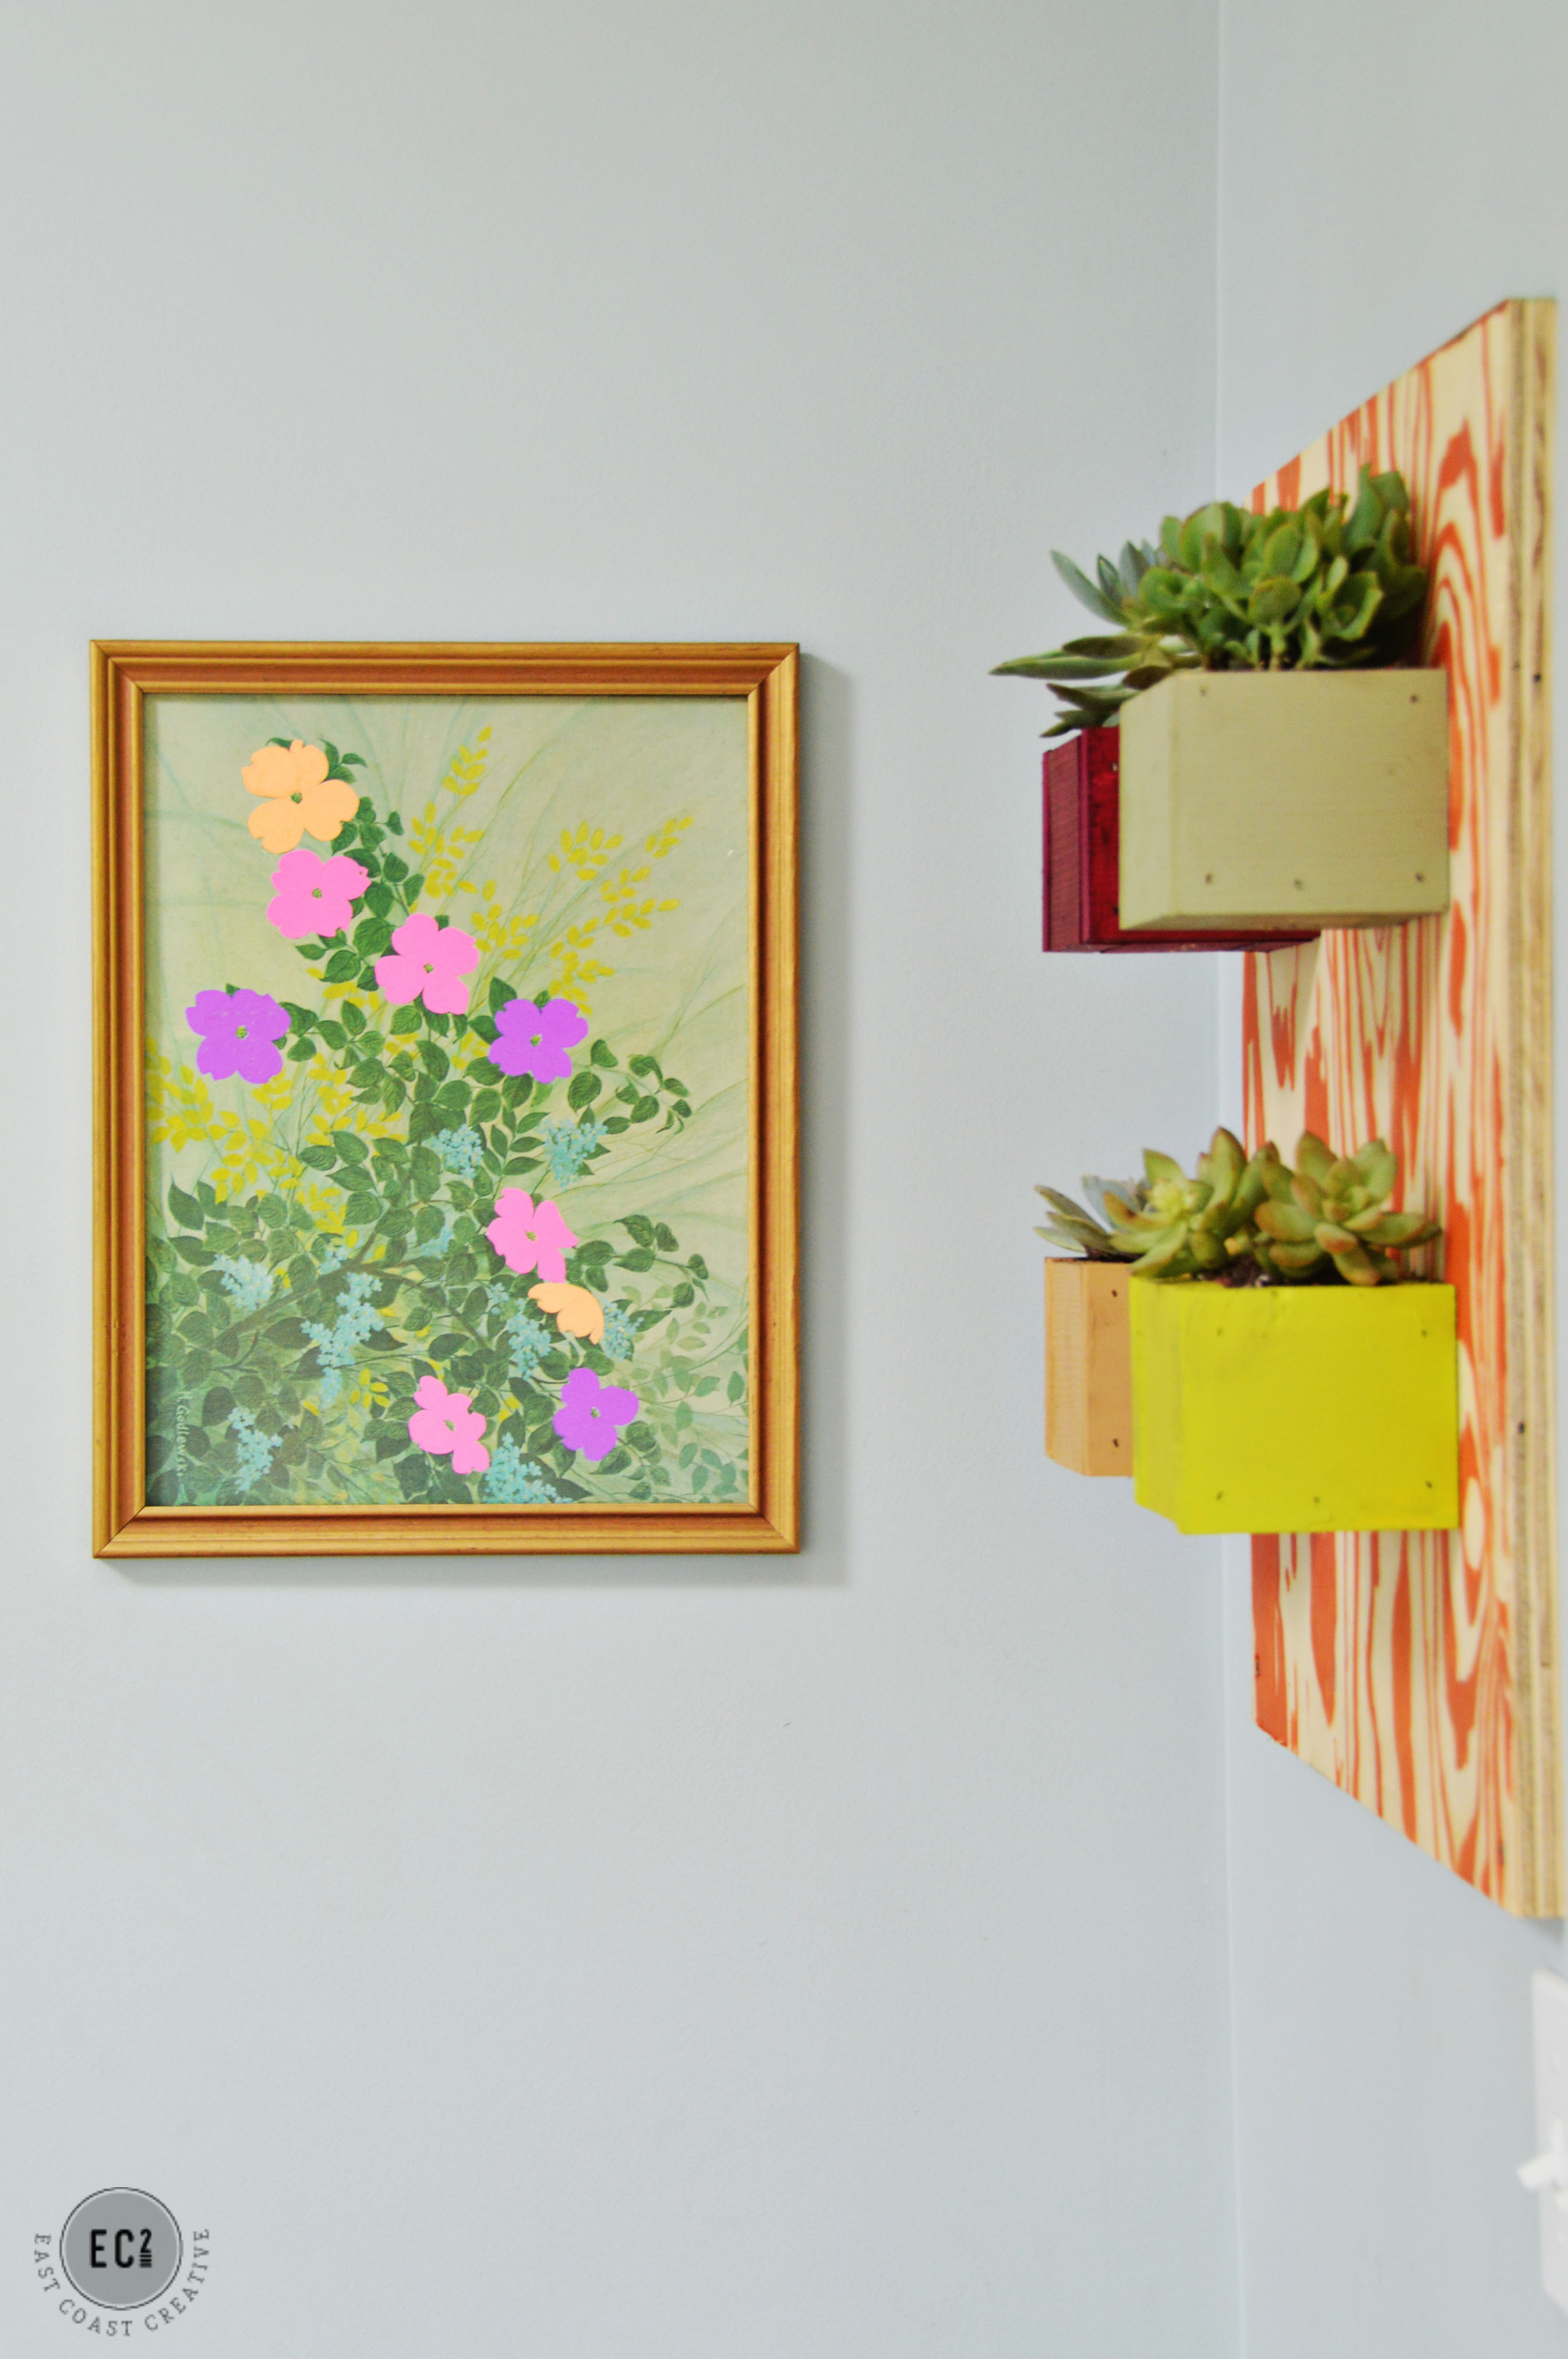
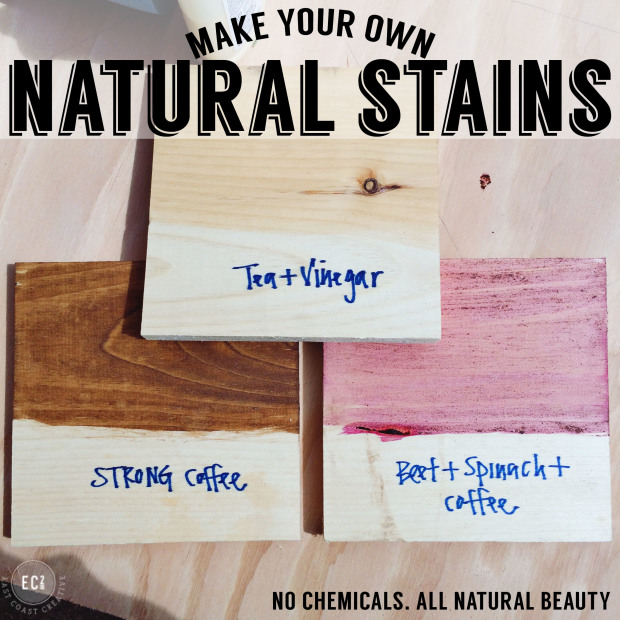
4- Once your cubes are made, stain the cubes and the plywood. Believe it or not, we used the SAME stain on both the plywood and pine boxes and just ended up with a crazy different result. We love the two-toned effect. We used a natural stain made from vinegar and steel wool and I’ll be sharing all of our natural stain recipes from this episode on Thursday this week. It’s amazing what colors you can create with kitchen items!! But any old store bought stain or stain combo would work fine too!
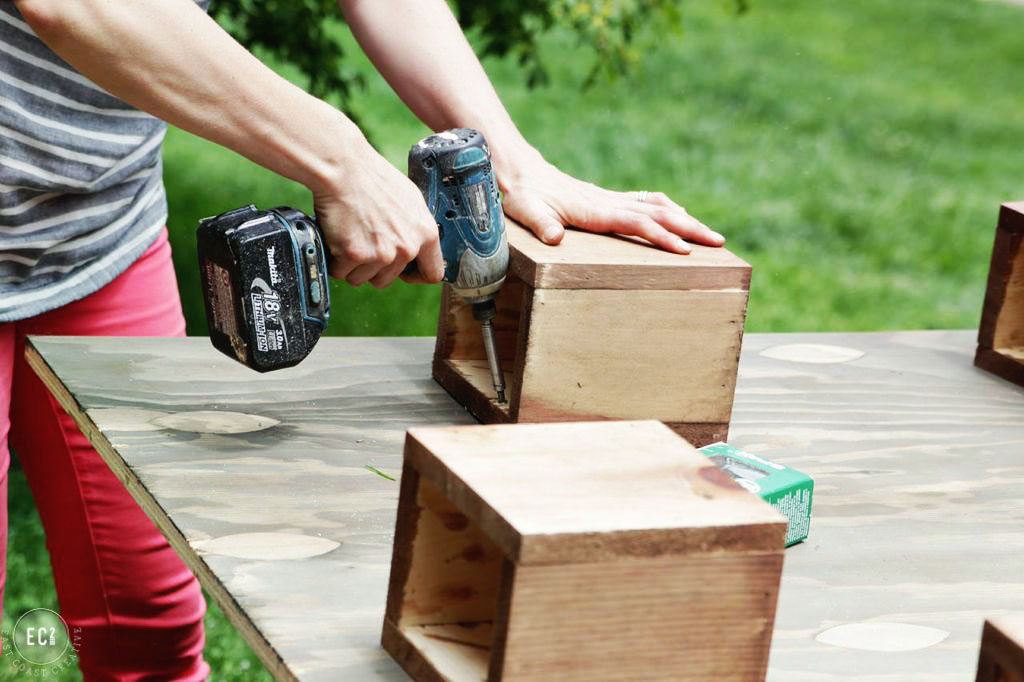
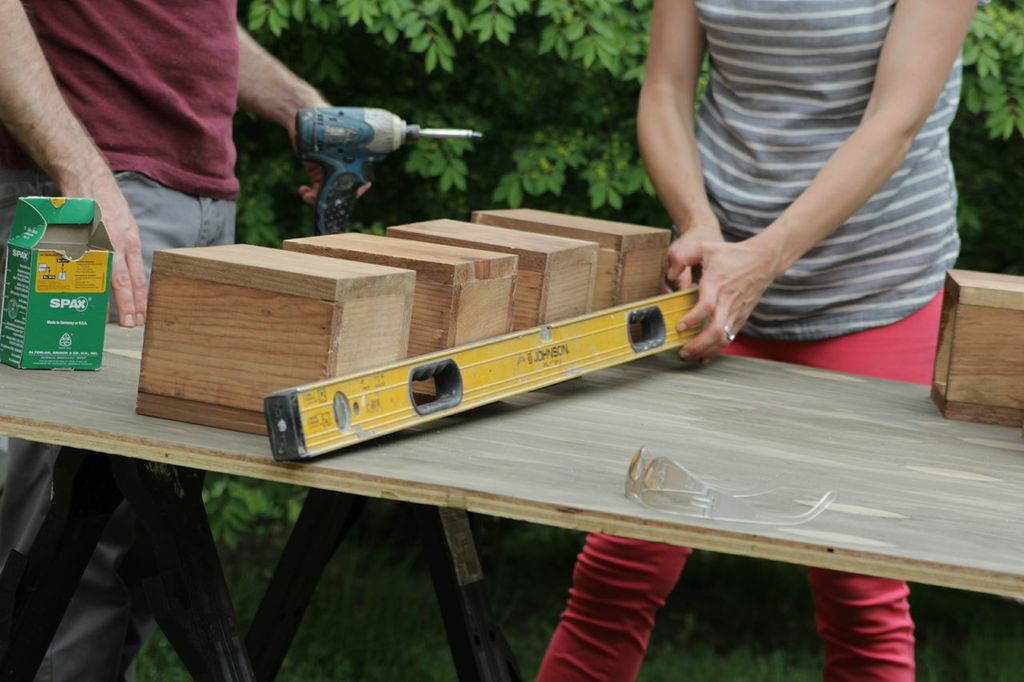
5- Attach the planter boxes to the plywood using screws. We attached them through the back of each cube and we made sure we had the right length screws, so they didn’t pop out through the back of the plywood.
If you want your planters in a grid like we did, be sure to use a level to keep things straight.
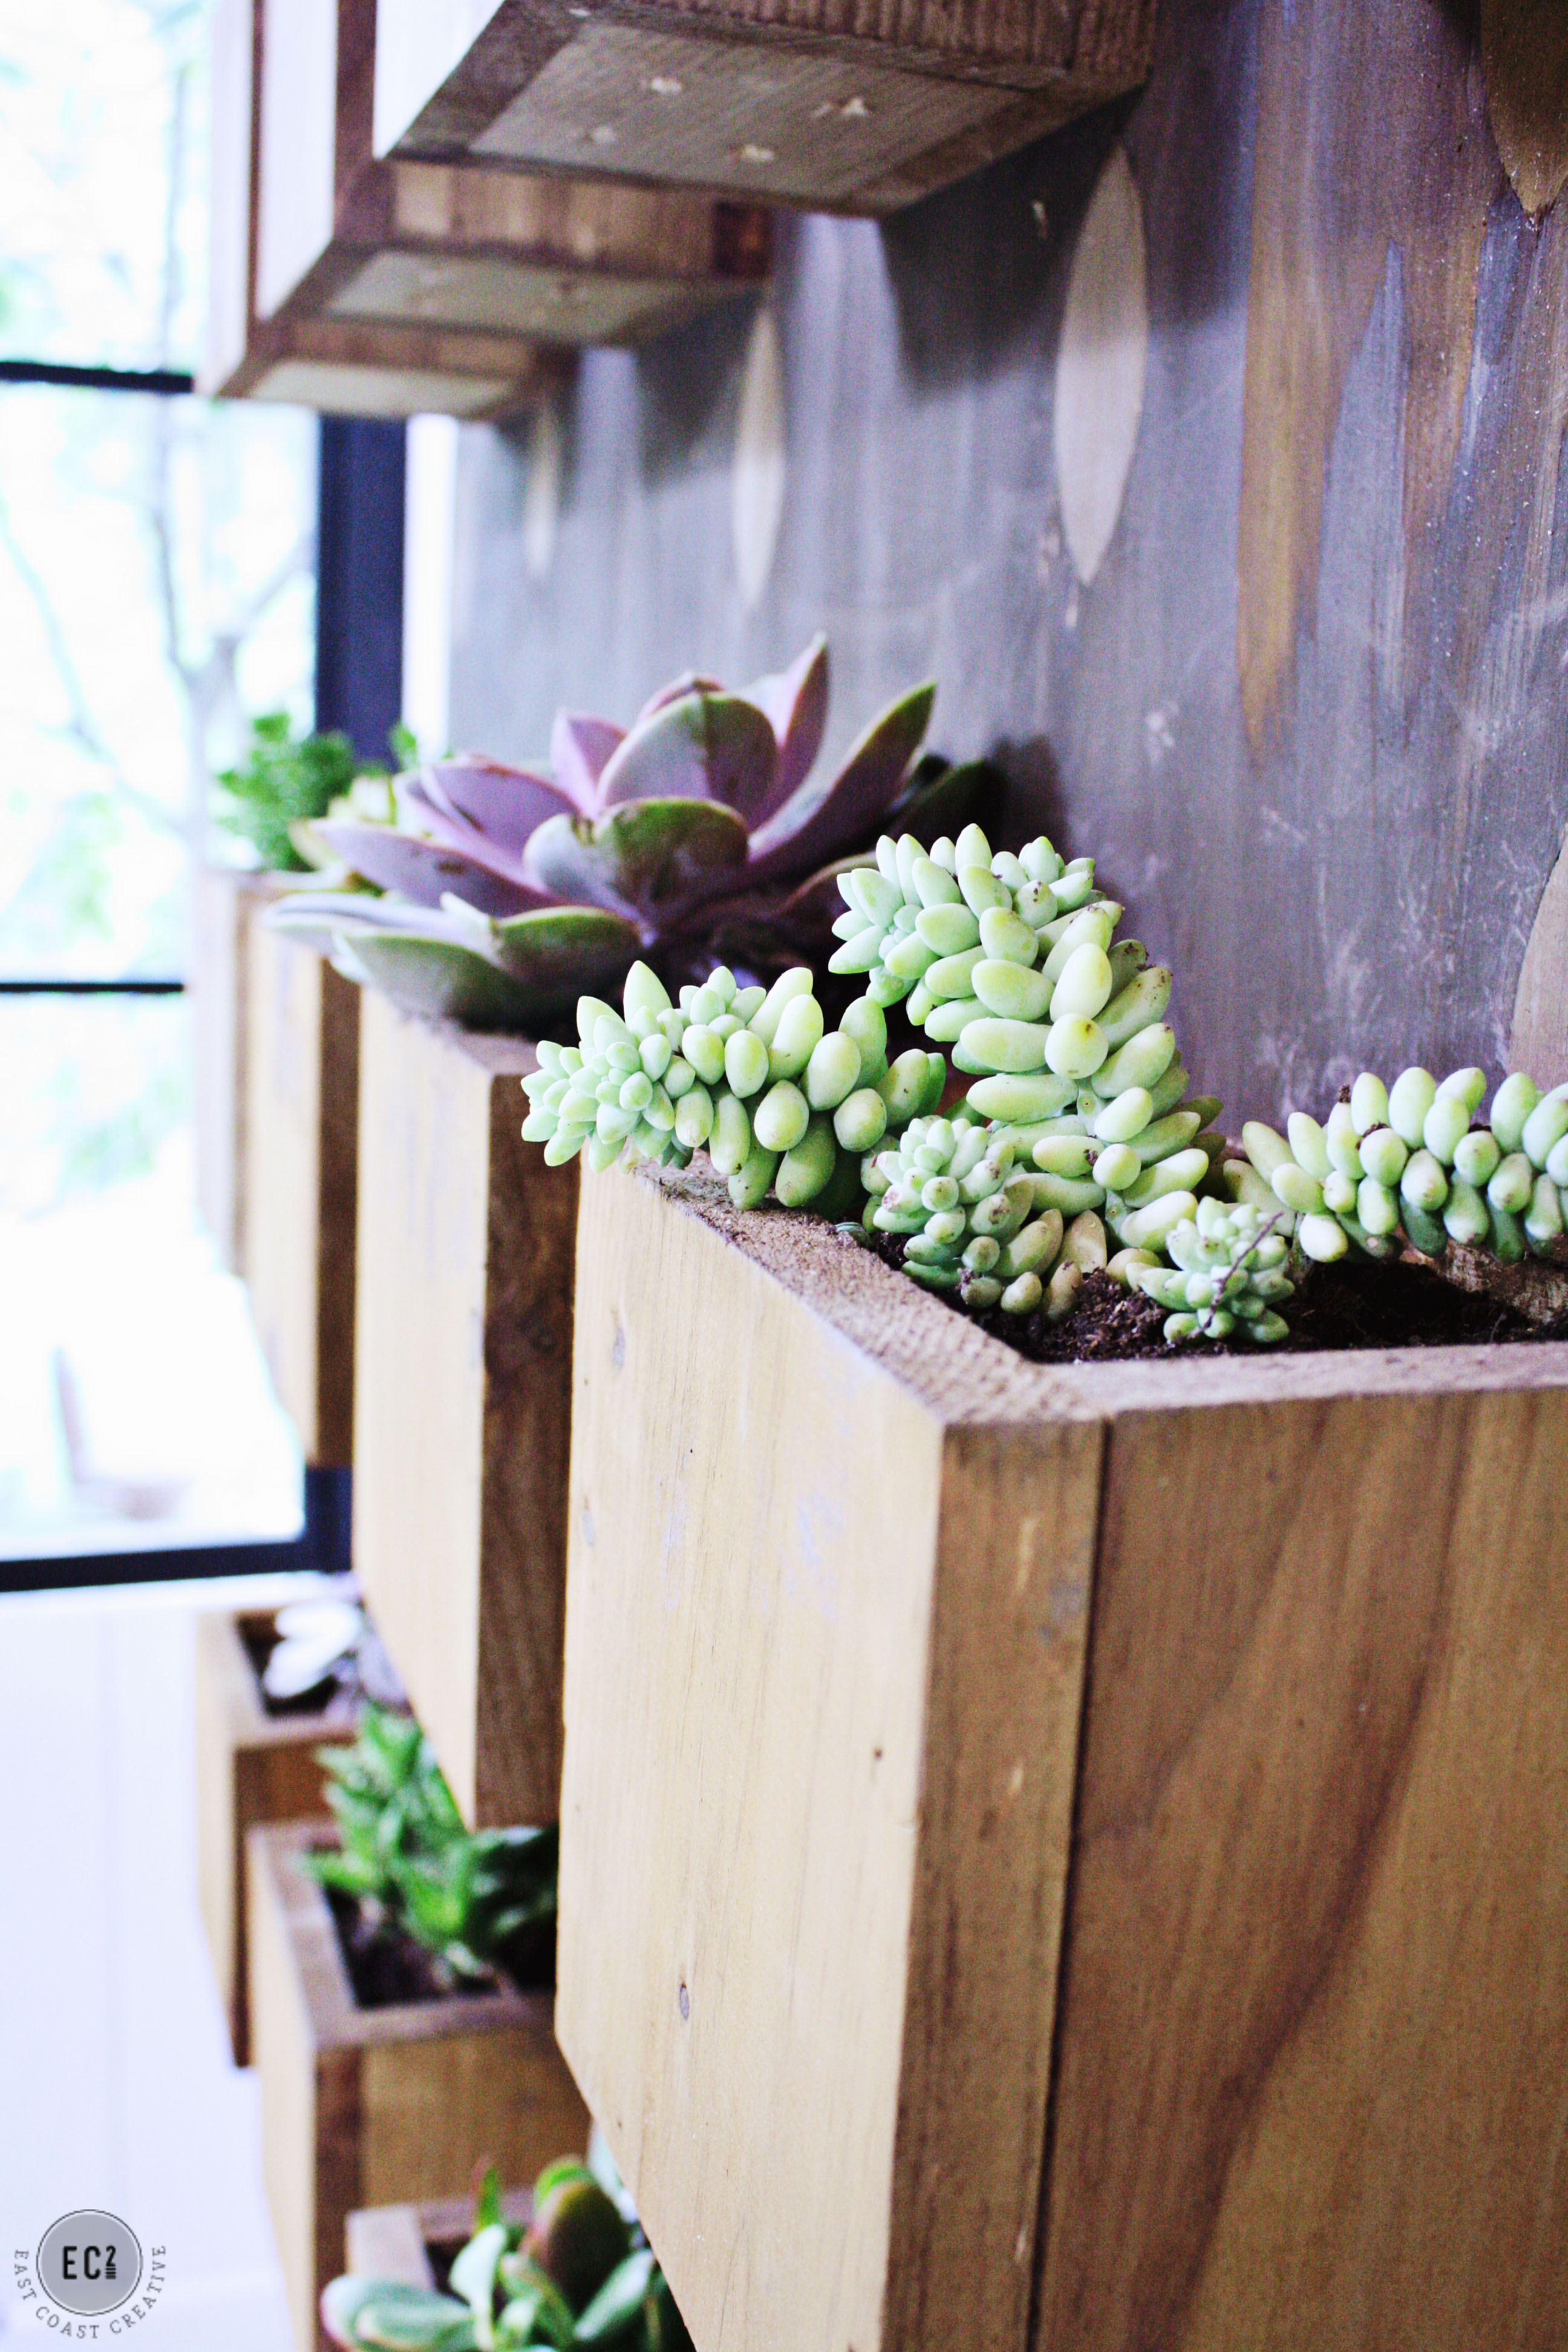
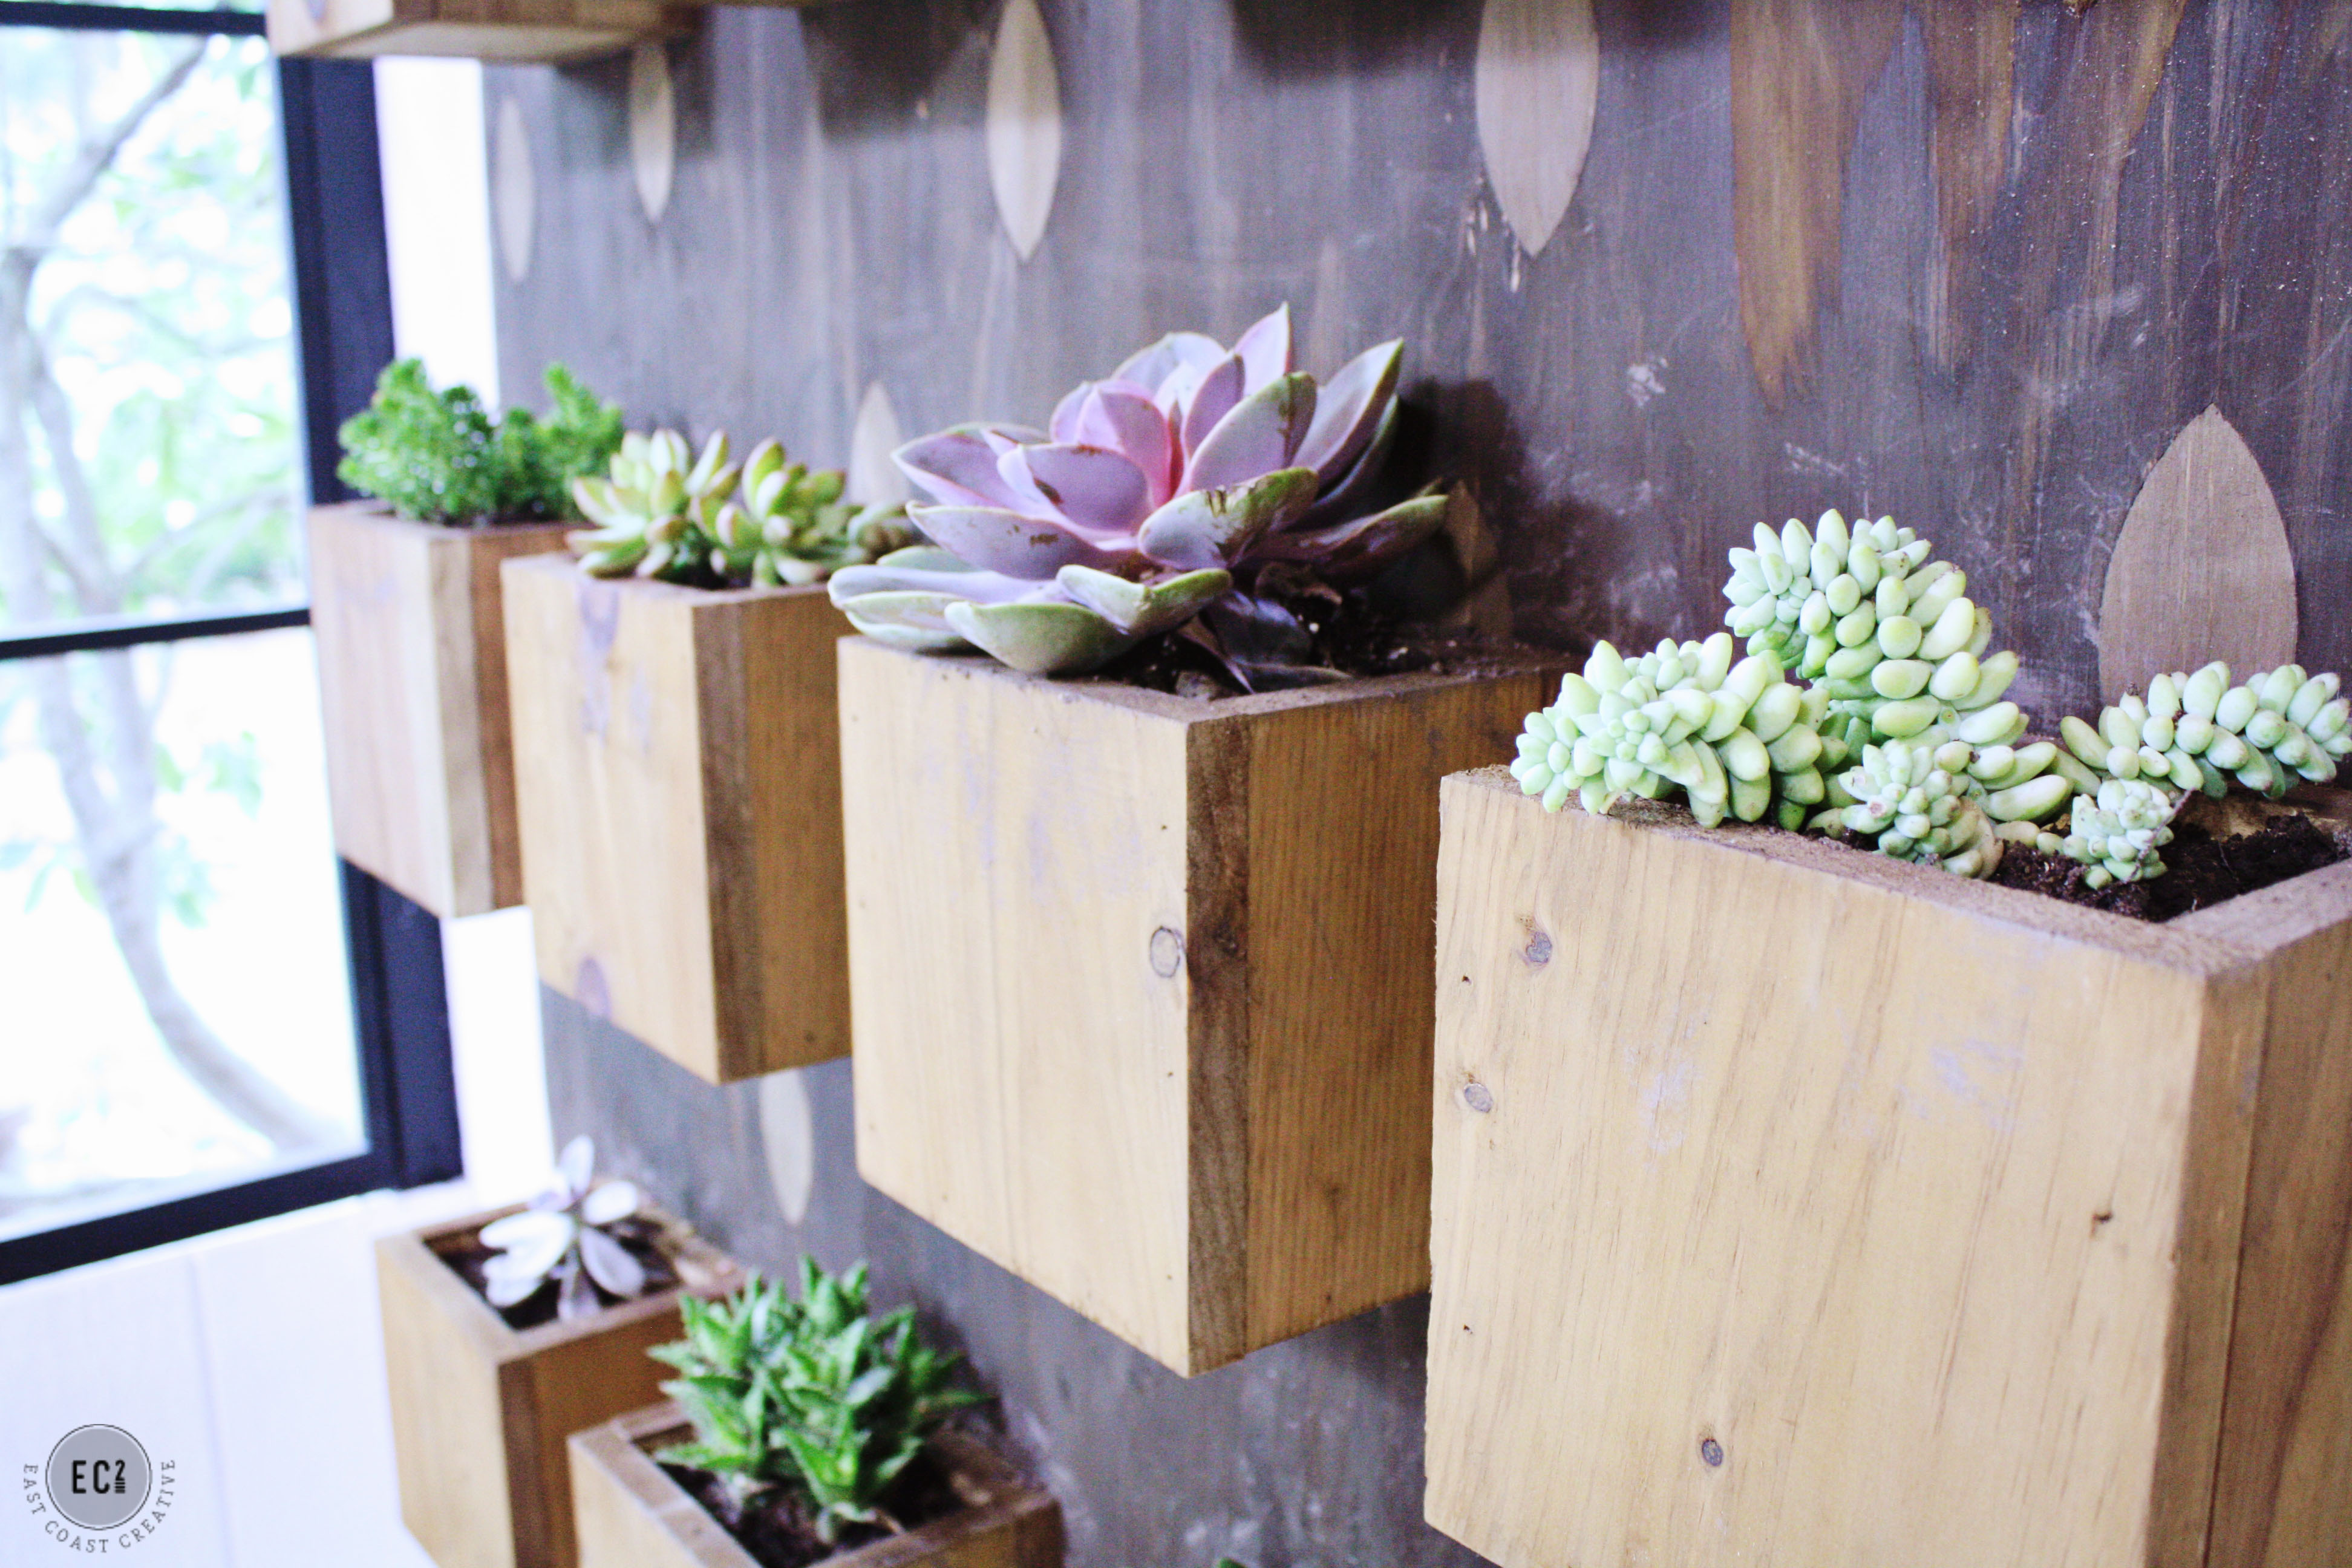
6- We didn’t take a picture of this step, but it’s an important one. We drilled 3 holes in the bottom of each planter so that we had adequate drainage for our plants. Once the holes are drilled you can do some planting. We used cactus soil and mixed it with some small stones as well. We’ve found this combo works the best to help us keep our succulents alive.
That’s it! It’s honestly such a simple project, but depending on how large you make it, can have a massive impact in a room!
I’m such a sucker for succulents- they’re so dang cool looking!
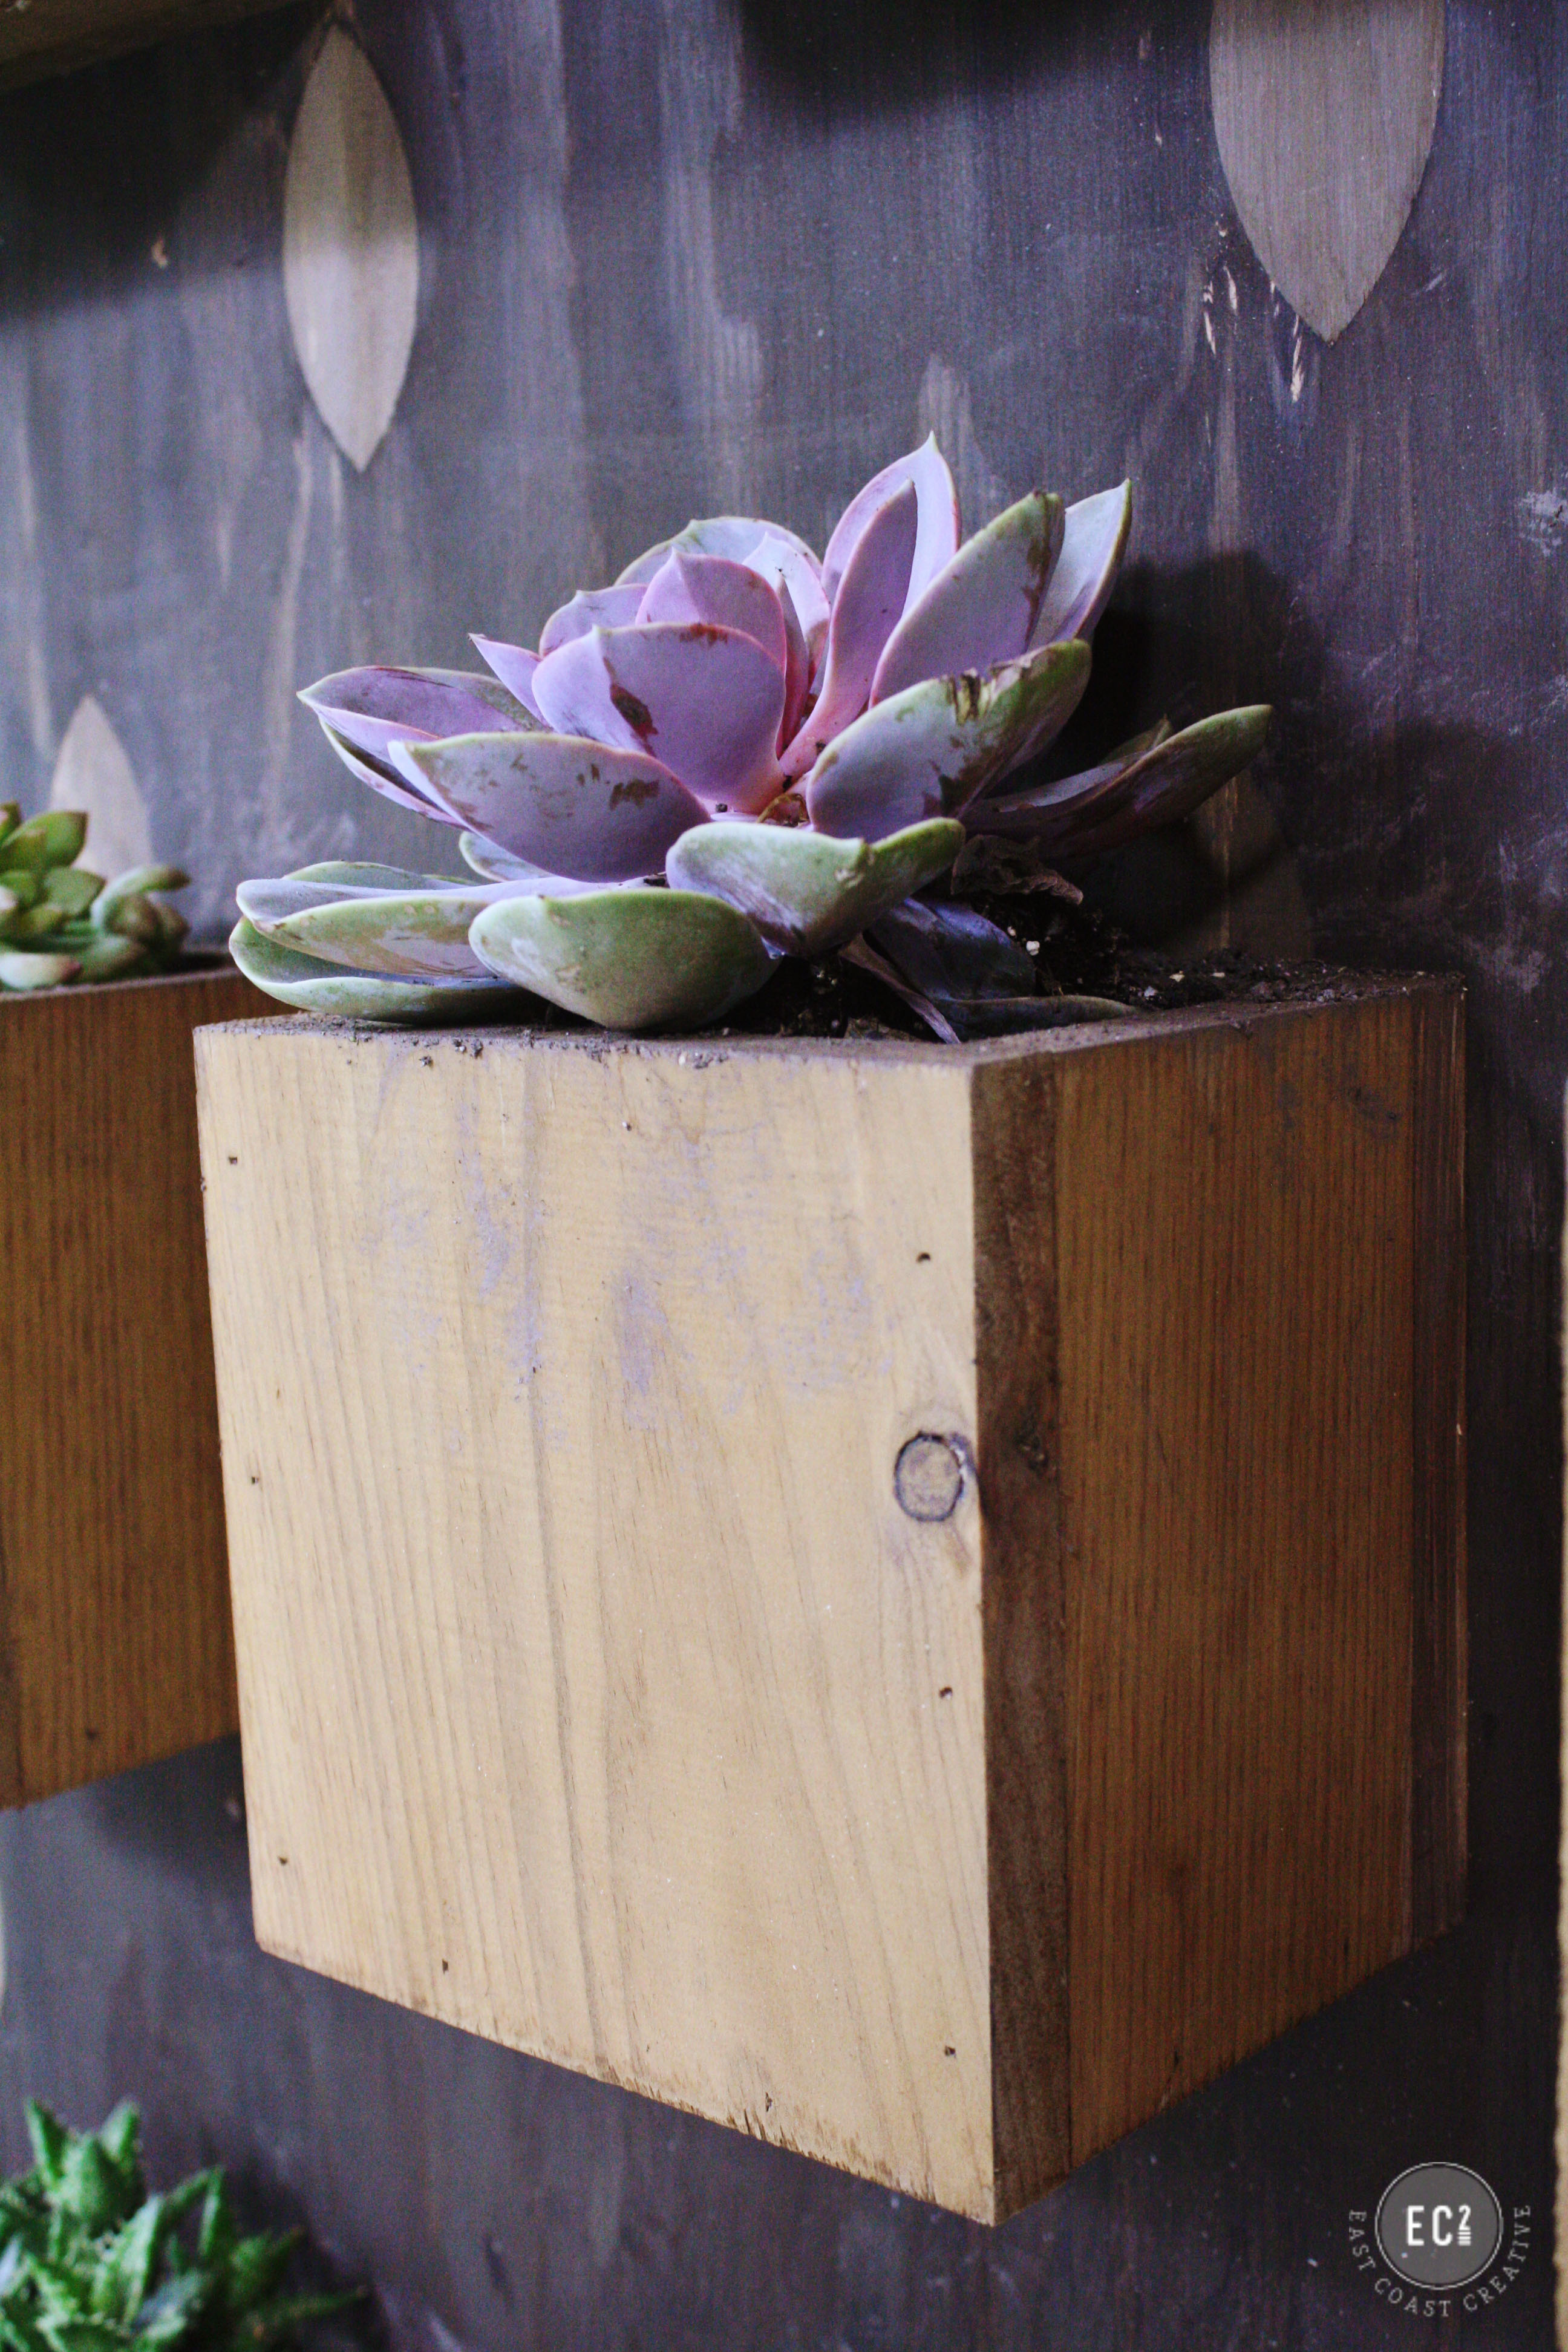
I love the contrast of the two wood tones…
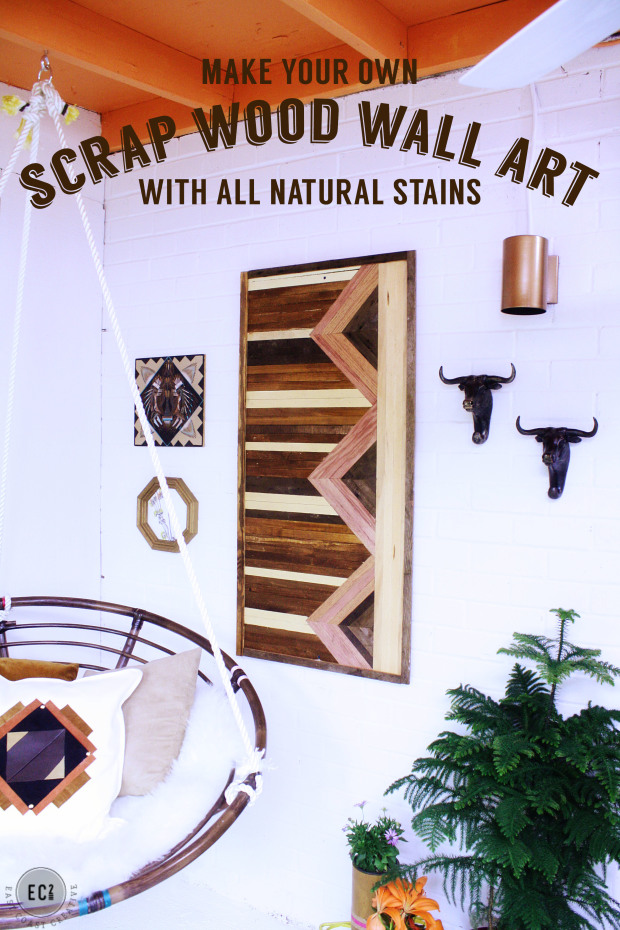
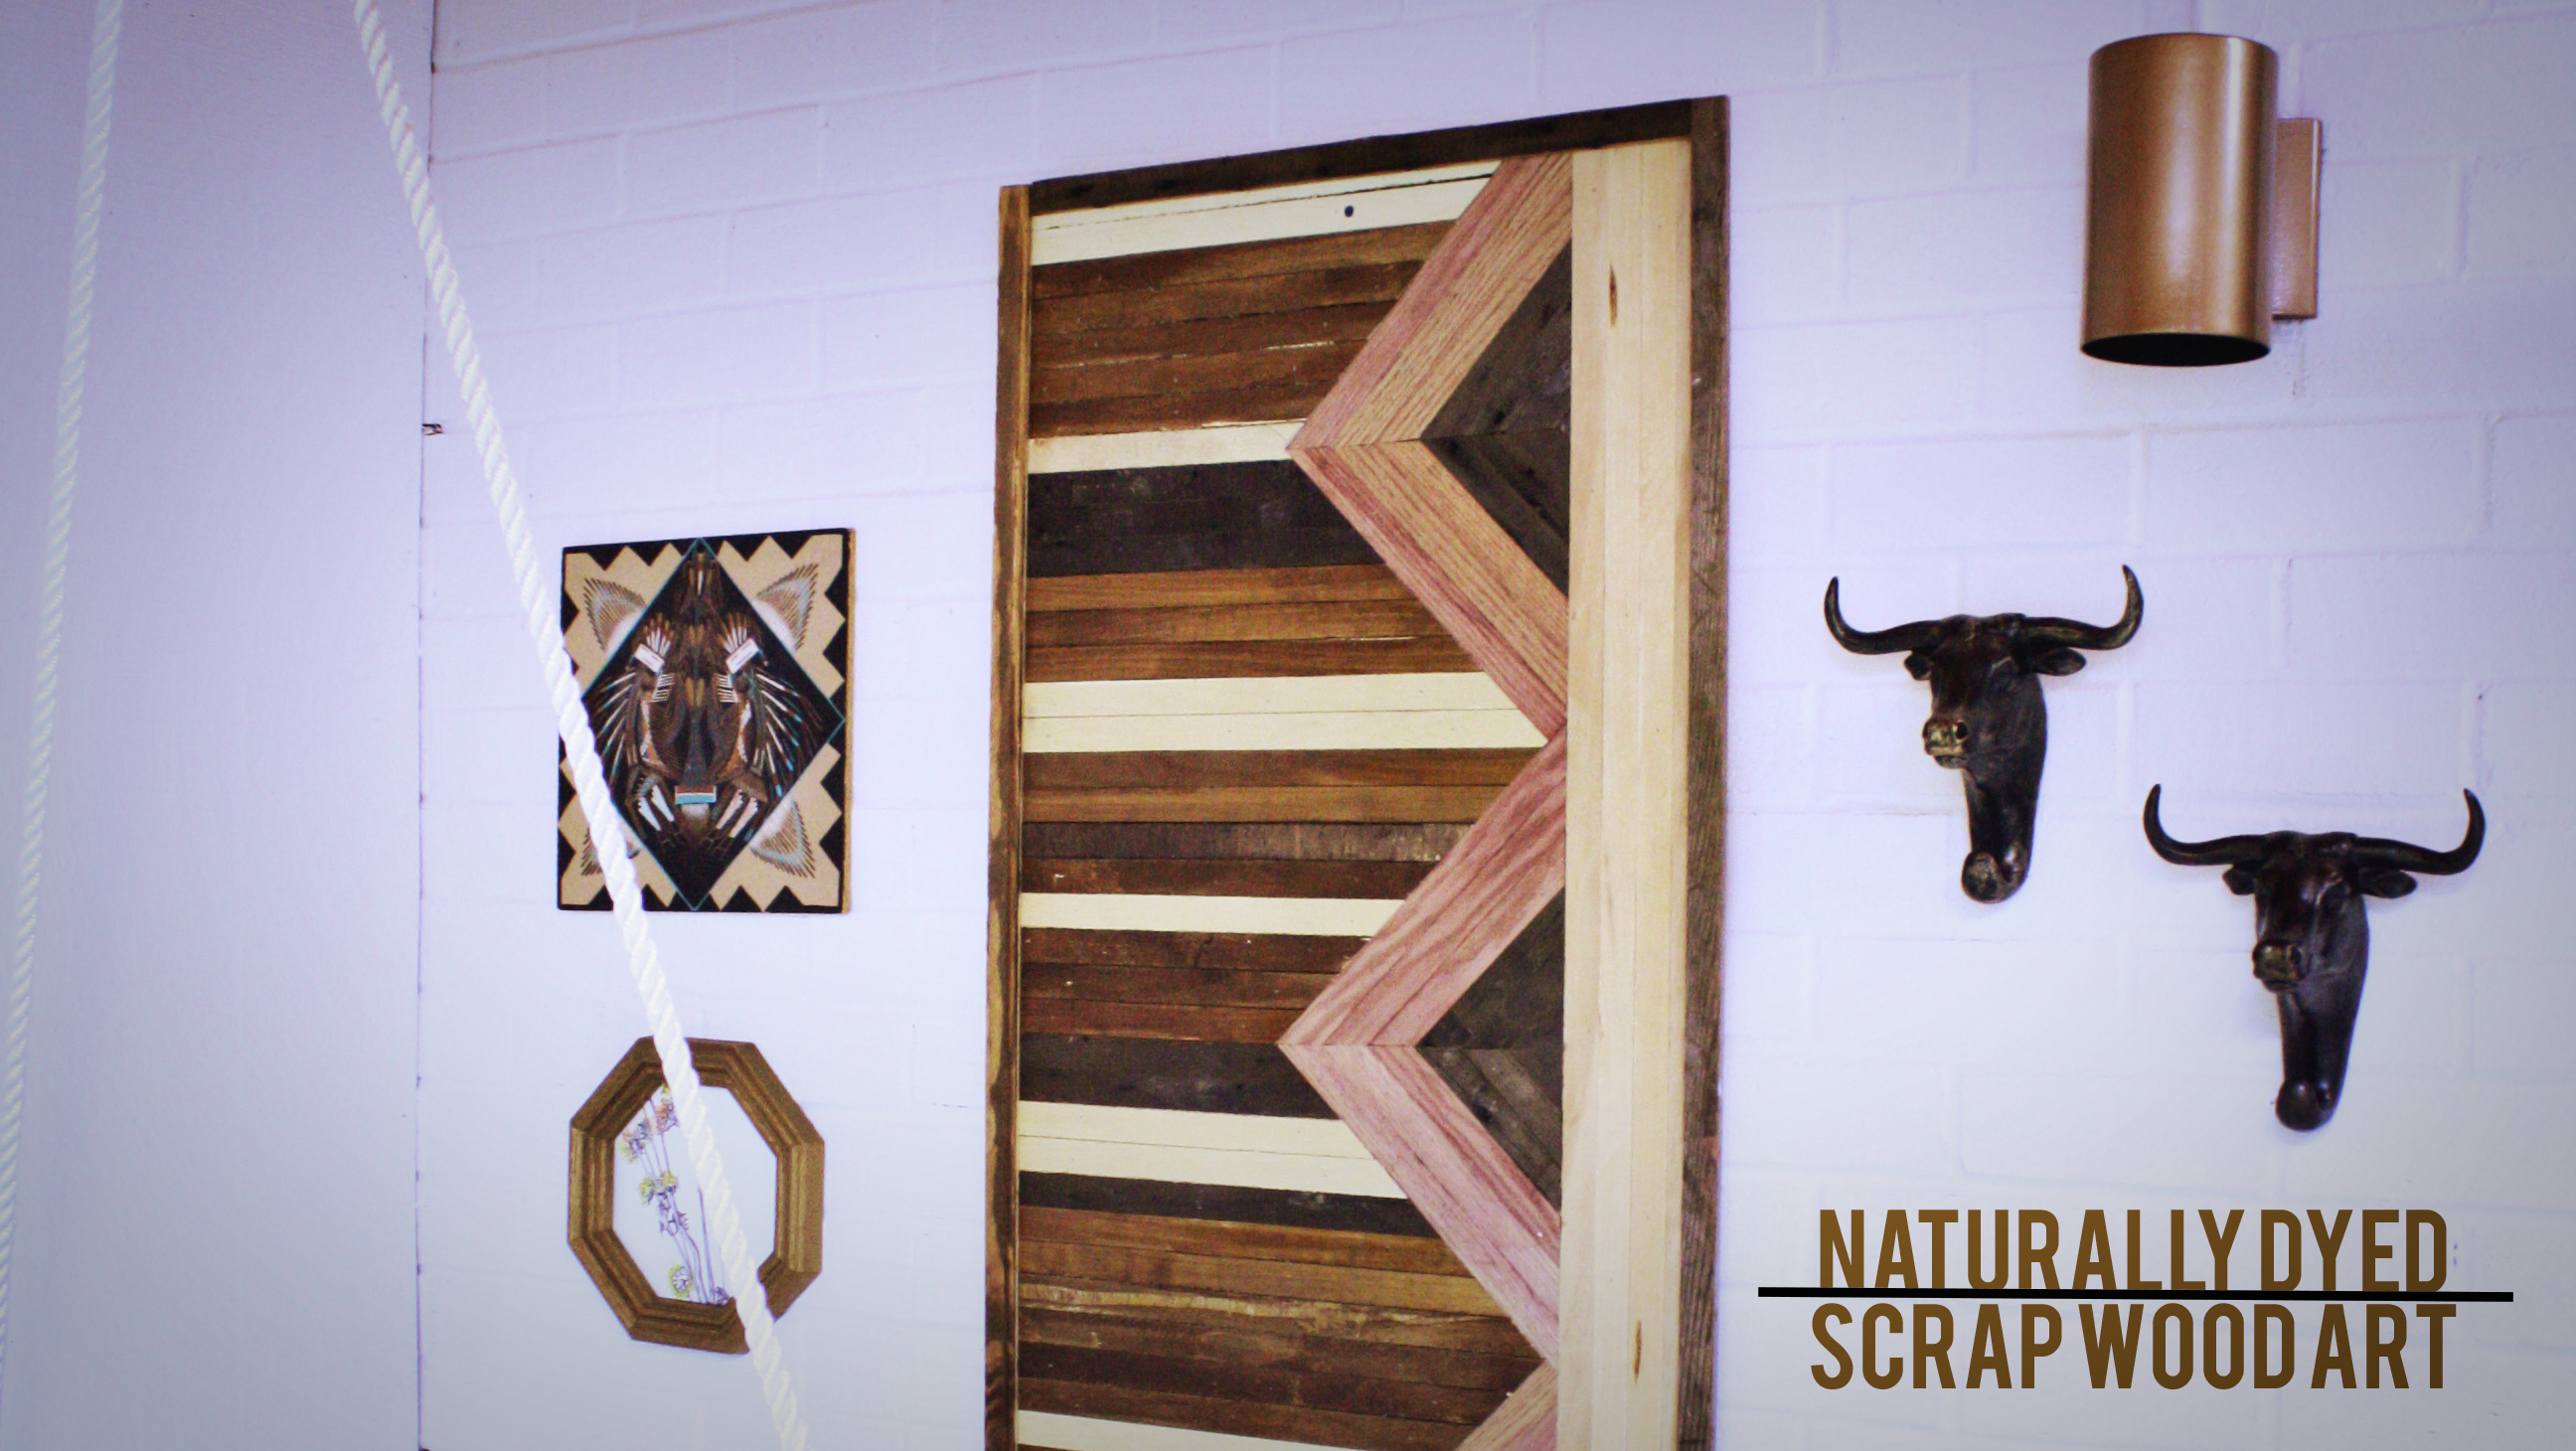
So there you have it. An epic project that doesn’t cost a lot, is easy to make, and could possibly rock your world! If you want to check out a more colorful, mini version of this project check out my scrap wood succulent planter project.
to get the natural stain recipes we used & read the tutorial for the scrap wood wall art we made for the sunroom!


3 things: 1) LOVE this garden wall 2) Are y’all not on Google +? I shared this post, but couldn’t find y’all! 3) Want to come makeover our bedroom, ha! We need professional help, ha!
Found y’all on Google + 🙂
Ha! Jamie you’re nuts! You don’t need a lick of help designing a room- the little man’s nursery is one of my favs!! And yes, we’re on G+ but I’m terrible and haven’t done much with it, my assistant is good about it, but I suck! 🙂 Are you headed to Haven? We’re missing again this year because of shooting an episode. Have fun if you go!!
How do you not have water dripping dow the wood after watering the plants?
How would you adapt the plant ‘wall’ to a patio wall. I live in an apartment and thought it might work well to do herbs in.??
[…] If you missed the other amazing DIY wall project in this sunroom, you can check out the Vertical Garden Wall tutorial here. […]
[…] Vertical Garden Wall […]
[…] Photo courtesy of East Coast Creative Blog […]
Like the other person comment, for the bottom row how do you water the plants and not have water all over your floor? Is this meant for outdoor use only?
[…] DIY Garden Wall – East Coast Creative […]
[…] East Coast Creative […]
[…] East Coast Creative […]
[…] EC2 shows off this beautiful garden wall idea that would be great in a hallway, breakfast nook or even inside a dining room that gets an abundance of natural lighting. […]
[…] EC2 […]
i absolutely love this! i want to put this above my bed in my room, but i want to make sure that the plants won’t leak water all over the place…how do you keep the water from dripping??
Hi Grace- If you fill the wells with faux succulents there’s no watering required! But if you fill in any gaps in the wood wells, you should be fine!
Amazing idea Monica!! Love this idea and will definitely be giving this a try. Thank you for sharing!
Nice architecture design of home..Architectural wall panels is also best technique for office design that are so creative.
[…] source […]
[…] eastcoastcreativeblog […]