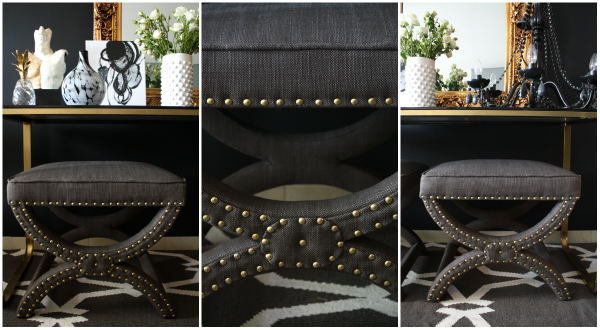
Okay, we’ve got another great tutorial for you today from Round 1 of CTWS- Black Rooster X-Bench Knock Off made by the fabulous Jacqui of Brooke Eva. (If you missed the sliding door console table that took first place, you can find it here!) I bet you didn’t know that Jacqui is competing in this contest all the way from Dubai. Isn’t that the coolest? She also has major design chops, has traveled all over the world and has a super cool blog (which you should definitely check out!) Not bad, eh? We were honestly flabbergasted when we saw these benches- the attention to detail, the charcoal fabric and gold nailheads blew us away. We’re sure you’re dying to read how she did it, so without further ado, here we go!
—————————————————————————————————————————————————————————-
I was so pleased week one was Knock off week, it had my name written all over it! I’ve been eyeing the x-bench stool available from online décor shop Black Rooster for a while but at $720 it’s a far cry from my budget and the perfect piece to knock-off!
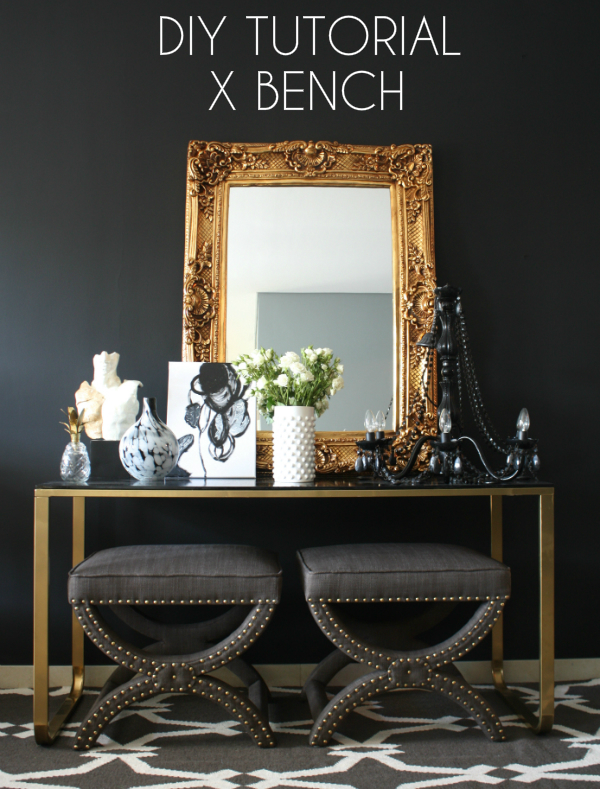
If you are somewhat shy the $720 you would need to purchase this x-bench here’s how to recreate this high end beauty at a third of the price:
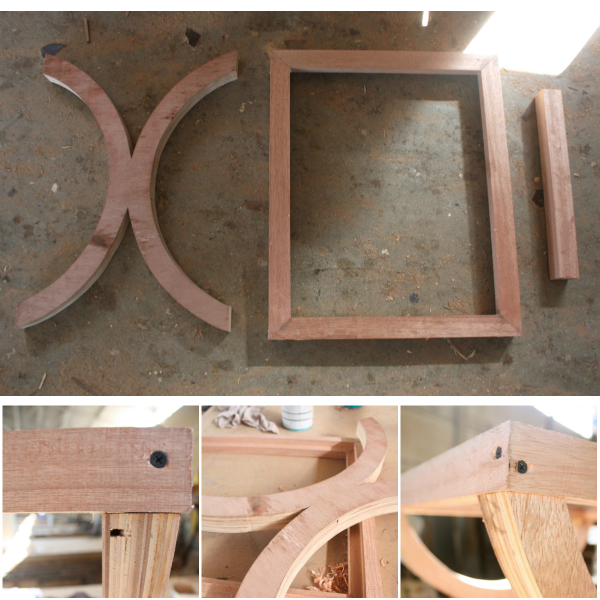
Step one: Wood
Buying inexpensive wood and cutting it to the specifications
- Dimensions: 23″L x 19″W x 21″H
- The legs were cut in one piece in the X shape – this is the only tricky part to the cutting.
- The base is a frame with chip board attached
- I attached the two side pieces of the legs once the whole frame was screwed together, using screws. However, a tip would be to not attach the them at all until the upholstery is complete because I had to remove them to cover them in foam and fabric and re-attach them.
Step two: Foam
Cut the foam for the seat of the stool and attach it to the base board with glue. The entire stool needs to be covered in foam. Use a thinner foam than the one you used for the base seat. I simply measured the width of the legs, and cut out multiple strips of foam and then sprayed the strips with glue and attached to the legs. This step is surprisingly simple and easy to do.

Step 3: Make a pattern for the legs.
I used lining material and chalk to trace the leg shape and then cut out the X shape pattern. I then used that pattern to cut out (8) X shaped cut outs with the my fabric.
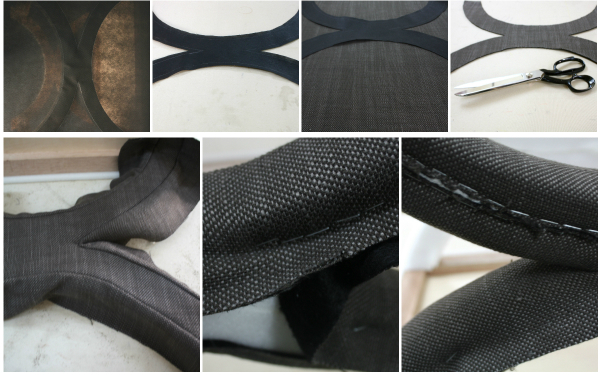
Sew two X pieces together. Attach the piece you have sewed together to the leg with a staple gun, keeping the fabric taut.
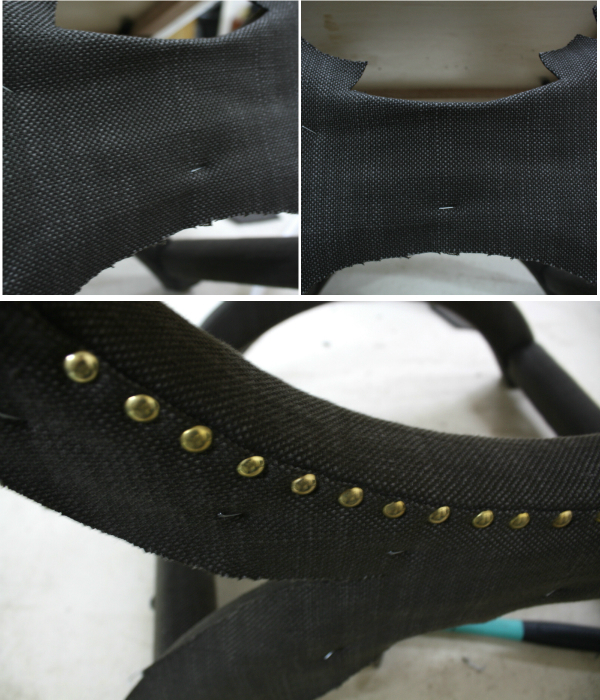
Once the piece is attached to the leg you will need to trim away the excess fabric, cutting as close as you can to the staple so that the will be no lumps when you attached your final piece. To complete the legs, take a single X piece of fabric and loosely staple it to the outside of the leg, this is simply to hold it in place whilst you attach it using the nail heads.
Cut slits in the fabric so that you can easily fold section by section in and secure with the nail head.
Remove the loose staples that were used initially.
A tip – in order to slide the side bars into the fabric that has been sewn to cover them cover the bars in plastic cling film so that they slide into the fabric easily. This was a life saver! I had to re-do the foam on the side bars twice before coming across that nugget of helpful information!
Step 4: Covering the Seat
Sew the base seat cover attaching it to the four pieces which will cover the four sides of the seat area.
Once you have sewed the seat cover make sure to pull it securely over the base and begin stapling it to the under side of the base board.
Use a piece of lining once that is compete to cover the area where you have stapled for a neat and professional underside.
Thank you all so much for voting for this project and bringing it in at second place. Do stay tuned for next week’s project Paint!
—————————————————————————————————————————————————————————-
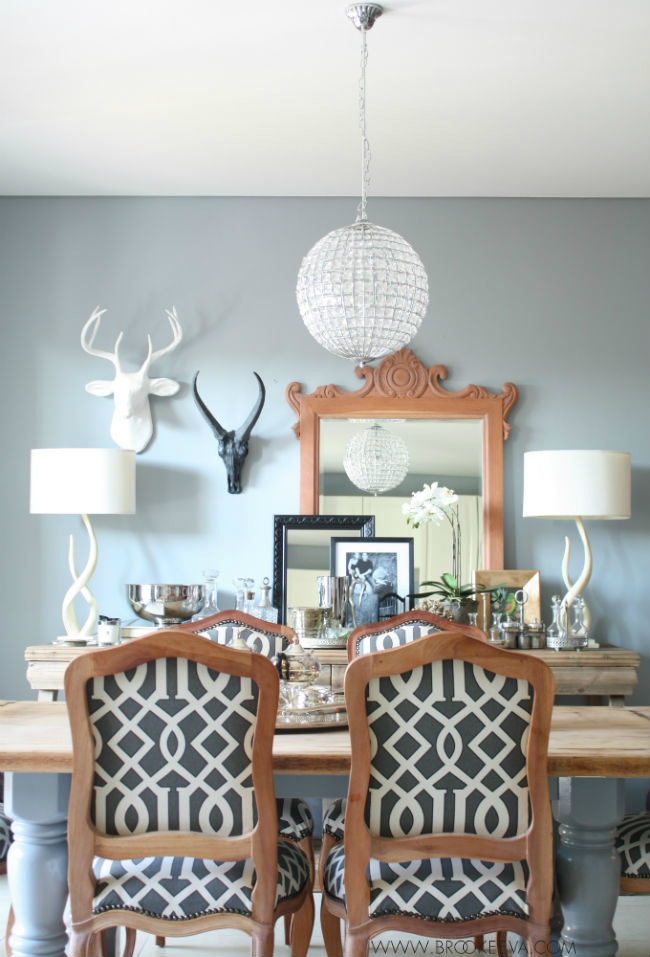
Isn’t that impressive? Jacqui has incredible style….I got lost in her blog just looking at pictures of her home. Gorgeous! Check out this
dining room….
We’ve got the full tutorial for the Nelson Bench from Becki and Chris tomorrow, so come on back for more DIY goodness. And have you entered the Apple Dream Vacation giveaway today? Do it! You won’t regret it when you’re sitting on a hot beach with a nice cold drink in your hand. 😉
a Rafflecopter giveaway


I’m blown away with how professional these look! I kept looking at her picture in the voting round thinking it was the picture of the real deal and she must have forgotten to post her picture somehow. ha! Her styling is impeccable as well.
If I were a Teenage Mutant Ninja Turtle, now I’d say “Kgubawnoa, dude!”
All I have to say is WOW!
I’d love to hear some more specifics about how the frame was assembled – I’ve never found it intuitive with X benches! Specifically how those side X pieces and the bottom supports were attached. Any chance of getting an addendum??
[…] missed our 2nd and first place knock off projects you are going to want to check them out here and here! Becki and Chris are coming to us from Canada, hey! She is a freelance graphic designer and […]
[…] an amazing week of Knock Off projects from Creating with the Stars (check out the top three here, here, and here), and now we have one more for you from the link up party! We’re so grateful for […]
[…] These pretty X benches come to us all the way from Dubai, check out the tutorial that Jacqui put together for us here. […]