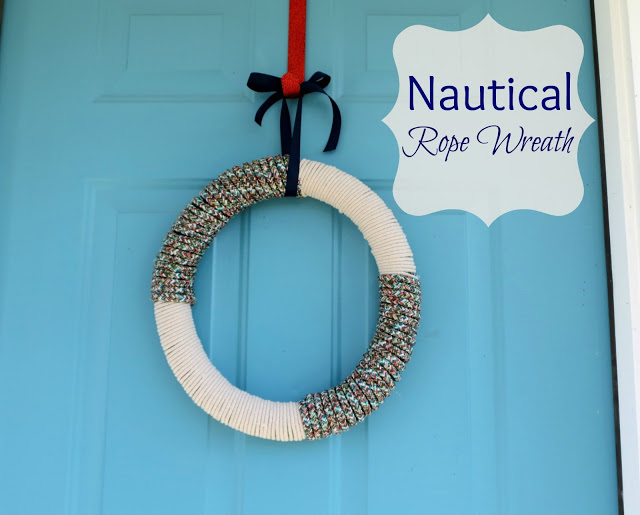

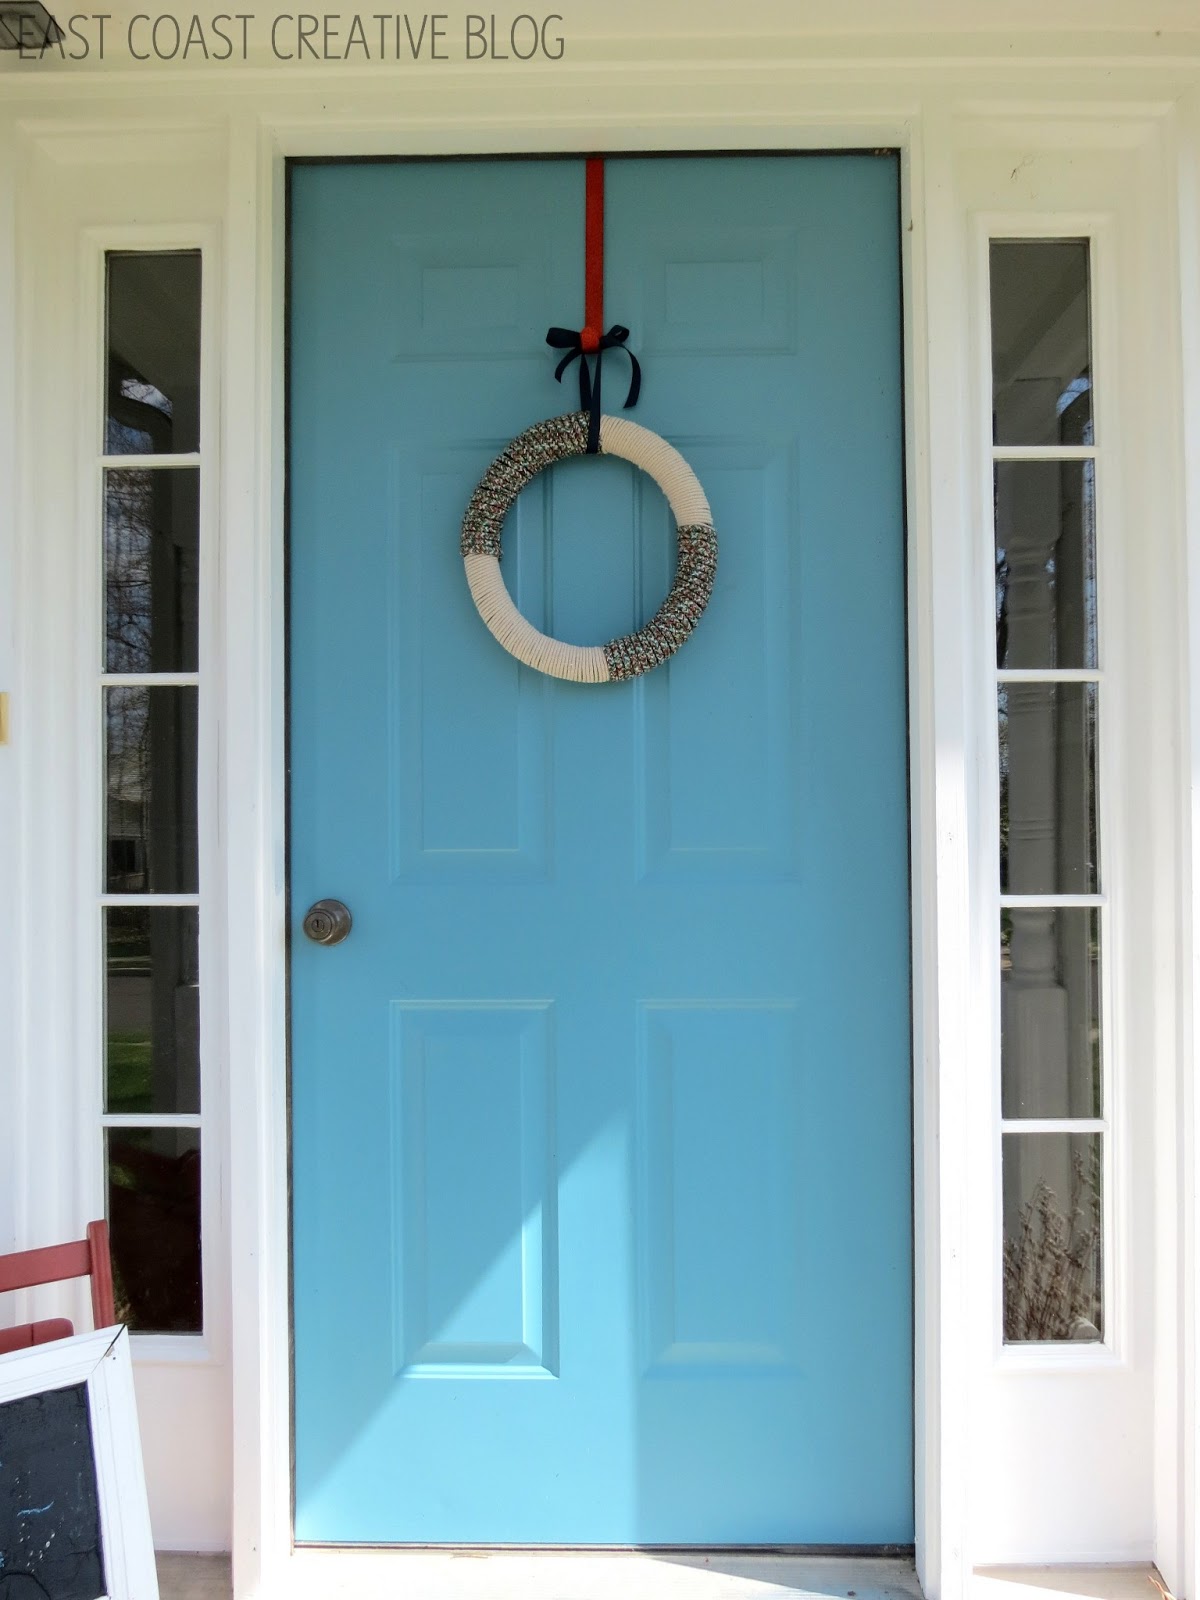
Yesterday I showed you my summer porch makeover that included this cute rope wreath. I love wreaths of all kinds (even anti-wreaths). It’s the first thing your guests will see when then enter your home, so it’s the perfect opportunity to make an impression! You don’t have to pay big bucks for a gorgeous wreath, either. I made this one for right around $10!

Isn’t that super cute? Perfect for summer!
Here’s what you’ll need to make your own:
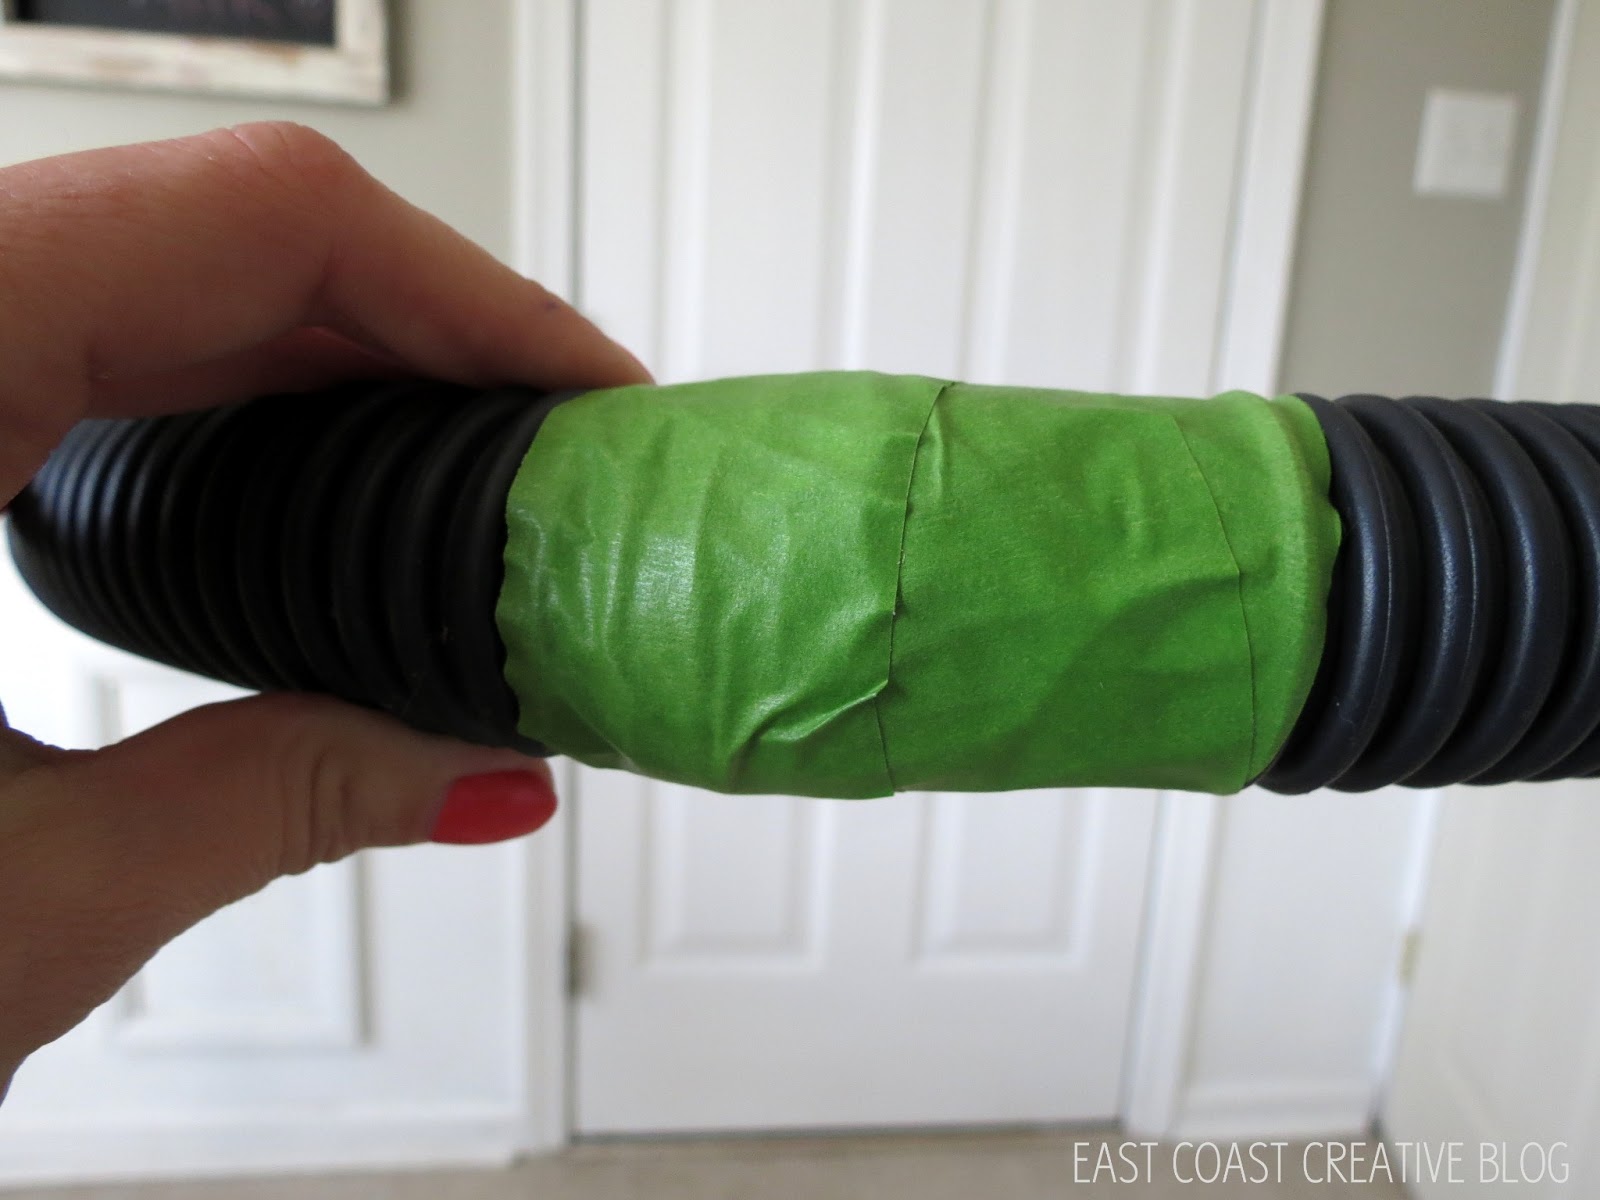
-Wreath form, rubber hose or pool noodle
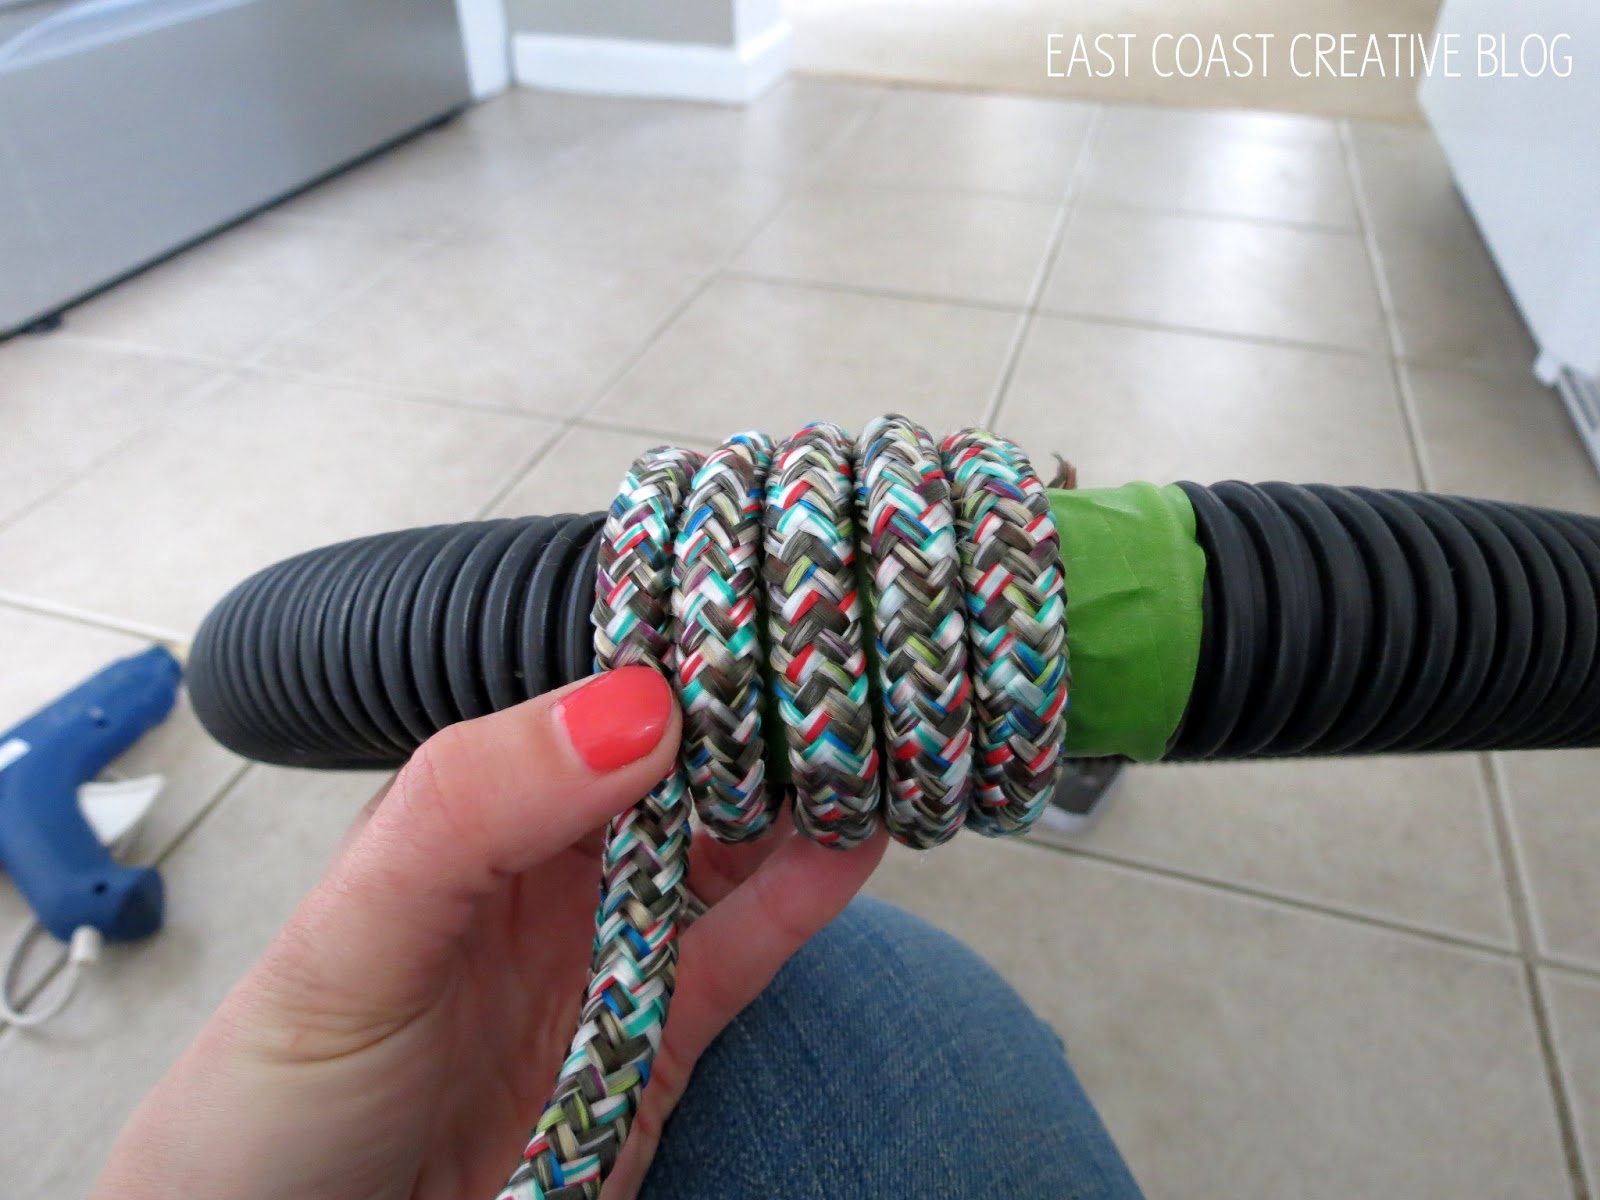
-Multi-color braided rope
-Natural-colored rope
-Hot glue gun
-Masking or painters tape
-ribbon for hanging

Step 1: Cut your hose or pool noodle to size, if using.
We are big fans of using what we have. Not only does this keep the cost down, but it’s environmentally friendly, too! I found this hose laying in my basement and decided it would be perfect as a wreath. Don’t be afraid to scout out your house to see if there is something you could use before going to buy a traditional wreath form.


Step 2: Attach the ends together to make a circle shape using tape.
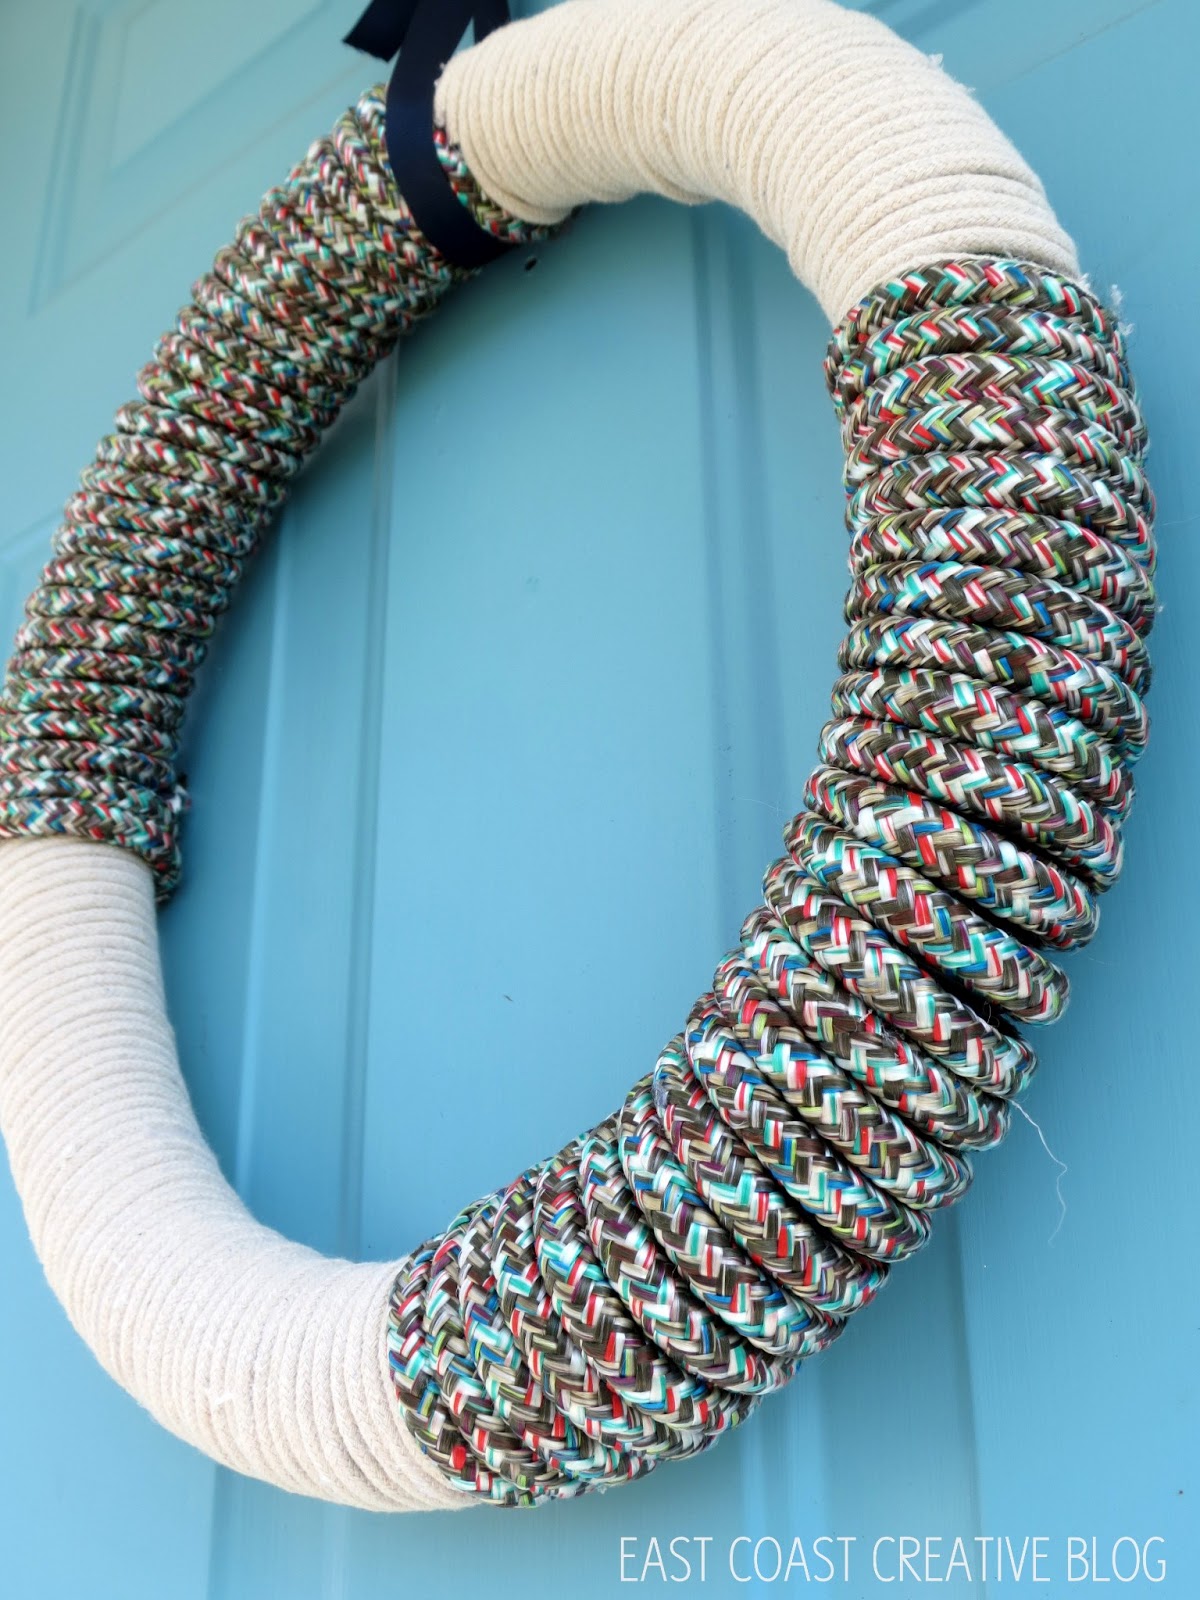
Step 3: Place hot glue on the back of your wreath and begin wrapping with the first color rope.
This project uses a lot of hot glue, so take extra caution not to burn yourself. You’d be surprised at how hot that glue can get!

Step 4. Wrap, wrap, glue, wrap, wrap. Repeat.
In order to keep my rope secure with no gaps, I used hot glue every time the rope wrapped around two or three times. I actually counted how many wraps I did with each rope to keep a uniformed look. I wanted to make sure that both color ropes were used evenly.
That’s it! I love the simplicity of this wreath and the way it gives a nod to nautical style without being over the top. It gives a pretty good glimpse at what my house is going to be like inside- simple, a little bit nautical and laid-back.
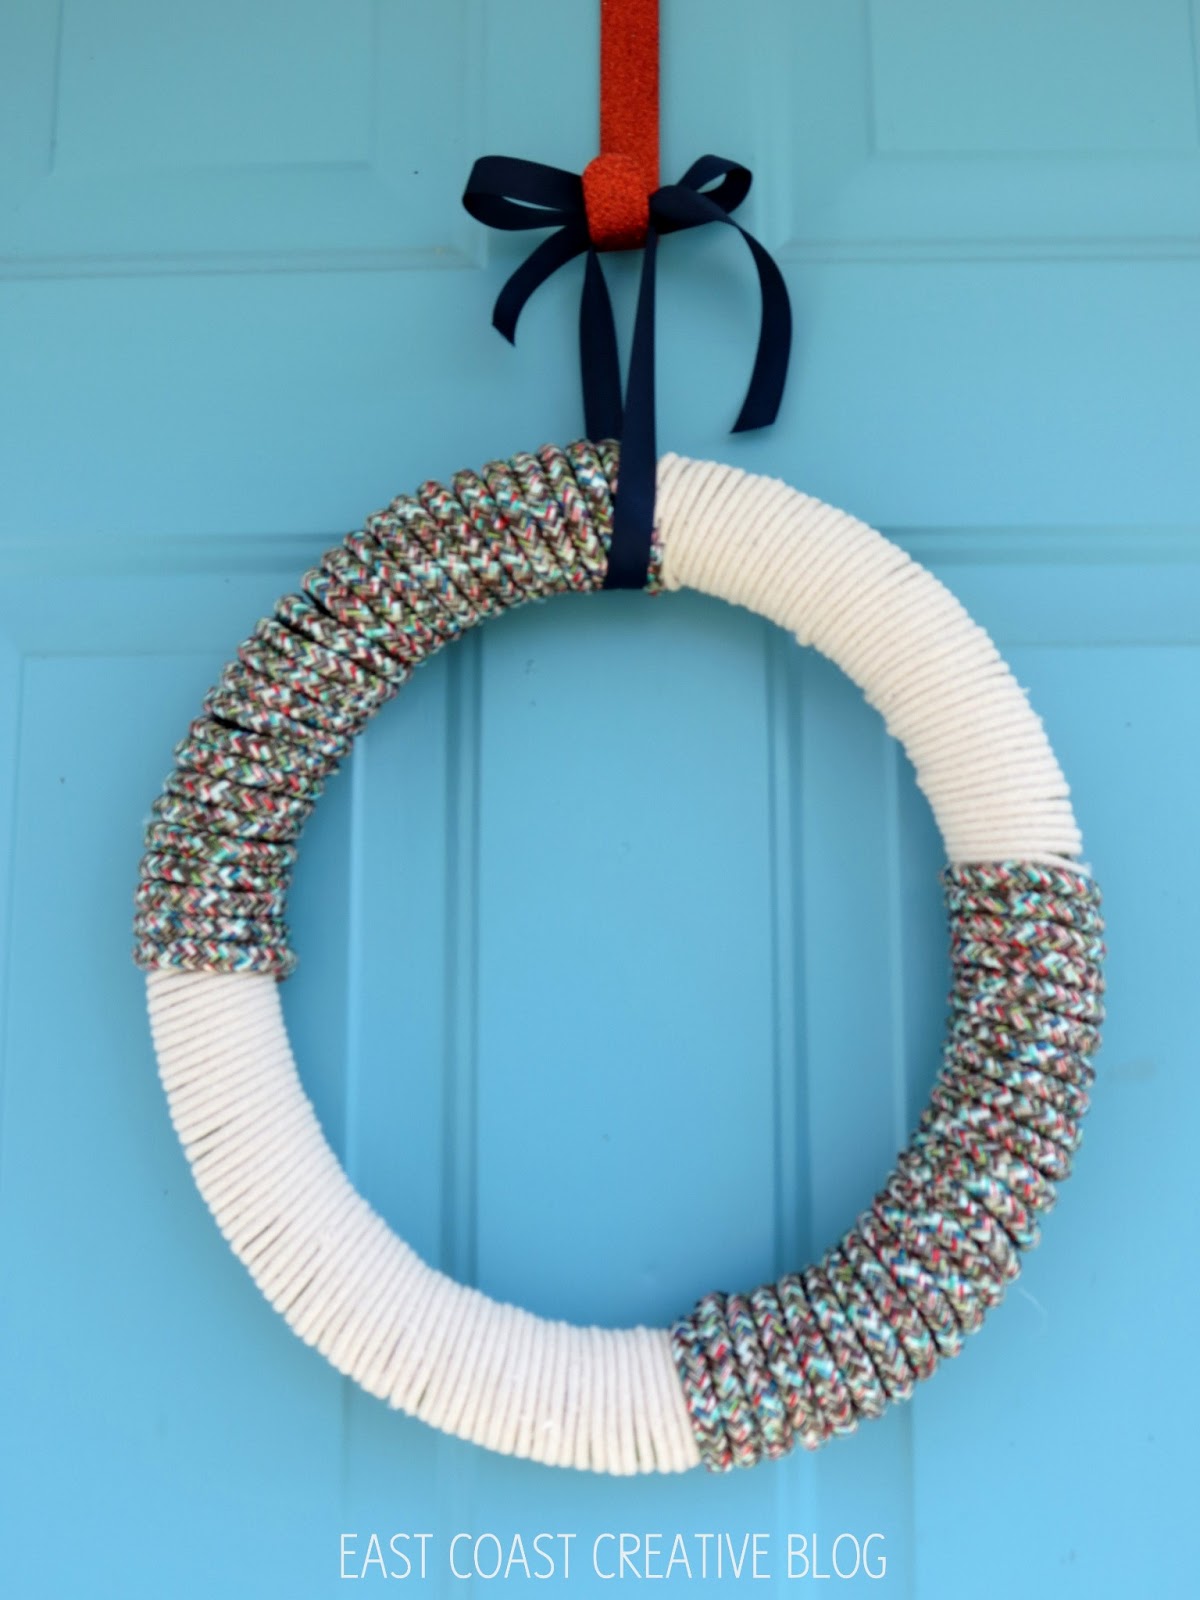
We love non-traditional wreaths and have made several others that match our style and were easy on our budgets!


Dressing up your front door is so much fun, so go on and get crazy with your creative, wreath-loving self!


The comments +