

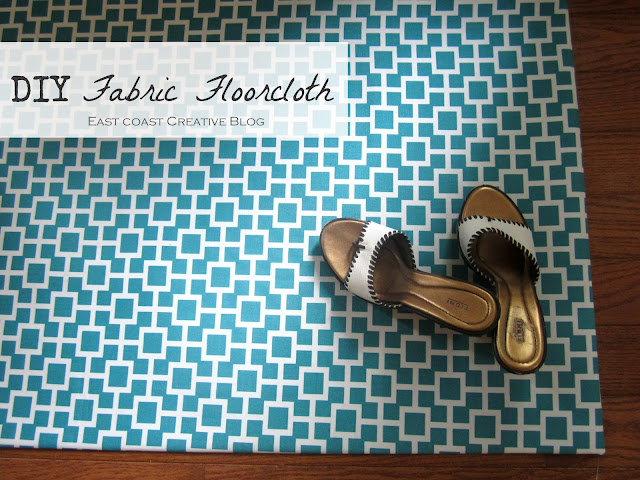
Hey all! We’re back from our trip to Haven in Atlanta! We learned so much and met so many great people, so while we collect all of our thoughts about it to share with you tomorrow, I thought I’d show you a project I did recently to spruce up my kitchen and entryway. I’m super excited about this because it opens up a whole world of possibilities for us DIYers who would rather make something custom than buy it at the store. Did you know you can make a floor cloth (basically a floor mat) out of fabric? You totally can. Hallelujah! Plus, it’s so ridiculously easy you’ll want to make one for every room of your house! Let’s get right down to business, shall we?

Fabric: the amount depends on the size of your mat. I used about 3/4 yard for my kitchen mat, and
1 1/2 yards for my entryway mat)
1 1/2 yards for my entryway mat)
Rubber Mat Runner: I’ve seen similar floor mats made with vinyl flooring remnants (check out Diane’s floor mat from In My Own Style!), but I wanted something sturdy with traction and this fit the bill! Found at Home Depot in the flooring section.
Spray Adhesive
Water-based Polyurethane
Scissors
Duct Tape

Step 2: Using your scissors, cut your rubber mat to size.
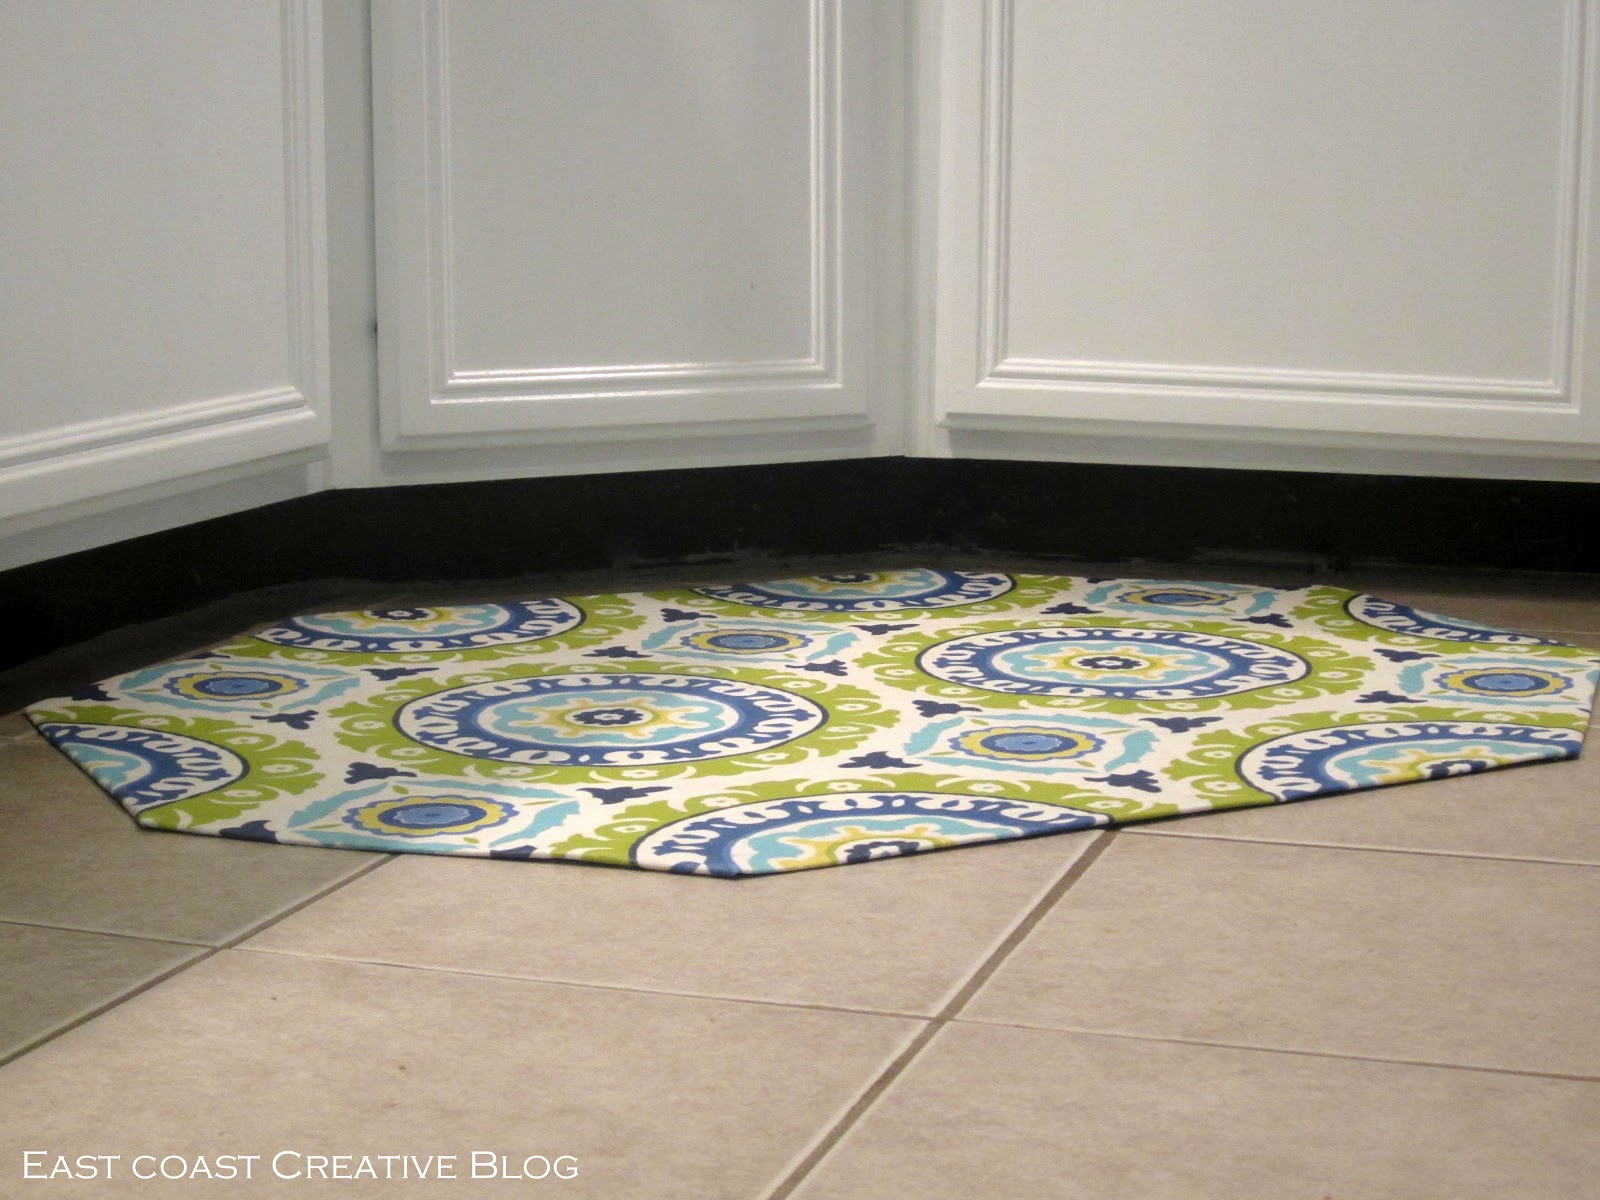
I wanted an octagonal shape for my kitchen so I measured the angles and then cut accordingly.


3. Measure and cut your fabric to size. Leave approximately 2-3 inches all the way around your rubber mat, because you’ll be wrapping the fabric around it later. Don’t forget to iron your fabric before moving to the next step! I used two different fabrics for two different mats. I had extra fabric from the pendant light I made for my kitchen. It’s called Waverly Solar Flair in Lime & Indigo, and it’s fabulous. I can’t remember the name of the other fabric- sorry! But I love.them.to.pieces. (I realize that loving fabric that much is wierd, but I’m ok with that)
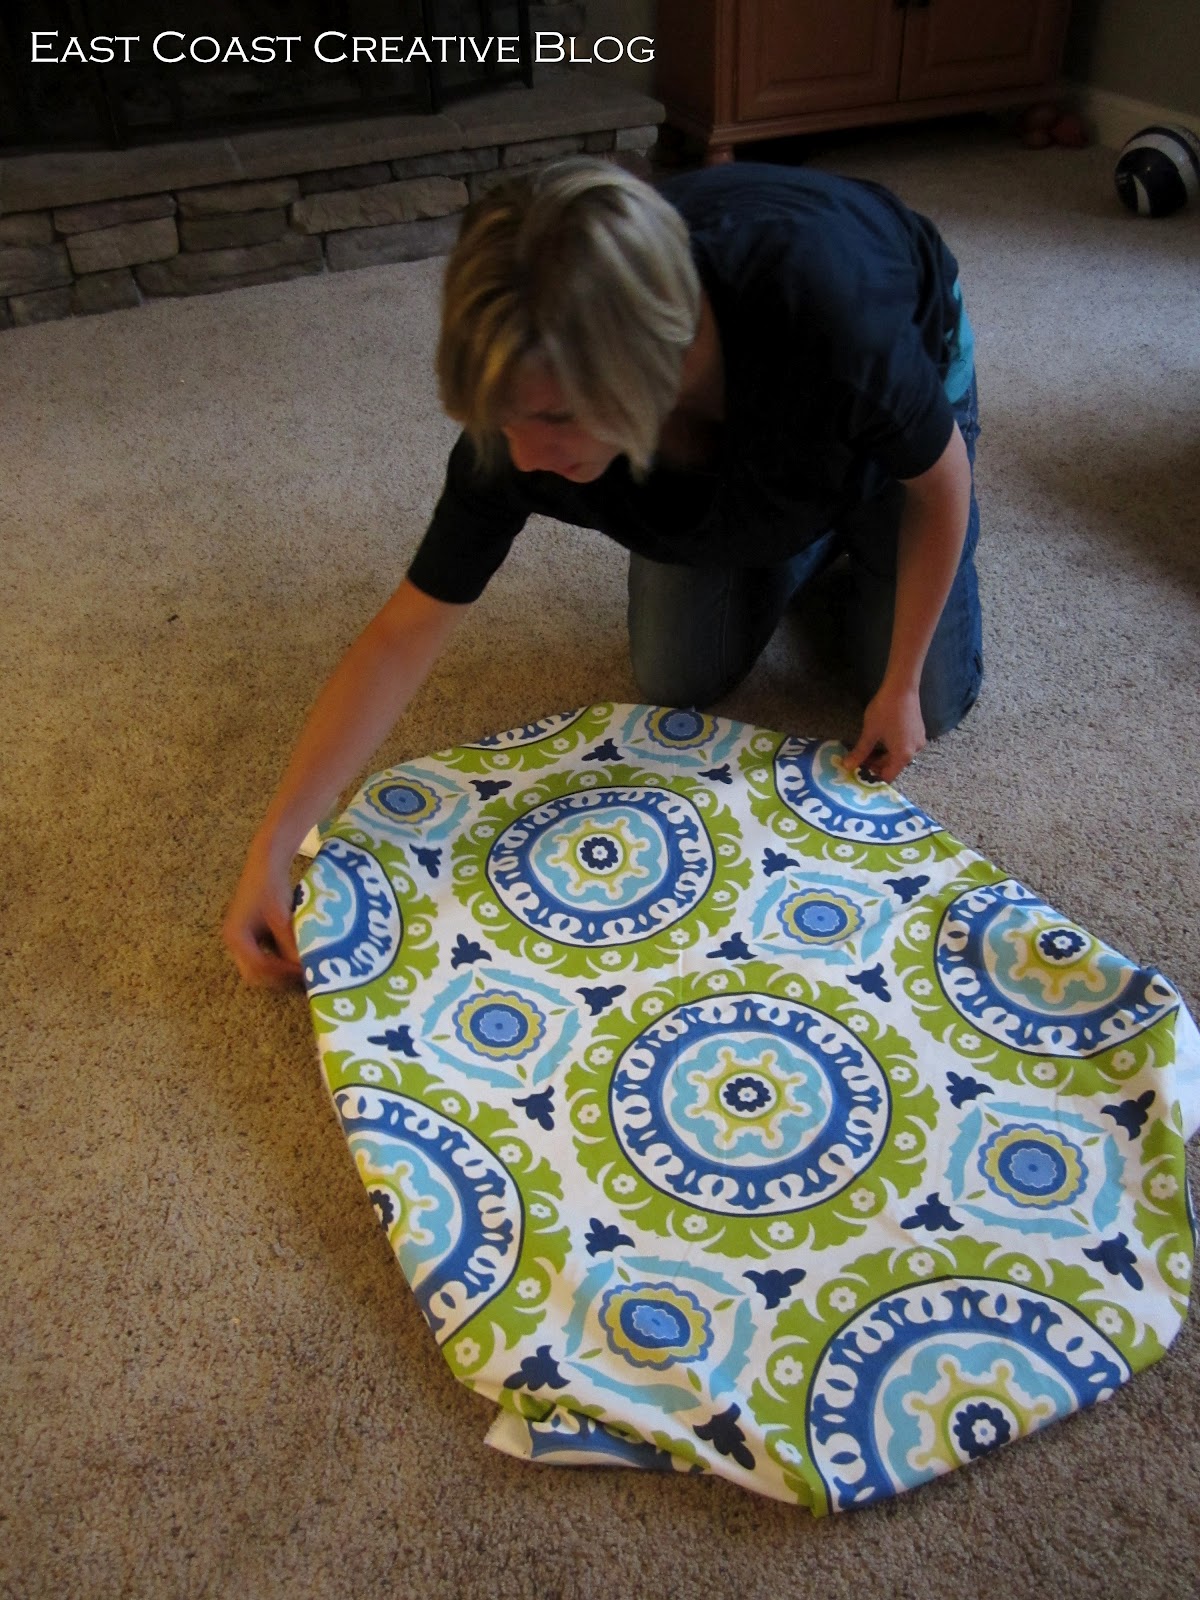
4. Determine your fabric placement. Then fold the fabric back about halfway and spray the rubber mat with spray adhesive. Fold the fabric back down, smoothing out the bubbles and wrinkles as you go. Lift the other side of fabric up and repeat that method. The fabric should stick well to the rubber mat.

Don’t mind me…just loving on my fabric while smoothing out the wrinkles.

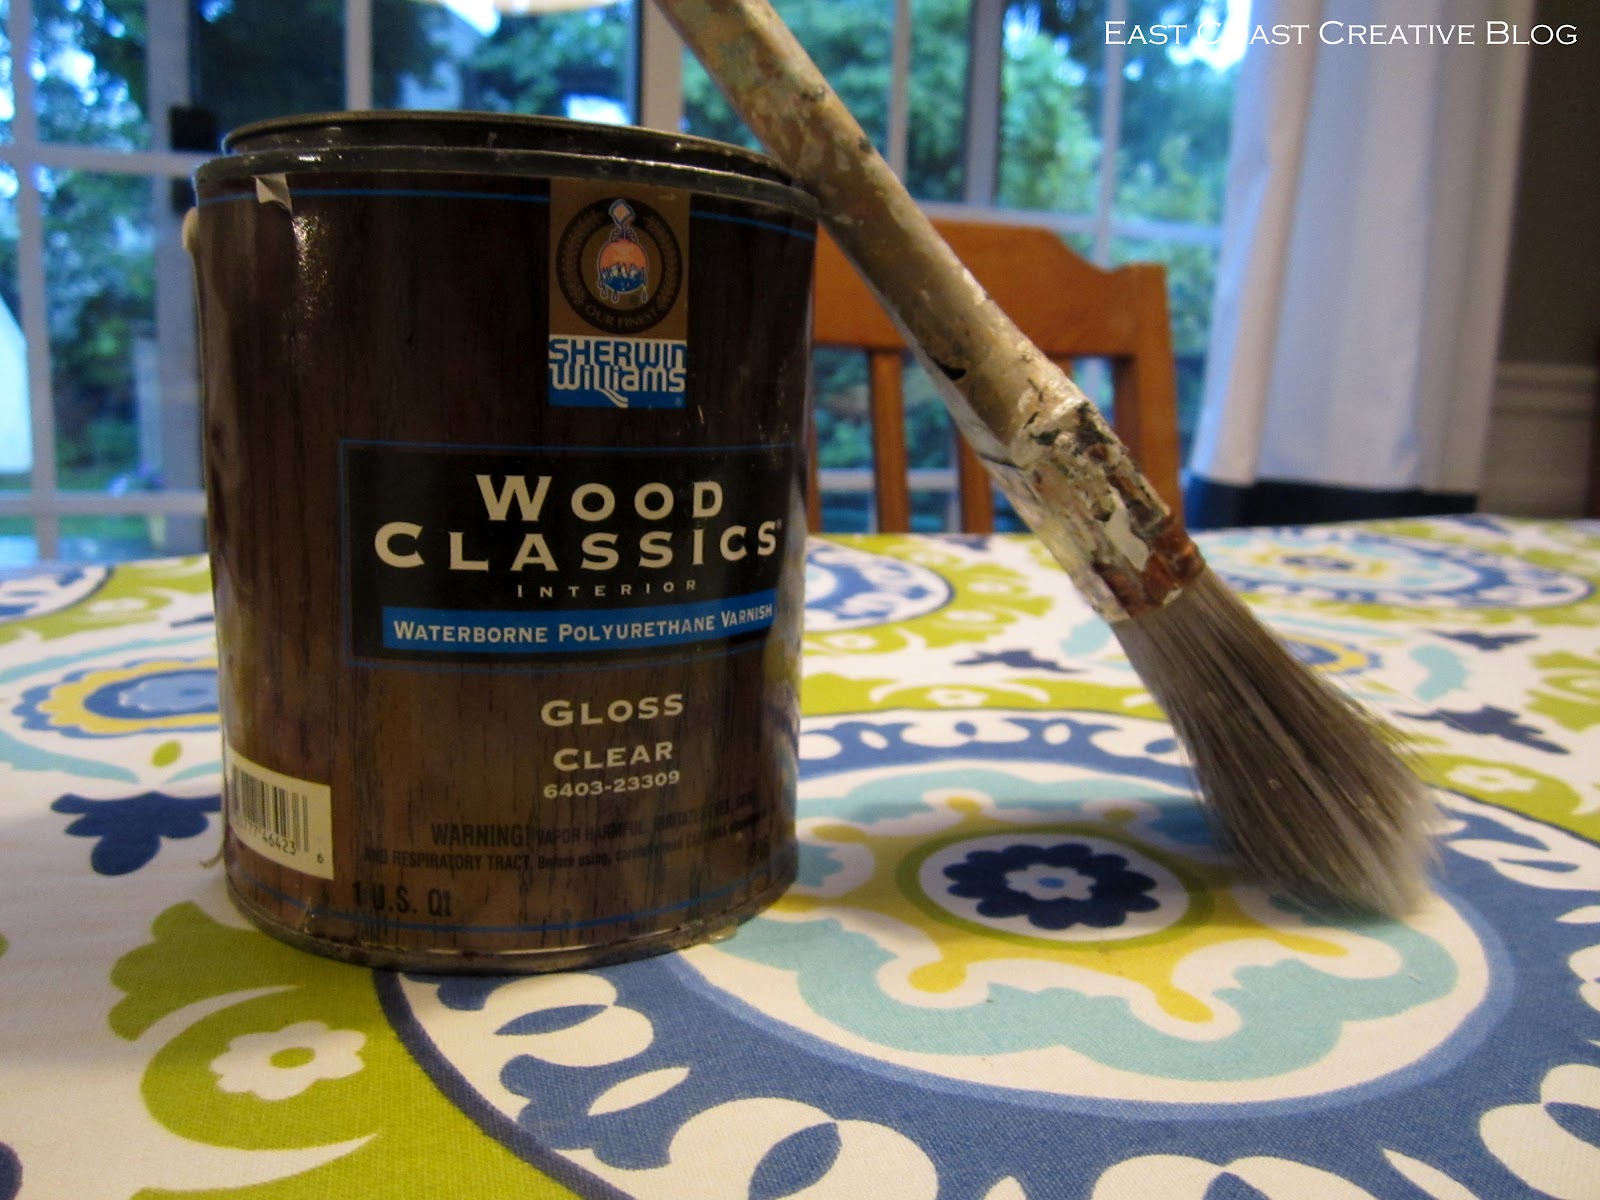
5. Brush a water-based polyurethane on to your fabric. Make sure it’s water-based so that your fabric doesn’t yellow! This will seal your fabric and protect it from water. You’ll also be able to wipe the mat down should anything spill on it (let’s be honest, I wish I could poly every surface in my house for this reason). I did 3 coats of poly, letting it dry completely in between coats.
6. Once the final coat has dried, lay your mat fabric-side down on the ground. Begin folding the edges of the fabric towards the center of the rubber mat. Spray each edge with adhesive and press down until it sticks. Then take your duct tape and run it along the edges to create a seal. No one will see the underside of your mat and you’ll want the extra security the duct table provides!
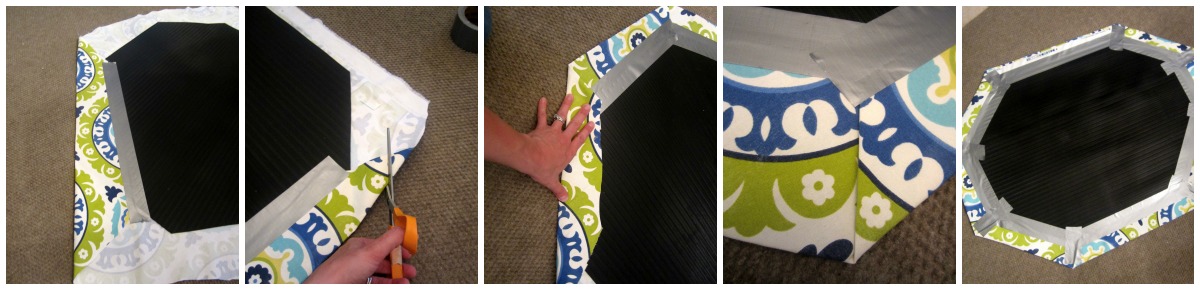
To create perfect corners, just follow these simple steps:
1. Grab the corner and fold up towards the center of the mat.
2. Fold one side up flush against the edge of the rubber mat to create a straight line.
3. Fold the opposite side up in the same way until both sides meet in the middle.

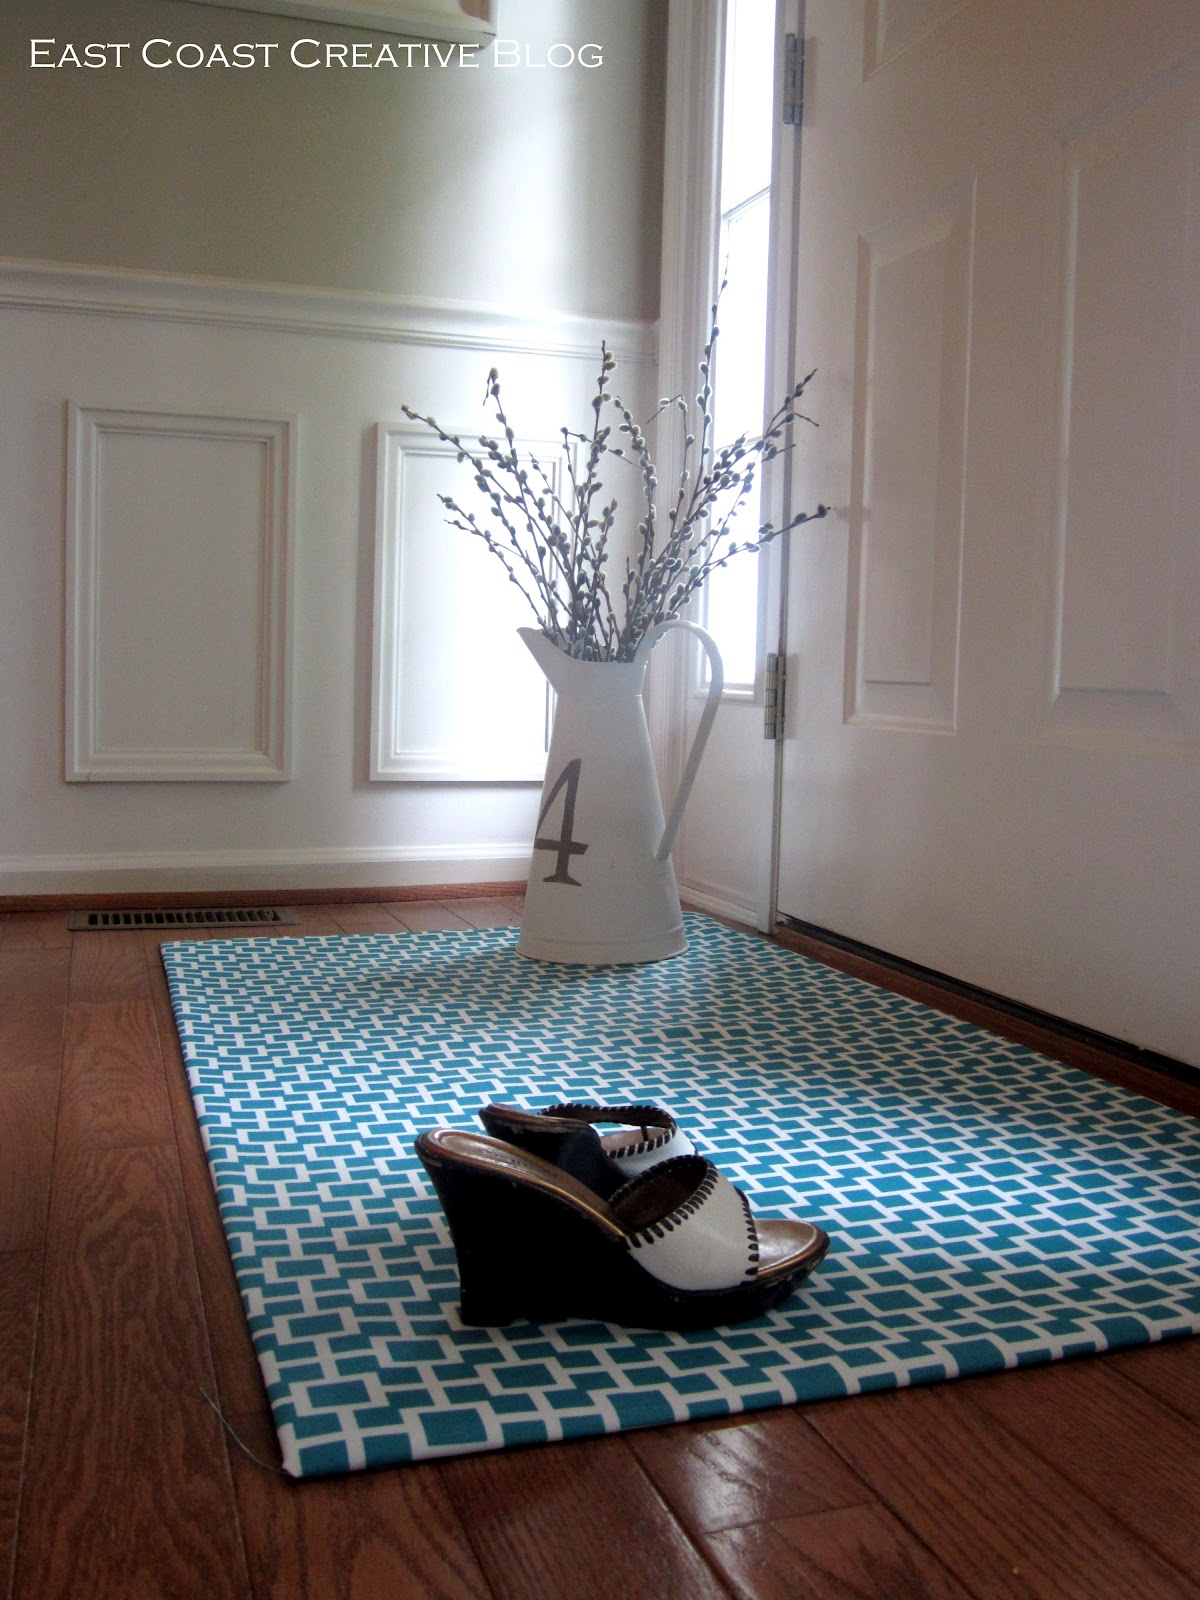
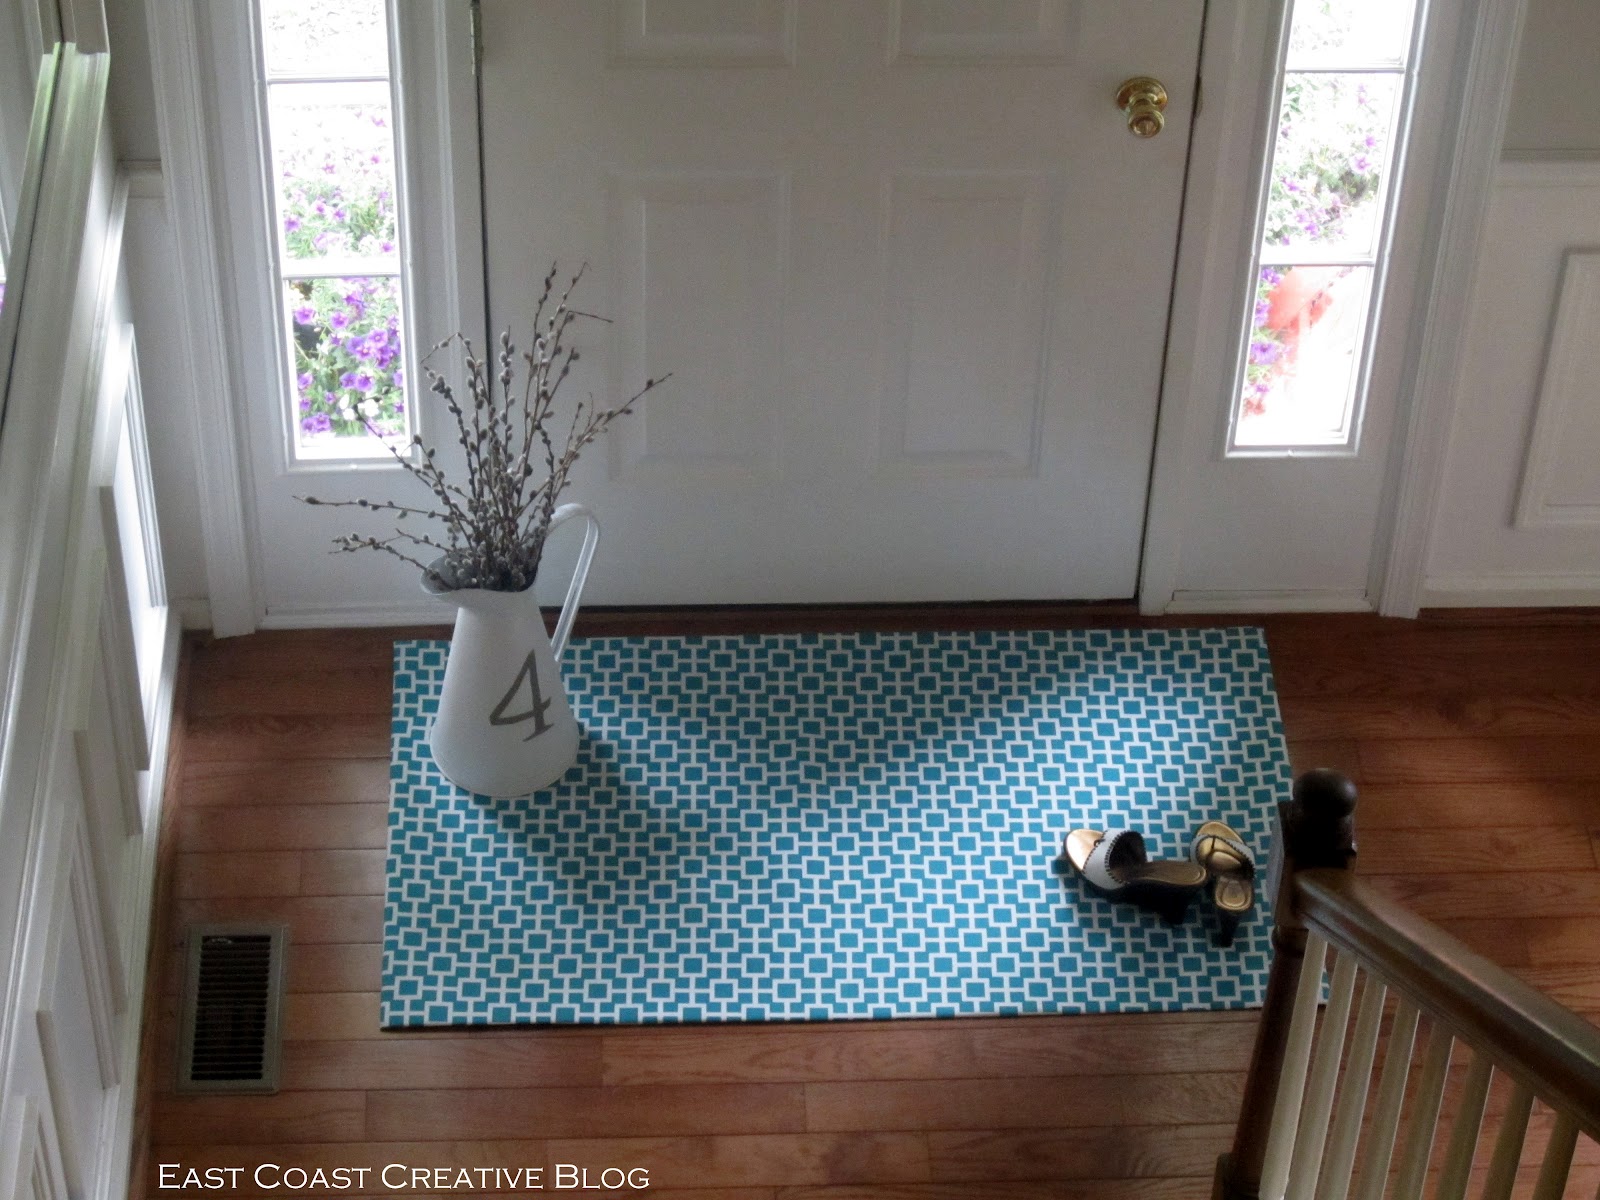
Once you’ve finished duct taping, you’re done! Lay your floor cloth down and admire your handiwork. So easy, and so cute! Here’s the one I made for the entryway (It’s 4 feet by 2 feet, if you were wondering):
And the one for my kitchen:

Because this mat already has traction, it doesn’t slide around really at all. However, if you wanted extra stay-put-ability, just run a line of caulk around the edges where the fabric is, and it will better grip the floor.
Ok, be honest, who’s going to dig through their fabric stash today or run to Joann’s to give this project a try?! 😉


Okay, not only do I have to finish painting my curtains…now I have to do this! You all are creating too much work for me! Thankfully, it’s all work that I love and it will make my house look the way I like! Great ideas, it looks beautiful.
Super pretty!
Thank you! 🙂
That looks really great – and it’s an awesome idea to try. I’m really picky about putting things on the floor (that’s why I often end up without anything there – heh heh), and with a dog in the house, this could also be cool for under Coca’s bowls. Mmmmh, so many possibilities! Thanks!
Great idea for under the dog bowls!!
Nice! I really like that.
Love this floor mat. I can’t wait to give this a try and of course loving the patterns you chose!
So cool! I will have to try this! I love the colors you picked, btw.
This is such a fun idea. I’ve been thinking of taking a canvas drop cloth and painting it to use as a floor mat … I hadn’t even thought of just using colorful fabric so I wouldn’t have to do the painting. haha
So glad I got you meet you gals at Haven … I took a few liberties with our relationship and declared us BFFs in my post today. The post was full of other things that also happened only in my head. 😉
Karah
Such a cute idea! Love both the patterns. 🙂
I love the fabrics! And this is opening up a whole new world of possibilities!!
Really cute project! I love that it can be wiped down! Perfect for kids! 🙂
Well, it DOES give me a reason to go to Joann’s, doesn’t it? Thanks for the tip. Linda
So Smart! So So Smart!! Gosh Darn I Love you Ladies!
So cute! I’m fighting the urge to go buy fabric right now… oh the possibilities! Great post!
Thanks, Chrissy! This project opened my eyes to millions of custom floor coverings. So, I say, go buy yourself some pretty fabric! 🙂
Jess
Just as an FYI, on your “Meet Us” section of the blog, you wrote that you were “formally known as…” when what I assume you meant to write was that you were “formerly known as…” I wanted to comment on that section, but there was no place to leave a message!
This is so amazing! I am always looking for that “perfect” mat by our front door. Now I can make my own. 🙂 thanks for a fantastic tutorial.
I love this! I will be buying the stuff to do this project today 🙂 I was wondering if you poly coated all the fabric, including the stuff that was folded under, or just the fabric on top. Thanks!
I’m wondering the same thing…(along with 2 posts down).
Finally got off my butt and made this!
Maybe this is a silly question, but the mat looks textured with ridges and such. But the finished fabric-ed project looks smooth and perfect. Does the fabric really lay flat across the textured mat? Can’t wait to try this out ! Thanks for the great idea !
I’m wondering the same thing…
Love this floor mat. I can’t wait to give this a try and of course loving the patterns you chose!
Floor Protection Film
Wow great idea! We have some horrible flooring new york city ny apartments. We could seriously use a store full of these to help renters out! Great blog post!
Ah I have been looking for the perfect rug for a while for my kitchen…this would make things so much easier if I could use my own fabric. Thanks for the idea!! Love it
Emily
emilyp711.wordpress.com
What about muddy messes?
The mats looks great! How have you been cleaning yours?
Thanks for the clear instructions. As someone who has been involved in floor refinishing, I have an appreciation for how much work this was but it sure was worth it. The floor looks beautiful.
Carpet Protection Film
Okay, I’m dying to know, how has your mat held up over time? I’d like something bright and pretty for our front entrance, but we’ve got a lot of traffic through there, and lots of snowy/muddy boots throughout the seasons…would something like this take the beating, or would it fall apart or stain after one season? It’s a beautiful idea, I’m just uncertain of it’s durability 🙂 Thanks!
~Jen
zachandjennie (at) hotmail (dot) com
OK. I saw this fabric on your sidebar and had to tell you I used it for the chairs in my office. I am honestly starting to wonder about us.
That is such a great project! I came home today to find that my puppy just chewed up my new little rug from Crate and Barrel, so this could be the perfect replacement 🙂 Also, totally normal to love fabric that much. At least for me!
{lamourcheznous.wordpress.com}
Super love this! I wonder if you sewing fabric that has been ‘Polyurethaned’ will hurt my sewing machine. I have an idea for a new project. Hmm…
I want to do this to cover my entire kitchen and bathroom floors, ha!
Love. Love. Love!
[…] ladies at East Coast Creative really knocked it out of the park with that sweet little floor cloth. And check out her big […]
LOVE your floor mats. I was given a large bolt of handwoven material (cotton) that the gentelman had wanted to make floor mats out of and never did. Because it is a netural tans and some white added in and it is hand woven I am relutant to make rugs out of it. But this idea I could go for. I can’t think of anything else to use it for…at the moment. I may even monogram them for family gifts. What do you think ? Thanks for an excellat idea.
[…] East Coast Creative Blog […]
Fantastic idea! I’ve been looking for something very thin yet cute to go in my entryway. How durable are these? And are these washable in the washing machine?
Hi, love the idea! I am wondering if it is slippery when wet and how the durability of the mat is. Thanks!
I love this idea and just bought some fabric. I’d like to use the same mat but the fabric is relatively light-weight. Is there something to put in-between the fabric and mat so the black ridges don’t show through?
Sure! You could just layer a solid fabric between it. Just use adhesive between each layer. 🙂 Good luck!!
I pinned this a few years back, and am in desperate need of a new rug. It’s for my back door. How did yours hold up?
For the kitchen it would be nice to save some padding. How would you suggest adding padding to the mat.
Hi Nora, just as we applied the fabric to the mat with spray adhesive, you can use that to adhere the mat to the padding in between the fabric and the mat.